Whenever someone is working with a very large dataset, grouping worksheets helps to perform tasks more easily. In Microsoft Excel, if you have the same layouts in all the worksheets, you can edit or add formulas more easily by grouping the needed worksheets. In this tutorial, I am going to explain 3 easy ways to group worksheets in Excel.
Why Do We Need to Group Worksheets?
Here are a few reasons why you should group worksheets in Excel:
- It will save you time by helping you work on multiple worksheets simultaneously.
- It will make your task easier while working with a very large dataset by making the same change in all the other sheets.
- It will help you to make the same correction across all the worksheets.
How to Group Worksheets in Excel: 3 Easy Ways
Here I’ve taken an Excel workbook that contains 4 worksheets and all of the worksheets have the same structure.

1. Using SHIFT Key to Group Worksheets
Here, I am going to show you how to use the SHIFT key to group adjacent worksheets. By using the SHIFT key, you will be able to select a range of worksheets in an Excel file.
Let me explain the steps to you,
Steps:
- To begin with, select any sheet of your choice.
- Here, I selected the “Using SHIFT Key” sheet.
- Next, hold the SHIFT key then click on the worksheet name “Using CTRL Key”.
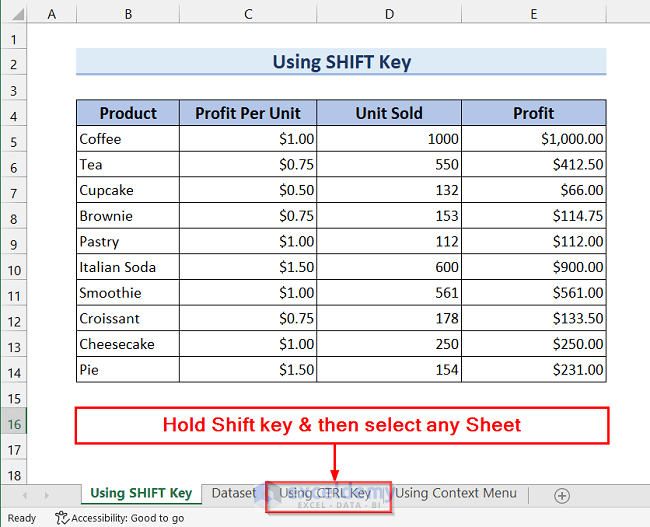
Now, you will see that all the sheets from “Using SHIFT Key” to “Using CTRL Key” are grouped.

2. Use of CTRL Key to Group Selected Worksheets
In this section, you will learn how to use the CTRL key to group selected worksheets. By using the CTRL key, you will be able to group any worksheet you want in your Excel file.
Let me explain the steps to you,
Steps:
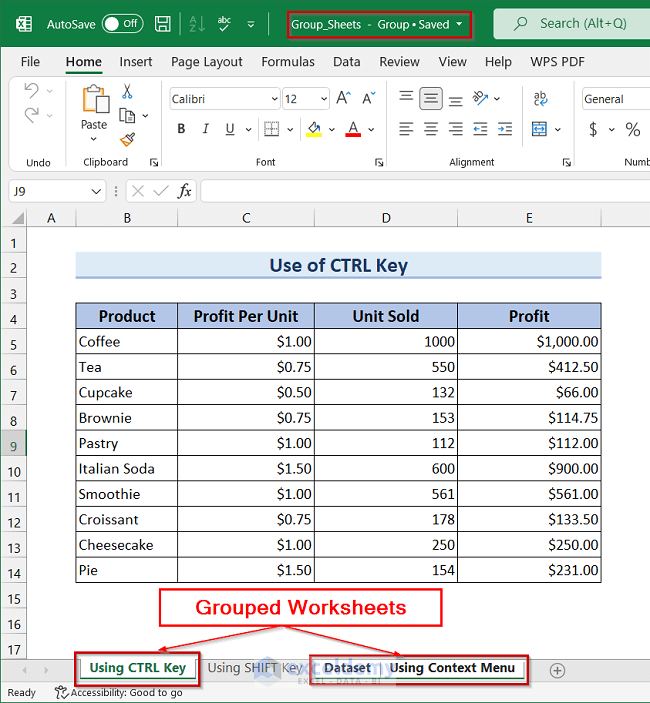
- To begin with, select any worksheet you want. Here, I selected the “Using CTRL Key” sheet.
- Next, hold the CTRL key and then click on the desired worksheets which are “Dataset” and “Using Context Menu”.
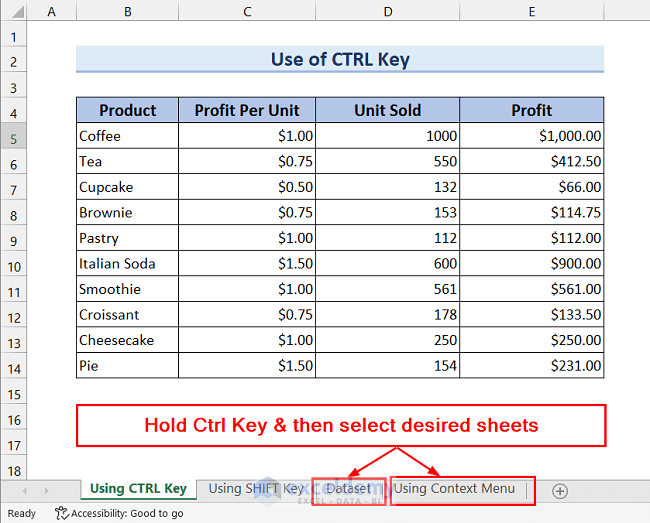
Now, you will see that the sheets named “Using CTRL Key”, “Dataset” and “Using Context Menu” are grouped.
3. Employing Context Menu Bar to Group All Worksheets
In this section, I will explain how to employ the Context Menu bar to group worksheets in Excel. By employing the Context Menu bar you will be able to select all the worksheets in an Excel file at a time.
Let me explain the steps to you,
Steps:
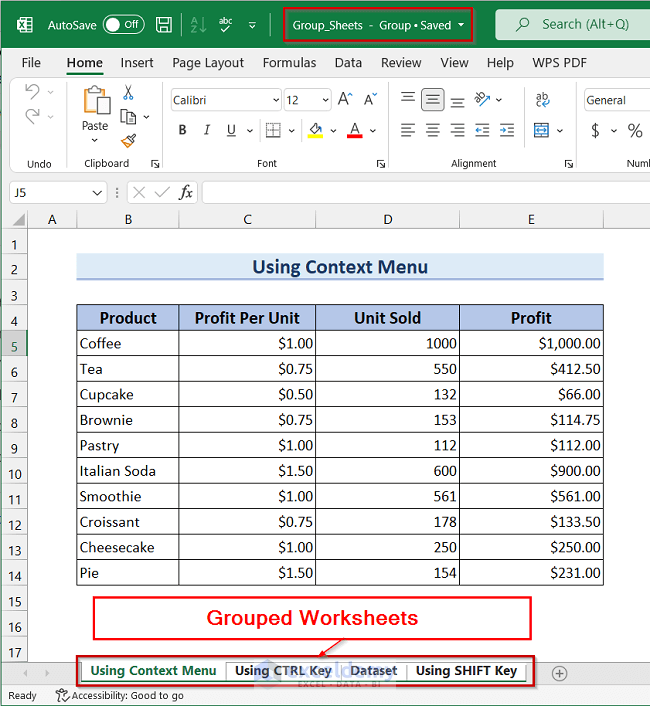
- First, right-click on any worksheet you want. Here, I clicked on the “Using Context Menu” sheet.
- Then, select Select All Sheets from the Context Menu bar.

Now, you will see that all the sheets in the Excel file are grouped together.
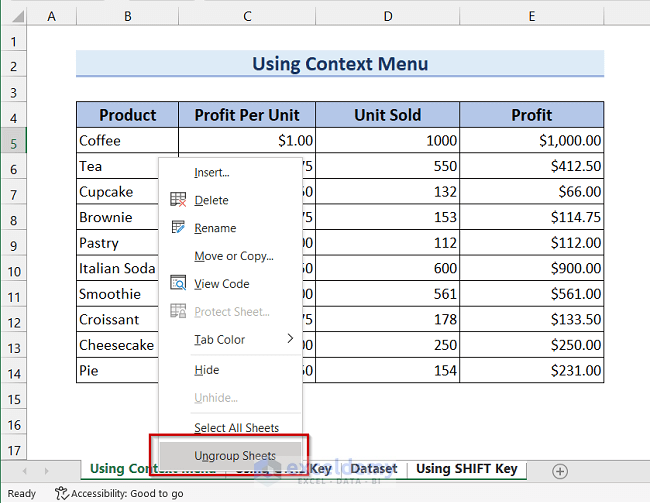
How to Ungroup Worksheets in Excel
While working with grouped worksheets, you can also know that ungrouping worksheets before moving to the next operation is essential.
Let me explain the steps by which you can ungroup worksheets,
Steps:
- At first, right-click any grouped worksheet.
- Next, select Ungroup Sheets.
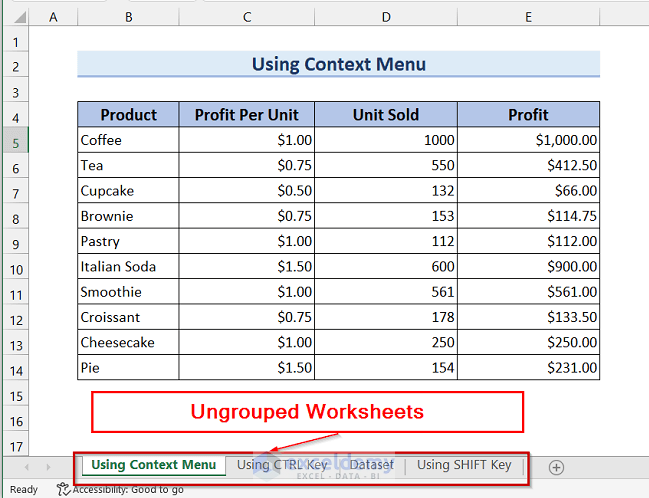
Now, you will see that all the worksheets are ungrouped.
Things to Remember
It should be noted that if you want to work on grouped worksheets you have to remember that the layout of the worksheets must be the same.
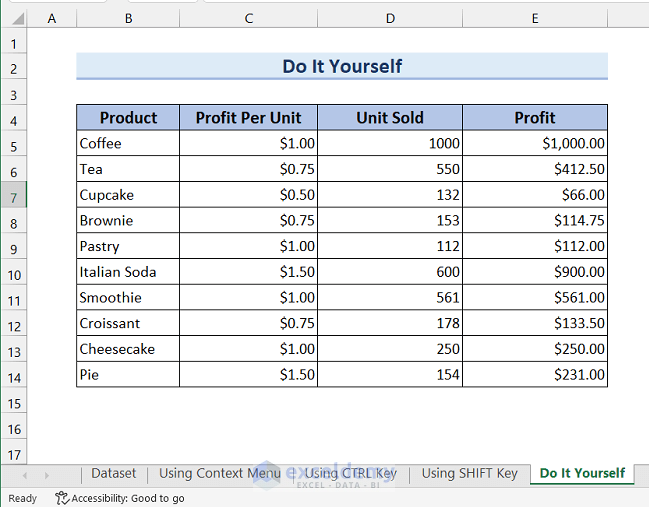
Practice Section
Here, I have provided a practice sheet for you to practice different ways how to group worksheets in Excel.
Download Practice Workbook
Conclusion
To conclude, I hope this tutorial was helpful for you. In this tutorial, I tried to explain 3 ways of how to group worksheets in Excel. I have covered 3 ways for 3 different situations. We recommend that you practice yourself and that will help you to understand better. Last but not least, if you have any suggestions or any other feedback let me know in the comment below.
Get FREE Advanced Excel Exercises with Solutions!
