How to Generate Reports in Excel
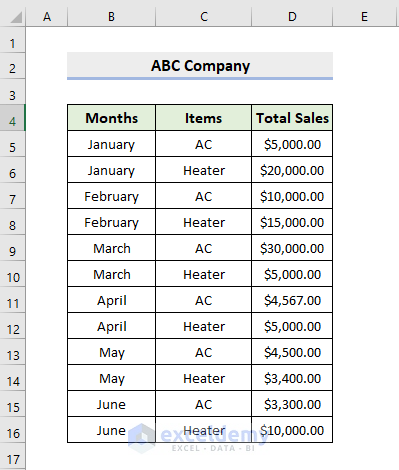
This is the sample dataset.
To create the report file “ Sales Summary of ABC Company”:
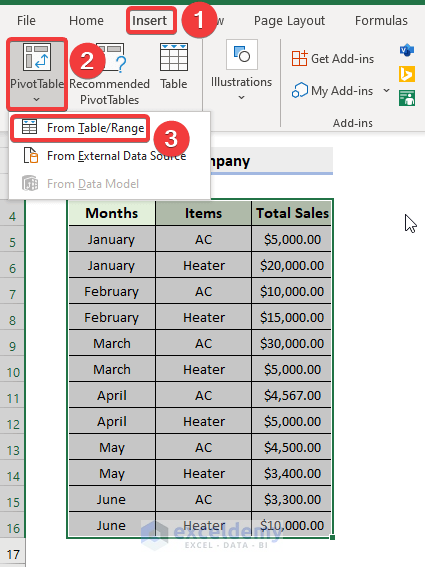
Step 1: Create a Pivot Table
- Select B4:D16.
- Go to the Insert tab.
- Select PivotTable> From Table/Range.
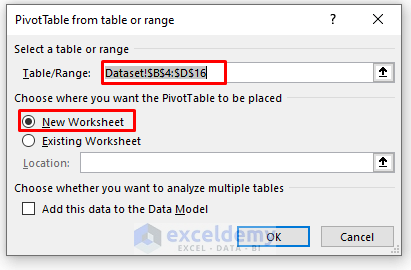
- In the PivotTable from table or range dialog box, choose New Worksheet.
- Click OK.
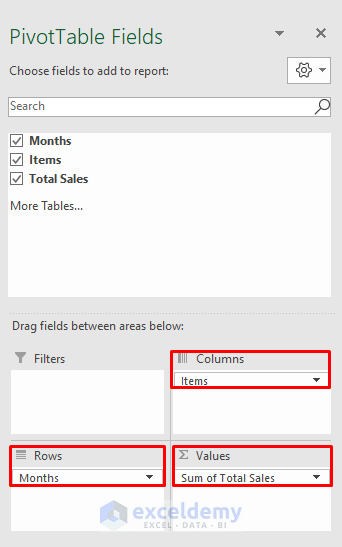
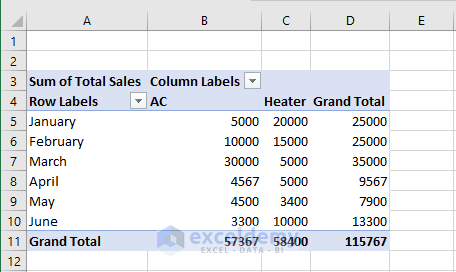
- Your PivotTable Fileds will be displayed in the new worksheet.
- Check Months, Items, and Total Sales.
- Enter Months in Rows, Items in Columns, and Total Sales in Values.
The report will be displayed.
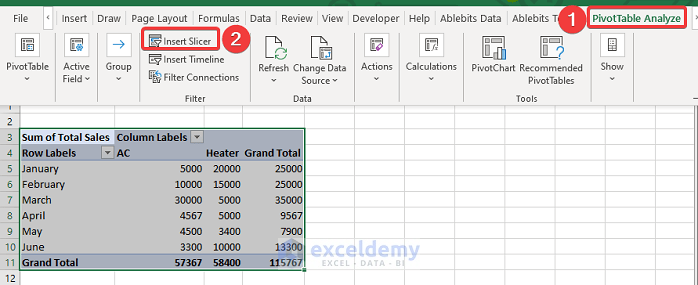
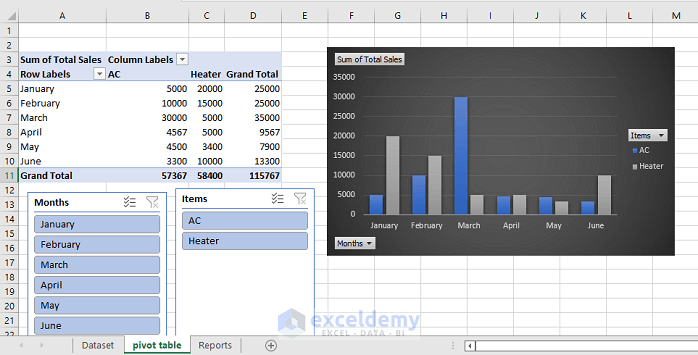
Step 2: Add a Slicer
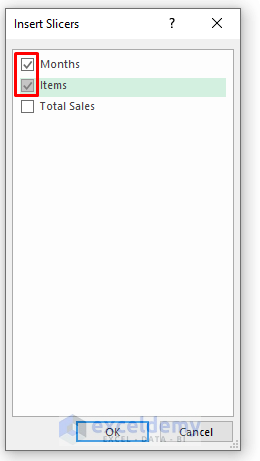
- Go to Pivot Table Analyze and select Insert Slicer.
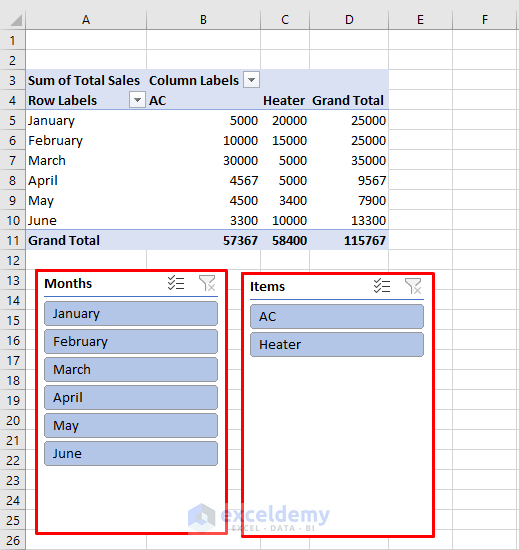
- Check Items and Months in the Insert Slicers Dialog box.
The report will be displayed.
Step 3: Create a Chart
- Select the data range and go to the Insert tab.
- Select 2-D Column.
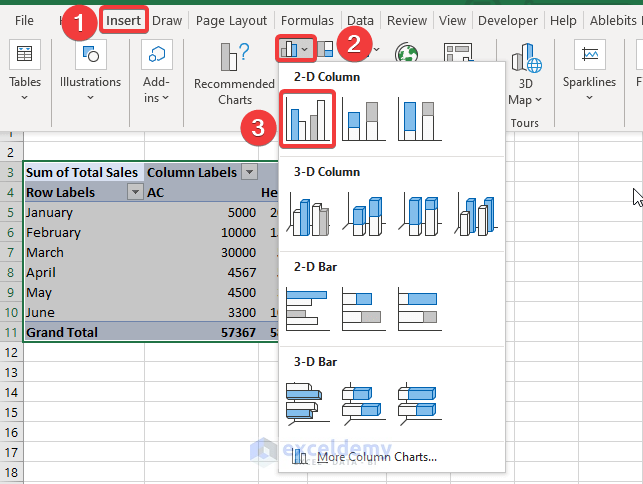
The following chart will be displayed.
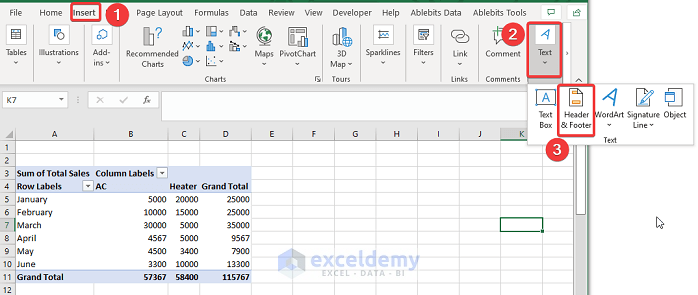
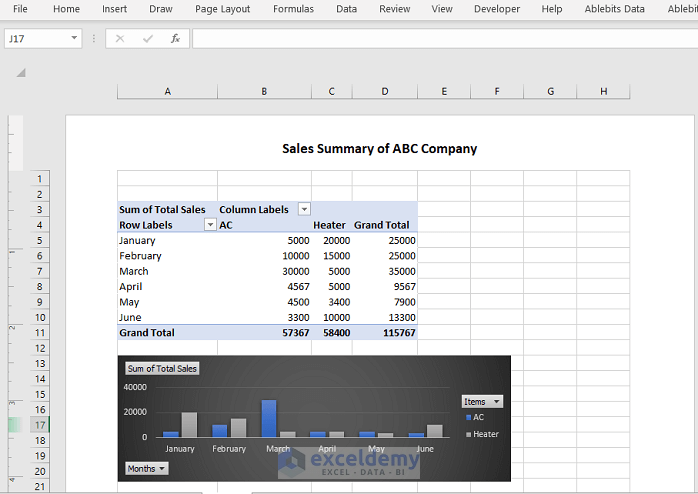
Step 4: Generate the Final Report
- Go to the Insert tab and select Text.
- Select Header & Footer.

- Enter the Header as shown below.
The report will be displayed.
Read More: How to Make Sales Report in Excel
How to Generate a PDF from Reports in Excel
Method 1 – Using the Save As Command
Steps:
- Go to the File tab and select Save As.
- Choose a folder to save the PDF by clicking “This PC”.
- Choose PDF in Save as Type.
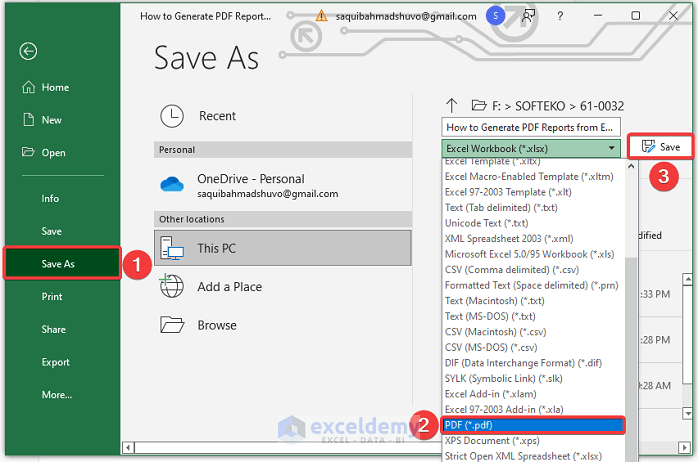
The PDF will be created.

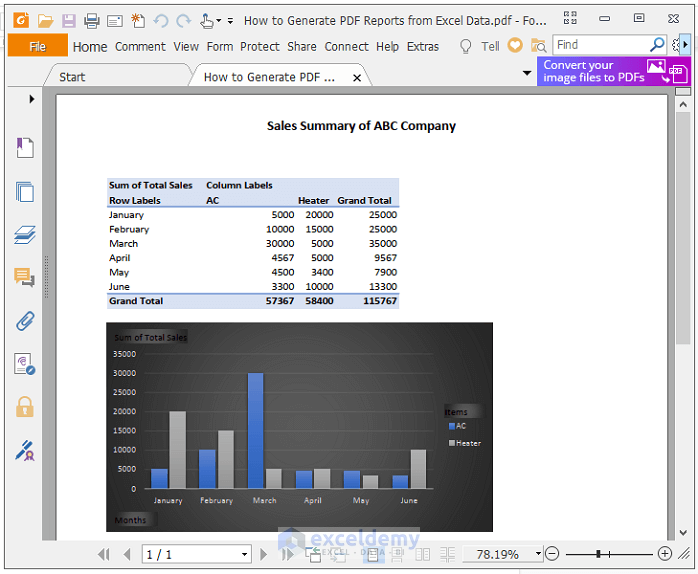
This is the output.
Read More: How to Make Monthly Report in Excel
Method 2 – Applying the Export Command
Steps:
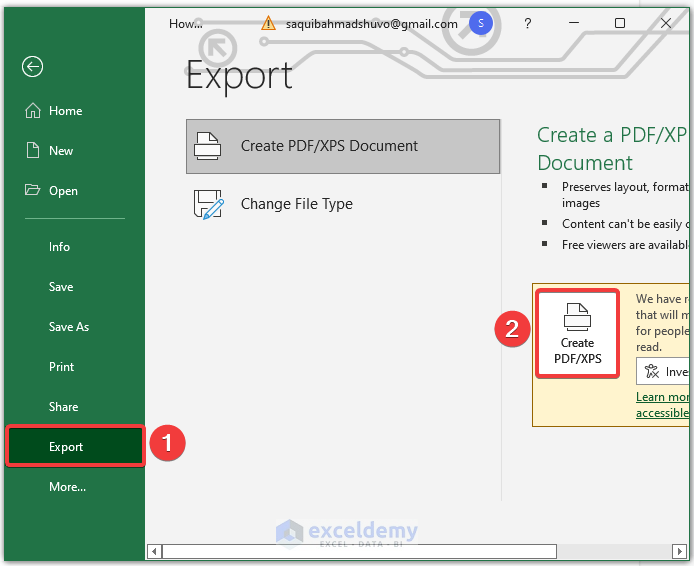
- Go to the File tab and select Export.
- Select Create PDF/XPS.
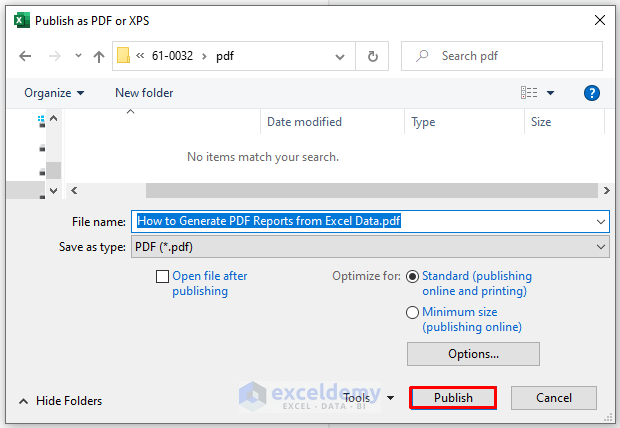
- Choose a folder to save the PDF.
- Click Publish.
The PDF will be created.
This is the output.
Read More: How to Create a Summary Report in Excel
Method 3 – Utilizing the Print Command
Steps:
- Go to the File tab and select Print.
- Select Print.
- Click Microsoft Print to PDF > Print.
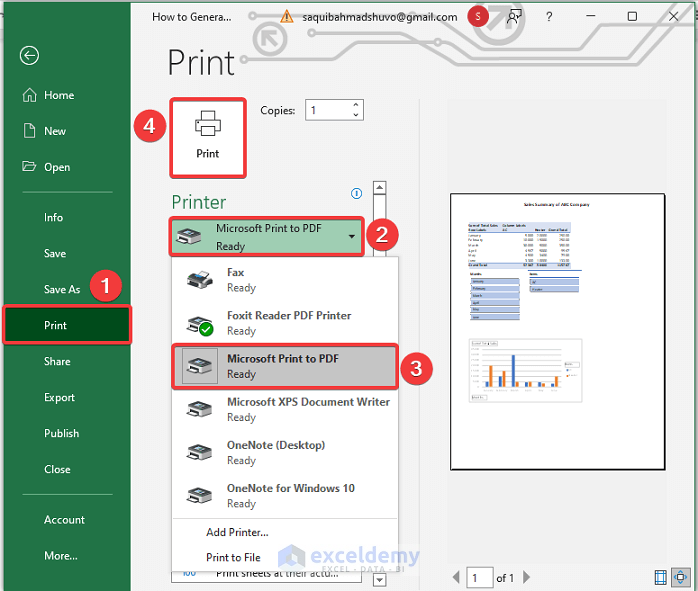
- Choose a folder to save the PDF.
- Press Enter.
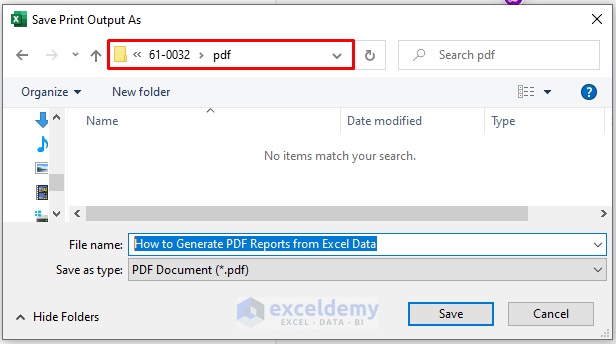
The PDF is created.
This is the output.
Method 4 – Using the Quick Access Toolbar
Steps:
- Click the Toolbar at the top of the window.
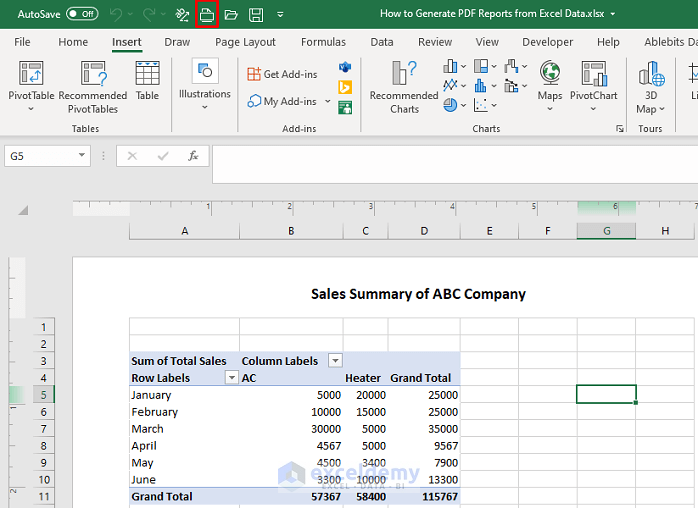
- Choose a folder to save the PDF.
- Click Publish.
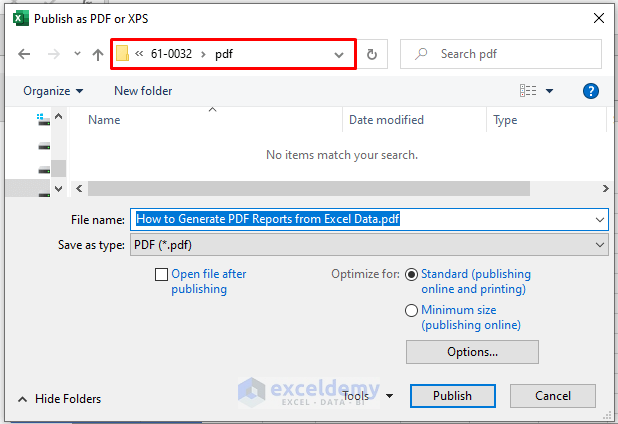
The PDF is created.
This is the output.
Download Practice Workbook
Download the practice workbook to exercise.
Related Articles
- Create a Report in Excel as a Table
- How to Make Report Card in Excel
- How to Automate Excel Reports Using Macros
- How to Generate Report in Excel using VBA pdf
- How to Generate Reports in Excel Using Macros
<< Go Back to Report in Excel | Learn Excel
Get FREE Advanced Excel Exercises with Solutions!
