Method 1 – Record Time of Data Entry by Merging IF and NOW Functions
Steps:
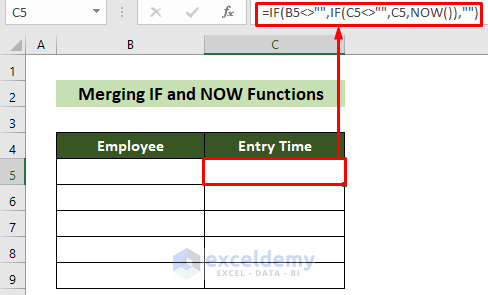
- Click on cell C5 and insert the following formula.
=IF(B5<>"",IF(C5<>"",C5,NOW()),"")- Hit the Enter key.
- For all the other cells drag your Fill Handle below.
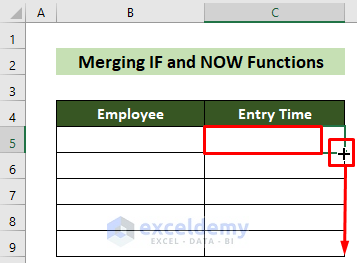
- Your automated formula for record of data entry time is established.
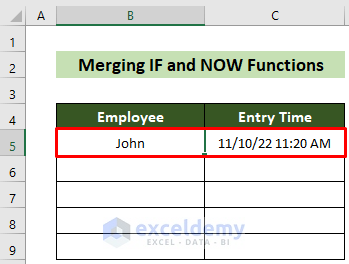
- Insert any employee name in cell B5.
- There will be an instant time of data entry stamped in cell C5.
- Look at the created formula for all cells below; insert employee names in every cell from B6 to B9 to get all data entry time.

- The formula may sometimes show errors due to iteration problems.
- Go to the File tab.
- Click on the Options option from the expanded File tab.

- The Excel Options window will appear.
- Go to the Formula tab here >> choose the Automatic option from the Workbook Calculation options >> tick on Enable iterative calculation option >> click OK button.
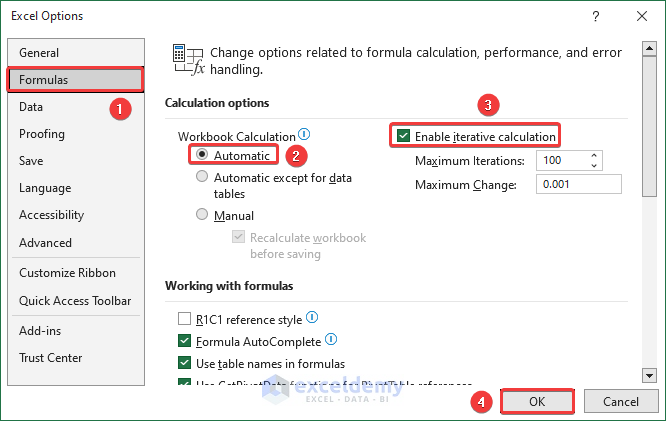
The iteration problem will be solved and you will get the exact time of data entry in Excel.
Record and Update Data Entry Time:
In the previous formula, you would get the time of data entry, but you can not update a data entry time. To update the B5 cell again, you should get a new time on cell C5 for the updated B5 cell.
Steps:
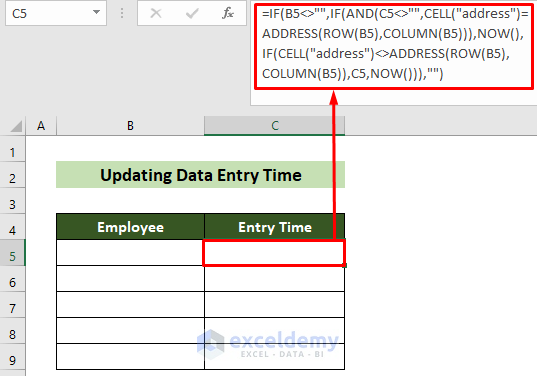
- Click on cell B5 and insert the following formula.
=IF(B5<>"",IF(AND(C5<>"",CELL("address")=ADDRESS(ROW(B5),COLUMN(B5))),NOW(),IF(CELL("address")<>ADDRESS(ROW(B5),COLUMN(B5)),C5,NOW())),"")- Hit Enter.
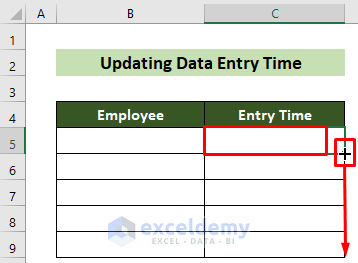
- All data ranges, place your cursor in the bottom right position of the cell and drag the Fill Handle below upon its appearance.
- The previous case, insert an employee name in cell B5. and you will get entry time in cell C5.
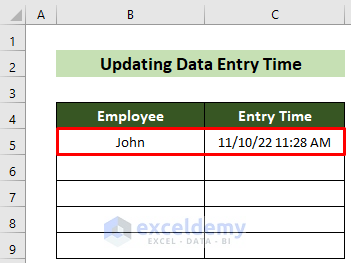
- Record the employee names in cell B6:B9 and you would get data entry time in cells C5 to C9.
- Click on cell B5 and record an employee name again.
- You will see the previous entry time is changed into a new entry time as cell B5 updates.

You would be able to record and update the time of data entry in Excel.
Method 2 – Creating a User-Defined Function to Record and Update Data Entry Time
Steps:
- Go to the Developer tab >> Visual Basic tool.

- The VB Editor window will appear.
- Go to the Insert tab here >> Module tool.
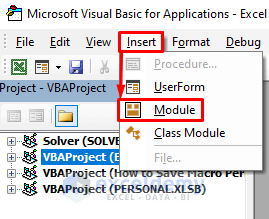
- A new module named Module1 will appear.
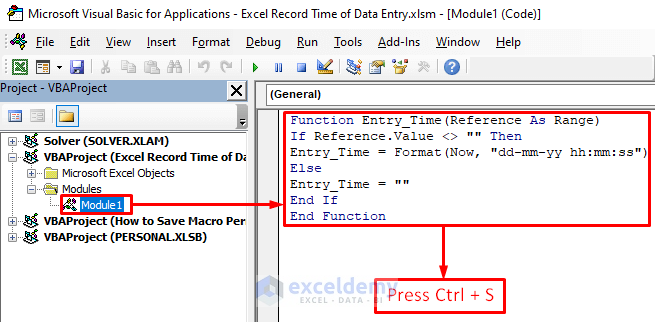
- Click on Module1 and insert the following code in the code window.
Function Entry_Time(Reference As Range)
If Reference.Value <> "" Then
Entry_Time = Format(Now, "dd-mm-yy hh:mm:ss")
Else
Entry_Time = ""
End If
End Function- Press Ctrl + S.
- A Microsoft Excel window will appear.
- Click the No button.
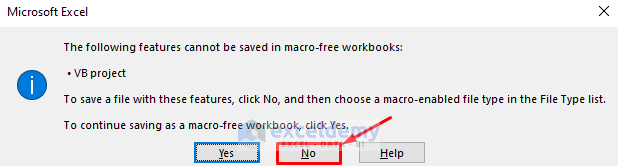
- The Save As window will appear.
- Choose the Save as type: option as .xlsm file and click on the Save button.
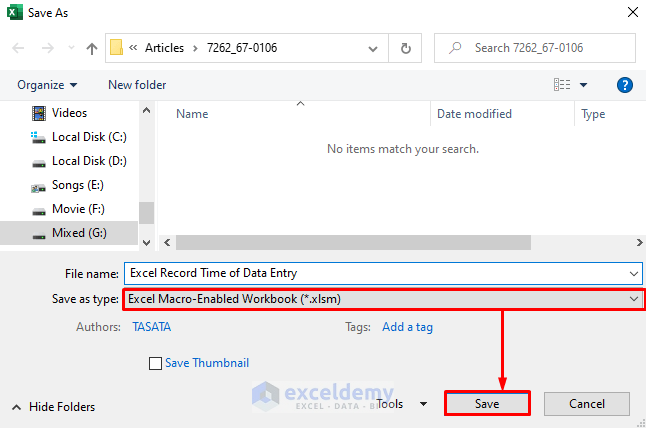
- You have created a new formula Entry_Time in your workbook.
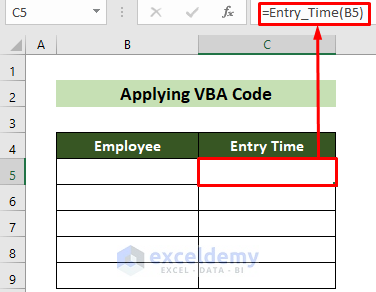
- Click on cell C5 and insert the following formula.
=Entry_Time(B5)- Hit Enter.
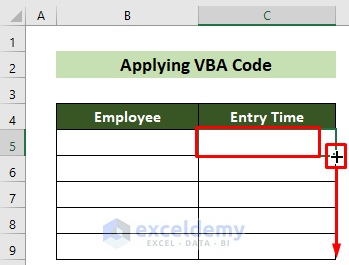
- For all the other cells below, use your Fill Handle feature below.
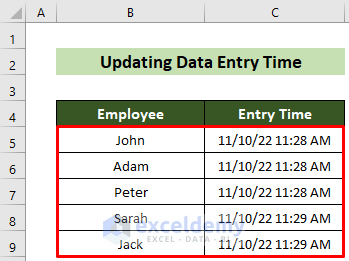
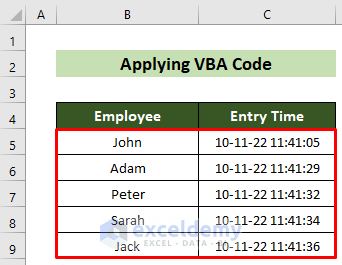
- Record any employee name in cell B5 and you will automatically see the time entry of the record in cell C5.
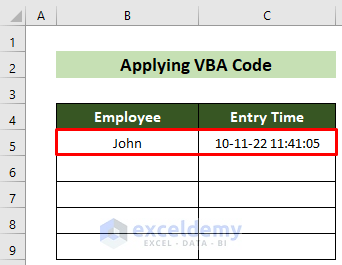
- Record other employee names in the cells below to get the entry time.
Get the instantaneous time entries for all employees, and the final result should look like this.
3 More Ways to Get Instant Date and Time
Method 1 – Using Keyboard Shortcut
Steps:
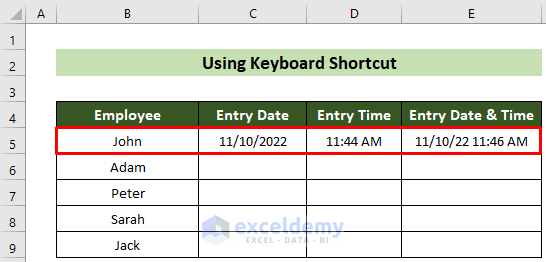
- Click on cell C5.
- Hold the Ctrl key and press the Semicolon (;) key on your keyboard.
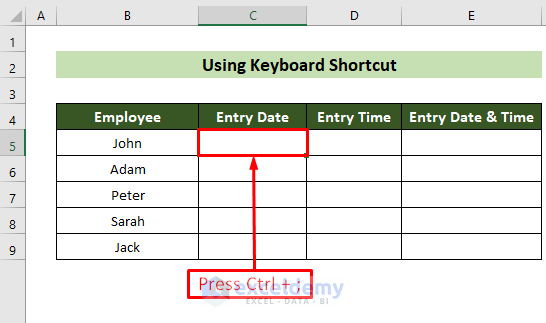
- Get your instant date in the cell.
- Get instant time click on cell D5 and hold Ctrl + Shift key on your keyboard.
- Press the Semicolon (;) key on your keyboard.
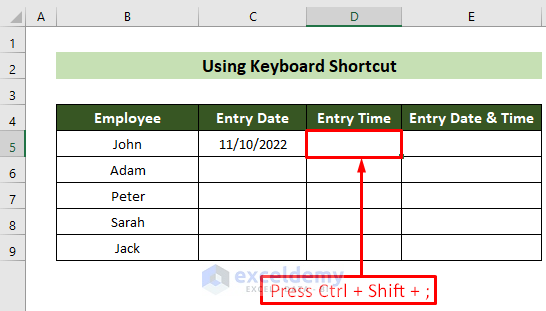
- Get the instant time in your selected cell.
- Get both instantaneous date and time, click on cell E5.
- Hold the Ctrl key and press the Semicolon (;) key.
- Press the Space bar and hold Ctrl + Shift key, and press the Semicolon (;) key.
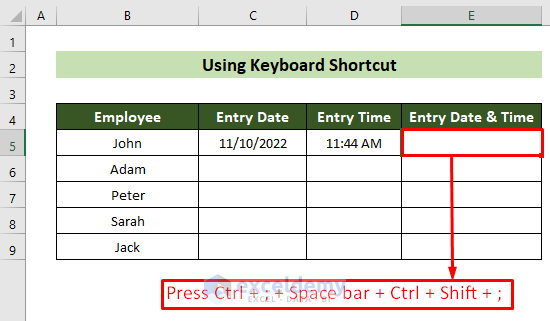
- Get all time and date values for the first cell.
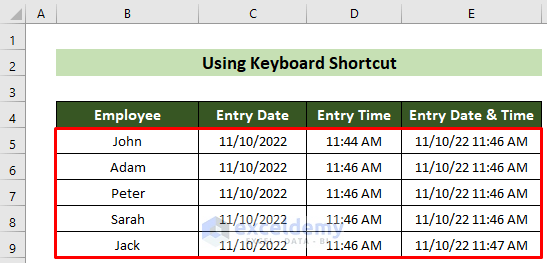
Repeat the procedures for every cell below and you will get all date and time results for all cells. The output should look like this.
Method 2 – Using TODAY Function to Show the Current Date
Steps:
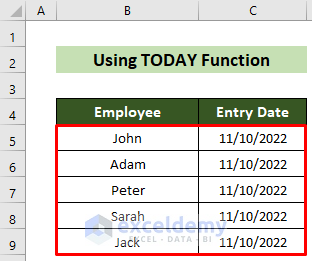
- Click on cell C5 and insert the following formula.
=TODAY()- Press the Enter key.

Get the current date at cell C5. For all the other cells below use the same formula to get the current date. The result should look like this finally.
Method 3 – Using the NOW Function to Get Instant Time
Steps:
- You need to format the output cells properly. Select the output cells (C5:C9 here) and press Ctrl +1 to do this.
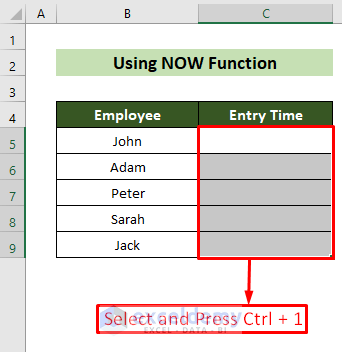
- The Format Cells window will appear.
- Go to the Number tab here >> choose Date from the Category: pane and choose the 3/14/12 1:30 PM option from the Type: options.
- Click the OK button.

- Click on cell C5 and insert the following formula.
=NOW()- Hit Enter.
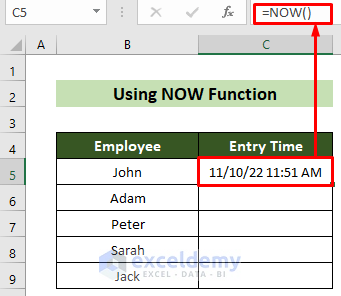
- You will get the instant time in cell C5.
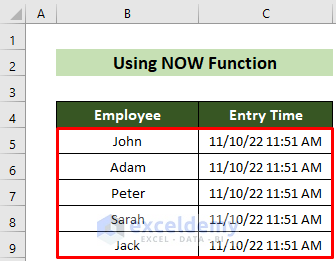
You can use the same formula for all the other cells below, and you will get all the instantaneous times in the cells. The final result should look like this.
Download Practice Workbook
You can download our practice workbook from here for free!
Related Articles
- How to Automate Data Entry in Excel
- How to Create a Data Log in Excel
- Types of Data Entry in Excel
- Excel Data Entry Practice Exercises PDF
- How to Check for Data Entry Errors in Excel
- How to Restrict Data Entry in Excel Cell
<< Go Back to Data Entry in Excel | Learn Excel
Get FREE Advanced Excel Exercises with Solutions!

Hi!
When I use method 2 (VBA) but I filter or sort by Employee, the date and time in every cell change and update to the new date and time. I do not want to lose the old record when sorting or filtering. How can I do to keep the records saved when filtering or sorting but if I update an old name because a mistake for example, get to update the date and time by that last update?
Hello Sergio Zuniga,
To keep the original timestamps intact when filtering or sorting while still allowing updates when changes are made, you’ll need to modify the VBA code. Use a Worksheet_Change event to record the time only when a new entry is made or a change occurs, rather than recalculating the time every time the cell is referenced.
1. Right-click the sheet tab and choose View Code.
2. Insert this VBA code.
Private Sub Worksheet_Change(ByVal Target As Range)
    If Not Intersect(Target, Me.Range("B:B")) Is Nothing Then
        If Target.Cells.Count = 1 Then
            If Target.Value  "" Then
                If Me.Cells(Target.Row, "C").Value = "" Then
                    Me.Cells(Target.Row, "C").Value = Format(Now, "dd-mm-yy hh:mm:ss")
                End If
            Else
                Me.Cells(Target.Row, "C").ClearContents
            End If
        End If
    End If
End Sub
Time is recorded in column C when a value is entered in column B.
The timestamp won’t update during sorting or filtering.
If a value is changed manually, the timestamp will only update if the cell in column C is empty.
Regards
ExcelDemy