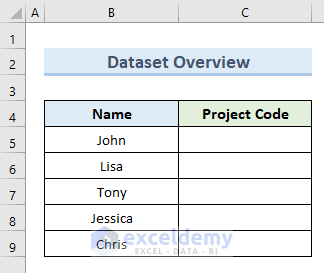
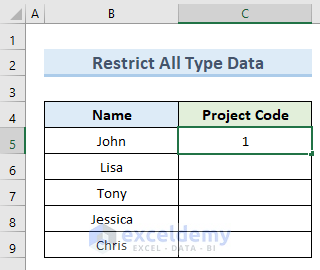
The following dataset contains the names of students in a column. We’ll restrict the data entry in the Project Code column.
Method 1 – Using Data Validation
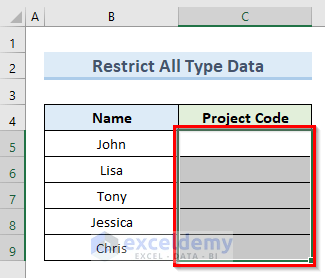
Case 1 – All Types of Data Entry Restriction
- Select the cell range C5:C9.
- Go to the Data tab, choose the Data Tools group, select the Data Validation drop-down and click on Data Validation.

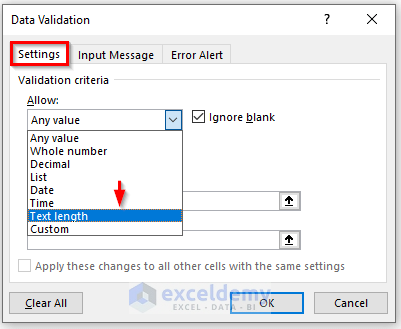
- The Data Validation dialog box appears.
- Go to the Settings tab and select the option Text length from the Allow drop-down list.
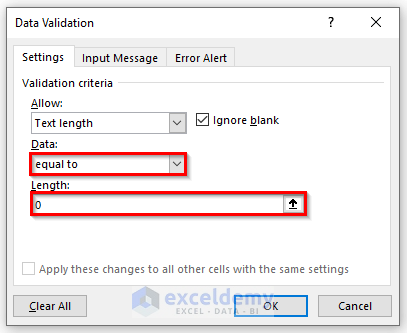
- Choose equal to from the Data drop-down list and type 0 in the Length field.
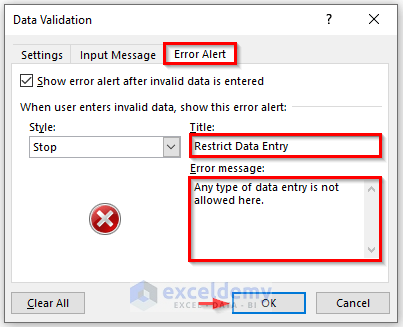
- Go to the Error Alert tab and type Restrict Data Entry in the Title field.
- Type a message in the Error message box. This message with the Title will show up when a user tries to enter data in specific cells.
- Click OK.
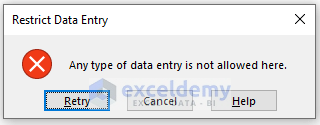
- Select cell C5 and type 1 in that cell.
- Press Enter.
- You’ll get an error warning box.
Read More: How to Check for Data Entry Errors in Excel
Case 2 – Limit Data Entry to Allow Only Number
- Select the cell range.
- Go to the Data tab, select the Data Validation drop-down, and pick Data Validation.
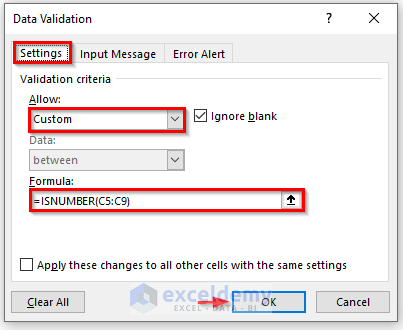
- The Data Validation dialog box appears. Go to the Settings tab and select the option Custom from the Allow drop-down list.
- In the Formula field, insert the following formula:
=ISNUMBER(C5:C9)This formula checks whether the values in the range C5 to C9 are numbers. - In the Error Alert tab, insert the desired title and error message.
- Click on OK.
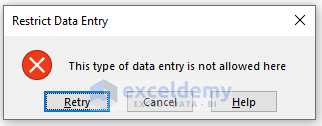
- Type ASD in cell C5.
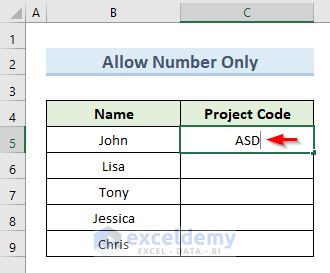
- Press Enter.
- You will see an error message box.
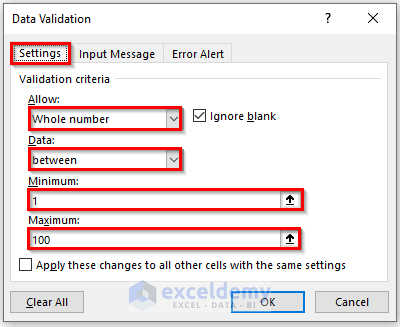
Case 3 – Limit Data Entry to Allow Whole Numbers in a Specific Range
- Select the cell range.
- Go to the Data tab and select Data Validation.
- The Data Validation dialog box appears. Go to the Settings tab.
- Select the option Whole number from the Allow dropdown list.
- Select between from the Data drop-down list.
- Put 1 in the Minimum field and 100 in the Maximum field.
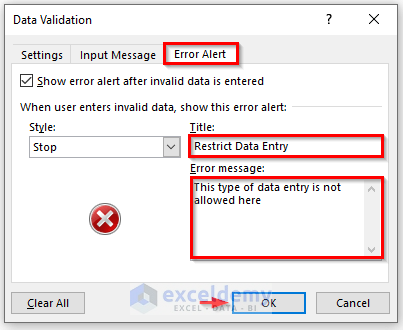
- Go to the Error Alert tab.
- Insert the Title and the Error message.
- Click OK.
- Type the value 125 in cell C5.
- Press Enter.
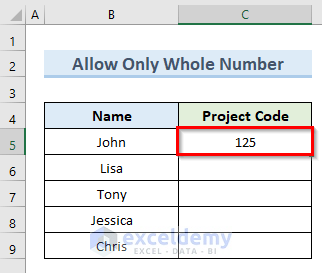
- An error message box appears.

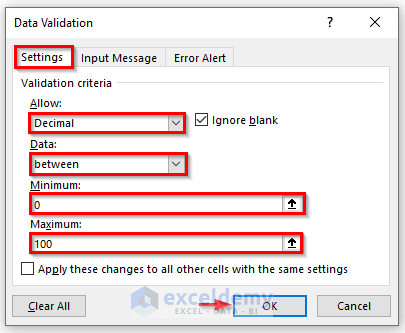
Case 4 – Decimal Numbers in a Specific Range Allowed
- Select the cell range.
- Go to the Data tab and select Data Validation.
- The Data Validation dialog box appears. Go to the Settings tab.
- From the Allow drop-down list, choose Decimal.
- Select between from the Data drop-down list.
- Fill in the Minimum and Maximum fields with the values 1 and 100, respectively.
- In the Error Alert tab, insert the desired title and error message.
- Click OK.
- Select cell C5. Type a 122.8 in that cell.
- Hit Enter.
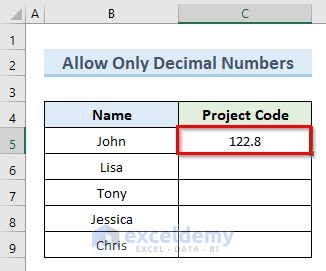
- You’ll see an error message box.

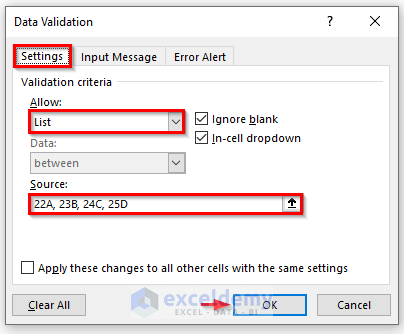
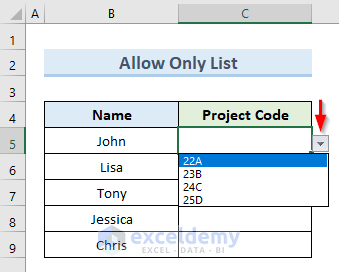
Case 5 – Restrict Data Entry to Allow a List
To restrict data entry to a list:
- Select the cell range.
- Go to the Data tab and select Data Validation.
- The Data Validation dialog box appears. Go to the Settings tab.
- Select the option List from Allow drop-down list.
- Type a list of values in the Source box.
- Click on OK.
- A drop-down icon appears beside the selected cells. You can only insert values in the cells from the list. Otherwise, it will show an error.
- Type 23R in cell C5. The value is not in the defined list.
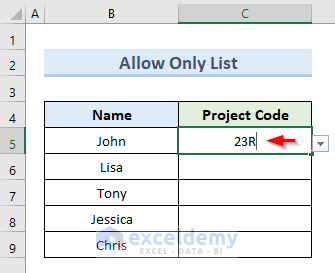
- Press Enter.
You will see an error message box.

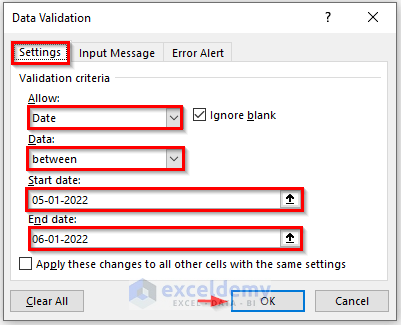
Case 6 – Limit Data Entry to a Date Range
To limit data entry to a range of dates:
- Select the cell range.
- Go to the Data tab and select Data Validation.
- The Data Validation dialog box appears. Go to the Settings tab.
- Select Date from the Allow drop-down list and choose between from the Data drop-down list.
- Type the starting date and ending date in the Start date and End date fields, respectively.
- Click OK.
- Type a date outside the specified range.
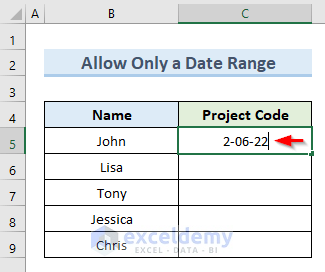
- Press Enter.
- You’ll get an error message box.

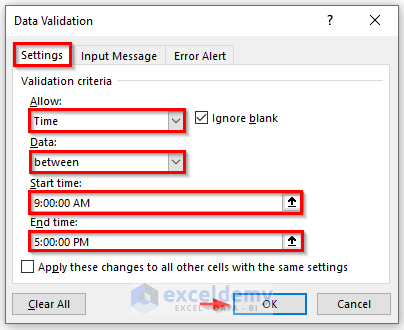
Case 7 – Restrict Data Entry to a Specific Time Range
- Select the cell range.
- Go to the Data tab and select Data Validation.
- The Data Validation dialog box appears. Go to the Settings tab.
- Select Time from the Allow drop-down list and choose between from the Data drop-down list.
- Set the values in the Start time and End time fields.
- Click OK.
- Type 6:00:00 PM in cell C5.
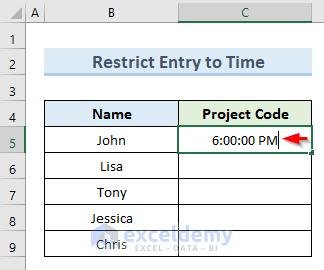
- Press Enter.
- You’ll get an error message box since the value is outside the defined range.

Read More: How to Record Time of Data Entry in Excel
Case 8 – Restrict Data Entry to Allow Only Text
- Select the cell range.
- Go to the Data tab and select Data Validation.
- The Data Validation dialog box appears. Go to the Settings tab.
- Select the option Custom from the Allow drop-down list.
- In the Formula field insert the following formula:
=ISTEXT(C5:C9). This formula checks whether the values in the range C5 to C9 are text. - Click OK.

- Type the numeric value 222 in cell C5.
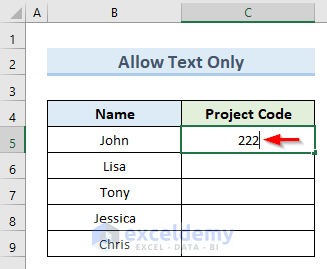
- Press Enter.
- An error message box will appear.

Method 2 – Protecting the Excel Worksheet
Step 1 – Unlock the Entire Worksheet
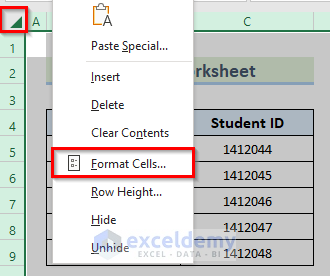
- Click on the triangle icon in the left corner to select the entire worksheet.
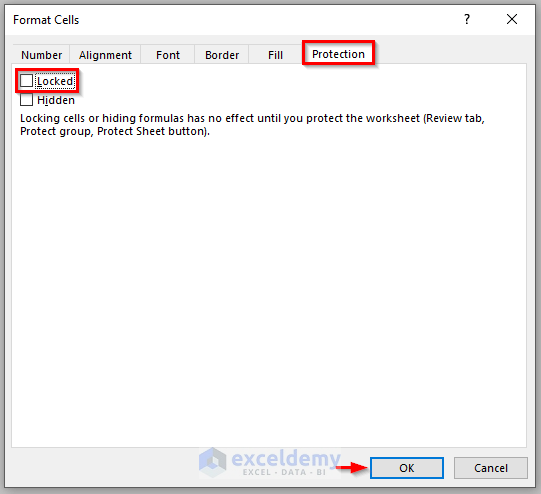
- Right-click and select the option Format Cells from the Context Menu.
- The Format Cells dialogue box appears. Go to the Protection tab.
- Uncheck the option Locked.
- Click OK.
Step 2 – Lock a Specific Range of Cells
- Select the cell range B5:B9.
- Right-click and select the option Format Cells.

- Go to the Protection tab in the Format Cells dialogue box.
- Check the option Locked.
- Click OK.

Step 3 – Protect Worksheet
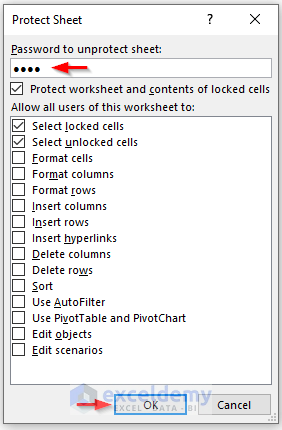
- Go to the Review tab and select Protect Sheet.

- The Protect Sheet dialog box appears. Type a password. We are using 1234.
- Click OK.
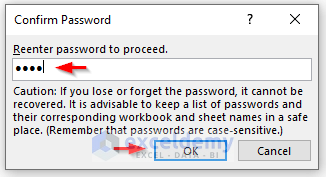
- A Confirm Password dialog box will appear. Re-enter the password.
- Click OK.
- Select cell B5. Start typing in any value.
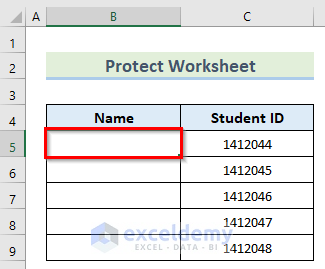
- You will get a warning box.

Download Practice Workbook
You can download the practice workbook from here.
Frequently Asked Questions
Why would I want to restrict data entry in Excel cells?
Restricting data entry helps ensure accuracy, prevent errors, and maintain consistency in your spreadsheet. It allows you to enforce specific rules and criteria for data input.
Can I protect specific cells or ranges in Excel from being edited?
Yes, you can protect specific cells or ranges by locking the cells and then protecting the sheet. This is useful for preserving formulas or restricting changes to critical data.
Can I restrict data entry based on a predefined list of options?
Yes, you can create drop-down lists in Excel, allowing users to choose from predefined options. This helps standardize data entry and reduces the risk of input errors.
Related Articles
- Automatically Insert Timestamp Data Entries in Excel
- How to Create a Data Log in Excel
- Types of Data Entry in Excel
- Excel Data Entry Practice Exercises PDF
- How to Automate Data Entry in Excel
<< Go Back to Data Entry in Excel | Learn Excel
Get FREE Advanced Excel Exercises with Solutions!
