What Is a Data Log in Excel?
The Data Log is a form for gathering data systematically. This makes data entry very easy. People don’t need to choose cells every time they enter data. They put data in a specific form, and that form will decide where to locate data in the Excel worksheet.
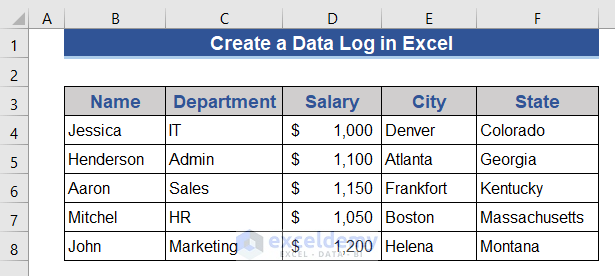
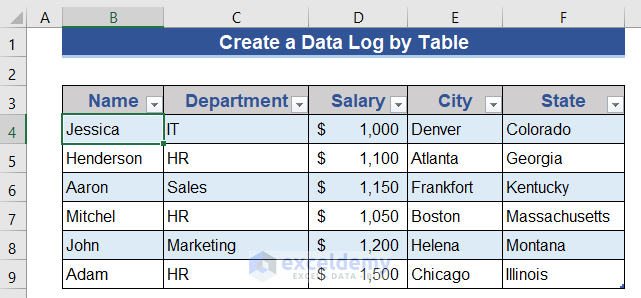
Below is a sample data log based on the Excel table. Basic data of employees are stored here.
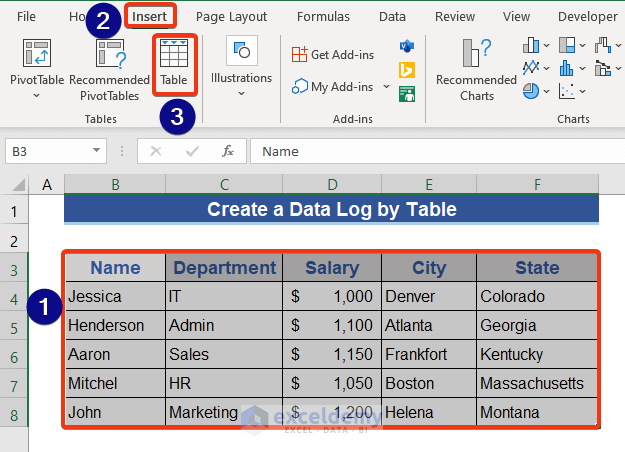
- Select all the cells with data.
- Choose the Table option from the Insert tab.
- The Create Table window will appear.
- Our selected range will be shown here. Check the My table has headers option.
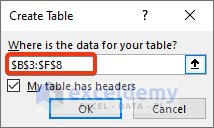
- Press OK.
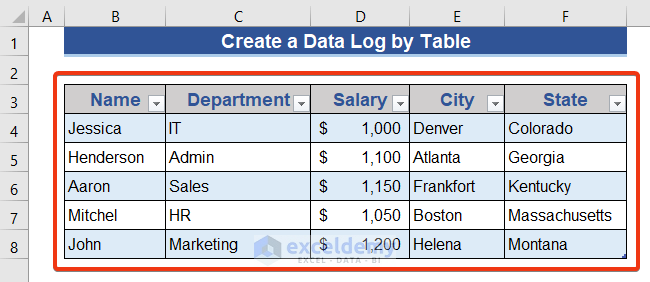
We can see a table has been formed. A sign on the right bottom indicates the table area.
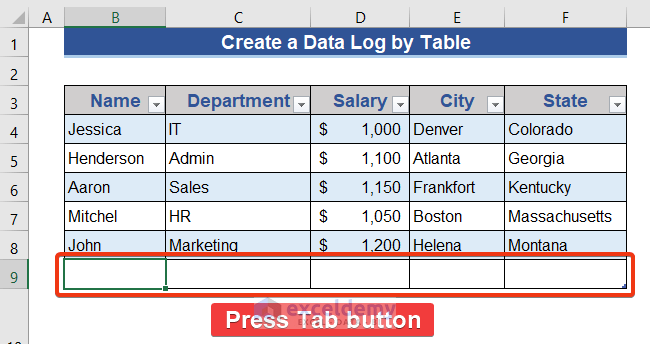
- We can expand the table easily. Press the Tab button from the keyboard, and the table will automatically expand.
There is a shortcut to forming a table, press Ctrl+T.
This is what a data log looks like in a table form. However, we will show how to create a data log by inputting information into a custom form, which will create a dataset.
Method 1 – Create a Data Log Using a Customized Excel Form
Steps:
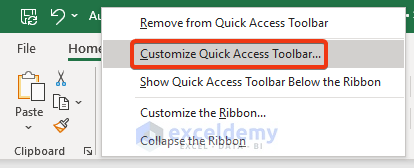
- Go to the upper top portion of the worksheet.
- Press the right button of the mouse on the existing icon of the Quick Access Toolbar.
- Click on the Customize Quick Access Toolbar option.
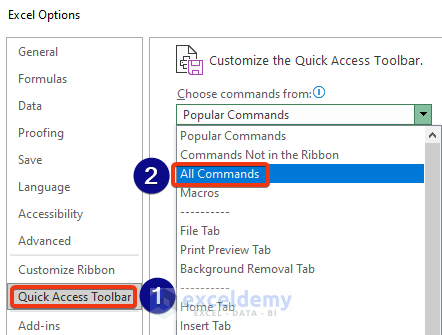
- The Excel Options window appears.
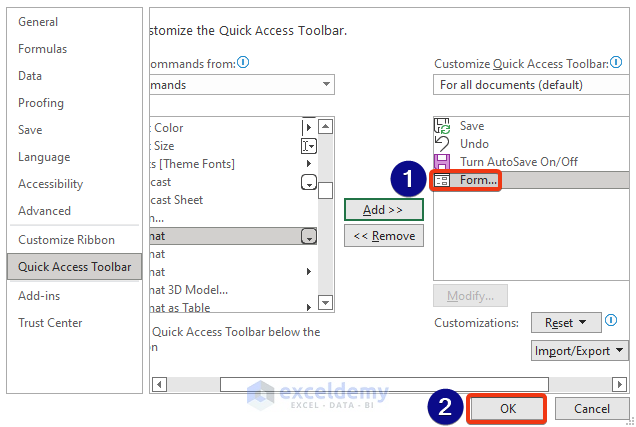
- Select the Quick Access Toolbar from the right side table.
- Choose All Commands from the Choose Commands section.
- Select Form and click the Add button.
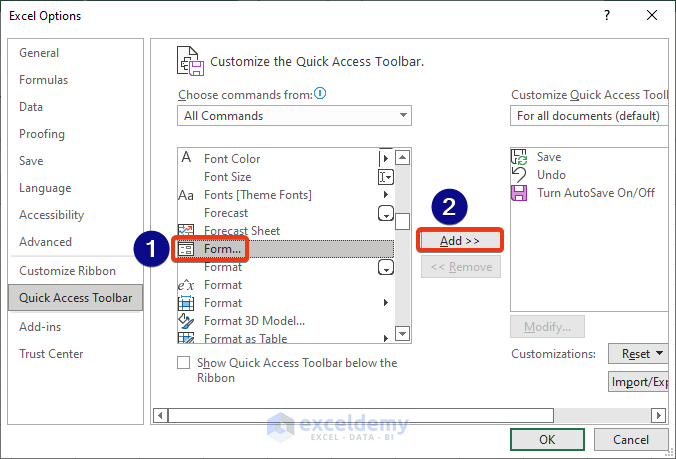
- Select the Form option of the Customize Quick Access Toolbar section.
- Click OK.
- We can see the Form icon added to the worksheet.
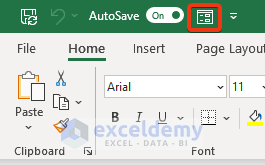
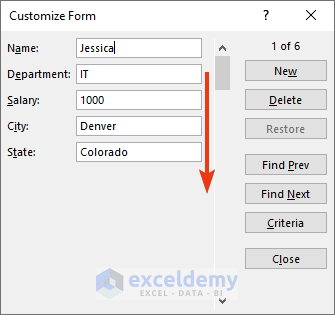
- Select any cell of the table.
- Click on the Form icon.
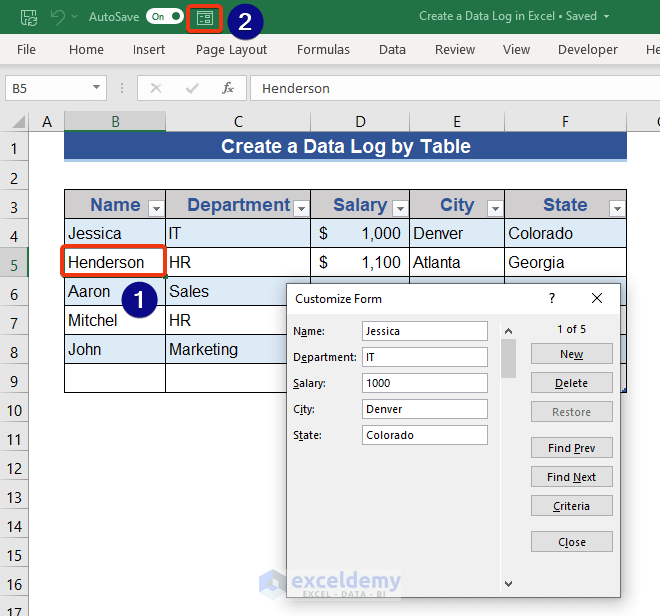
The Customize Form window appears now. The information on the 1st cell is shown.
- Click on the New option of the Customize Form.
- Input values in different cells and then click on New.
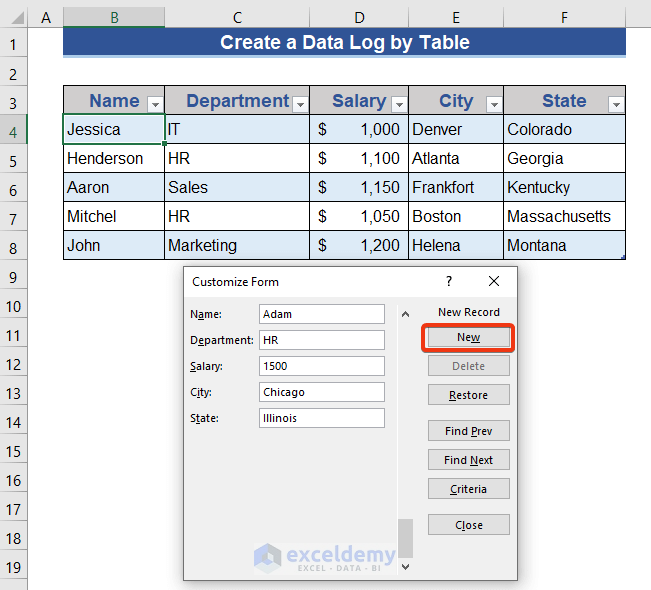
- Have a look at the following image.
We can see a new row is added to the table.
- The Customize Form has multiple options to perform.
- We can move the navigator to get further data.
There are also options to go to the previous and next option. We can discover any item from the Criteria option.
- Click on the Criteria button.
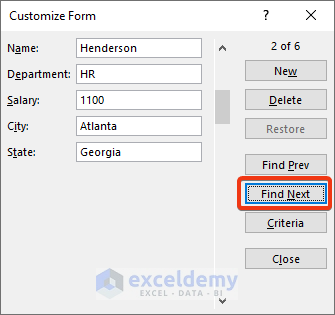
- We can search based on any option of the input data. We will search based on the Department option. We can click on the Find Prev and Find Next options.
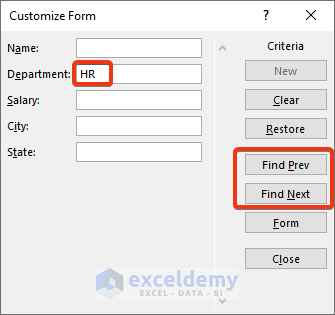
- Click on the Find Next button.
Read More: How to Automate Data Entry in Excel
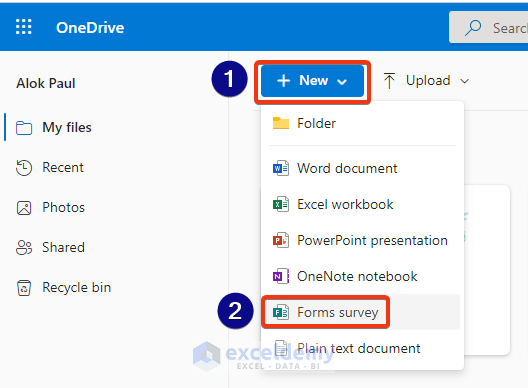
Method 2 – Create a Data Log Using OndeDrive Forms
Steps:
- Enter the Onedrive from any browser.
- Click on New from the Forms survey option.
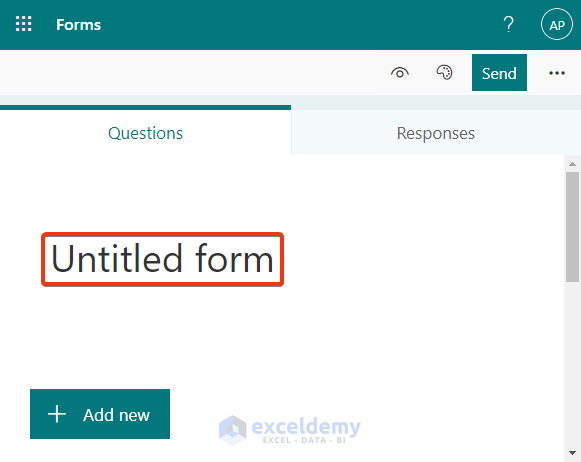
- A form appears named Untitled form.
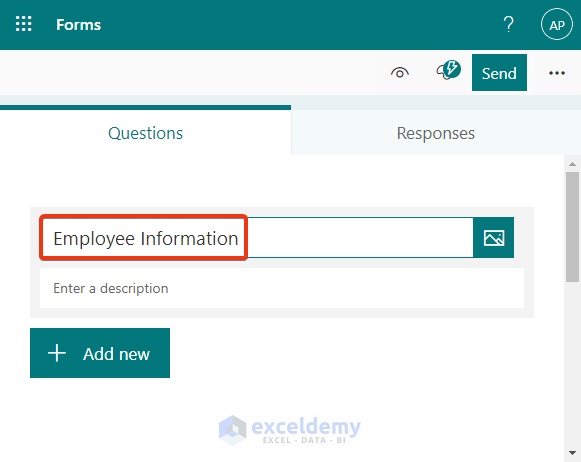
- Rename the form as Employee Information.
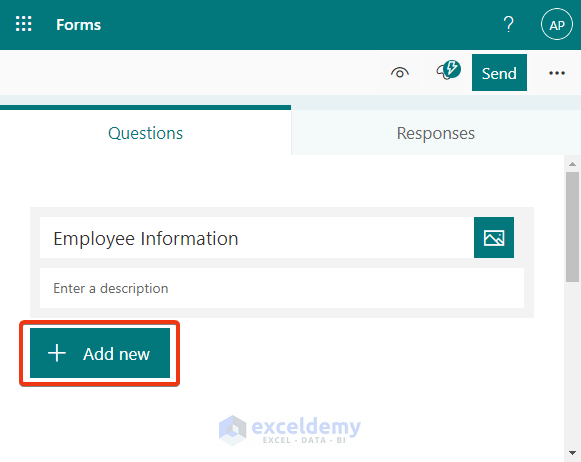
Add options to the input data.
- Click on the Add new option.
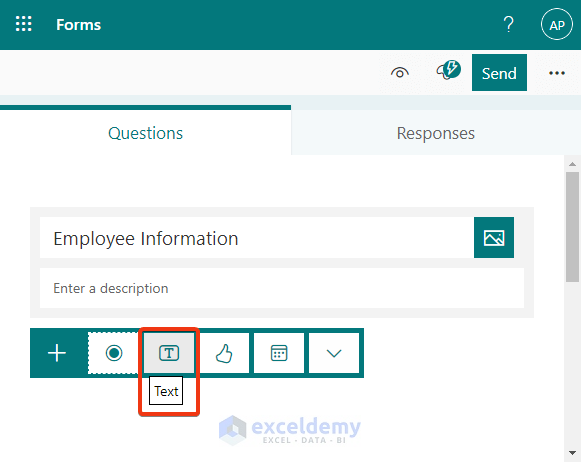
- A row appears with different options.
- Click on the Text option.
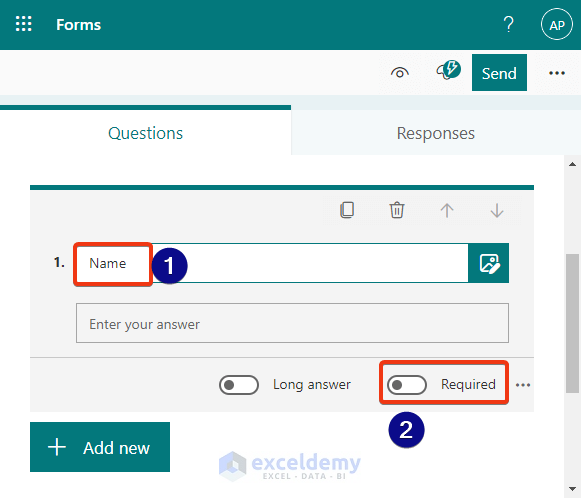
- We can make the options mandatory or compulsory.
- Click on Required to make it mandatory.
- Add other columns.
- Click on the Preview option.
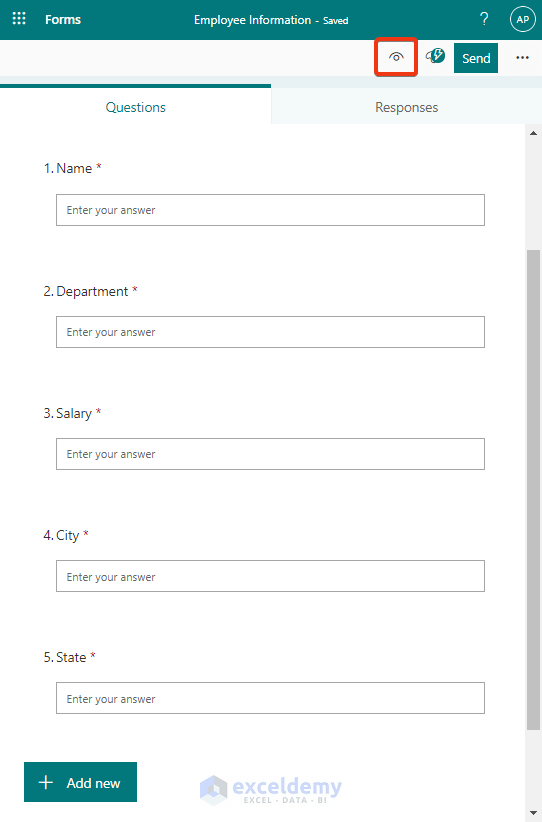
- Have a look at the window.
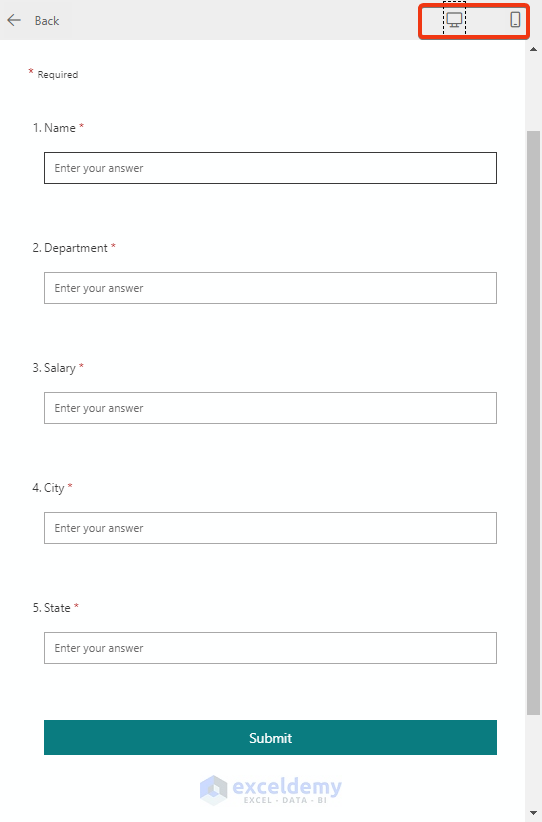
This is the user interface. We can also see there are 2 options: desktop view and mobile view.
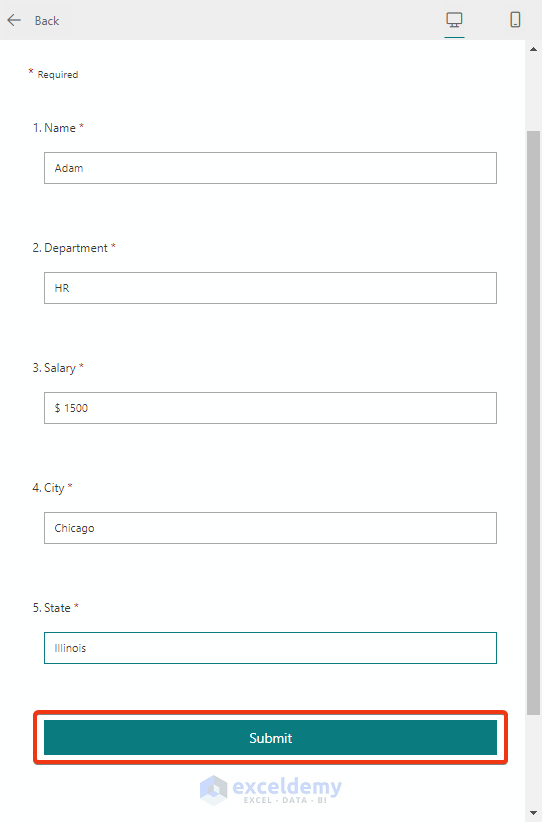
- Input the information.
- Click on the Submit button.
- See the submitted response.

- Go to the Responses tab.
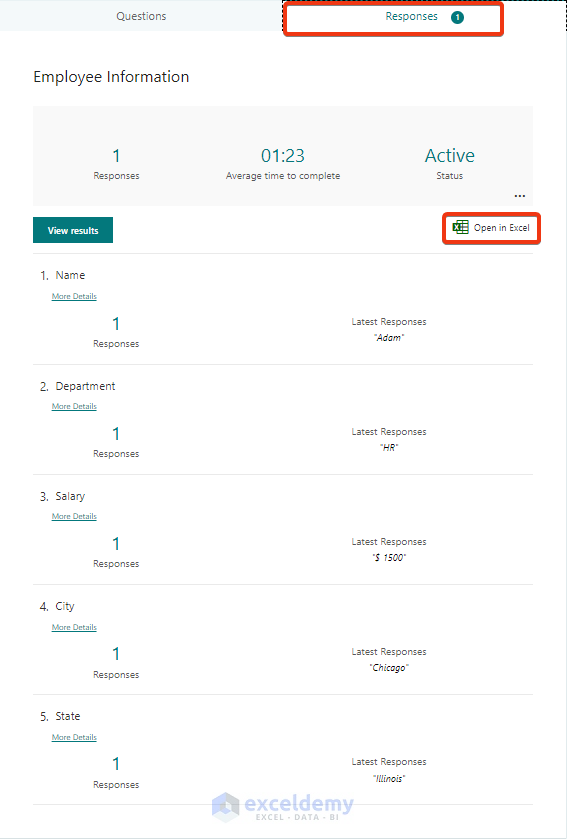
We can see the inputted information. The Open in Excel option allows us to download the Excel file.
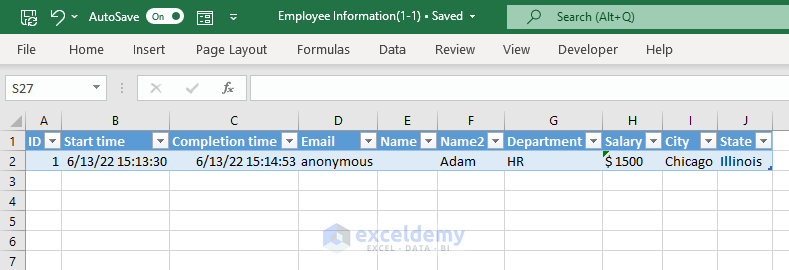
This is what the Excel file looks like after inserting information.
Quick Notes
- For Method 1, an Excel table is mandatory.
- In Method 2, internet connectivity is necessary; the user must have an email address.
Download the Practice Workbook
Download this workbook to practice.
Related Articles
- Types of Data Entry in Excel
- How to Record Time of Data Entry in Excel
- How to Check for Data Entry Errors in Excel
- Excel Data Entry Practice Exercises PDF
- How to Restrict Data Entry in Excel Cell
- How to Automatically Insert Timestamp Data Entries in Excel
<< Go Back to Data Entry in Excel | Learn Excel
Get FREE Advanced Excel Exercises with Solutions!
