Method 1 – Utilizing the ‘Inspect Document’ Option to Delete Hidden Rows in Excel
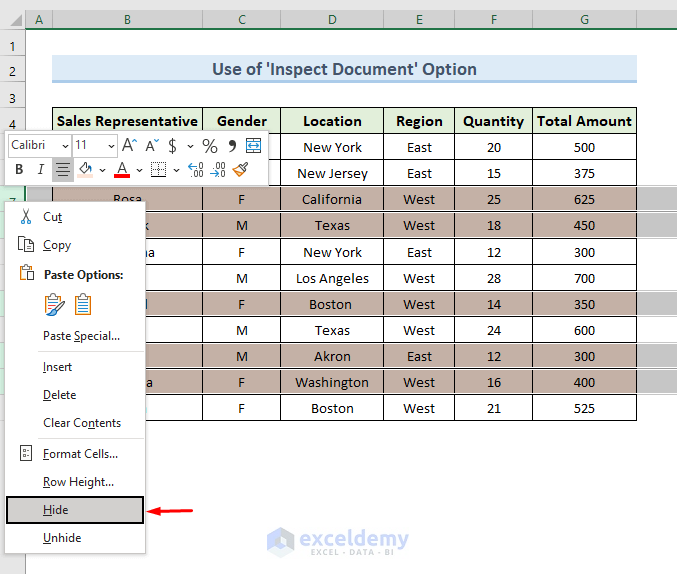
- Hide the highlighted rows, select the rows.
- Right-click on the cell index number.
- Click Hide.
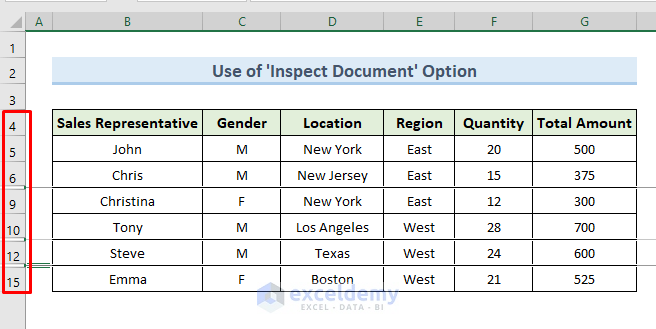
- See the highlighted rows are not visible.
NFollow some steps to delete these hidden rows.
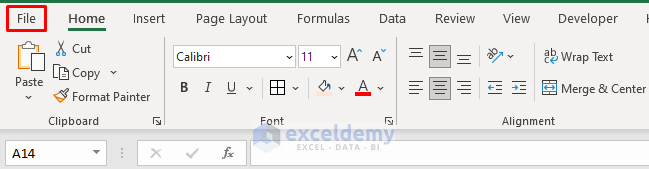
- Got to the File option from the ribbon.
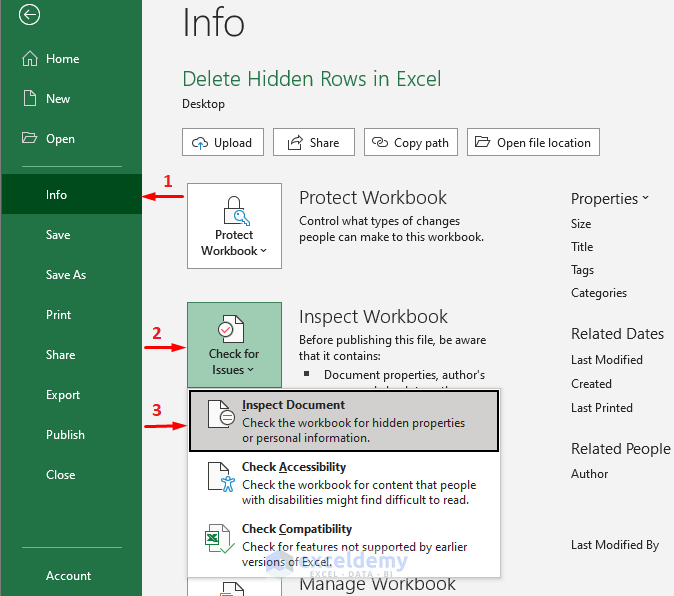
- Select the Info section. Go to the ‘Inspect Workbook’. From the drop-down select the ‘Inspect Document’ option.
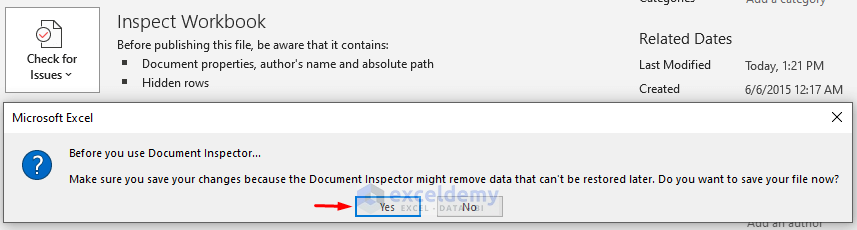
- A box like this will appear. Select Yes.
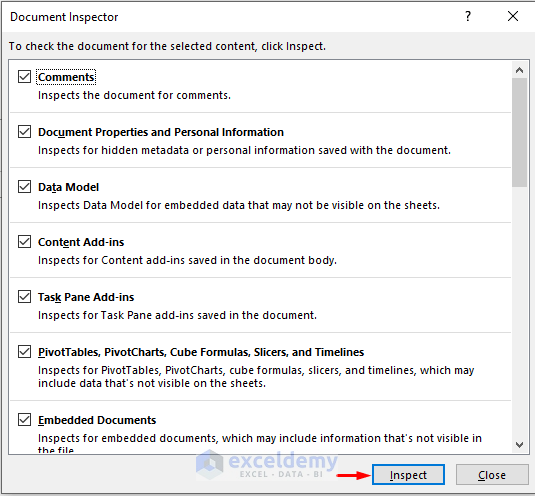
- From the Document Inspector window click on the option Inspect.
- Scroll down. Select the option Remove All for the Hidden Rows and Columns section.
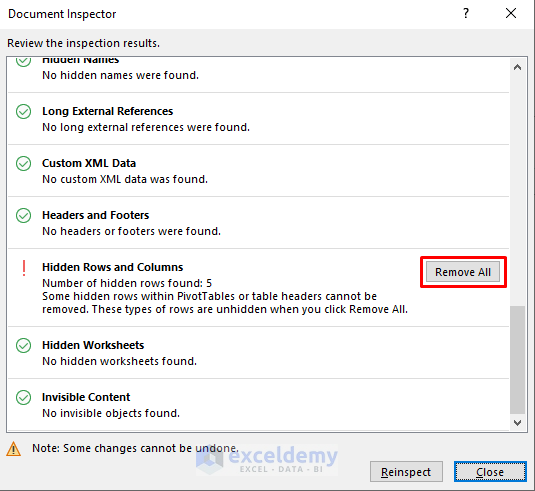
- See that the hidden rows are not present anymore. The below image shows the uninterrupted sequence of row numbers after deleting the hidden rows.

Note: You can’t undo the deleted rows. If you don’t want to delete them permanently, you must keep a data backup.
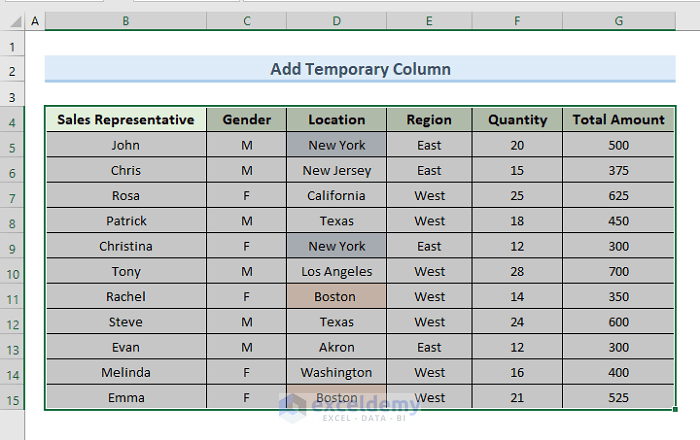
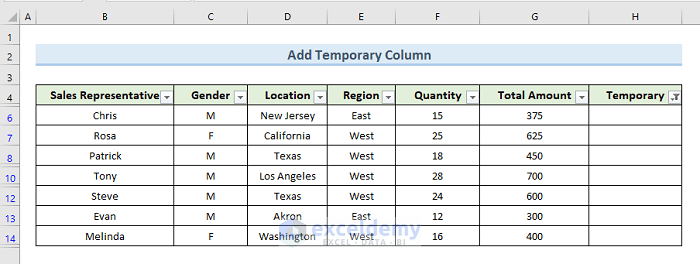
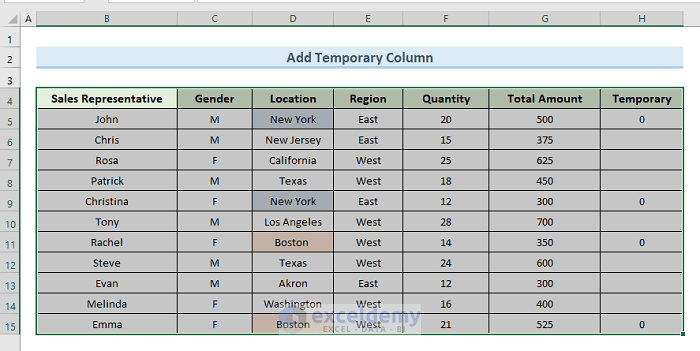
Method 2 – Adding a Temporary Column to Delete Hidden Rows
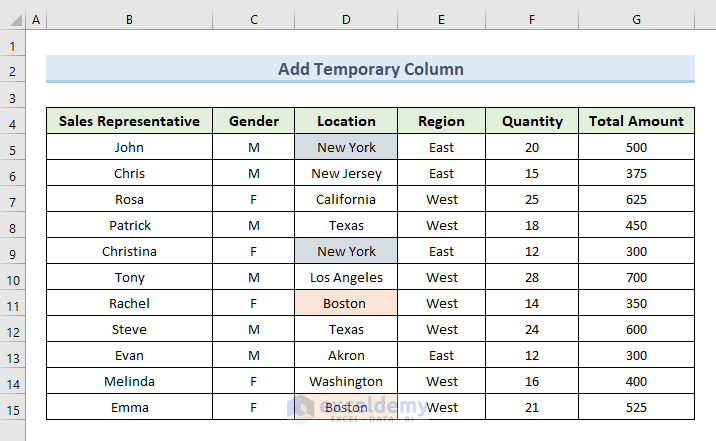
Delete hidden rows by adding a temporary column. Use filtering to apply this method. Suppose we just want to keep the sales data of New York and Boston locations in the following dataset. Delete the rest of the rows. Just follow the simple steps to execute this:
- Select the entire dataset (B4:G14).
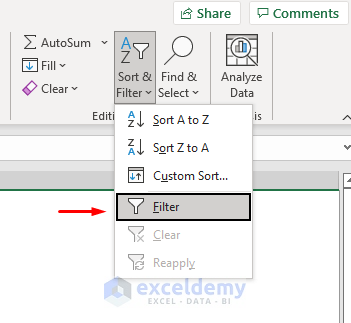
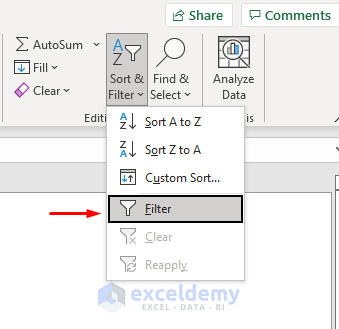
- Go to the Sort & Filter option. From the dropdown click on the option Filter.
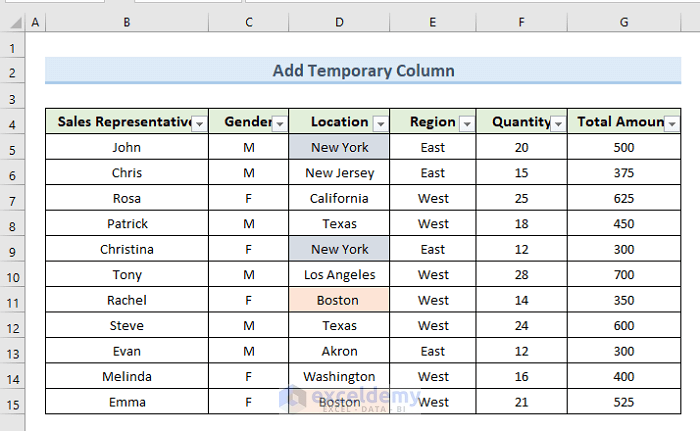
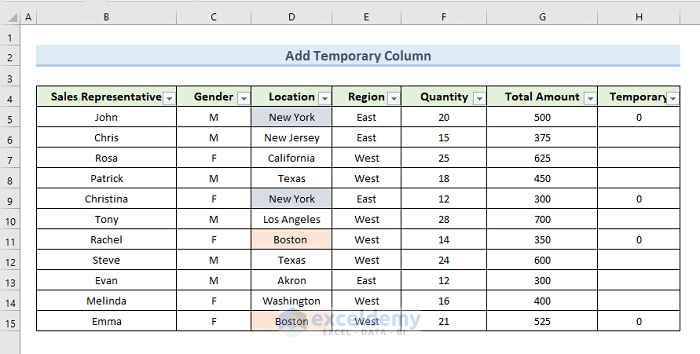
- See a dataset like this with filtering options at the column head.
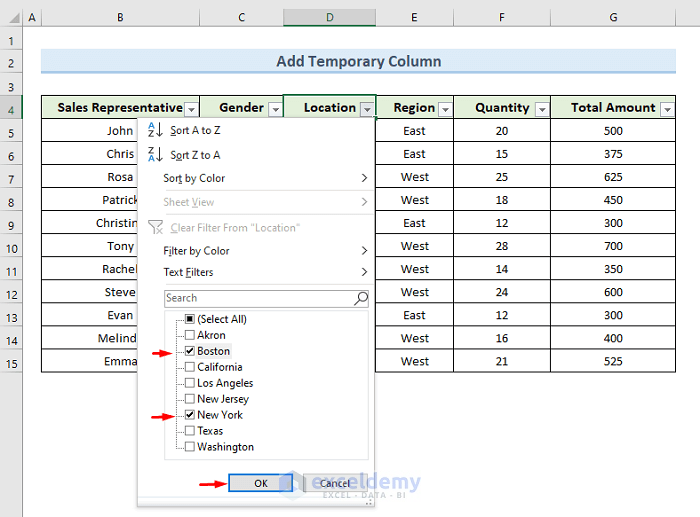
- Go to the filtering drop-down of the title Location. Just select the options New York and Boston.
- Press OK.
- Get only the sales data for New York and Boston. Other rows are hidden now.
- Add a new column. Name it Temporary. Enter the value 0 in cell H5.
- Drag the Fill Handle tool.
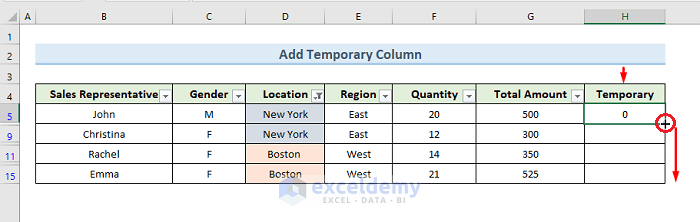
- Get the value 0 for all the rows.

- Select the entire dataset (B4:B15) again.
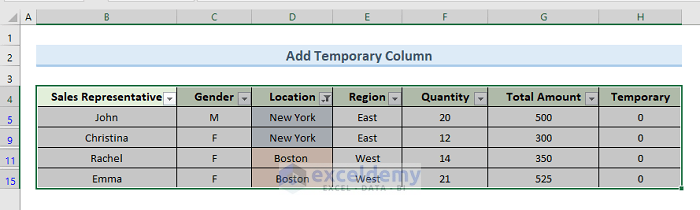
- Go to the Sort & Filter drop-down. Select the option Filter.

- All the hidden data are now visible. See 0 only in the rows that we want to keep.
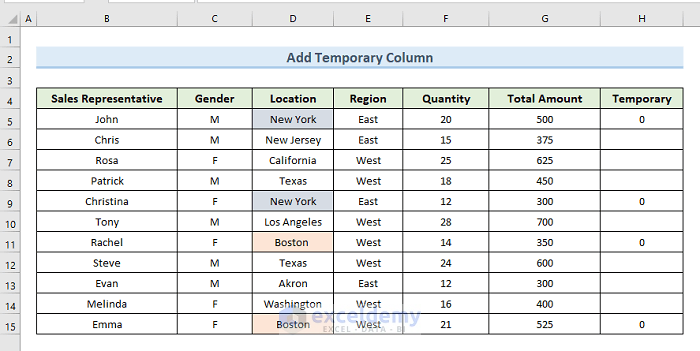
- Select the entire dataset (B4:G15) again.
- Go to Sort & Filter. From the drop-down, select the option Filter.
- See the filtering drop-downs in the title bars of the dataset.
- Go to the drop-down option in the ‘Temporary’ column.
- Deselect option 0.
- Click OK.
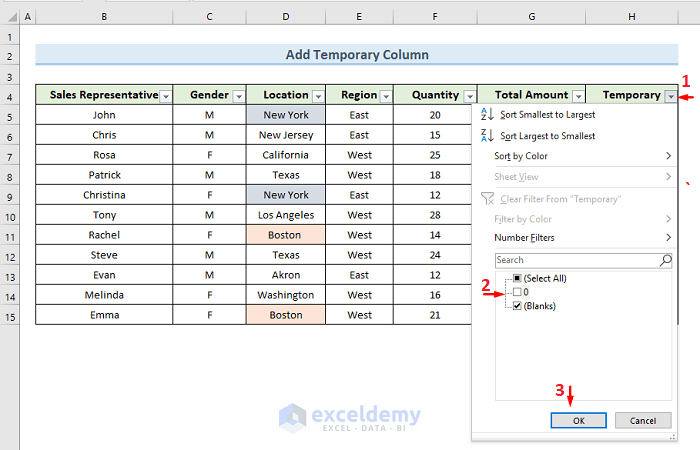
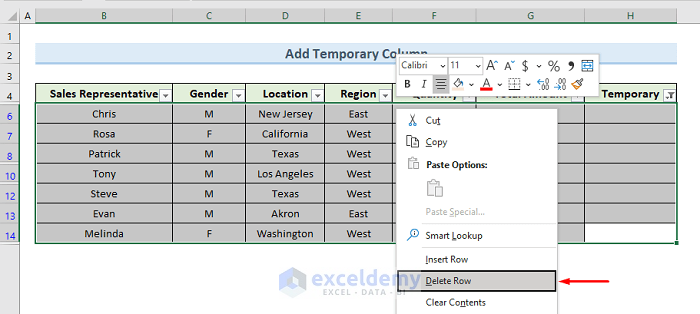
- Get the rows that we have to delete.

- Select all the rows. Do a right-click and click on the option Delete Row.
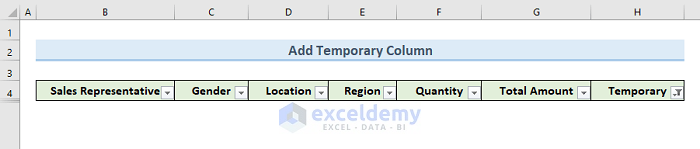
- All the rows without the value 0 are now deleted.
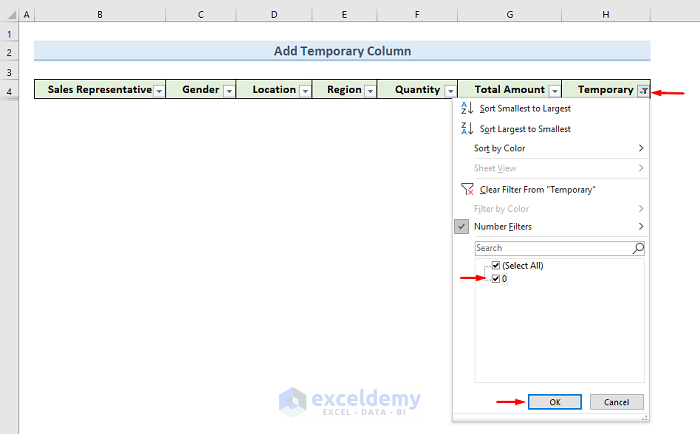
- Go to the drop-down of the Temporary column. Select option 0.
- Click OK.
- The dataset for the cities of New York and Boston.
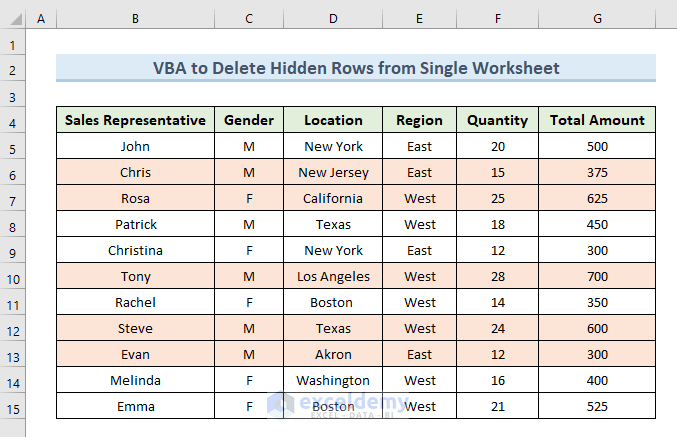
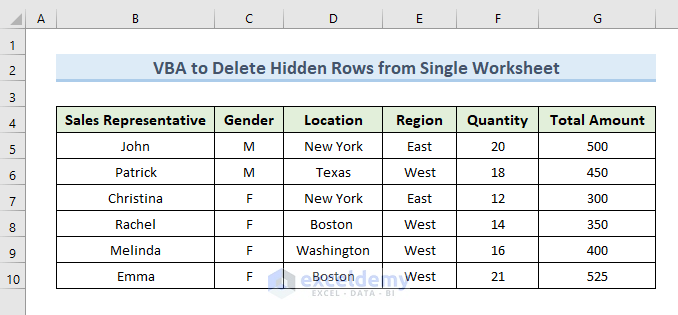
Method 3 – Using VBA Code to Delete Hidden Rows in Excel
3.1. Deleting Hidden Rows from Entire Worksheet
The following dataset of sales. In our experimental dataset, the highlighted rows are hidden. Delete these rows using VBA.
Hiding the highlighted rows or database will look like the below image. We can see that the row index number is not consecutive.

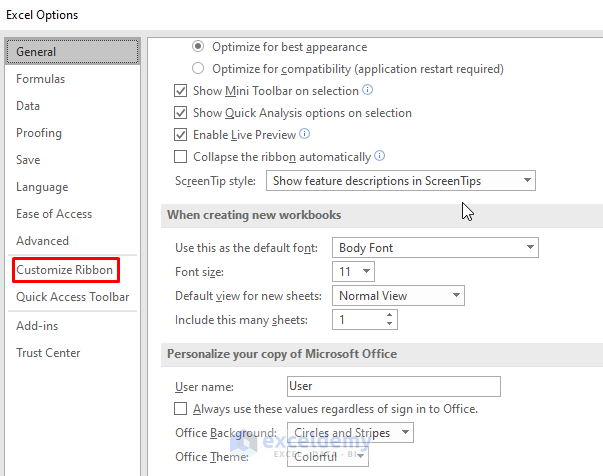
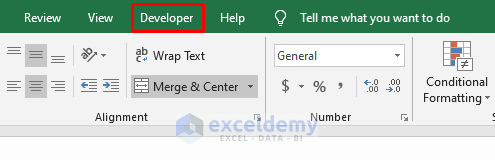
It should be noted that if we do not have the Developer tab in our Excel, we have to activate the Developer tab to create macro-enabled content.
See how to activate the Developer tab. Just follow the instructions given below.
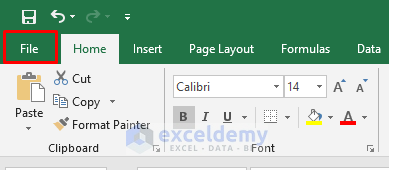
- Go to the File option in the top-left corner of our Excel.

- Select the Options.
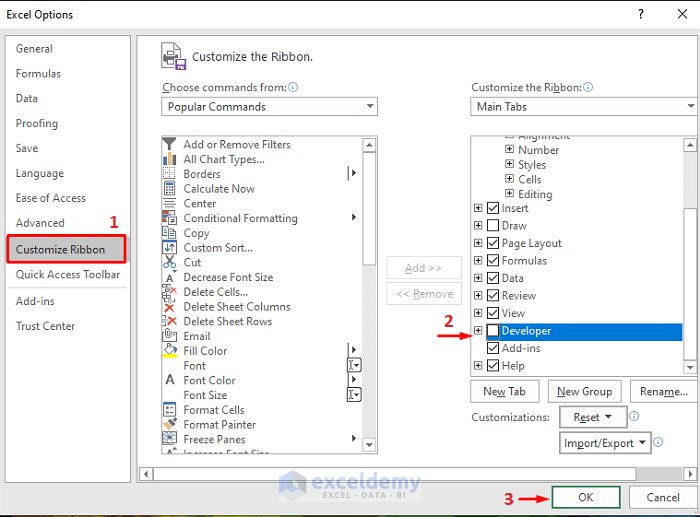
- A new window will come. Select the option Customize Ribbon from the available options.
- Select the Developer option and click OK.
- Ssee the Developer tab in our Excel.
 Now we will use the Developer tab to create macro-enabled content.
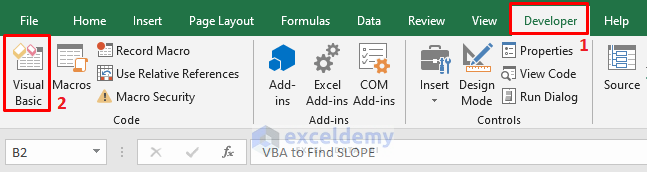
- Go to the Developer tab. Select the Visual Basic option.
- A new window will open. From the window select the Insert tab. From the drop-down, select the Module option. Get a new module named Module-1.
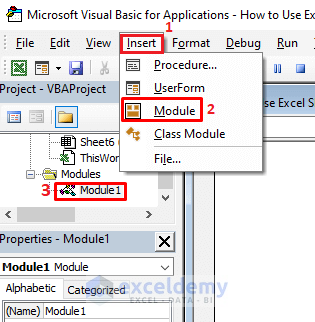
- Select the option Module-1. A blank window will open. Insert the following code in the blank window.
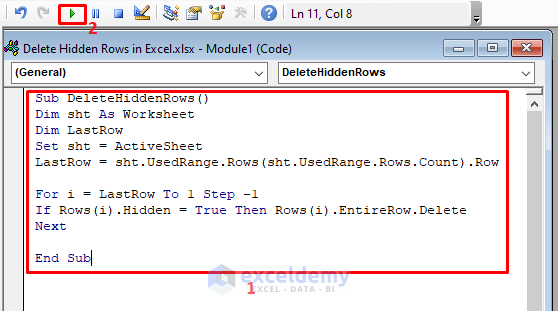
Sub DeleteHiddenRows()
Dim sht As Worksheet
Dim LastRow
Set sht = ActiveSheet
LastRow = sht.UsedRange.Rows(sht.UsedRange.Rows.Count).Row
For i = LastRow To 1 Step -1
If Rows(i).Hidden = True Then Rows(i).EntireRow.Delete
Next
End Sub- Click on the run option that we can see in the image. Press F5 as well to run the code.
- See that we have deleted all the hidden rows.
3.2. Removing Hidden Rows from Specific Range
Use VBA to delete the hidden rows from a specific range. Also continue with our earlier dataset.
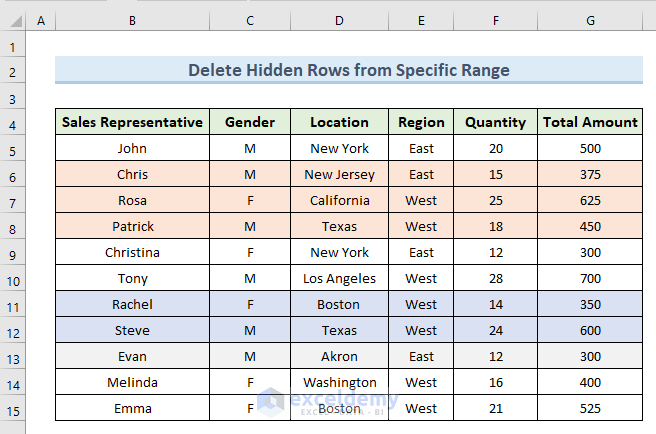
- Our range is (B4:G9). We will not delete hidden rows after row number 10. That’s why we are using two colors to highlight the hidden rows.

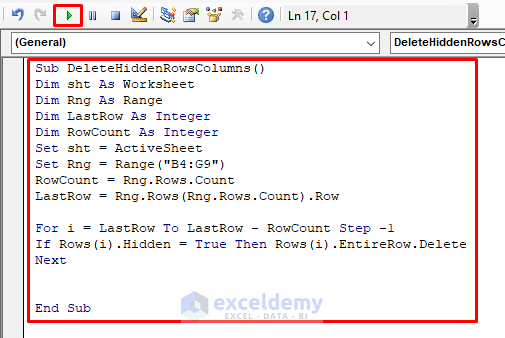
- From the Developer tab go to the code window.
- Insert the following code there:
Sub DeleteHiddenRows()
Dim sht As Worksheet
Dim Rng As Range
Dim LastRow As Integer
Dim RowCount As Integer
Set sht = ActiveSheet
Set Rng = Range("B4:G9")
RowCount = Rng.Rows.Count
LastRow = Rng.Rows(Rng.Rows.Count).Row
For i = LastRow To LastRow - RowCount Step -1
If Rows(i).Hidden = True Then Rows(i).EntireRow.Delete
Next
End Sub- Click on the run option that we can see in the below image. We can press F5 as well to run the code.
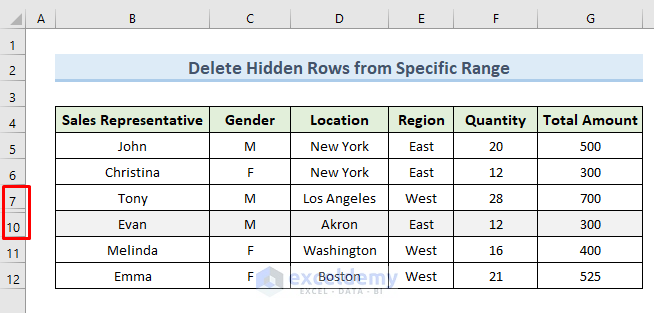
- See that the hidden rows within the range (B4:G9) are deleted. Hidden rows after row number 10 are still present.
Download Practice Workbook
You can download the practice workbook from here.
Related Articles
- How to Delete Filtered Rows in Excel?
- How to Delete Unused Rows in Excel?
- How to Find and Delete Rows in Excel
- How to Delete Multiple Rows in Excel Using Formula?
- How to Delete Multiple Rows in Excel with Condition?
- How to Delete Rows in Excel That Go on Forever?
- How to Delete Infinite Rows in Excel?
- How to Remove Rows Containing Identical Transactions in Excel?
<< Go Back to Delete Rows | Rows in Excel | Learn Excel
Get FREE Advanced Excel Exercises with Solutions!
