Nowadays, Excel is the most versatile tool for analyzing and visualizing data. Most people in the office and businesses use this software on a day-to-day basis. While working in Excel we may need to delete rows for many reasons. Like, there might be irrelevant data or blank cells. So, it’s a pretty necessary task. In this article, we’ll demonstrate 5 basic and easy methods to delete rows in Excel that go on forever. So, go through the entire article to understand the whole topic properly.
Not to mention, here, we have used Microsoft Excel 365 version, you may use any other version according to your convenience. Please leave a comment if any part of this article does not work in your version.
How to Delete Rows in Excel That Go on Forever: 5 Easy Methods
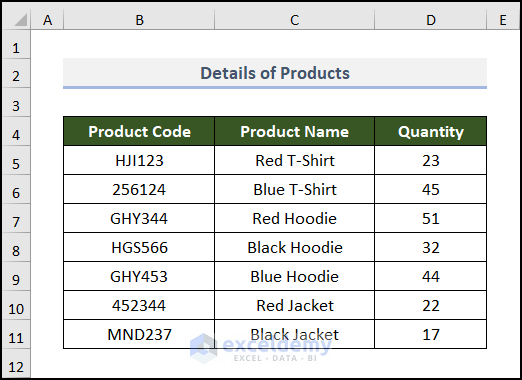
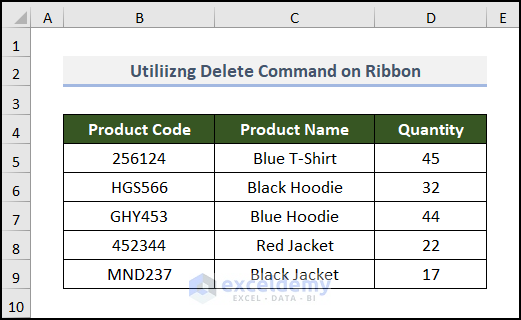
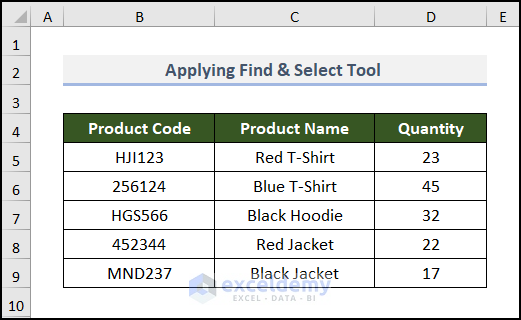
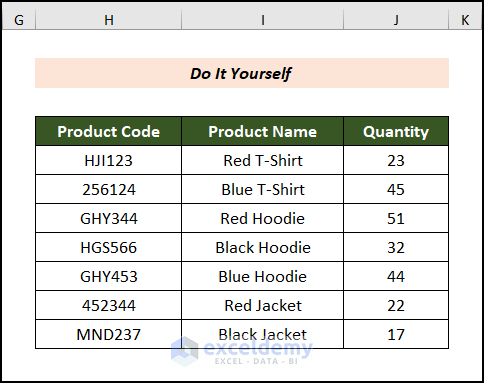
For ease of understanding, we are going to use Details of Products of a certain clothing store. This dataset includes the Product Code, Product Name, and Quantity in columns B, C, and D respectively. Using this dataset, we’ll try to achieve our goal. So, let’s explore them one by one.
Note: This is a basic dataset to keep things simple. In a practical scenario, you may encounter a much larger and more complex dataset.
1. Using Context Menu
In our very first method, we’ll use the manual method to delete rows in Excel. Let’s follow the steps below to do this using this method.
📌 Steps:
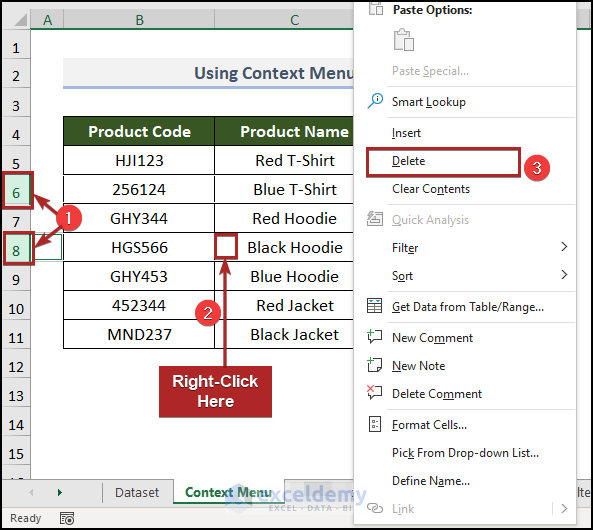
➽ At first, select the rows that you want to delete.
➽ Then, right-click your mouse.
➽ After that, select Delete from the Context Menu.
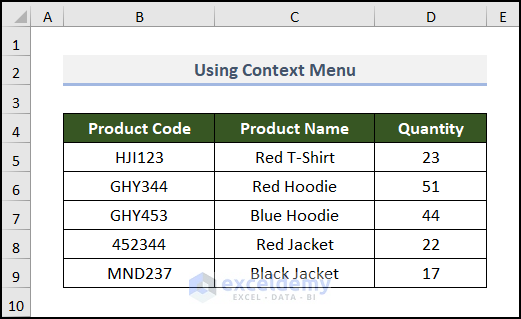
Immediately, you’ll notice that the selected rows are deleted now.
2. Utilizing Delete Command from Ribbon
In this method, we’ll delete rows in Excel that go on forever using the Delete tab from the Home ribbon.
📌 Steps:
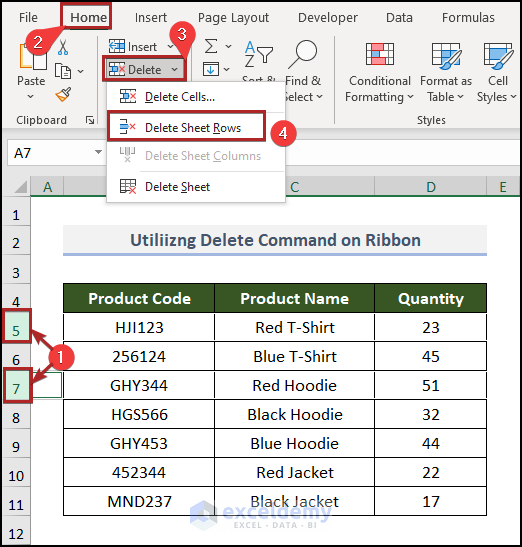
➽ Firstly, select the rows.
➽ Later, click as follows: Home > Cells > Delete > Delete Sheet Rows.
Then, instantly, you will notice that those rows are no more.
3. Applying Find & Select Tool
Here, we’ll use the Find & Select tool to delete blank rows in Excel that go on forever. This is useful when you’re working with large spreadsheets or when you need to change certain text repeatedly. For this method, I have placed two blank rows in my dataset.
📌 Steps:
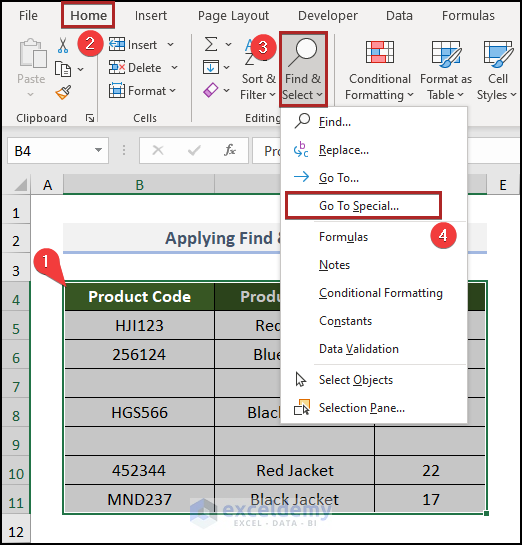
➽ At this time, select the data range (B4:D11).
➽ Correspondingly, click Home > Editing > Find & Select > Go To Special….
Suddenly, a dialog box named “Go To Special” will appear.
➽ Mark on the Blanks option.
➽ Press OK.
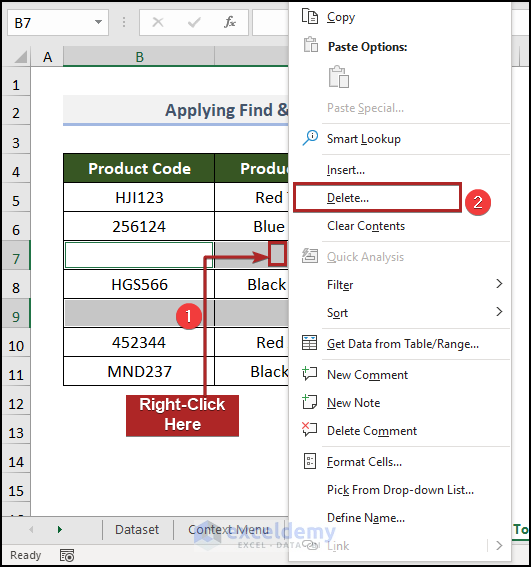
The blank rows are now highlighted.
➽ Then right-click your mouse and select Delete from the Context Menu.
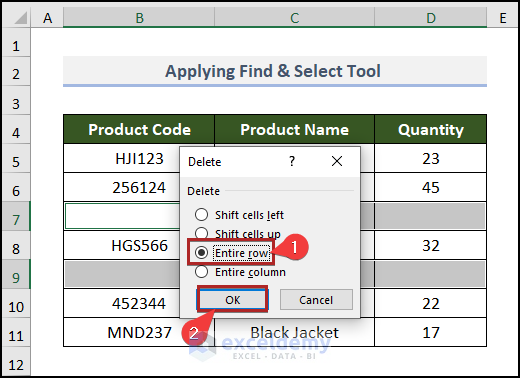
A new Delete dialog box will open up.
➽ Mark the choice of the Entire row and press OK.
Now you’ll spot that the blank rows are gone forever.
4. Implementing Filter Option
Filtering data in Excel refers to displaying only the rows that meet certain conditions. We’ll apply it here in our last method to remove blank rows in Excel.
📌 Steps:
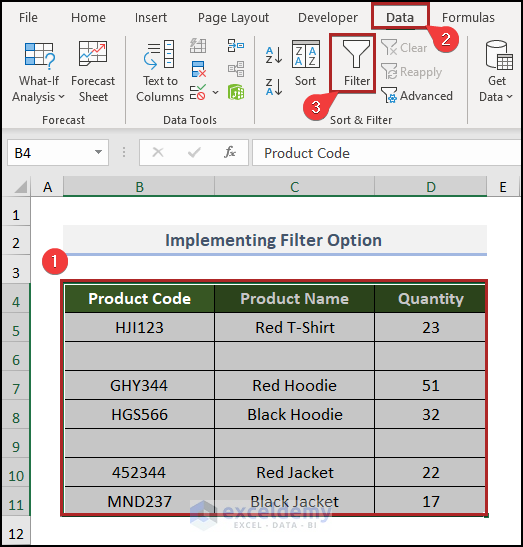
➽ Initially, select the data range including the title.
➽ Then, click in the sequence: Data > Filter.
Then, you will see the filter icon beside every heading of your dataset.
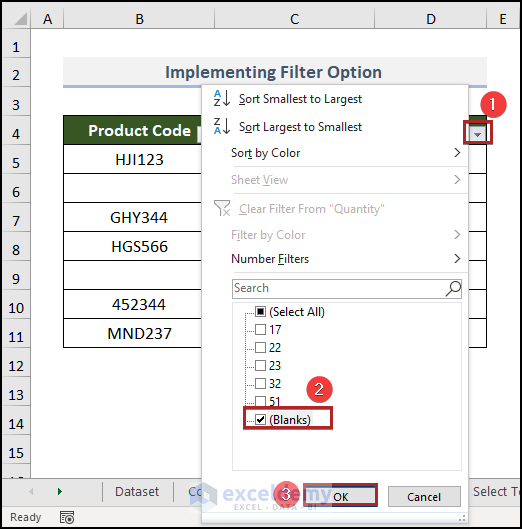
➽ At this moment, press any filter icon, and the filtering options will open up.
➽ Then, unmark everything except (Blanks).
➽ As usual, press the OK button.
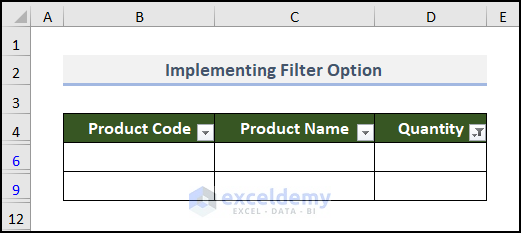
As a result, it is showing only the blank rows now.
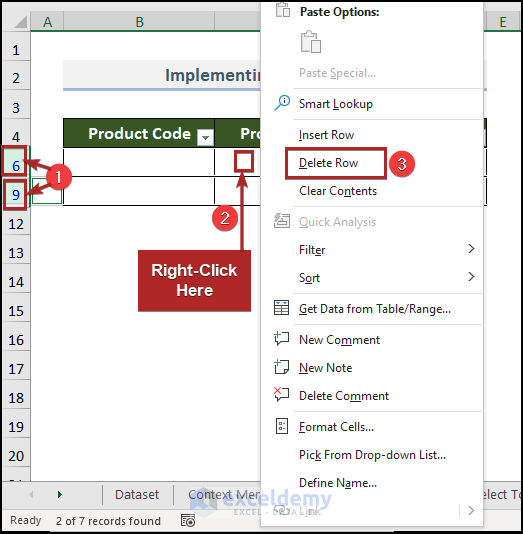
➽ Afterward, select those blank rows and right-click your mouse.
➽ Now, click on Delete Row from the Context Menu.
Magically, the blank rows are deleted. Now, we’ll execute the following steps to get back the other rows.
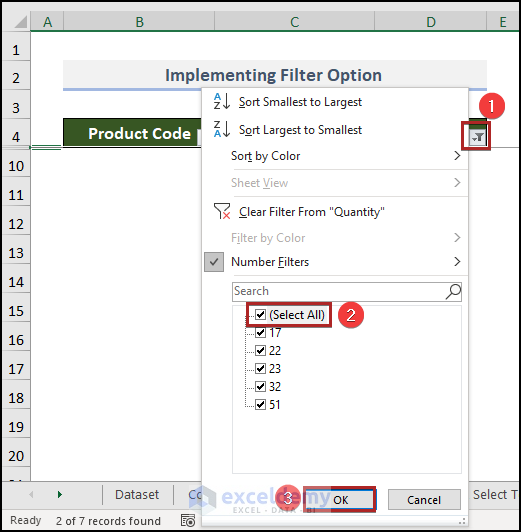
➽ This time, click on the filter icon again.
➽ Then, mark the (Select All) option.
➽ Finally, press OK.
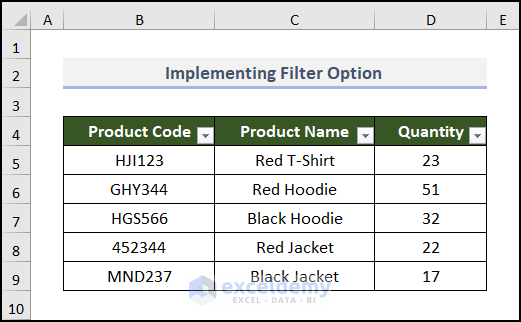
Our filled rows are back now.
Related Content: How to Delete Filtered Rows in Excel?
5. Incorporating VBA Macro
You might be wondering, is there a way to automate this task? Then VBA has you covered. Just follow along.
📌 Steps:
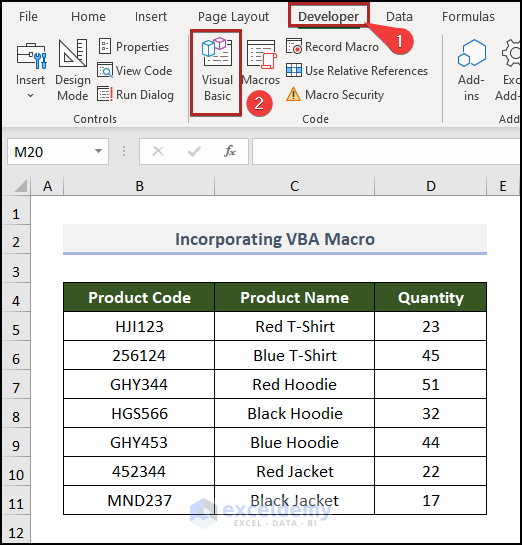
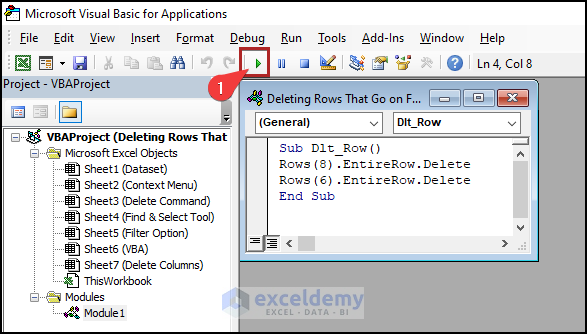
➽ Firstly, go to Developer tab >> Visual Basic option.
Then, the Visual Basic Editor will open up.
➽ Secondly, go to Insert tab >> Module option.
After that, a Module will be created.
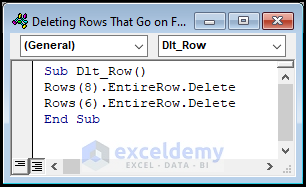
➽ Thus, paste the following code into the module.
Sub Dlt_Row()
Rows(8).EntireRow.Delete
Rows(6).EntireRow.Delete
End Sub
➽ Now, click on the Run icon or press the F5 key on the keyboard.
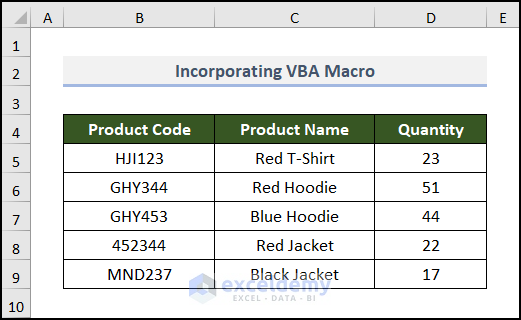
Magic! Look at the worksheet now. The desired rows are gone.
How to Delete Columns That Go on Forever in Excel
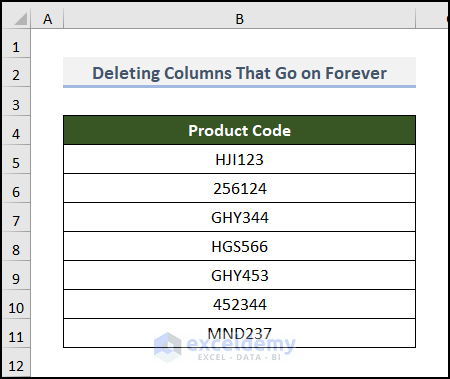
Like before, we also can delete columns in Excel that go on forever. It’s simple and so easy. Just follow along.
📌 Steps:
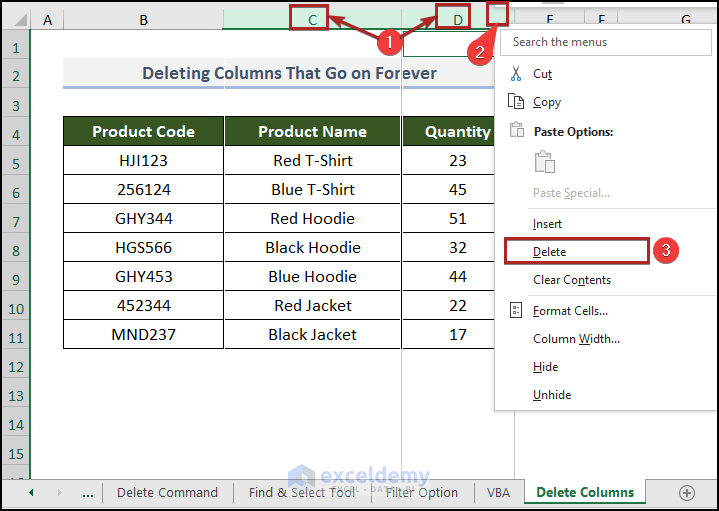
➽ At first, select columns C and D.
➽ Then, right-click anywhere inside these two column headings.
➽ After that, select the Delete option from the Context Menu.
Look, they are gone now.
Practice Section
For doing practice by yourself, we have provided a Practice section like the one below on the right side of the sheet. Please do it by yourself.
Download Practice Workbook
You may download the following Excel workbook for better understanding and practice.
Conclusion
This article explains how to create an invoice in Word from Excel data in a simple and concise manner. Thank you for reading this article. We hope this was helpful. Please let us know in the comment section if you have any queries or suggestions.
Related Articles
- How to Delete Hidden Rows in Excel?
- How to Delete Unused Rows in Excel?
- How to Find and Delete Rows in Excel
- How to Delete Multiple Rows in Excel Using Formula?
- How to Delete Multiple Rows in Excel with Condition?
- How to Delete Rows in Excel without Affecting Formulas?
- How to Delete Infinite Rows in Excel?
- How to Remove Rows Containing Identical Transactions in Excel?
<< Go Back to Delete Rows | Rows in Excel | Learn Excel
Get FREE Advanced Excel Exercises with Solutions!