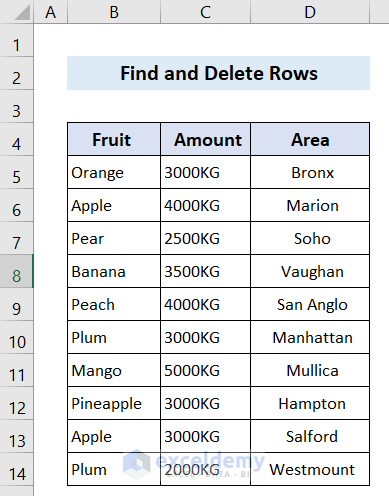
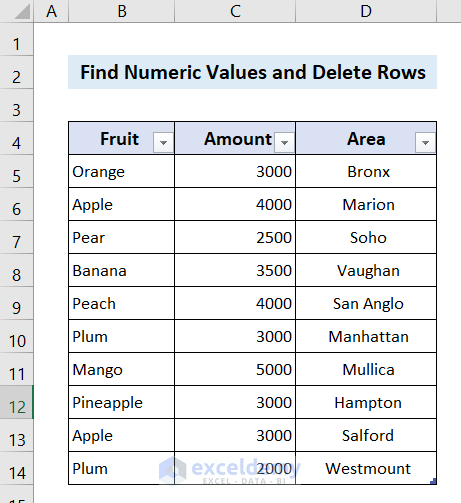
Dataset Overview
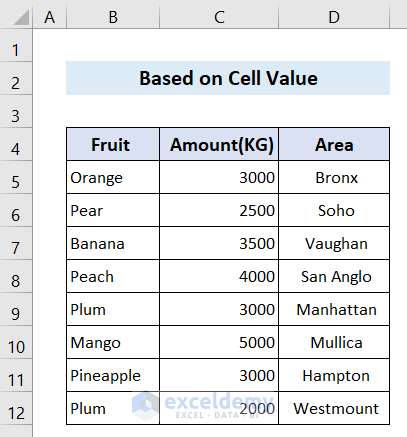
In this article, we’ll illustrate five simple methods to locate and remove rows from your datasheet. We’ll work with a dataset comprising ten rows of information about fruits, quantities, and delivery locations in the UK and the US. Our data is confined to cells B5:D14.
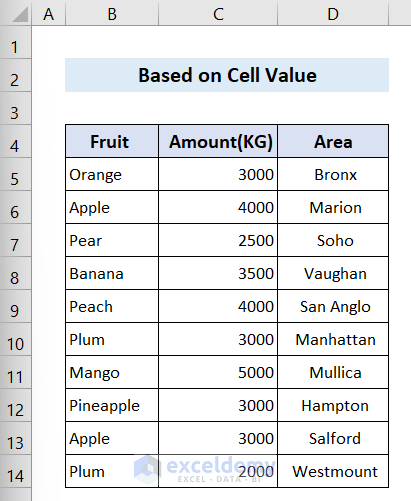
Method 1 – Finding and Deleting Rows Based on a Cell Value in Excel
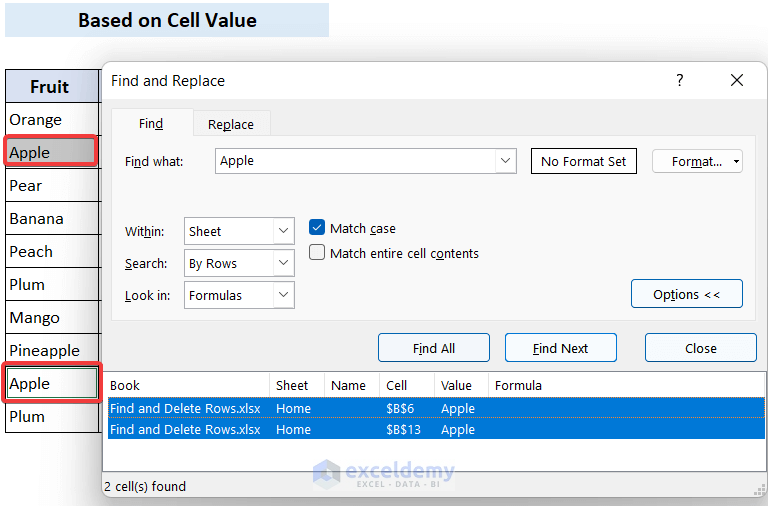
We want to delete rows which have a cell value ‘Apple’.
Steps:
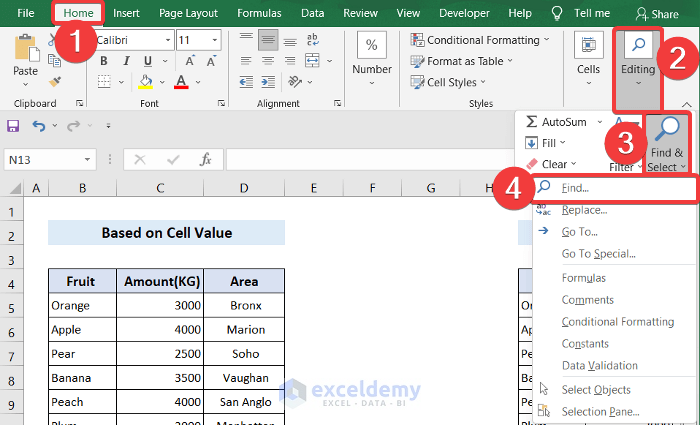
- Go to the Home tab.
- Click on Editing and select Find & Select > Find.
- In the Find and Replace dialog box, enter the value you want to find (e.g., “Apple”) in the Find what box.
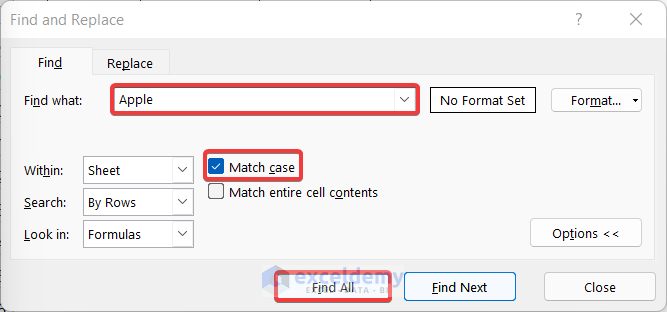
- Check the Match case option and click Find All.
- The matching cells will be selected.
- Now, go to the Home tab again and choose Cells > Delete > Delete Sheet Rows to remove those rows.
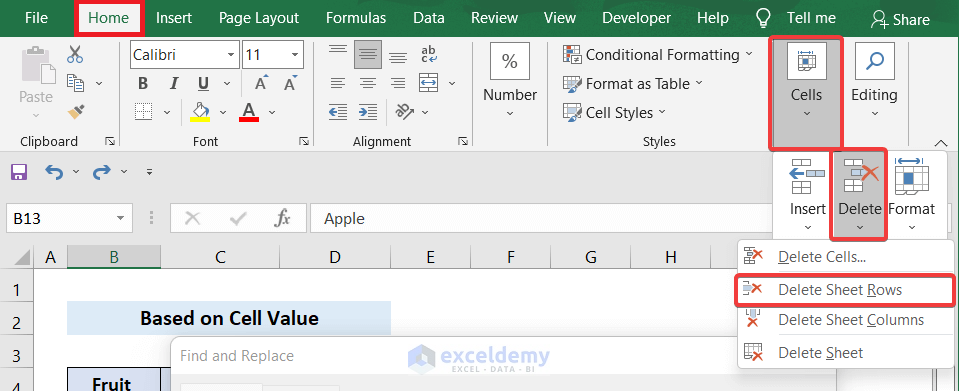
- You will see that the 2 rows have been removed from the datasheet.
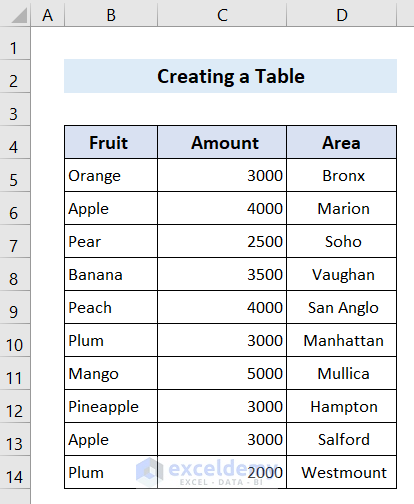
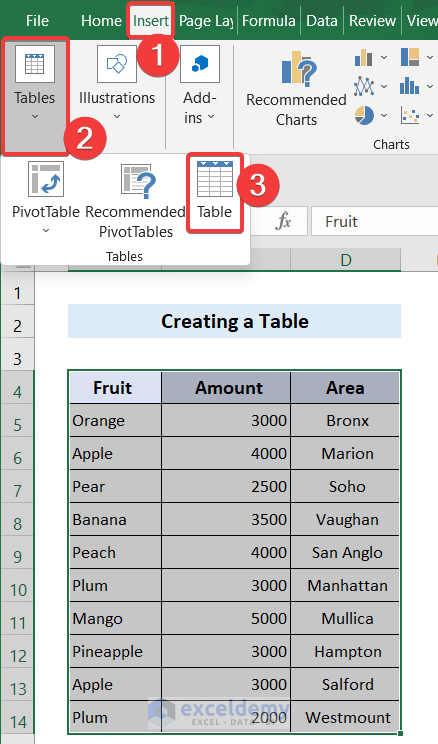
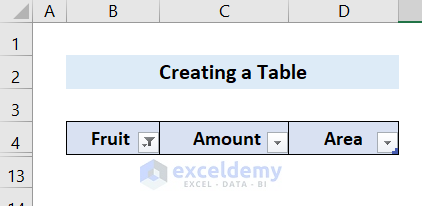
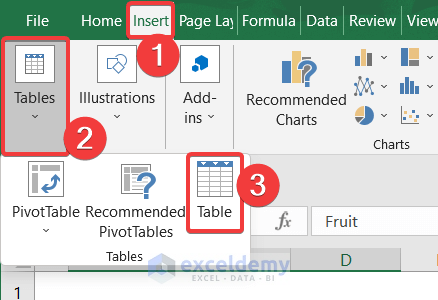
Method 2 – Creating an Excel Table to Find and Remove Rows
We want to delete the rows which have a cell value ‘Apple’ in the column entitled Fruit.
Steps:
- Select the entire range of cells (B5:D14).
- In the Insert tab, click Tables > Table.
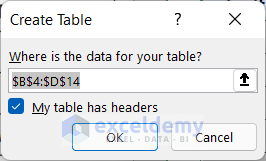
- In the Create Table dialog, check the My table has headers option and click OK.
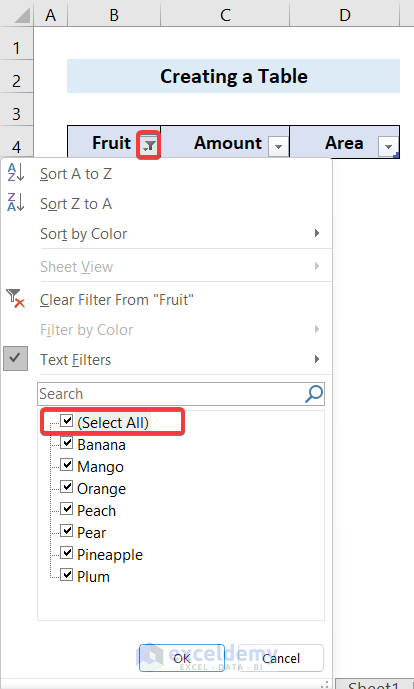
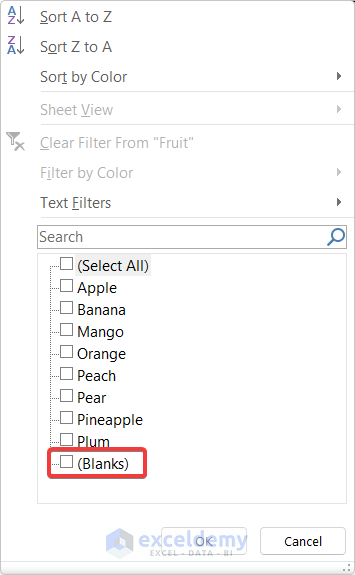
- A table will be created. Click the drop-down arrow in the bottom right corner of cell D.
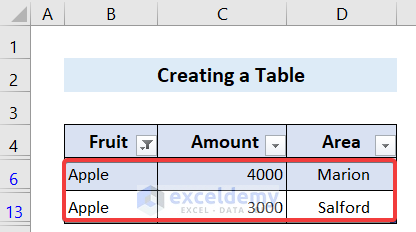
- Deselect Select All and choose only the Apple option.

- Click OK to close the filter option. You’ll see only the rows containing “Apple” in the table.
- Select those rows, right-click, and choose Delete > Entire Sheet Row.
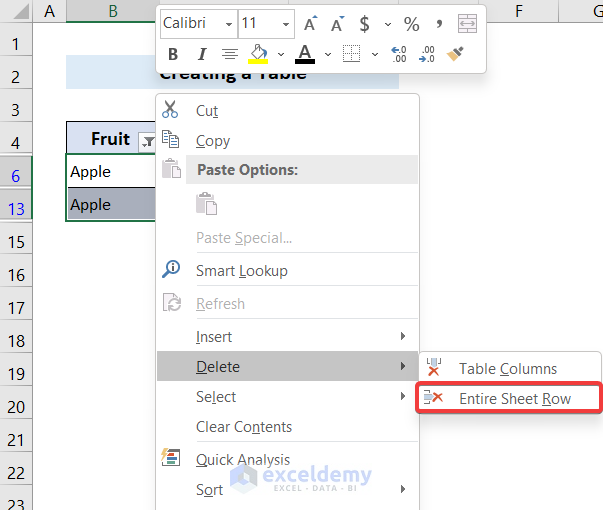
- Those rows will disappear.
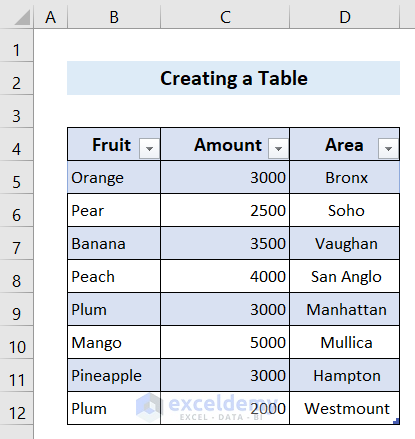
- To restore the remaining rows, click the filter icon in the cell titled Fruit and select Select All.
- The remaining rows will be visible in the dataset.
Read More: How to Delete Filtered Rows in Excel?
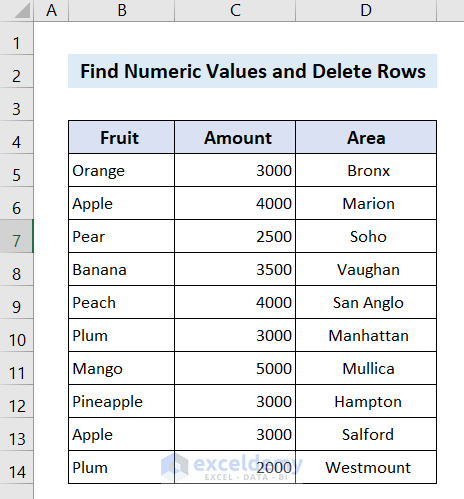
Method 3 – Finding and Deleting Rows Based on Numeric Values
This method shares some similarities with the previous one. However, the criteria for finding rows will be entirely different. In this approach, we’ll filter out rows containing a fruit amount of less than 3000KG. The steps for this process are outlined as follows:
Steps:
- Select the range of cells containing your data (in this case, B5:D14).
- Similar to the previous method, create a table by going to the Insert tab and selecting Tables > Table.
- In the “Create Table” dialog, check the My table has headers option and click OK.
- The table will be created.
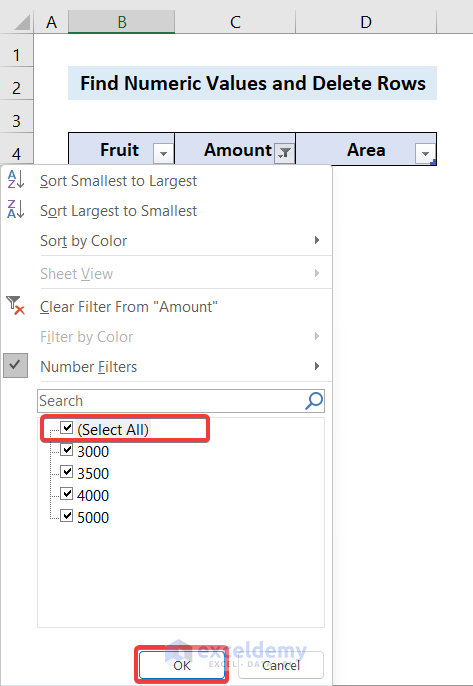
- Click the drop-down arrow in the bottom right corner of the cell titled Amount within the table.
- Choose the Filter option and select Less Than.
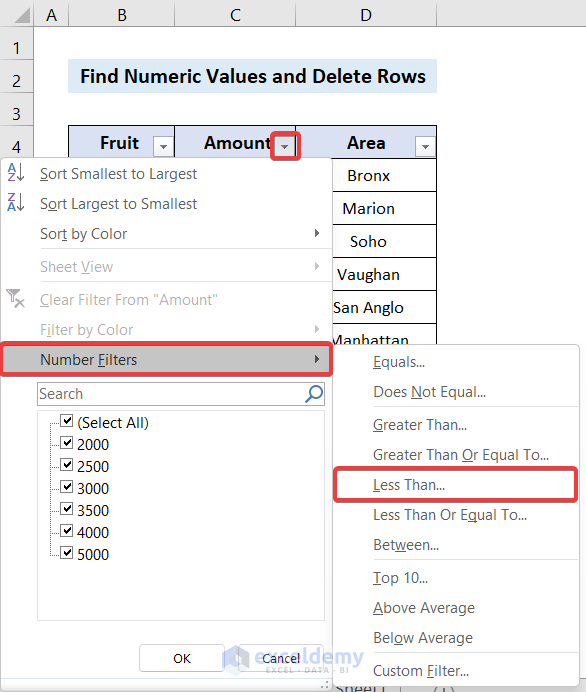
- In the dialog that appears, enter the value 3000 in the empty box next to “is less than.”
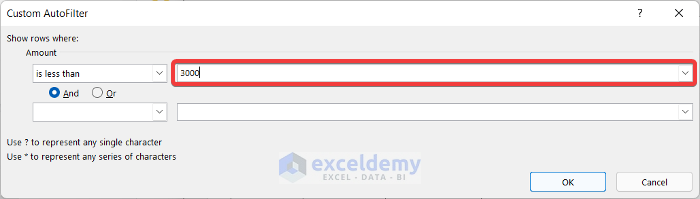
- Click OK to apply the filter. Now, you’ll see only the rows where the fruit amount is less than 3000.
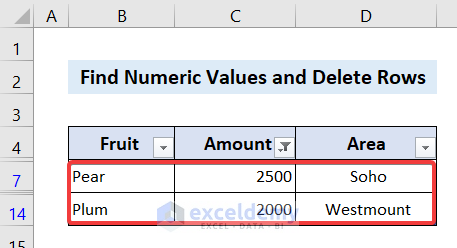
- Select both rows that meet the criteria (e.g., those with amounts less than 3000).
- Right-click and choose Delete > Entire Sheet Row.

- The selected rows will disappear.
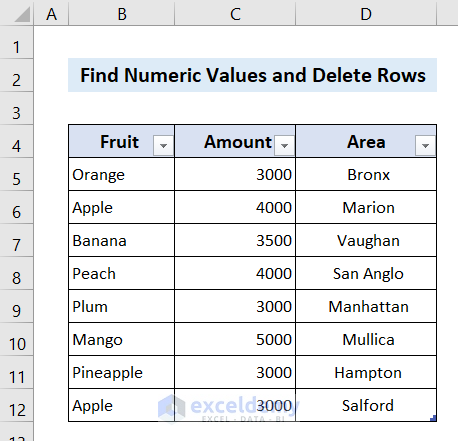
- To restore the remaining rows, click the filter icon in the cell titled Amount and select Select All.
- The remaining rows will be visible in the table.
Read More: How to Delete Multiple Rows in Excel with Condition?
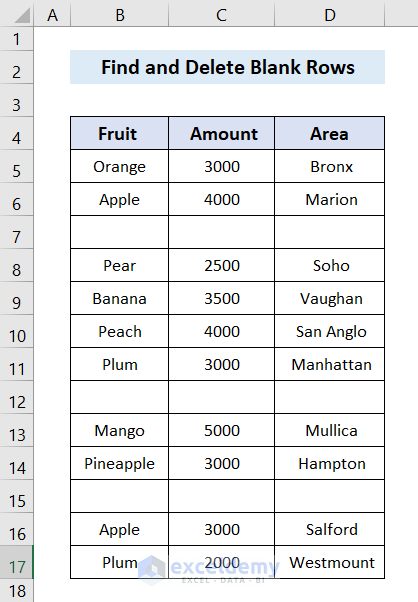
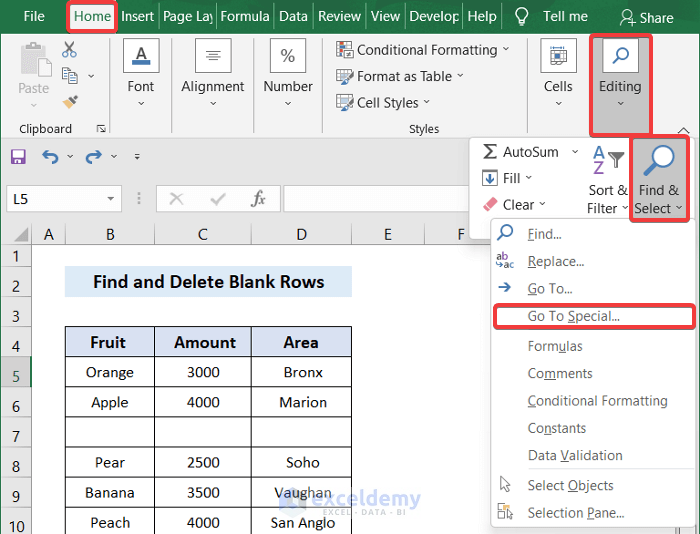
Method 4 – Searching for Blank Rows and Remove Them in Excel
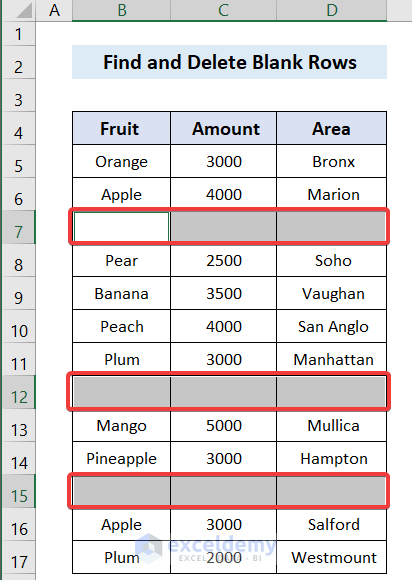
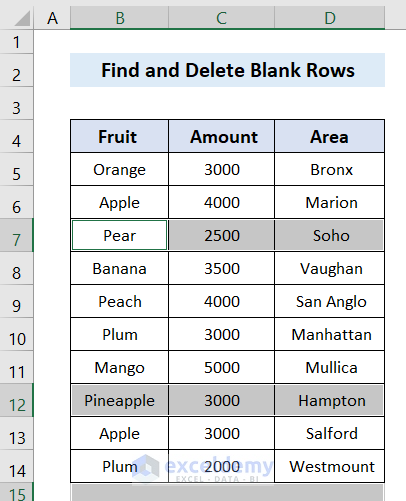
In this datasheet, we have 3 blank rows, rows 7, 12 and 15, that we want to remove. The steps for this process are outlined as follows:
Steps:
- Select the entire range of cells containing your data (B4:D17).
- In the Home tab, select Editing > Find & Select > Go to Special.
- A dialog box titled Go to Special will appear.
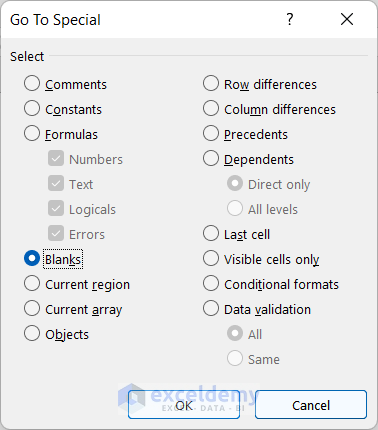
- Click on Blank and then click OK.
- The blank rows will be selected.
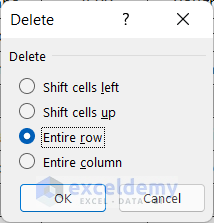
- Right-click and choose Delete.
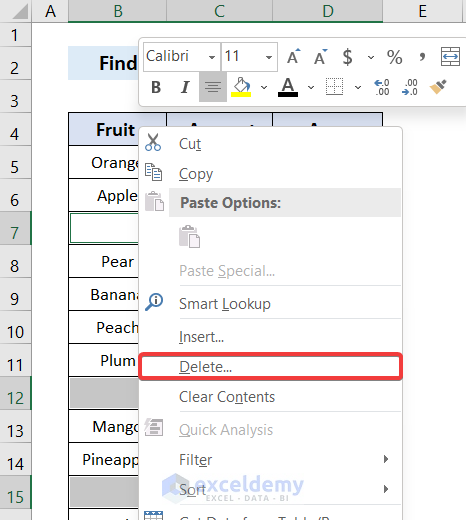
- In the small dialog box that appears, select Entire Row and click OK.
- The blank rows will be deleted, and the remaining dataset will shift upward.
Things You Should Know:
Remember that you can also achieve similar results by creating a table (as shown in Method 2) and selecting the Blank option instead of others.
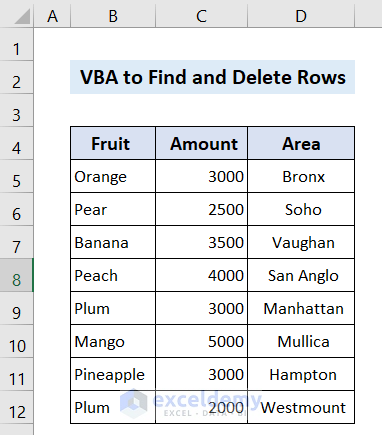
Method 5 – Applying VBA Macro to Find and Delete Rows
Writing a VBA code can also help you to find and delete rows from an Excel datasheet. Our dataset is in the range of cells B5:K86. The steps for this process are outlined as follows:
Steps:
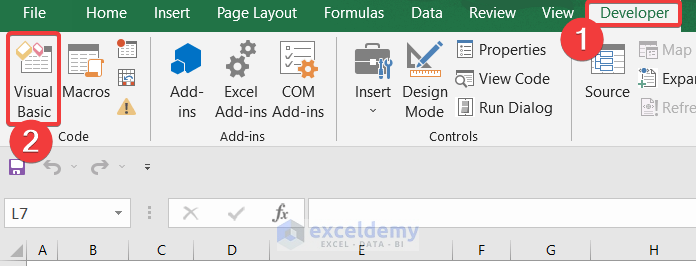
- Go to the Developer tab (if you don’t see it, enable it by customizing your ribbon).
- Click on Visual Basic or press Alt+F11 to open the Visual Basic Editor.
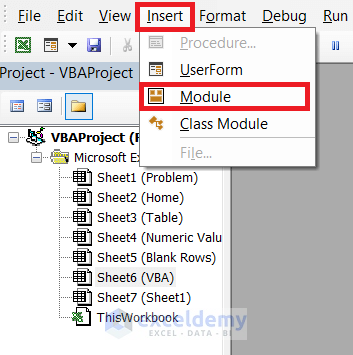
- In the Visual Basic Editor, click on the Insert tab.
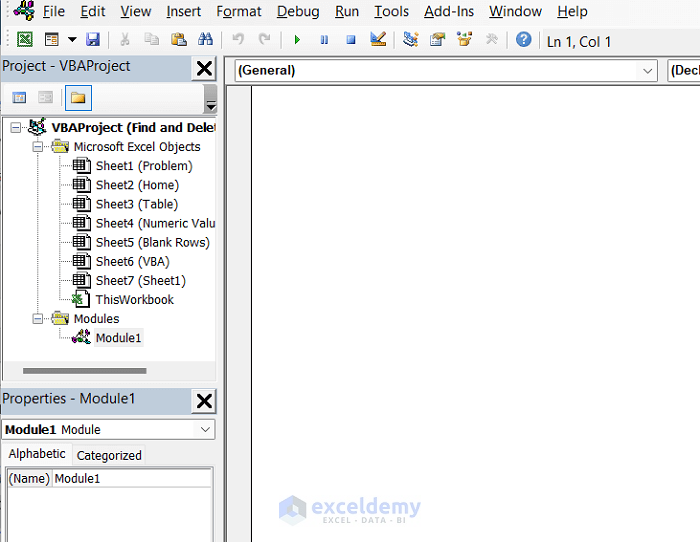
- Choose Module to create a new module.
- In the empty editor box, enter the following VBA code:
Sub Delete_Rows_Specific_Cell_Value()
    Dim ROW As Long
    Dim Worksheet As Long
    ROW = 15
    For Worksheet = ROW To 1 Step -1
    If Cells(Worksheet, 2) = "Apple" Then
        Rows(Worksheet).Delete
    End If
    Next
End Sub- Close the editor.
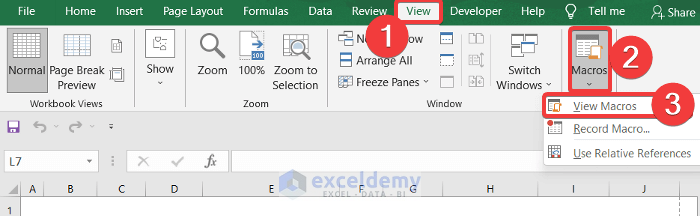
- From the View ribbon, click on Macros > View Macros.
- A dialog box will appear. Select Delete_Rows_Specific_Cell_Value.
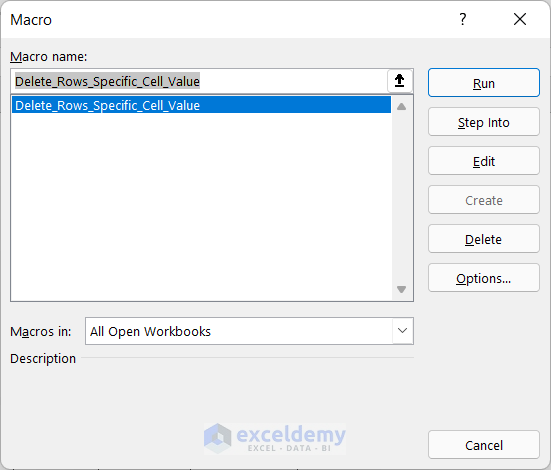
- Click the Run button to execute the code.
By following these steps, you’ll be able to find and delete the desired rows based on the specified criteria (Apple in this case). Your visual code should work perfectly, and the rows will be removed from your datasheet.
Download Practice Workbook
You can download the practice workbook from here:
Related Articles
- How to Delete Hidden Rows in Excel?
- How to Delete Unused Rows in Excel?
- How to Delete Multiple Rows in Excel Using Formula?
- How to Delete Rows in Excel That Go on Forever?
- How to Delete Infinite Rows in Excel?
- How to Remove Rows Containing Identical Transactions in Excel?
<< Go Back to Delete Rows | Rows in Excel | Learn Excel
Get FREE Advanced Excel Exercises with Solutions!
