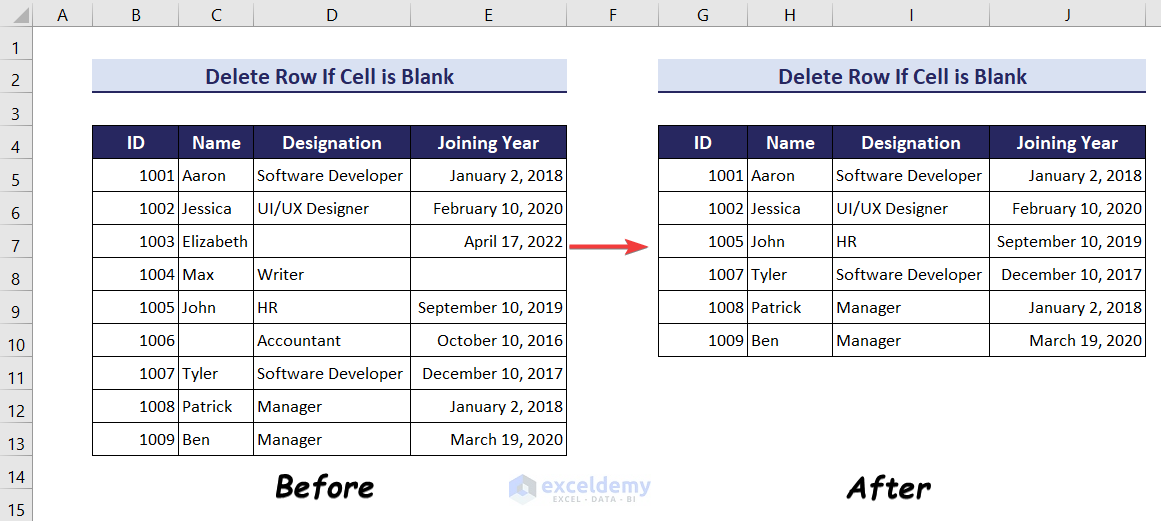
We have some rows with blank cells, and we’ll delete entire rows that have blanks.
Method 1 – Using the Go To Special Command
- Select the whole dataset.
- Go to the Home tab, choose Find & Select, and select Go To Special.
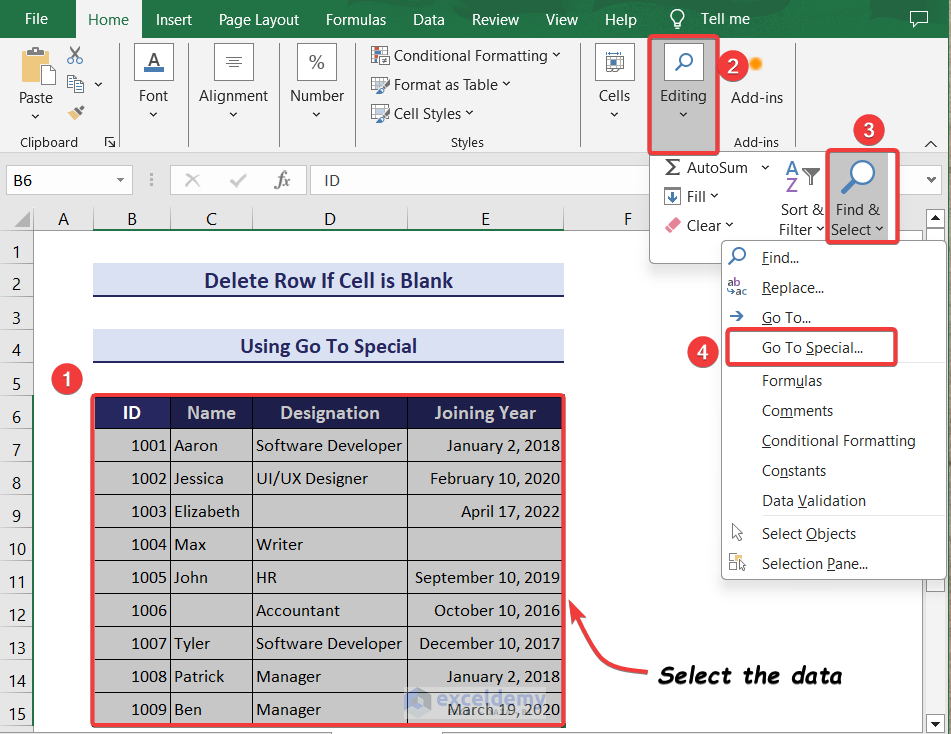
- From the Go To Special dialog box, select Blanks.
- Click OK.
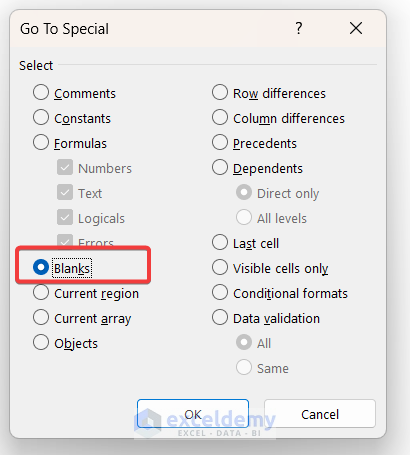
- The blank cells will be highlighted.
- Select any of the blank cells and right-click on it.
- Click on Delete.
![]()
- The Delete dialog box will appear.
- Select Entire row and click on OK.
![]()
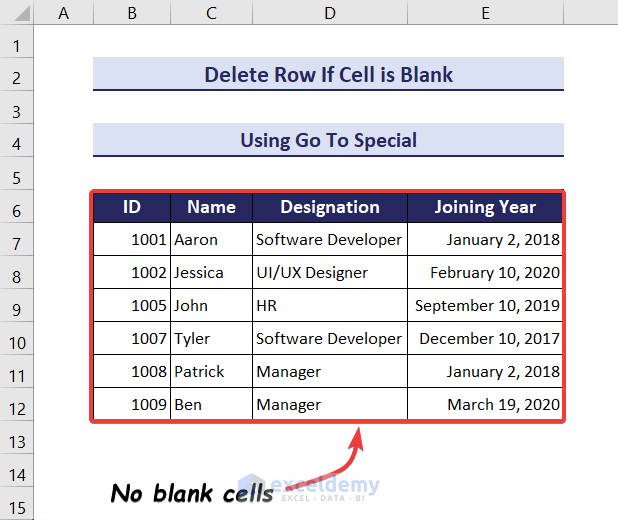
All the rows that have blank cells will be deleted.
Method 2 – Using the Find and Replace Feature to Identify Rows and Delete Them
- Select all the data.
- Press Ctrl + F on your keyboard.
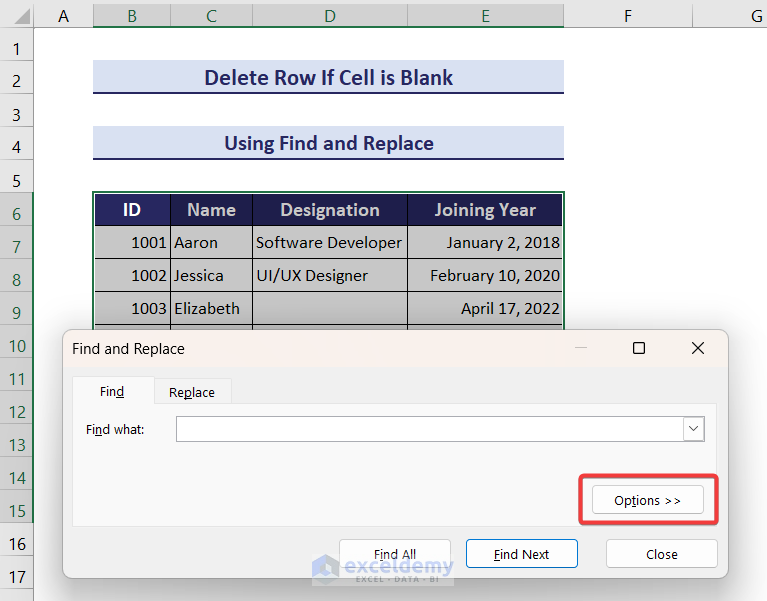
- Click on Options.
- In the Find and Replace Dialog box:
- Select Match entire cell contents.
- Select Values from the Look in dropdown menu.
- Click on Find All.

- This will bring up the lists of all rows containing blank cells.
- Press Ctrl + A to select all those rows.
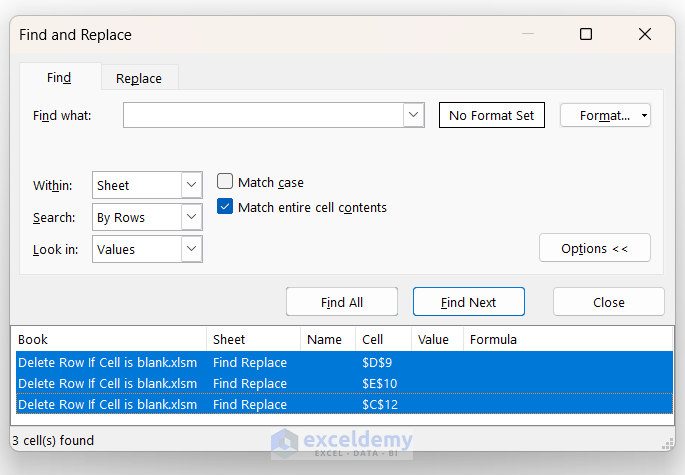
- It will highlight all those blank cells.
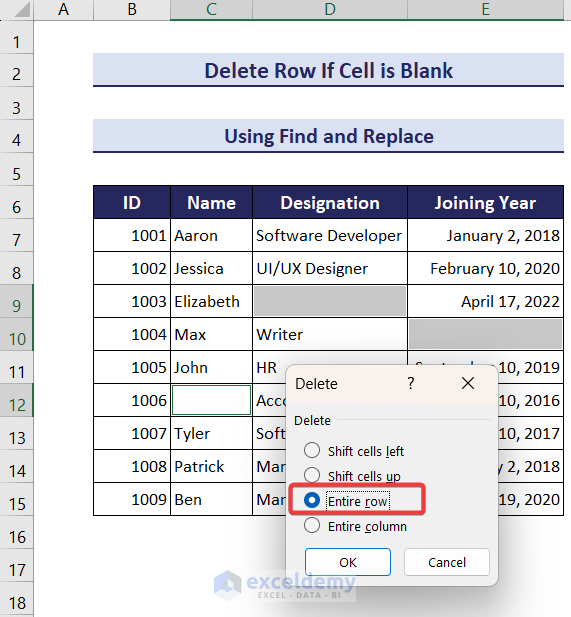
- Right-click on a blank cell.
- Click on Delete, then select Entire row and choose OK.
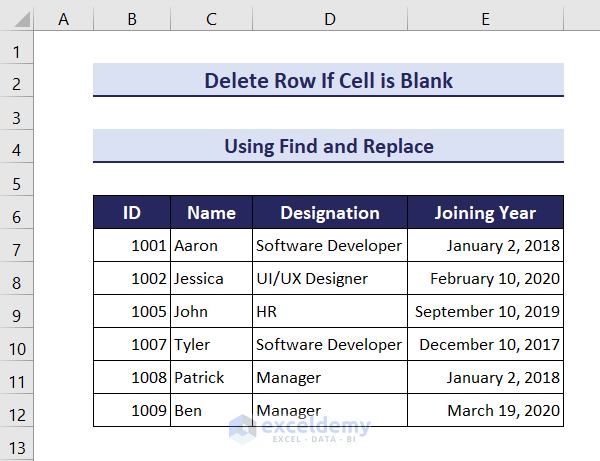
This will delete all those rows having blank cells.
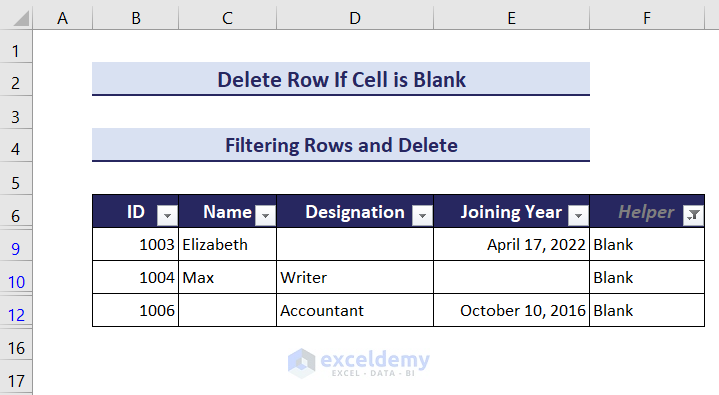
Method 3 – Filtering Rows with Blank Cells and Deleting Them
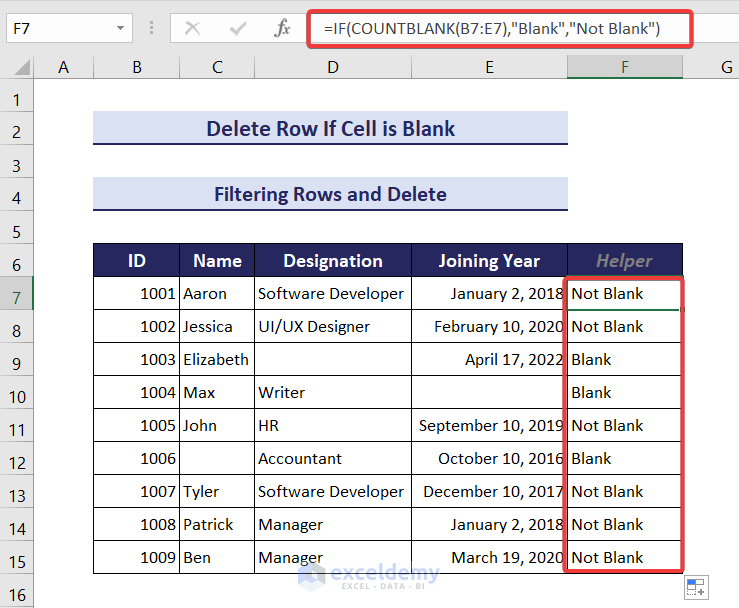
- Create a Helper column.
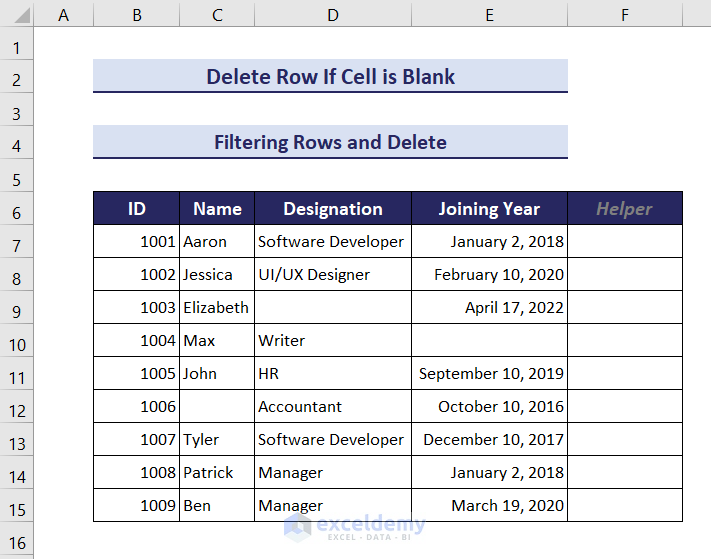
- Insert the following in the first cell of the column: =IF(COUNTBLANK(B7:E7),”Blank”,”Not Blank”)
- Press Enter.
- Drag down the Fill Handle.
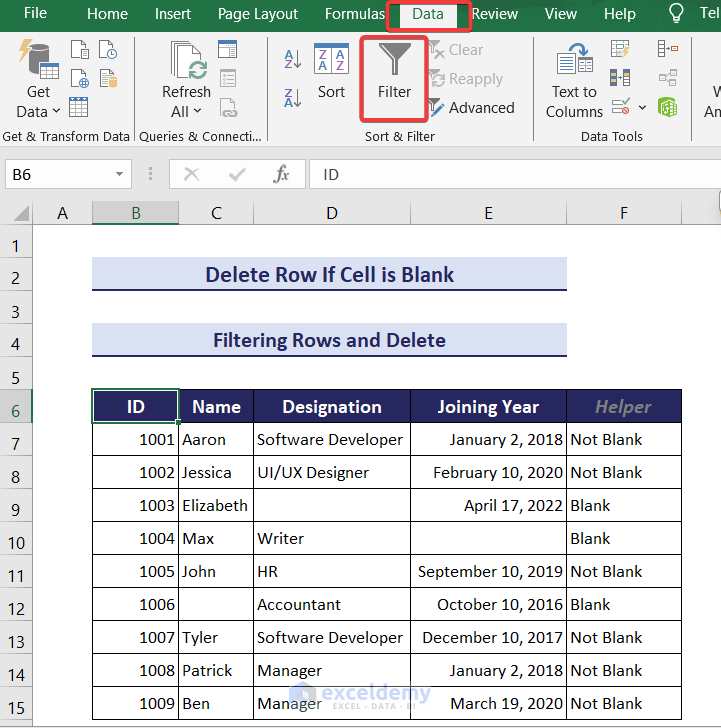
- Go to the Data tab and Sort & Filter group, then choose Filter.
- Click on the drop-down of the Helper column.
- Select Blank.
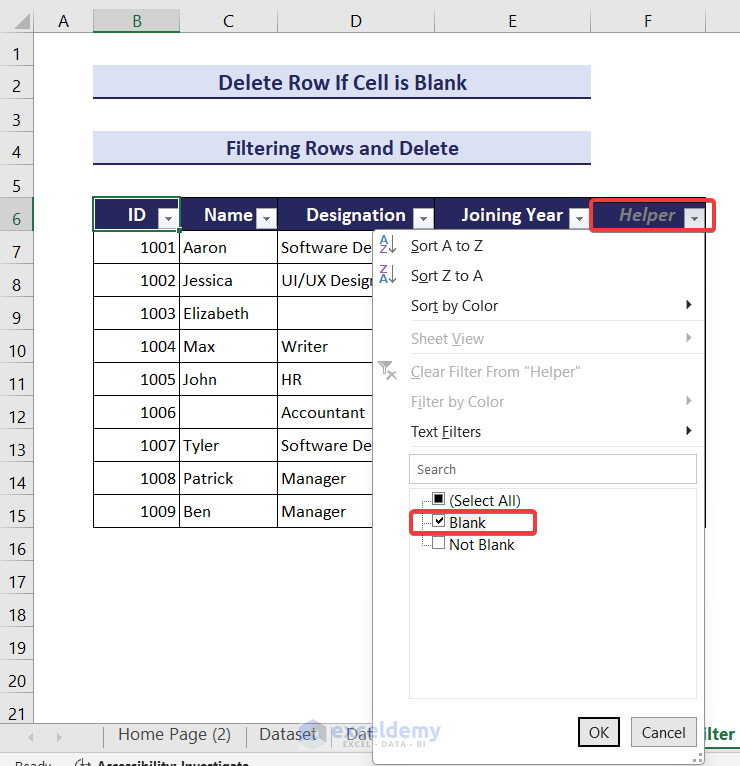
You will see the rows that have blank cells.
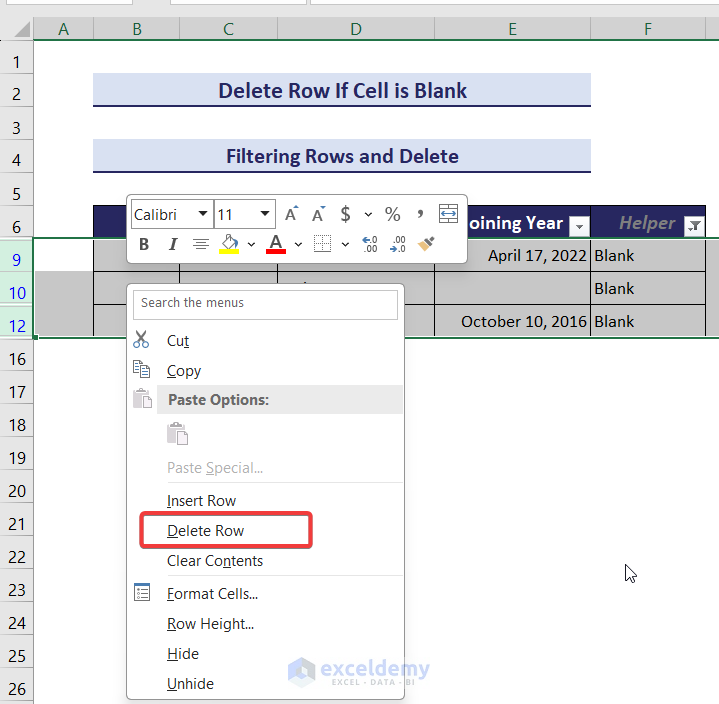
- Select these rows and right-click on them.
- Click Delete Row.
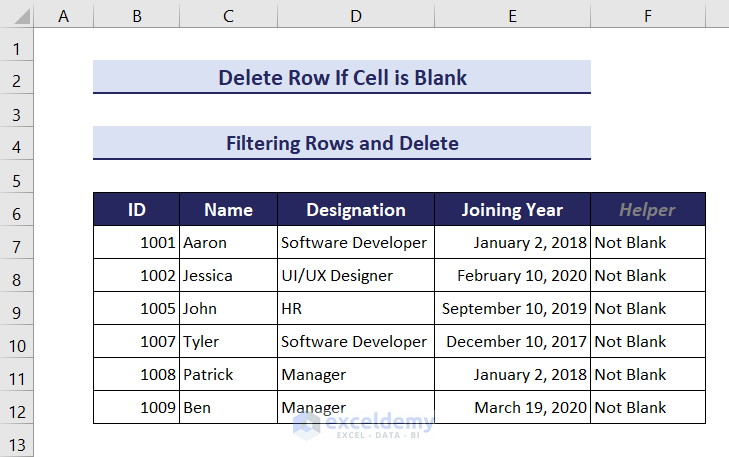
This will remove all the rows if any cell is blank in Excel.
- Remove the filter.
Read More: How to Delete Rows in Excel with Specific Text?
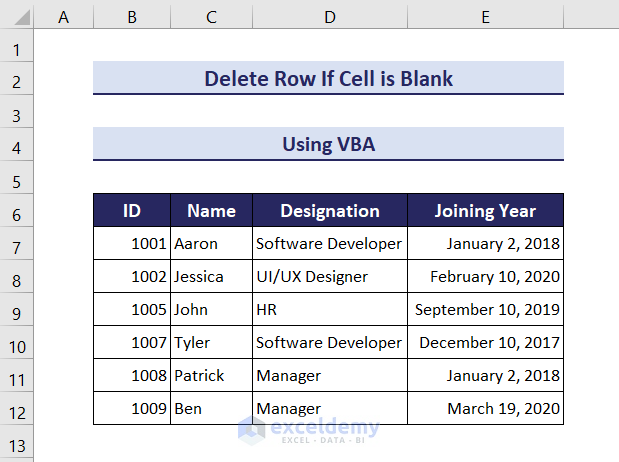
Method 4 – Using VBA
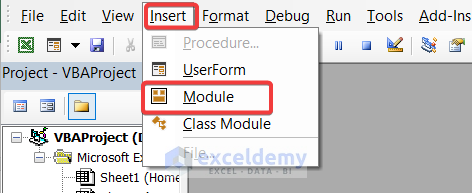
- Go to the Developer tab.
- Click on Visual Basic.

- Select Insert and choose Module.
- In the code editor, insert the following code:
Sub RemoveRows() On Error Resume Next Range("B6:E15").SpecialCells(xlBlanks).EntireRow.Delete End Sub - Click on Run or you can press the F5 button.
All the rows containing blank cells will be deleted.
Download the Practice Workbook
Frequently Asked Questions
How do I remove blank cells from rows in Excel?
- Select the range where you want to delete rows.
- Go to the “Home” tab, click “Find & Select” in the editing group, then choose “Go To Special“.
- Select “Blanks” and click “OK”.
This highlights all blank cells in the selected range. - Right-click on one of the highlighted cells, choose “Delete”, then “Shift cells up“.
How do I remove blank cells from a column?
In the selected column, use “Go To Special” > “Blanks”, right-click on highlighted cells, and choose “Delete” > “Shift cells up” to remove blank cells and shift the remaining cells up.
Can I recover rows after I’ve deleted them in Excel?
Rows can be recovered immediately after deletion using the Undo function (Ctrl + Z). However, once the workbook is saved and closed, it’s not possible to recover the deleted rows without a previous backup.
Related Articles
- How to Delete All Rows Below a Certain Row in Excel?
- How to Remove Highlighted Rows in Excel?
- How to Delete Blank Rows in Excel?
- How to Delete Row If Cell Contains Specific Values in Excel?
- How to Delete Empty Rows at the Bottom in Excel?
- How to Delete All Rows Not Containing Certain Text in Excel?
- How to Delete Rows Based on Another List in Excel?
<< Go Back to Delete Rows | Rows in Excel | Learn Excel
Get FREE Advanced Excel Exercises with Solutions!

Great methods, thank you for publishing them!
Hello, Aleksandra!
Thanks for your appreciation.
Regards
ExcelDemy