Opening new tabs one by one and naming them in Excel is tedious and time-consuming. But we can create tabs automatically using VBA codes.
In the GIF below, cells C6:C8 contain employee names, and a tab for each in this cell range is created automatically using a VBA macro in Excel.
Here are 3 different cases where we create tabs automatically in Excel:
Case 1 – Creating a Tab from Single Cell Value
To create a tab from a cell value automatically using VBA, you need to know the cell’s position, the value of which you use to create the tab. This method has one drawback: you cannot use it for multiple cell values.
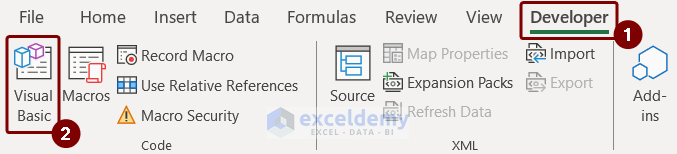
Before creating tabs with VBA, check whether your Excel shows the Developer tab. If your Excel does not show the Developer tab, enable it from the ribbon.
STEPS:
- Go to the Developer tab > Visual Basic from Code group.
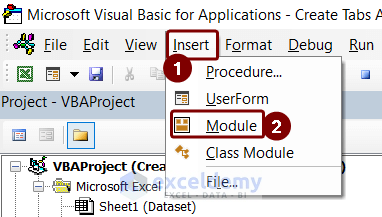
- Select Module from the Insert tab in the VBA window.
- Paste the following VBA code into the Module:
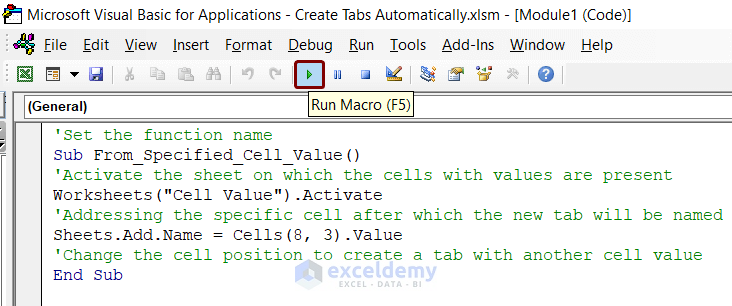
'Set the function name Sub From_Specified_Cell_Value() 'Activate the sheet on which the cells with values are present Worksheets("Cell Value").Activate 'Addressing the specific cell after which the new tab will be named Sheets.Add.Name = Cells(8, 3).Value 'Change the cell position to create a tab with another cell value End Sub - Save the code.
- Press the play button or F5 to run the code.
The tab is created and named after the specific cell value from the code.

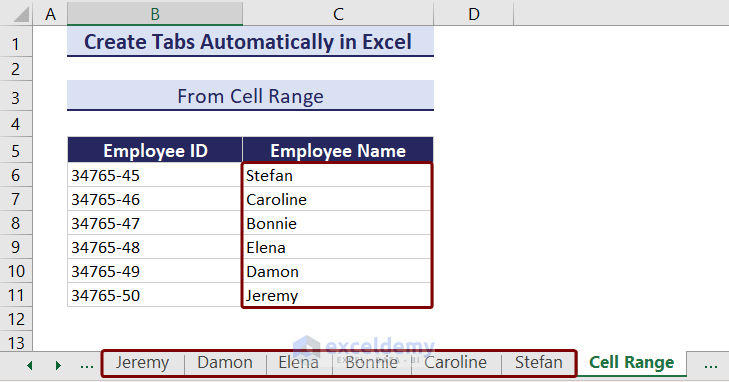
Case 2 – Creating Tabs from Cell Range
We can also simultaneously create multiple tabs from the cell values of a certain cell range with VBA code. The code will create an input dialog box in which we specify the cell range, thus automating the process. You can create tabs from any cell range, including from a single cell value.
STEPS:
- Go to the Developer tab > Code group > Visual Basic.
- In the VBA window, select Module from the Insert tab.
- Paste the following VBA code into the Module:
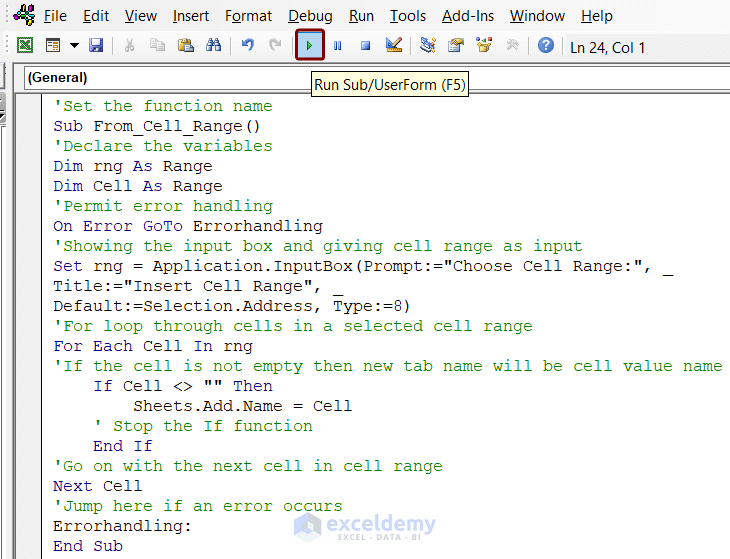
'Set the function name Sub From_Cell_Range() 'Declare the variables Dim rng As Range Dim Cell As Range 'Permit error handling On Error GoTo Errorhandling 'Showing the input box and giving cell range as input Set rng = Application.InputBox(Prompt:="Choose Cell Range:", _ Title:="Insert Cell Range", _ Default:=Selection.Address, Type:=8) 'For loop through cells in a selected cell range For Each Cell In rng 'If the cell is not empty then the new tab name will be the cell value name If Cell <> "" Then Sheets.Add.Name = Cell ' Stop the If function End If 'Go on with the next cell in cell range Next Cell 'Jump here if an error occurs Errorhandling: End Sub - Save the code.
- Press the play button or F5 to run it.
- Insert the cell range from which to create tabs in the input box.
- Click OK.

Tabs are created automatically, named after the cell values of the selected cell range.
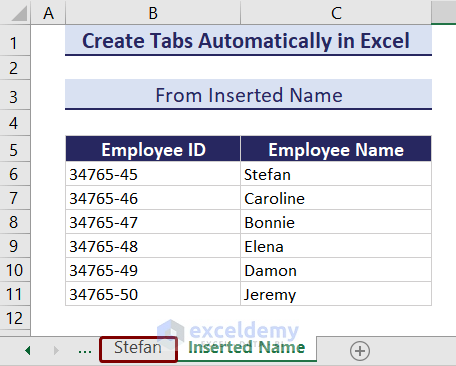
Case 3 – Creating Tabs with Custom Names
You can also create tabs automatically then name them in a dialog box after running the code, including with custom names that do not appear in your dataset.
STEPS:
- Go to the Developer tab > Visual Basic from Code group.
- Select Module from the Insert tab in the VBA window.
- Paste the following VBA code into the Module.
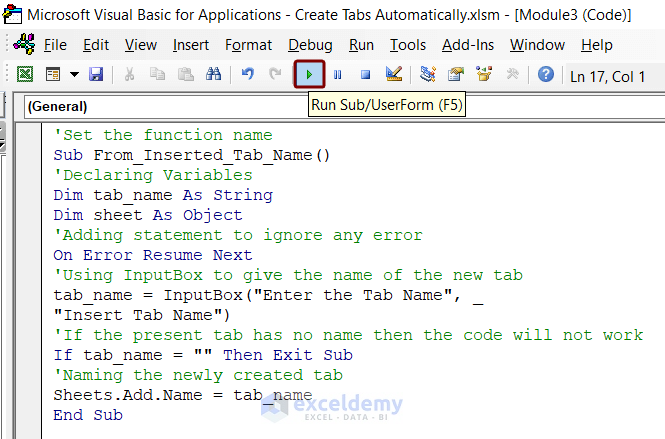
'Set the function name Sub From_Inserted_Tab_Name() 'Declaring Variables Dim tab_name As String Dim sheet As Object 'Adding statement to ignore any error On Error Resume Next 'Using InputBox to give the name of the new tab tab_name = InputBox("Enter the Tab Name", _ "Insert Tab Name") 'If the present tab has no name then the code will not work If tab_name = "" Then Exit Sub 'Naming the newly created tab Sheets.Add.Name = tab_name End Sub - Save the code.
- Press the play button or F5 to run the code.
- Insert the name for the tab in the input box.
- Click OK.

A tab will be created with the inserted name.
Read More: How to Create Tabs Within Tabs in Excel
Frequently Asked Questions
How do I create a daily tab in Excel?
To create a daily tab in Excel:
- Insert the days of the week in a range in a sheet and select the cell range.
- Insert a VBA code that creates tabs from the cell range automatically.
- Save and run the code.
How do I create a new sheet in Excel with the same format?
To create a new sheet with the same formatting as an existing worksheet:
- Go to the worksheet containing the format to be copied.
- Right-click on the sheet tab.
- Select the Move or Copy option.
- Tick the “Create a copy” checkbox in the Move and Copy dialog box.
- Click OK.
How to troubleshoot if automatic tab creation isn’t working as expected?
Check the VBA code for errors, review the logic for tab creation conditions, and ensure that your Excel workbook is not protected. You can also use the VBA editor’s debugging tools to identify and fix issues.
Related Articles
- How to Group Tabs Under a Master Tab in Excel
- How to Change Worksheet Tab Color in Excel
- How to Put Excel Tabs on Top of Worksheet
- [Fixed!] Excel Sheet Tabs Hidden Behind Taskbar
- How to Unhide Sheet Tab in Excel
<< Go Back to Sheets Tab in Excel | Excel Parts | Learn Excel
Get FREE Advanced Excel Exercises with Solutions!

I copied and pasted the example for method one and it only created a tab for the first cell in the set. I tried several ranges but always only got one tab. Any idea what could be happening, none of the cells were blank?
Hello Adam! I checked the excel file and followed the steps mentioned in the article. It seems to work fine. Here, I am attaching a video for you, please follow this video and try again. If you face difficulties again, please send your excel file to [email protected].
https://www.exceldemy.com/wp-content/uploads/2023/08/Create-Tabs-Using-VBA.mp4
You can also read the article below to know more about VBA inputbox.
https://www.exceldemy.com/vba-inputbox-example/
Have a nice day!
This macro works fantastic, however, does it have a limitation? I tried to select a range of 45 cells. It would only create 20. Is there a way to expand the selection? or is this limited within excel?
Hello Roland Ocampo,
Glad you found the macro useful! There shouldn’t be a strict limitation on the number of tabs it can create, but Excel does have a limit on the total number of sheets (which depends on memory). If your macro stops at 20, check if there’s a loop constraint in the VBA code (e.g., a counter limit). You might need to modify the loop to ensure it processes all 45 cells. Also, make sure Excel isn’t restricting macro execution due to settings or available system resources.
Possible Reasons for the Issue:
Error Handling Without Resume Next: The macro might encounter an issue (such as duplicate sheet names or invalid characters) and stop execution without looping through all 45 cells.
Duplicate Sheet Names: If the selected range contains duplicate values, the macro might fail when trying to create a sheet with an existing name.
Invalid Characters in Sheet Names: Excel does not allow certain characters (\ / ? * [ ]) in sheet names, which could prevent some sheets from being created.
Excel Memory or System Limits:
While Excel allows many sheets, system memory might limit the actual number. This version ensures that all 45 sheets are created, handles errors properly, and skips invalid entries instead of stopping the macro.
Regards
ExcelDemy