Steps to Create Tabs Within Tabs in Excel
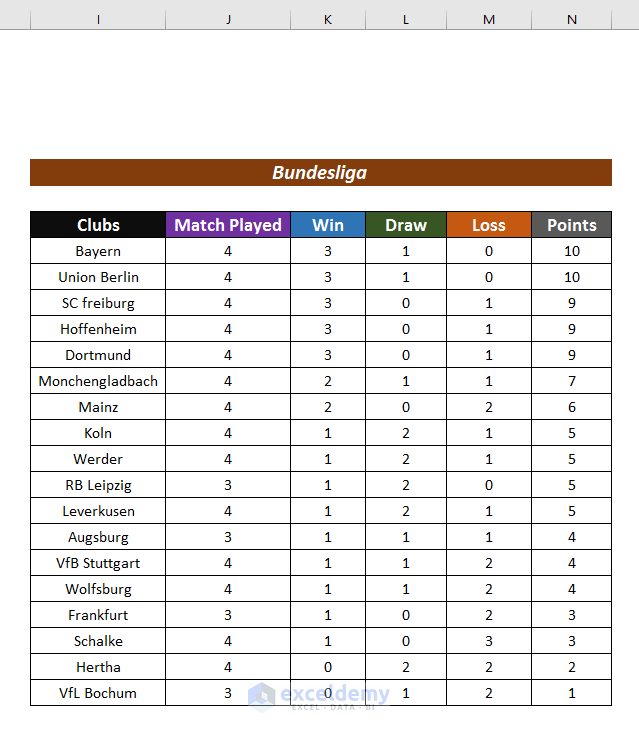
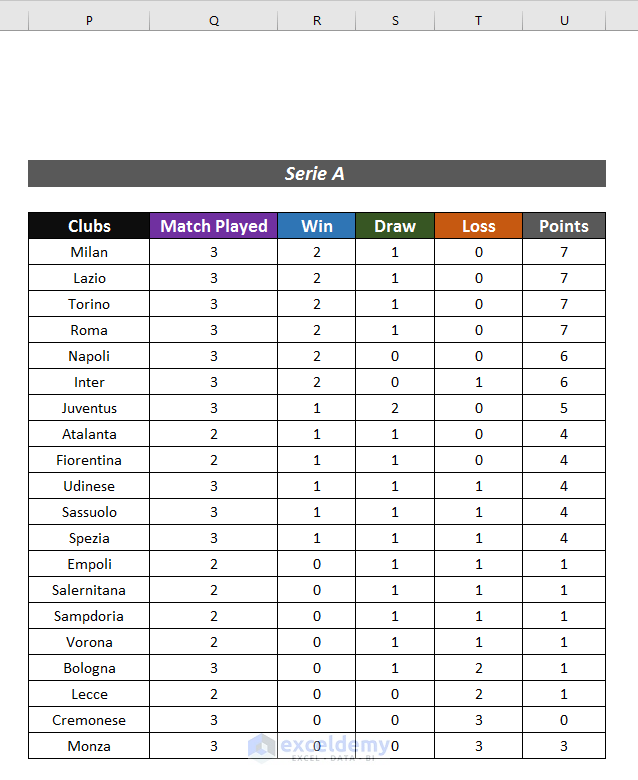
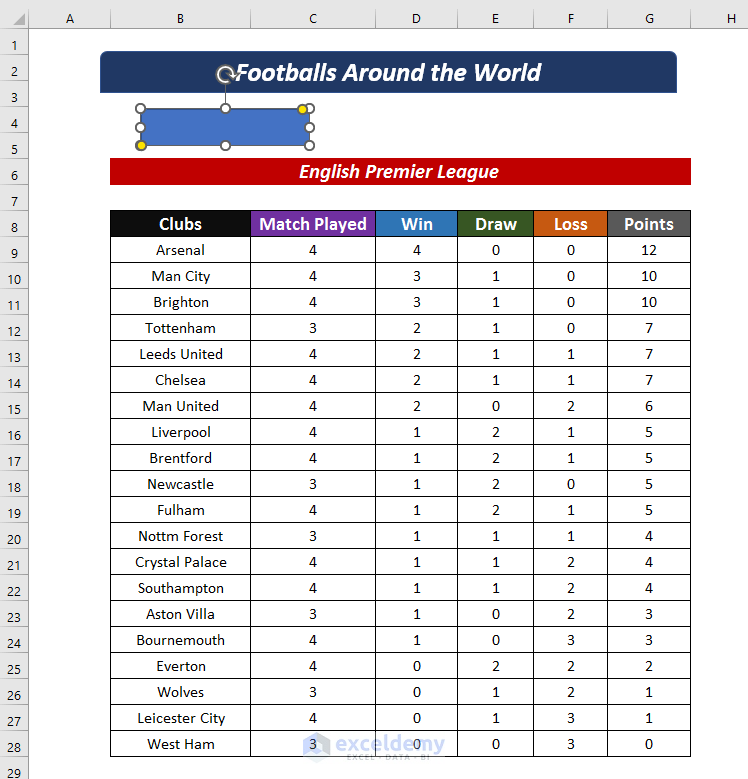
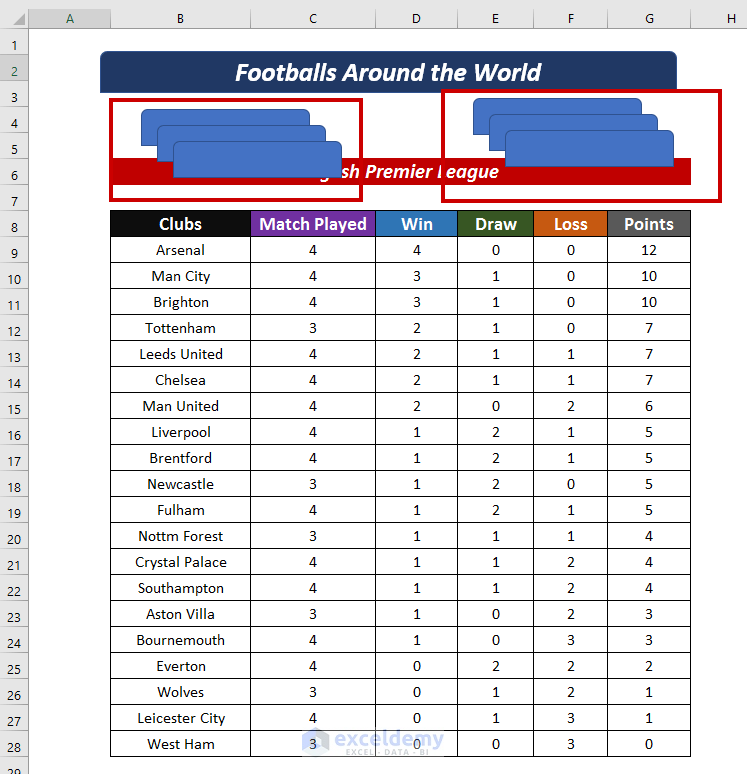
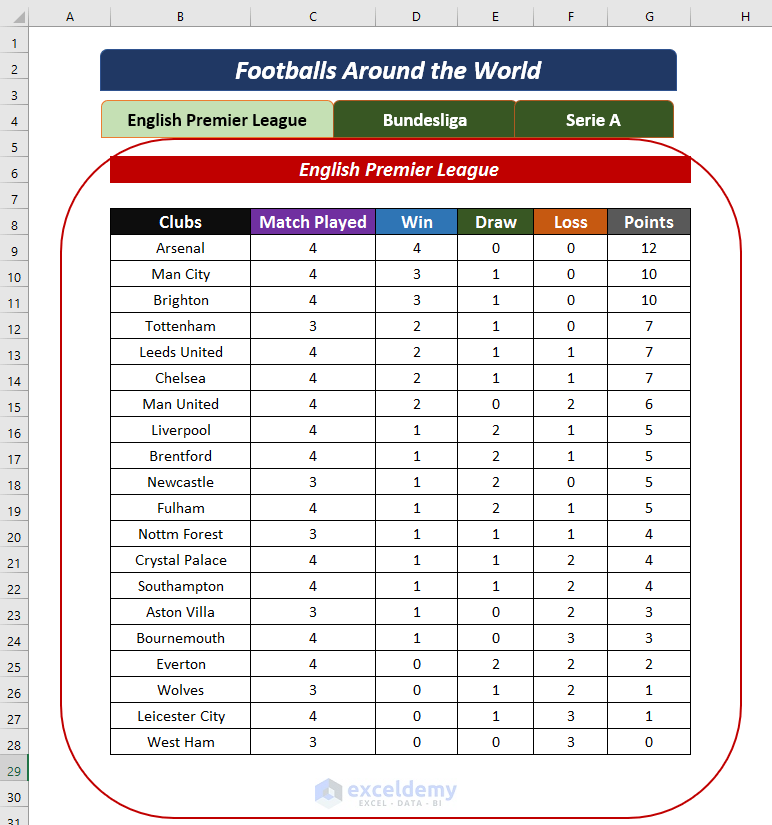
In this tutorial, we will create tabs within tabs to show detailed statistics of three football clubs. The dataset contains data about the English Premier League in Column B to Column G, Bundesliga in Column I to Column N, and Serie A in Column P to Column U.

Step 1: Organize the Data Similarly for Each Tab
- Arrange all the tables in a sheet with consistent column headers.
- Leave enough space above the tables for tab insertion.
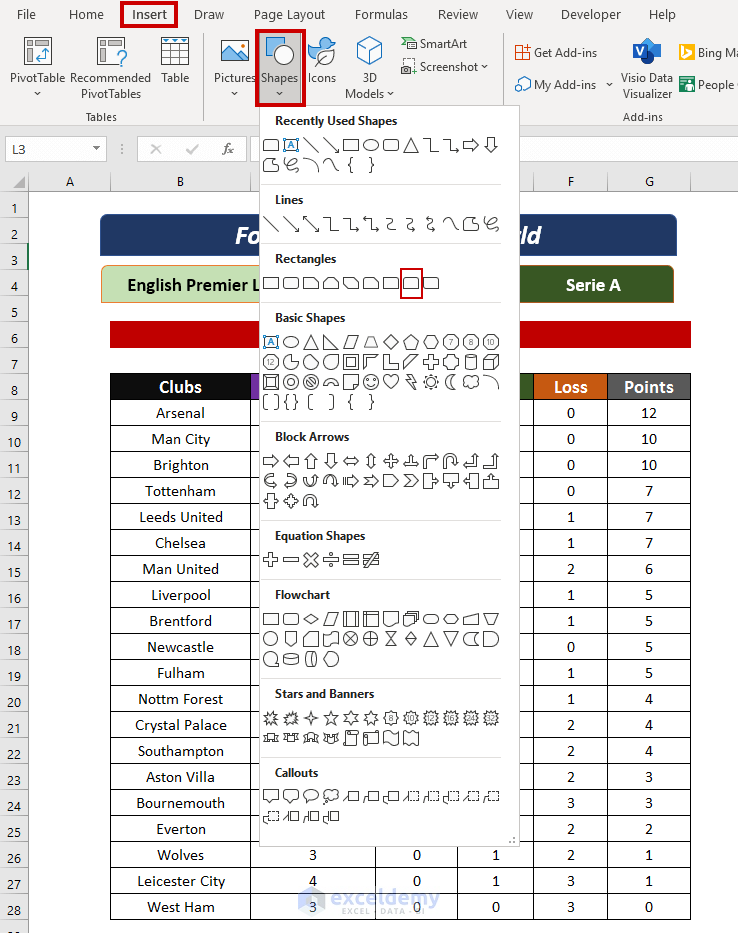
Step 2: Insert the Necessary Tabs Within the Sheet
- Go to the Insert tab.
- Select Shapes from the Illustrations section.
- Choose a shape to set as a tab.
The shape selected here is the “Rectangle: Top Corners Rounded” shape.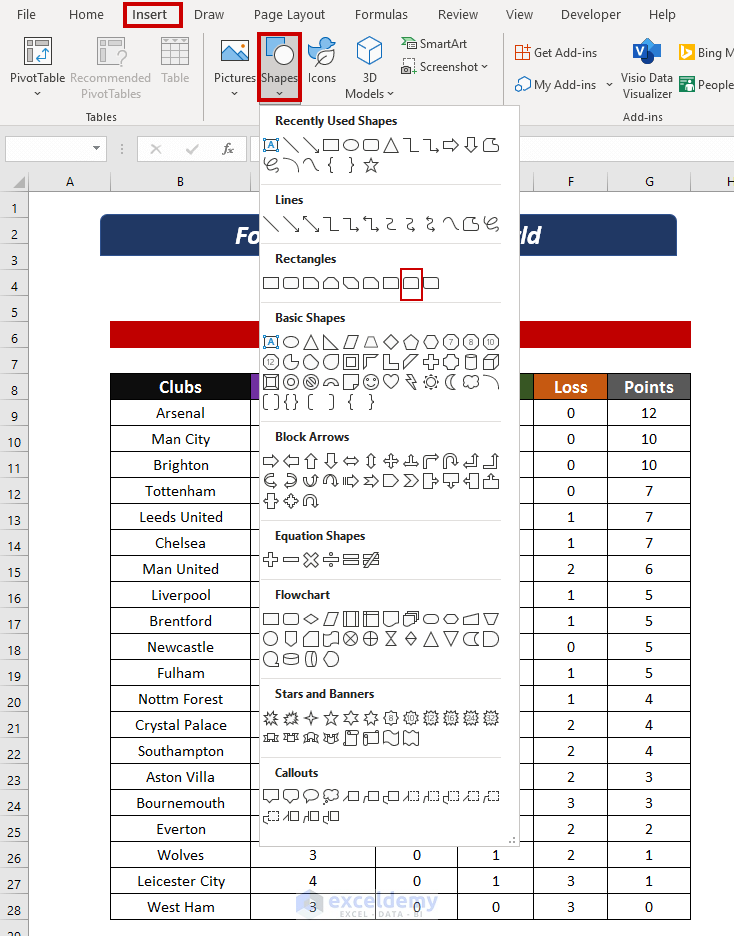
- Click and drag the cursor to create the shape.
Define the size of the inserted shape from the Size section in the Shape Format tab if you need it. - Create the required number of duplicates of the shape by pressing the CTRL+D buttons.
While duplicating tabs, always create twice as many tabs as tables. In our example, six rectangles are created as the chosen dataset includes three tables. - Separate the shapes into two groups with an equal number of shapes.
On the image below, rectangles are separated into two groups of three. One set of rectangles will be used for the “On” button associated with each table, while the remaining three rectangles will be designated for the “Off” button.
- Select all the shapes in one group and right-click on them.
- Pick a format according to your preferences from the Style tab.
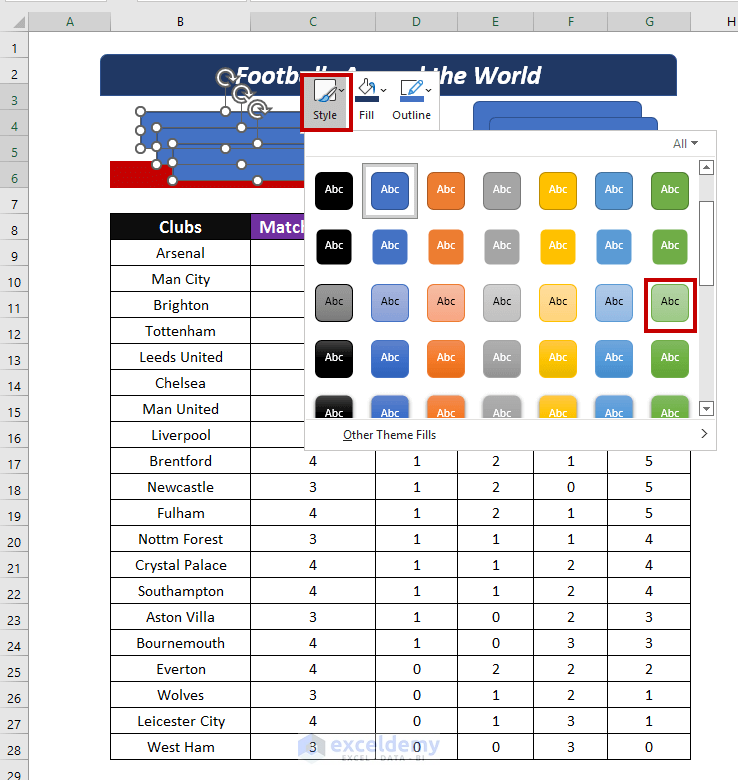
- Format the other set of rectangles in the same manner.
Choose different shades of colors to differentiate the two groups, as one will signify “On” and the other “Off”button.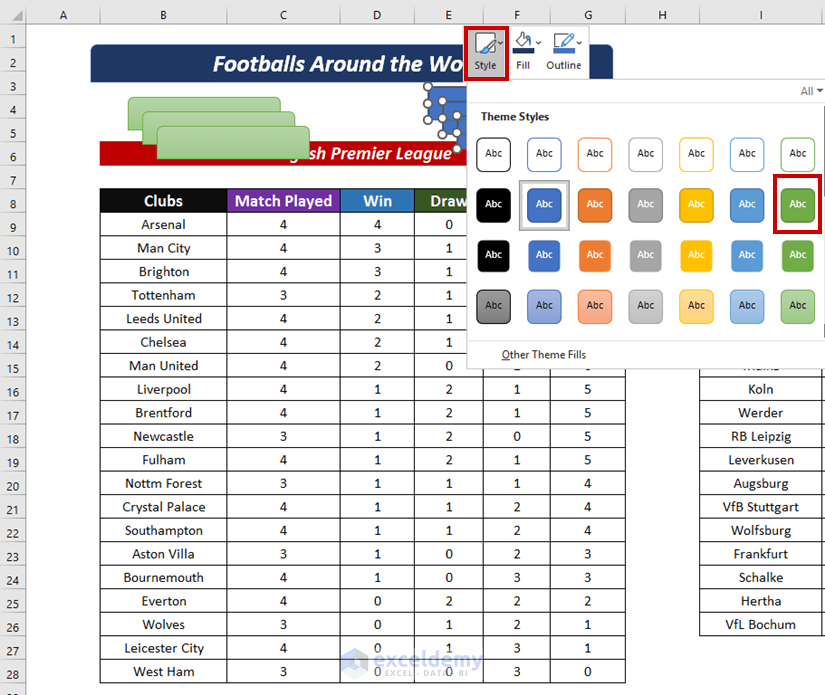
- Add text to the shapes and arrange them in a line.
Each set is named after the tables in the sheet.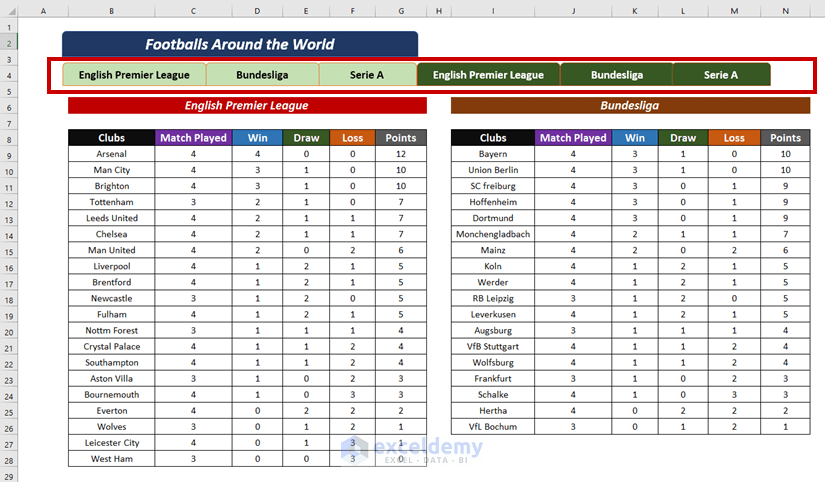
Step 3: Align All the Tabs Within the Sheet
- Add a name to each shape from the Name Box.
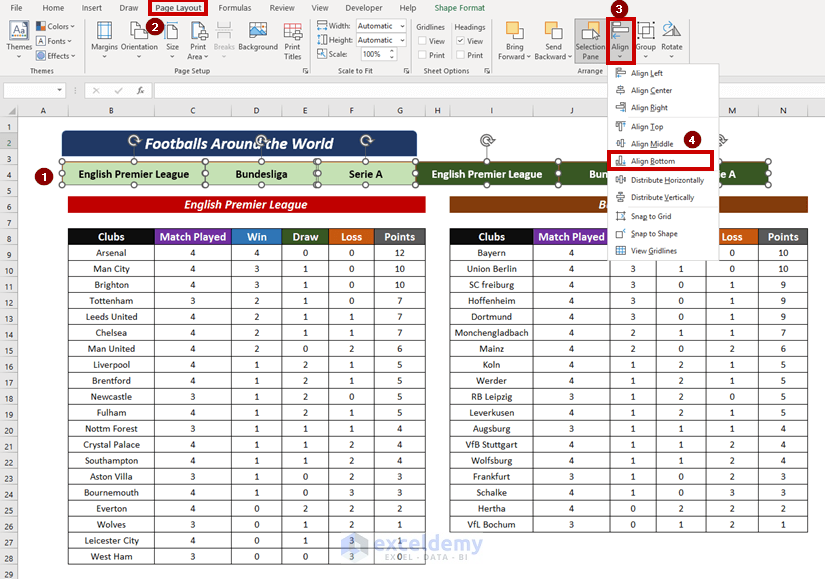
- Select all the rectangles by pressing the CTRL key.
- Go to Page Layout > Arrange group > Align option > Align Bottom.
- Select the shapes of the same name and choose Align Left in the Align tab.
As an example, we have selected the rectangles named English Premier League and aligned them with the Align Left option.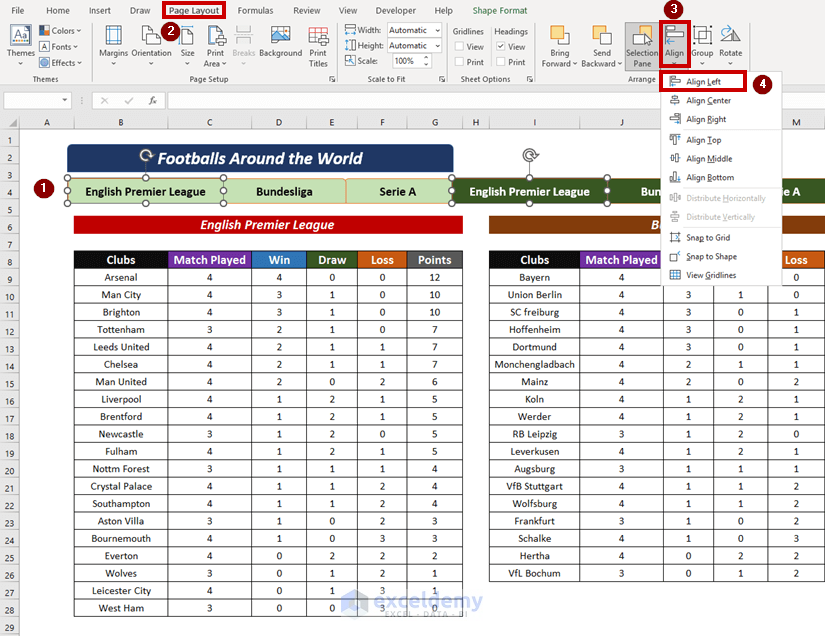
5. Following the same procedure, align the rest of the rectangles.

Step 4: Insert the VBA Code
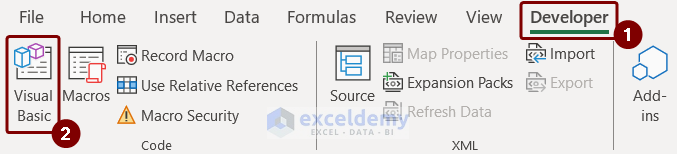
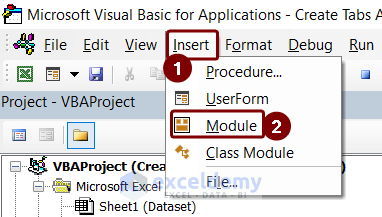
- Go to the Developer tab and click on the Visual Basic button in the Code section.
- Select Module from the Insert tab in the VBA window.
- Copy and paste the following VBA code into the Module.
Sub TabEpl()
With Sheet1
.Shapes("EplOn").Visible = msoCTrue
.Shapes("EplOff").Visible = msoFalse
.Shapes("BundOn").Visible = msoFalse
.Shapes("BundOff").Visible = msoCTrue
.Shapes("SerieOn").Visible = msoFalse
.Shapes("SerieOff").Visible = msoCTrue
.Range("B:H").EntireColumn.Hidden = False
.Range("I:U").EntireColumn.Hidden = True
End With
End Sub
Sub TabBundesliga()
With Sheet1
.Shapes("EplOn").Visible = msoFalse
.Shapes("EplOff").Visible = msoCTrue
.Shapes("BundOn").Visible = msoCTrue
.Shapes("BundOff").Visible = msoFalse
.Shapes("SerieOn").Visible = msoFalse
.Shapes("SerieOff").Visible = msoCTrue
.Range("I:O").EntireColumn.Hidden = False
.Range("B:H,P:U").EntireColumn.Hidden = True
End With
End Sub
Sub TabSeieA()
With Sheet1
.Shapes("EplOn").Visible = msoFalse
.Shapes("EplOff").Visible = msoCTrue
.Shapes("BundOn").Visible = msoFalse
.Shapes("BundOff").Visible = msoCTrue
.Shapes("SerieOn").Visible = msoCTrue
.Shapes("SerieOff").Visible = msoFalse
.Range("P:V").EntireColumn.Hidden = False
.Range("B:O").EntireColumn.Hidden = True
End With
End Sub
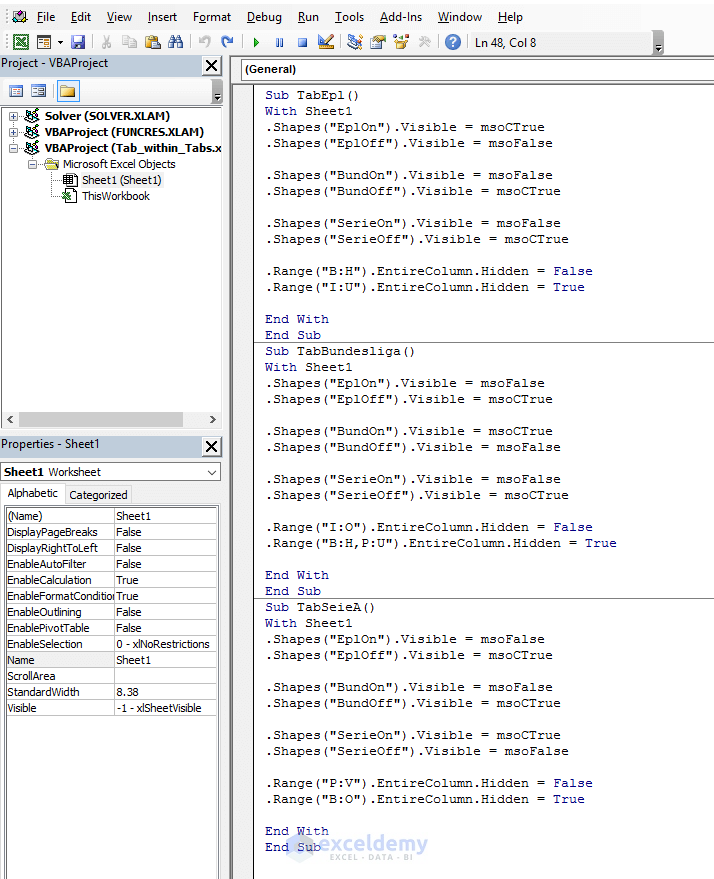
The VBA code given consists of three sub-routines: TabEpl(), TabBundesliga(), and TabSerieA(). These subroutines manage the visibility of shapes using the Shape.Visible property, which determines the tabs’ color based on whether they are selected or not. The Range.EntireColumn property controls the visibility of columns on “Sheet1.” When a specific tab is selected, any data not related to that tab will be hidden. For instance, in TabEpl(), Columns B to H are visible, while Columns I to U are hidden.
Step 5: Assign the VBA Code to Each Tab
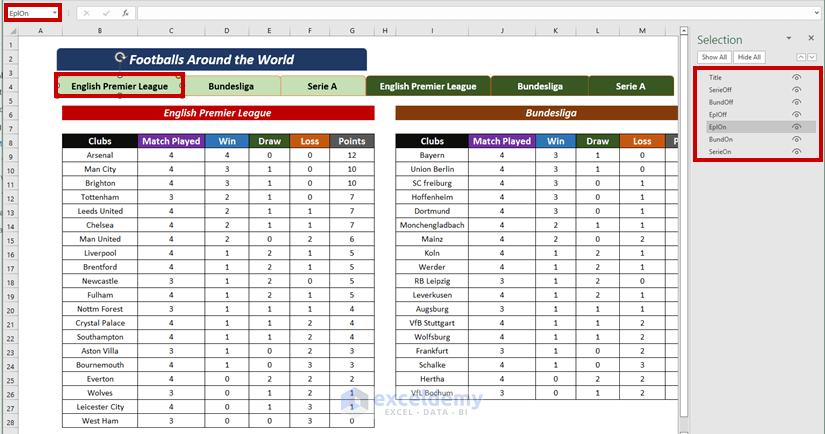
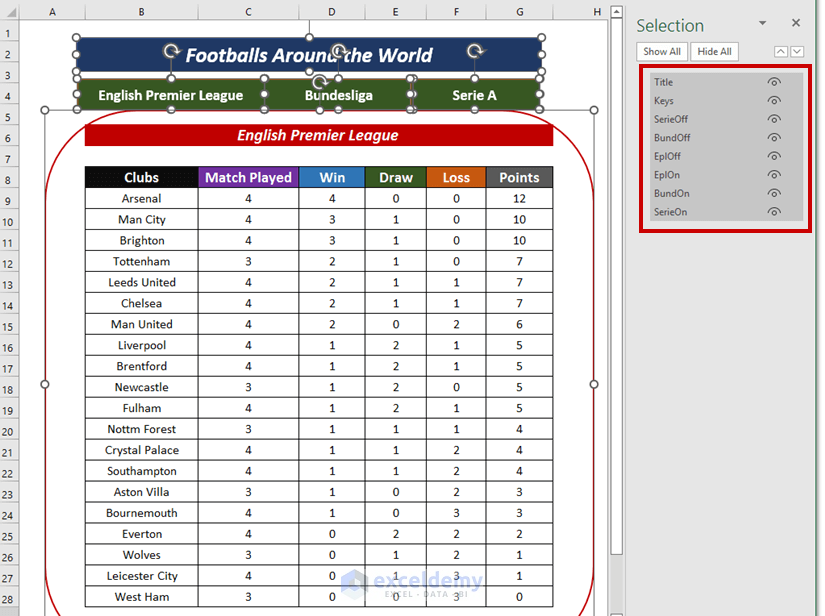
- Go to the Page Layout tab and click on Selection Panel within the Arrange section.
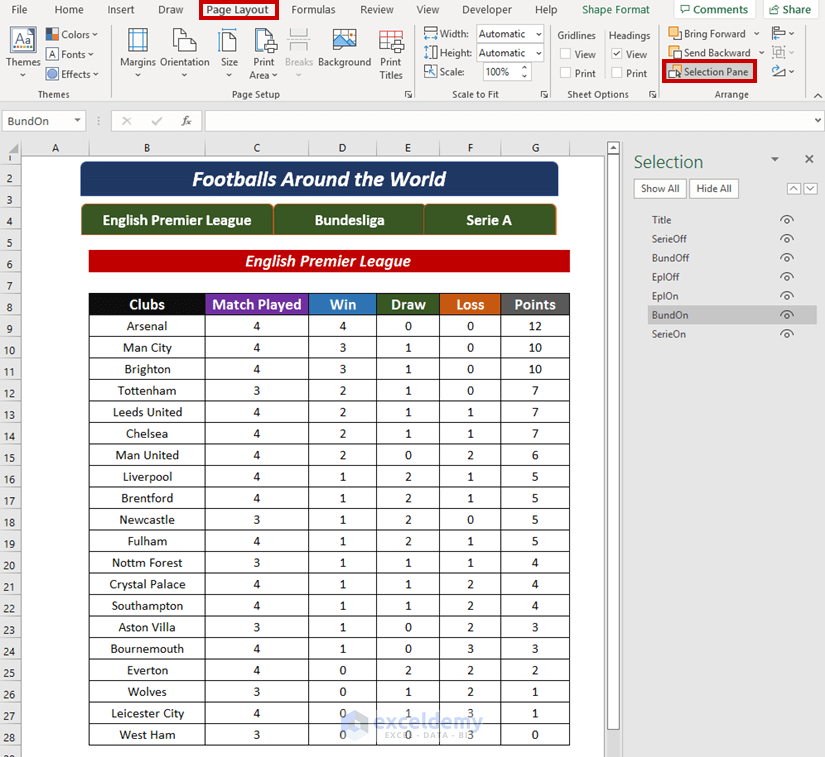
The Selection Panel will appear on the right side of the worksheet. - Select the aligned tabs while pressing the CTRL key.
Select the tabs of the same name, such as EplOff, EplOn. - Right-click on the tabs and select the Assign Macro option.
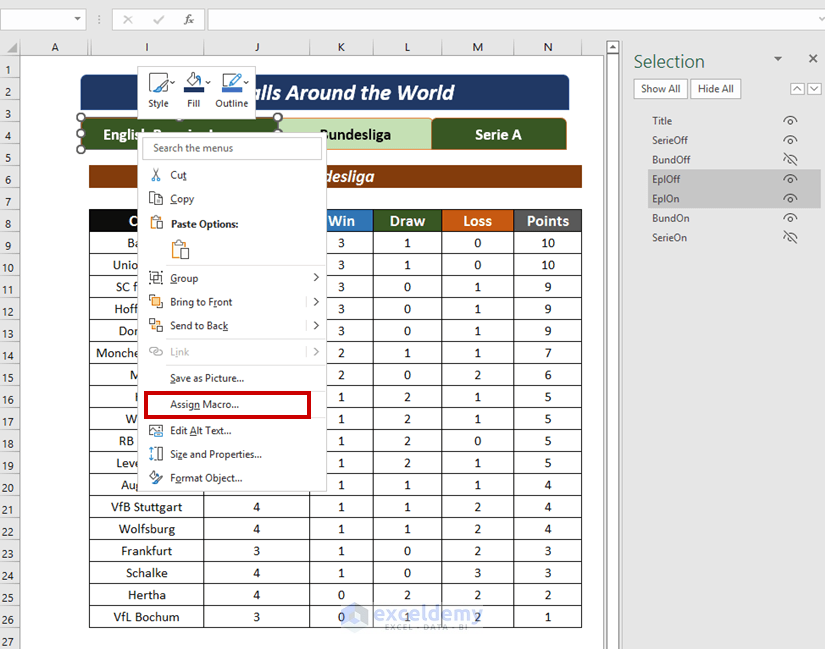
- Select the related macro from the options in the Assign Macro box.
Sheet1.TabEpl macro is selected for the English Premier League tabs.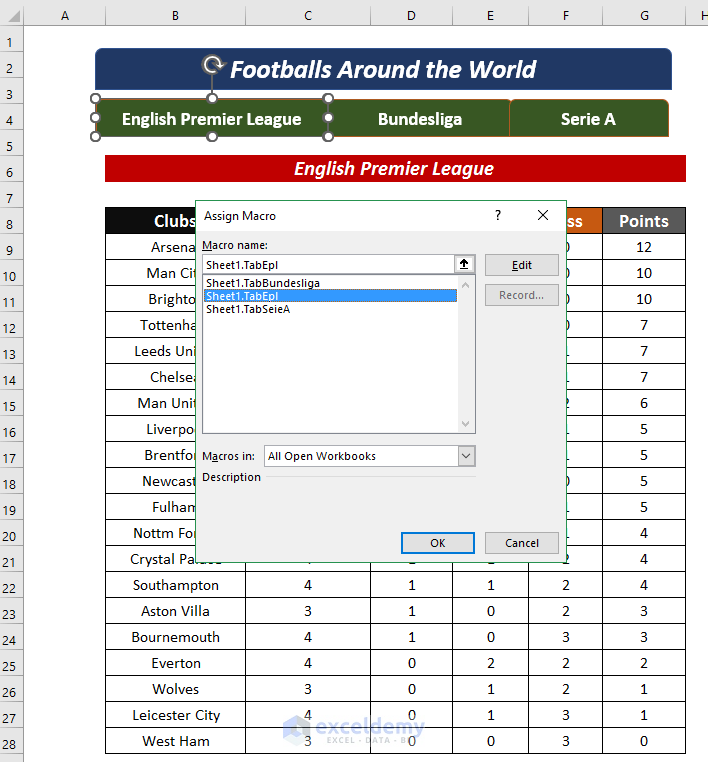
Step 6: Compile All Tabs Together
- Go to Shapes in the Insert tab.
- Choose a shape from the available options.
- Enclose the entire dataset within the selected shape.
- Select all the shapes from the Selection Panel by pressing the CTRL key.
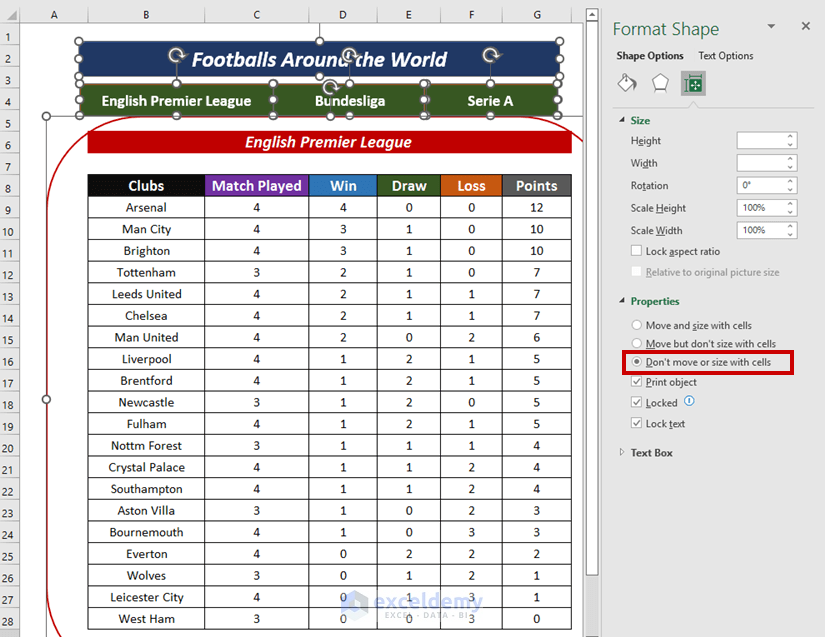
- Right-click on the selection and choose the Size and Properties option.
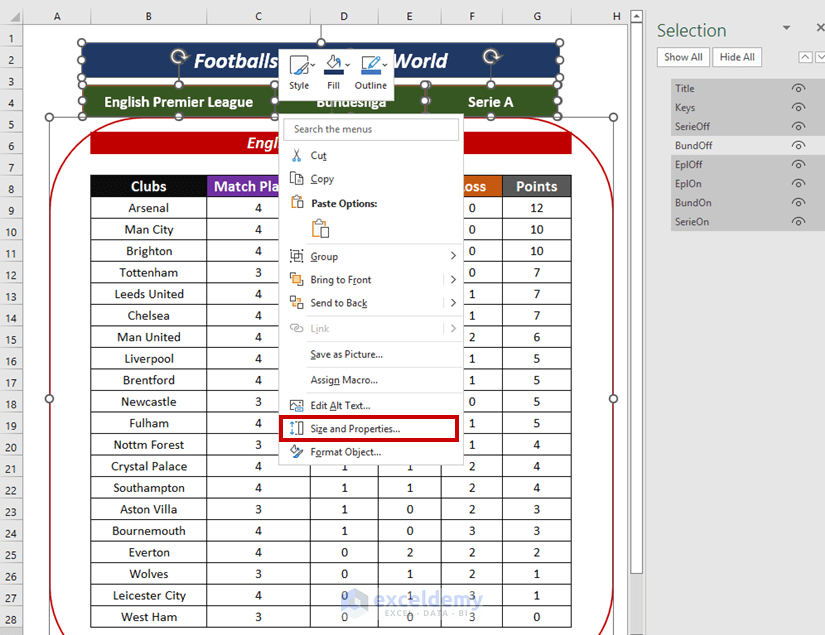
A Format Shape box will appear on the right side. - In the Properties section, check the “Don’t move or size with cells” box.
The Output of Creating Tabs Within Tabs
The final outlook of tabs within tabs is displayed below.

Download Practice Workbook
Frequently Asked Questions
Are tabs within tabs suitable for creating interactive dashboards?
Yes, they are excellent for creating interactive dashboards. By assigning VBA code to tabs, you can make your Excel workbook dynamic, allowing users to interact with specific data sets seamlessly.
Can I use images or icons instead of shapes for the tabs?
Yes, you can use images or icons as tabs. Insert the images, assign appropriate names, and use VBA code to control their visibility. This can add a visual flair to your nested tabs setup.
What precautions should I take before creating tabs within tabs in a large dataset?
Before implementing nested tabs in a large dataset, back up your workbook. Additionally, consider testing the functionality on a smaller dataset to ensure smooth performance and identify potential issues.
Related Articles
- How to Create Tabs Automatically in Excel
- How to Group Tabs Under a Master Tab in Excel
- How to Change Worksheet Tab Color in Excel
- How to Put Excel Tabs on Top of Worksheet
- [Fixed!] Excel Sheet Tabs Hidden behind Taskbar
- How to Unhide Sheet Tab in Excel
<< Go Back to Sheets Tab in Excel | Excel Parts | Learn Excel
Get FREE Advanced Excel Exercises with Solutions!

WHERE DO I FIND THE CODE ON MY SPREASDSHEET TO COPY OVER TO THE MODULE
Hello Rose,
You can copy the code from the article. Or if you want to copy the code from our Excel workbook then follow the steps below.
Open Visual Basic from the Developer tab.
Open the Sheet1 to get the code.
Regards
ExcelDemy
Hi Shamima,
I am trying to add tabs within tabs on my current workbook but am using multiple sheets, i have inserted my four tabs on page but having trouble with modifying the VBA code to suit my work book.
My details are below
[email protected]
Hello Martin Noyes,
Thanks for your message! To help you best with customizing the VBA for multiple sheets, could you please post the details of your workbook structure (sheet names and how you want the tabs to work) on our Exceldemy Forum?
That way, our team and community can provide you with tailored support.
Regards,
ExcelDemy
.