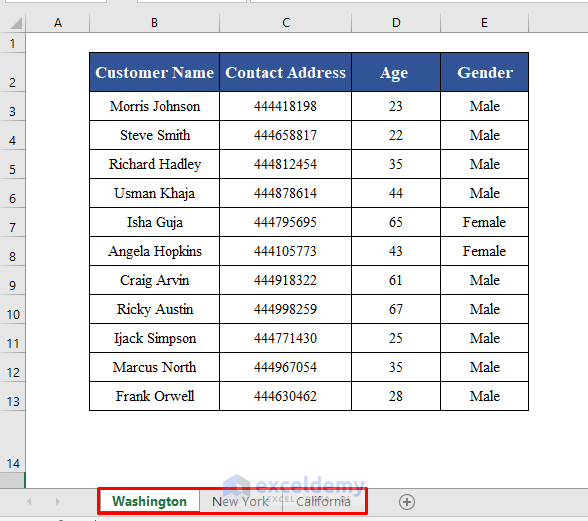
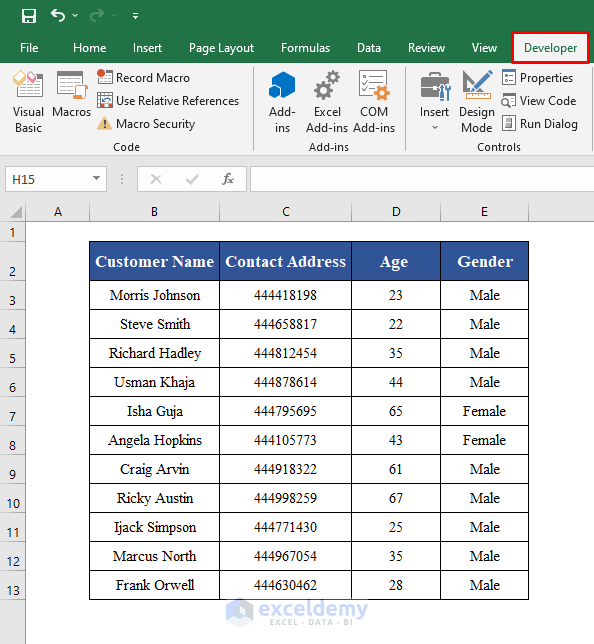
Here we’ve got three worksheets called Washington, New York, and California that contain the names, contact numbers, ages, and genders of some customers of these three branches of a bank. Let’s create a form that can input new rows into the sheets through a button.
Step 1 – Developing a UserForm in Excel VBA to Create the Data Entry Form
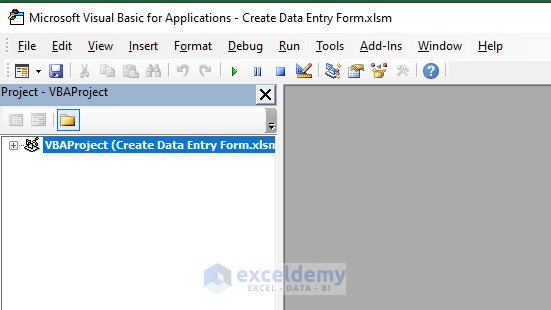
- Press Alt + F11 on your keyboard to open the Visual Basic window.
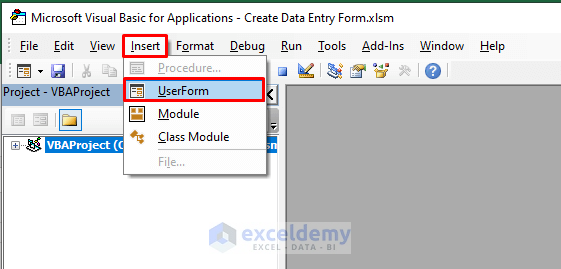
- Go to the Insert tab and choose the UserForm option in the toolbar. A new UserForm called UserForm1 will open.
- Drag a Label (Label1) from the toolbox to the left-most top corner of the UserForm.
- Change the display of the Label to Worksheet.
- Drag a Listbox (Listbox1) to the right of Label1.
- Drag a few more Labels equal to the total number of columns of the data set (4 in this example) over the left side of the UserForm.
- Next to each Label, drag a TextBox.
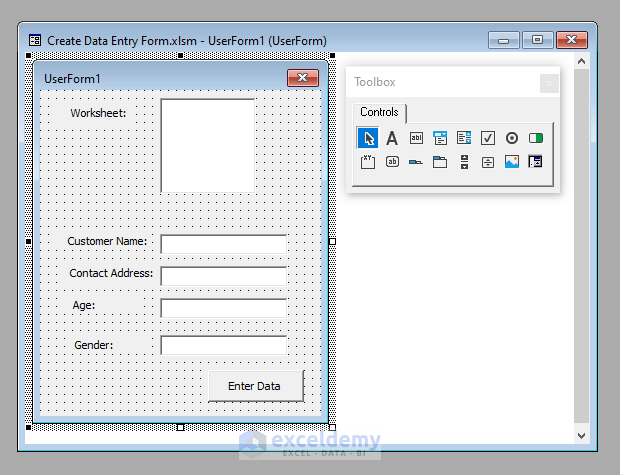
- Change the displays of the Labels to match the column headers of your data set (Customer Name, Contact Address, Age, and Gender here).
- Drag a CommandButton to the right-most bottom side of the UserForm.
- Change the display of the button to Enter Data.
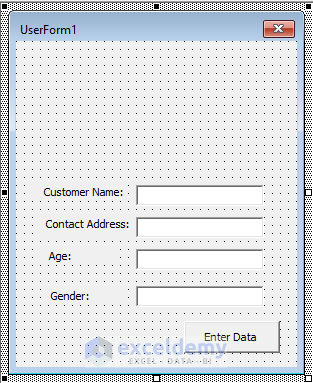
- Here’s how the form should look, approximately:
- Double-click on the Listbox. A private sub procedure called ListBox1_Click will open.
- Enter the following code there:
Private Sub ListBox1_Click()

For i = 0 To UserForm1.ListBox1.ListCount - 1
    If UserForm1.ListBox1.Selected(i) = True Then
       Worksheets(UserForm1.ListBox1.List(i)).Activate
    End If
Next i

End Sub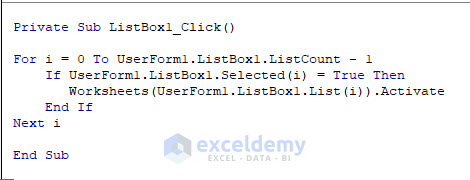
- Double-click on the CommandButton. Another private sub procedure called CommandButton_Click will open.
- Enter the following code there:
Private Sub CommandButton1_Click()
Total_Rows = ActiveSheet.UsedRange.Rows.Count + 1
Active_Column = 1
Set Top_Cell = ActiveSheet.Range("B2")
 For i = 1 To Total_Rows
    If Top_Cell.Cells(i, 1).Value = "" Then
        For Each Ctrl In UserForm1.Controls
            If TypeName(Ctrl) = "TextBox" Then
                Top_Cell.Cells(i, Active_Column).Value = Ctrl.Text
                Active_Column = Active_Column + 1
            End If
        Next Ctrl
    Exit For
    End If
Next i
End Sub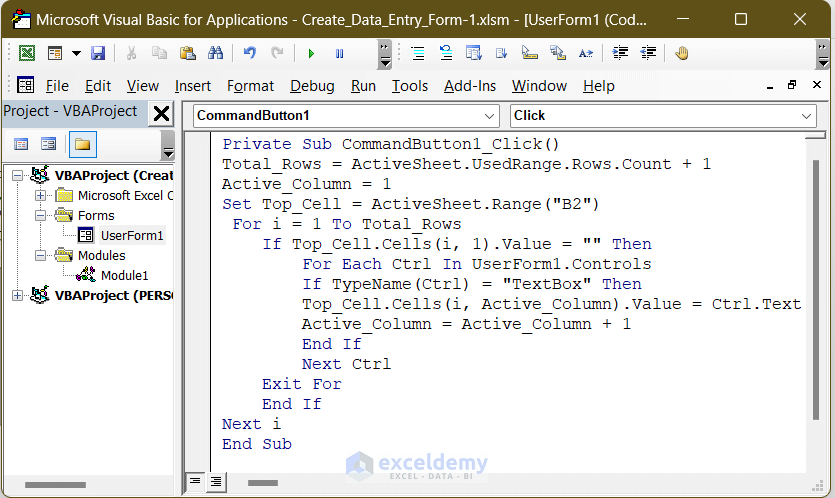
Note: We have hard-coded the Top_Cell as cell B2. So make sure that the headings start at B2 in all the worksheets.
- Go to the Insert tab and select the Module option in the toolbar.
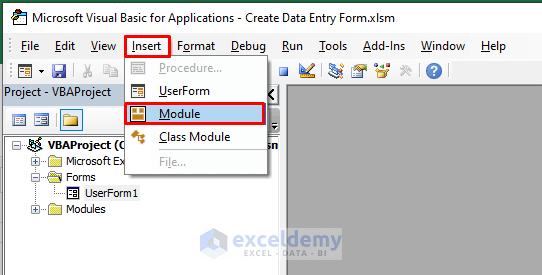
- A new Module called Module1 will be inserted.
- Enter the following code there:
Sub Run_UserForm()

UserForm1.Caption = "Data Entry Form"

UserForm1.ListBox1.BorderStyle = fmBorderStyleSingle
UserForm1.ListBox1.ListStyle = fmListStyleOption

For i = 1 To Sheets.Count
    UserForm1.ListBox1.AddItem Sheets(i).Name
Next i

Load UserForm1
UserForm1.Show

End Sub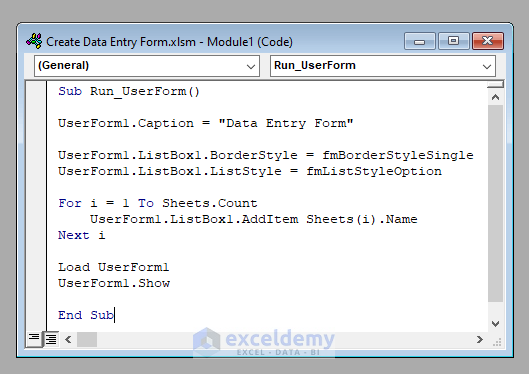
Step 2 – Inserting a Button to Open the Data Entry Form
- Click and open the Developer tab from the Excel Ribbon on the top. If you don’t see it in your Excel Ribbon, follow the steps mentioned here to display the Developer tab on the ribbon.
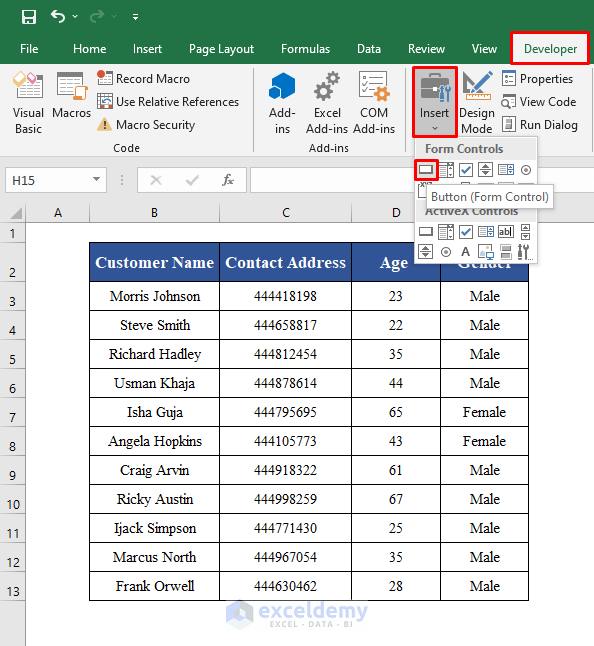
- Under the Developer tab, in the section Controls, click on Insert.
- You’ll find a handful of tools ready to use.
- Drag a Button (Form Control) from the topmost left side.
- Drag the button to the desired zone on your worksheet and release it. A dialog box called Assign Macro will open.
- In the Macro name field, insert Run_UserForm.
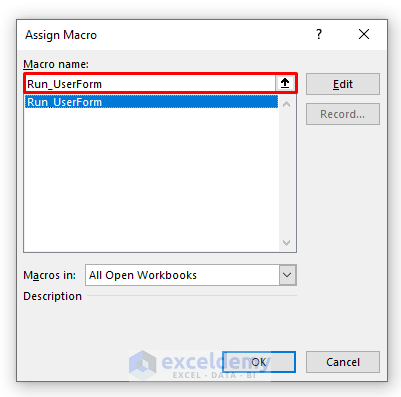
- Click OK.
- You can change the display of the button. We’ve changed it to Enter New Data.

You can enter a button in each of our worksheets by repeating these steps.
Step 3 – Viewing the Final Output of Data Entry Form
- Click on the button Enter New Data on the worksheet. The data entry form will open.
- Select the worksheet on which you want to make the new entry. Here we’ve selected New York. The moment you select a worksheet, it’ll become active.
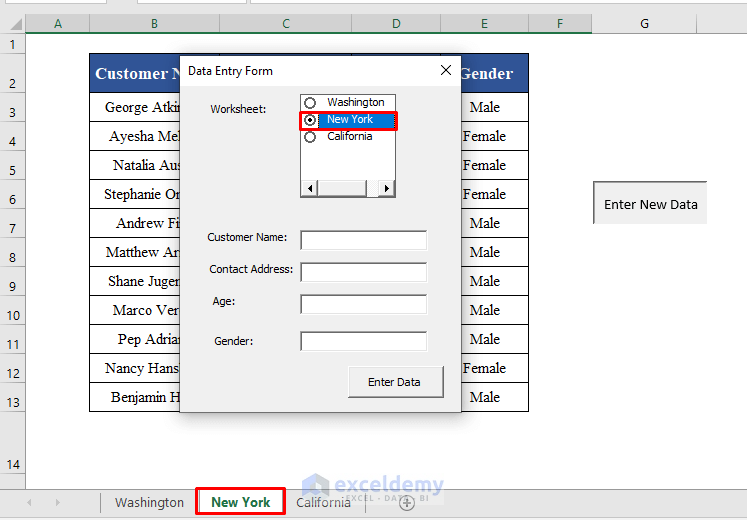
- Fill up the rest of the data that you want to enter. Here we’ve put Jennifer Marlo, 444204240, 26, and Female.
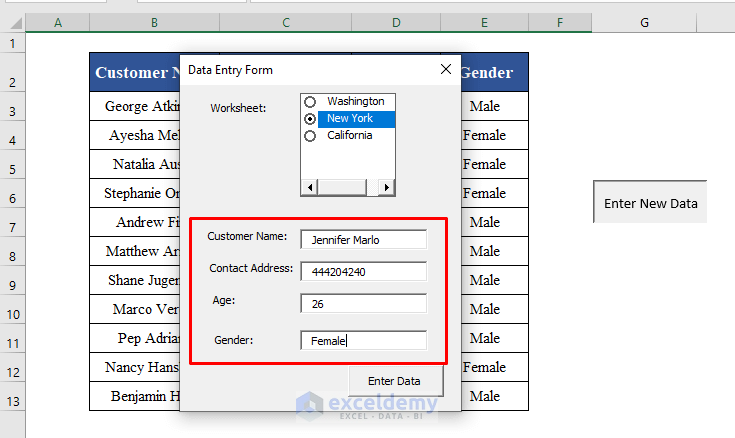
- Click Enter Data.
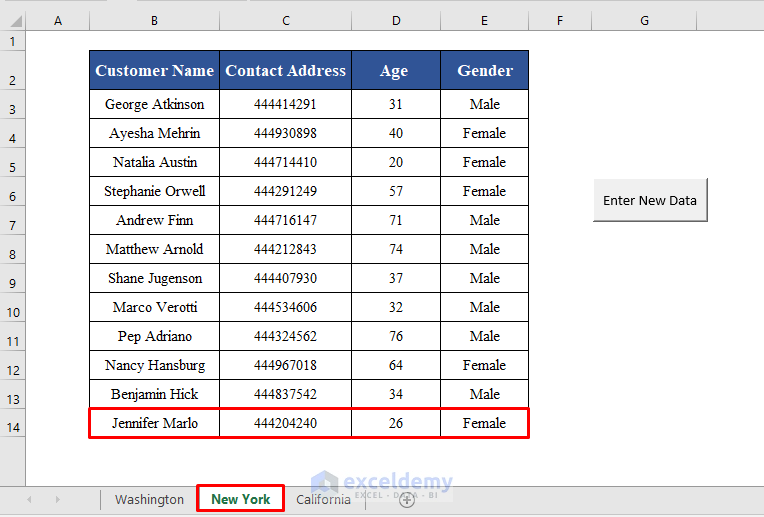
- You’ll find the new data entered into the last row of the database.
Read More: How to Create an Excel Data Entry Form Without a UserForm
Things to Remember
- While entering new data, the code follows the sequence of the TextBoxes of the UserForm. Therefore, while adding TextBoxes on the UserForm, maintain the sequence of the columns in your database.
Download Practice Workbook
Download this practice workbook to exercise while you are reading this article.
Related Articles
- How to Populate an Excel Spreadsheet from a Web Form
- How to Make a Fillable Form in Excel
- How to Create an Excel Data Entry Form That Includes Checkboxes
- How to Create an Autofill Form in Excel
- How to Create Data Entry Form with Drop Down List in Excel
- How to Create Data Entry Form in Excel
- How to Create a Printable Form in Excel
- How to Design Form in Excel
- How to Make an Excel Spreadsheet Look Like a Form
<< Go Back to Data Entry Form in Excel | Data Entry in Excel | Learn Excel
Get FREE Advanced Excel Exercises with Solutions!

Hi !
Thanx for the very helpfull article !
Is it possible to have the ENTER NEW DATA button to a different worksheet and when we click on the ENTER NEW DATA button and select the worksheet on which we want to make the new entry (New York, Washington,California) the worksheet NOT to become active?
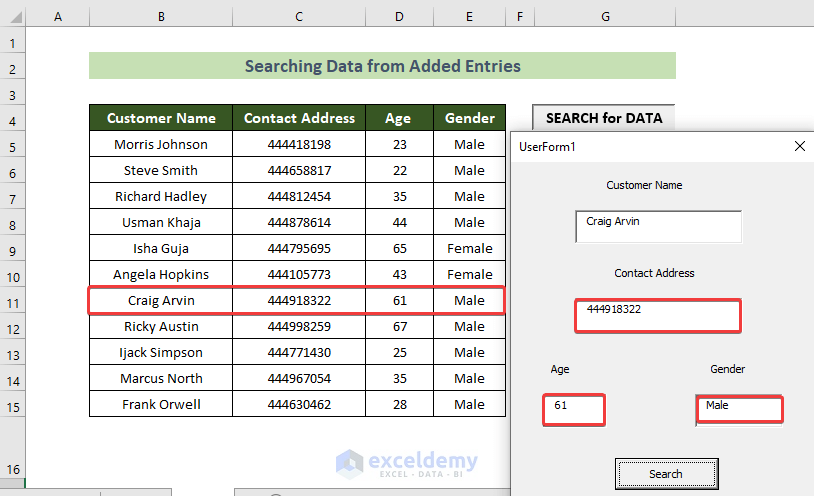
How vba can be modified in order not only to enter new data to one of these three worksheets, but also to search for a name or address in the already added entries?
Hey, YIANNIS ZOUGANELIS!
Thank you for your query. Hope you are doing well. You have asked some thoughtful questions. I am answering all your queries one by one below.
Q1: First of all, you have asked if it is possible to have the ENTER NEW DATA button on a different worksheet.
Yes, this is very much possible. In this regard, you will have to follow the same procedures of the article to create the forms and buttons for everything in the worksheet just where you want the button to appear.
Q2: Second, you want the selected worksheet not to become active. In this regard, you have to change the code a little bit. Say, you have set the button in the MainSheet worksheet. Now, you want to be active in this sheet all along. You don’t want to activate any other selected worksheet.
In this regard, create the button and form in the MainSheet worksheet and then write the code below inside the Code window of the Command_Button1.
Code:
Private Sub CommandButton1_Click()TargetSheet = ListBox1.ValueIf TargetSheet = "" ThenExit SubEnd IfWorksheets(TargetSheet).ActivatelastRow = ActiveSheet.Cells(Rows.Count, 1).End(xlUp).RowActiveSheet.Cells(lastRow + 1, 2).Value = TextBox1.ValueActiveSheet.Cells(lastRow + 1, 3).Value = TextBox2.ValueActiveSheet.Cells(lastRow + 1, 4).Value = TextBox3.ValueActiveSheet.Cells(lastRow + 1, 5).Value = TextBox4.ValueWorksheets("MainSheet").ActivateEnd SubQ3: Thirdly, you want to search for present values rather than entering values. This is a different thing. Say, you are given the same dataset as per the article. Now, you want to enter only the customer’s name and want to get the contact address, age, and gender. Go through the steps below to achieve this.
Steps:
Sub Search_Data() UserForm1.Show End SubCode:
Sub SearchButton_Click()Dim sh As WorksheetSet sh = ThisWorkbook.Sheets("Search")Dim lr As Longlr = sh.Range("B" & Rows.Count).End(xlUp).RowDim i As LongIf Application.WorksheetFunction.CountIf(sh.Range("B:E"), Me.TextBox1.Text) = 0 ThenMsgBox "No match found!", vbOKOnly + vbInformationCall ResetExit SubEnd IfFor i = 2 To lrIf sh.Cells(i, "B").Value = Me.TextBox1.Text ThenTextBox1 = sh.Cells(i, "B").ValueTextBox2 = sh.Cells(i, "C").ValueTextBox3 = sh.Cells(i, "D").ValueTextBox4 = sh.Cells(i, "E").ValueEnd IfNext iEnd SubFunction Reset()TextBox1.Value = ""TextBox2.Value = ""TextBox3.Value = ""TextBox4.Value = ""End FunctionFinally, you will be able to get your desired automated search result.
Regards,
Tanjim Reza
Hi, I had a question, I noticed that when I deleted an entry on row 1 for example wrong data was entered, then I add the data again via the form, it should insert the new data into row 1, however, it will leave a blank and insert the data into the row 2. Is there something I had miss out?
Thank you GLENN for bringing the issue you faced to our attention. We are sorry to hear that you faced the problem regarding the position of new entries. We have updated the code and Excel file. In the revised code, we have hard-coded the Top_Cell as cell B2 in CommandButton1_Click() subroutine. So make sure that, the headings start at B2 in all the worksheets. Now, you can download the new file and try it again. Hopefully, you will not face the problem anymore.
Sincerely,
Aniruddah
Exceldemy
Hello, I have a question. How can I alter the code so that you don’t have to choose a worksheet but instead it enters new data on the worksheet you are currently on?
Thanks in advance
Hi JASON,
Thank you for your comment. According to your comment, I understand that you want to alter the code so that you don’t have to choose a worksheet but instead, it enters new data on the worksheet you are currently on.
For this, you don’t need any ListBox named ListBox1. Follow the below steps:
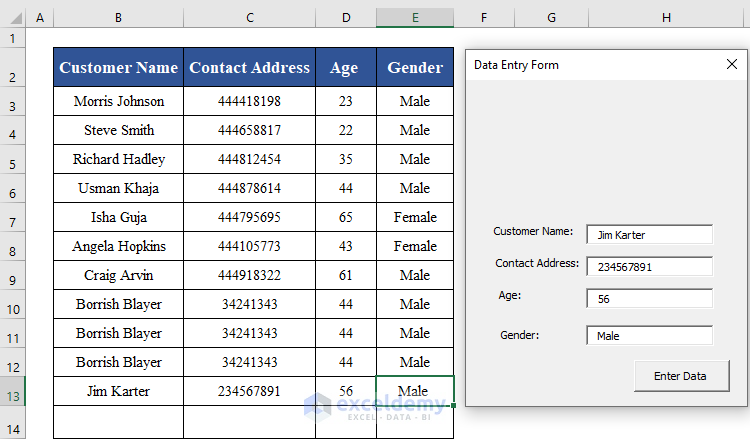
● In Step 1, while developing the UserForm to create the Data Entry Form, you don’t need to put ListBox1 as there will be no selection option according to your query.
So the UserForm will look like the following image.
● Now, in Module 1 insert the following code and save it.
Sub Run_UserForm()
UserForm1.Caption = “Data Entry Form”
Load UserForm1
UserForm1.Show
End Sub
Now, you are good to go. You will not have to choose a worksheet instead, it enters new data on the worksheet you are currently on.
Here is a sample image. I have entered data in the worksheet named Washington.
Hopefully, you will be able to solve your problem now. Please feel free to reach out to us with any other questions or you can send us your Excel files as well.
Regards
Nujat Tasnim
Exceldemy.