What Is an AutoFill Form in Excel?
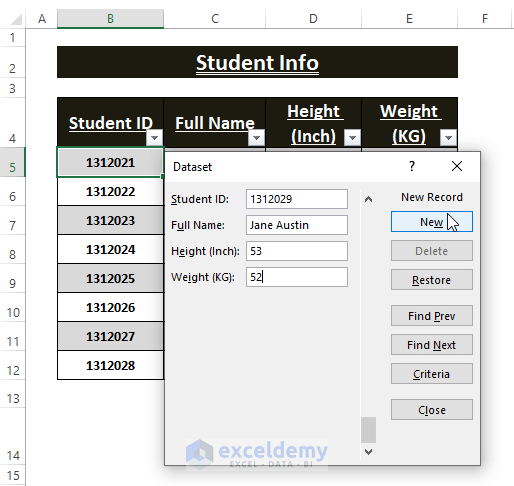
Autofill Form is a data entry or verification tool. It has a unique layout where each column header from a Table becomes a dedicated data entry field. Existing data from the Table automatically populates the fields in the Autofill Form. You can move around the data by clicking on the Scroll bar. You can also add, delete, or find entries within the dataset using its offered keys.
Read More: How to Create Data Entry Form in Excel
Step 1 – Setting Up Data to Create an Autofill Form
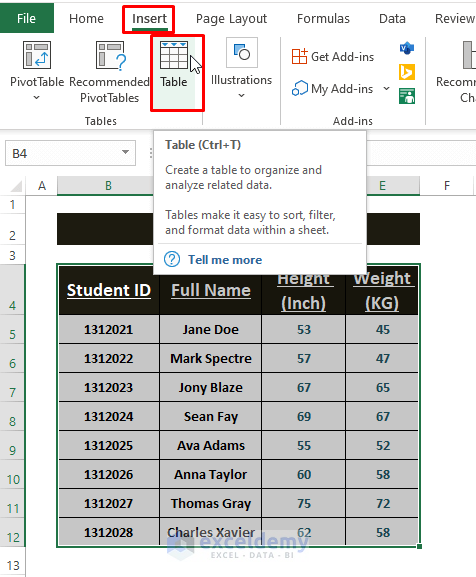
Before creating an Autofill Form, you need to set up your data as a table. Insert an Excel Table. Highlight the desired range and go to the Insert tab > Click on Table (in the Tables section).
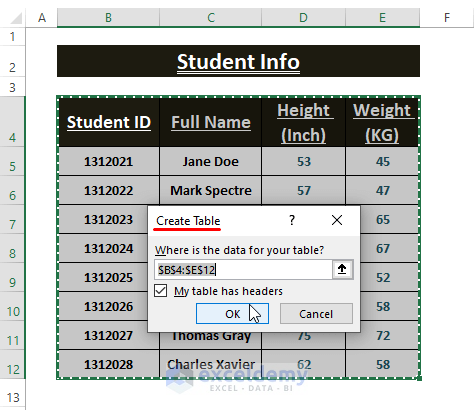
Excel brings up a Create Table dialog box. Tick the My table has headers option and click OK.
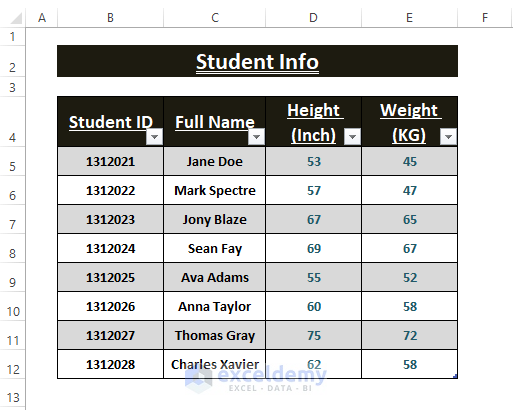
Excel creates a Table containing all the highlighted data in it as shown below.
Step 2 – Adding Data Entry Form Tool to Quick Access Toolbar
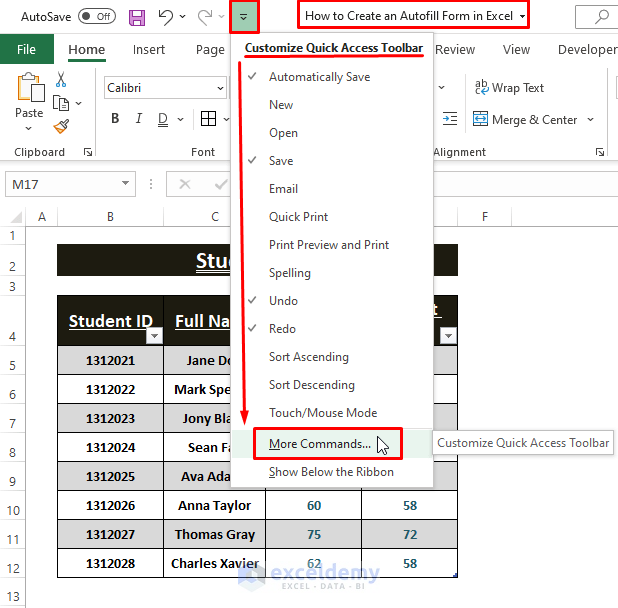
Click on the Customize Quick Access Toolbar Icon. Click on the More Commands option.
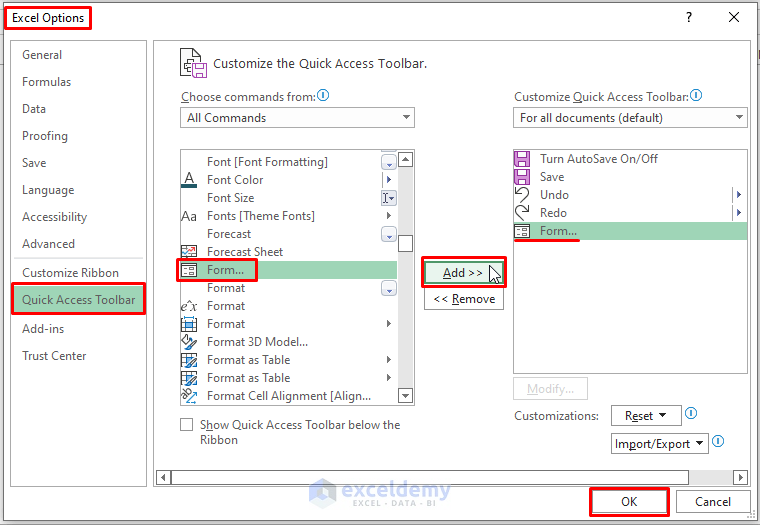
The Excel Options window will appear. In the window, click on Quick Access Toolbar > Choose All Commands under Choose Commands from option > Click on Form > Click on Add > Click OK.
After returning to the worksheet, you can see the Form tool appears in the Quick Access Toolbar region.
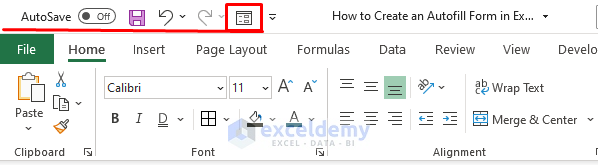
You can now create an Autofill Form in Excel.
Read More: How to Create Data Entry Form in Excel VBA
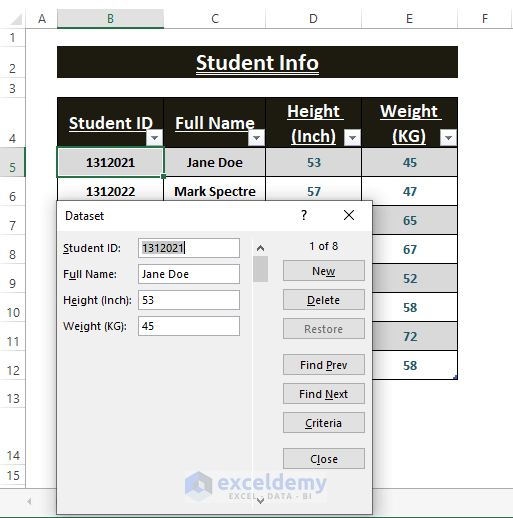
Step 3 – Parts of Autofill Form
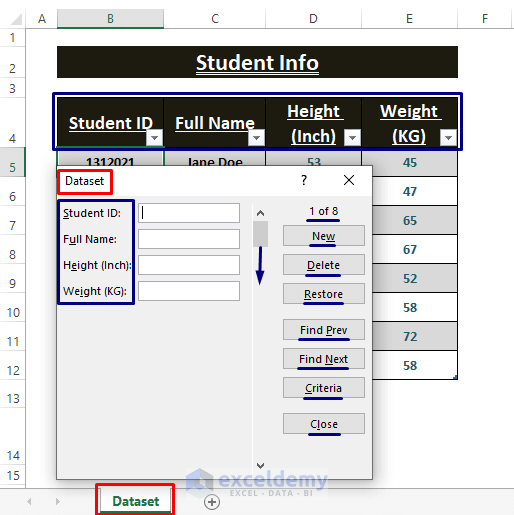
Entry boxes of an Autofill Form rely on the data Table. The Autofill Form incorporates all the Table headers as its entry boxes. The Keys of an Autofill Form are static. There are multiple keys within an Autofill Form. The keys do the basic operations such as adding new entries, deleting them, or going around the entries.
⏩ New: Users can add new entries by clicking on this key. After editing an existing entry users can add a new entry by clicking on it.
⏩ Delete: Clicking on this key deletes the loaded entry in the form.
⏩ Restore: While editing an existing entry, users can restore the previous entry in the form by clicking on it. Make sure not to apply New or press the Enter key.
⏩ Find Prev: Clicking on this key takes you to the previous entry.
⏩ Find Next: This key finds the next entry.
⏩ Criteria: To find a specific entry or record, users can use this key.
⏩ Close: This key closes the Autofill Form.
⏩ Scroll Bar: To move around up or down rows, move the scroll bar or click on the Up or Down arrow.
Step 4 – Creating an Autofill Form
After setting up all the data and getting familiar with the Autofill Form keys, you can create an Autofill Form.
Place the cursor on any cell and click on the newly added Form in quick access tool.

Excel brings up the Autofill Form with the selected entry. You can move around the entries to edit, check, or add new entries using the Autofill Form.
Related Articles
- How to Create an Excel Data Entry Form Without a UserForm
- How to Design Form in Excel
- How to Create an Excel Data Entry Form That Includes Checkboxes
- How to Make an Excel Spreadsheet Look Like a Form
- How to Populate an Excel Spreadsheet from a Web Form
- How to Create Data Entry Form with Drop Down List in Excel
- How to Make a Fillable Form in Excel
- How to Create a Printable Form in Excel
<< Go Back to Data Entry Form in Excel | Data Entry in Excel | Learn Excel
Get FREE Advanced Excel Exercises with Solutions!
