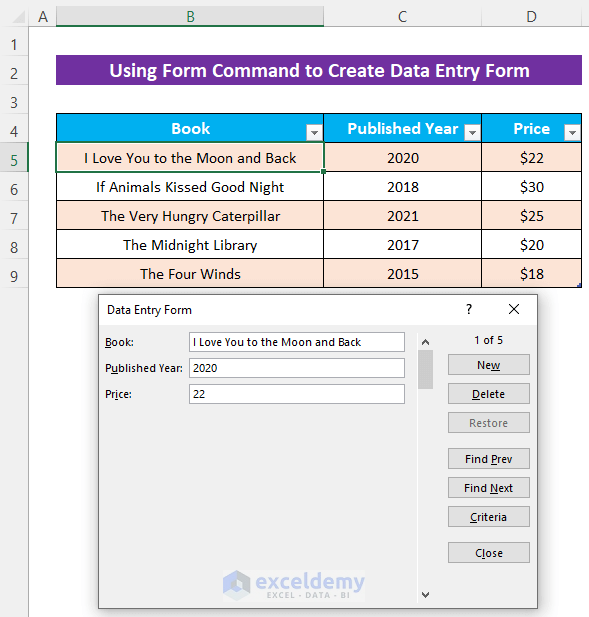
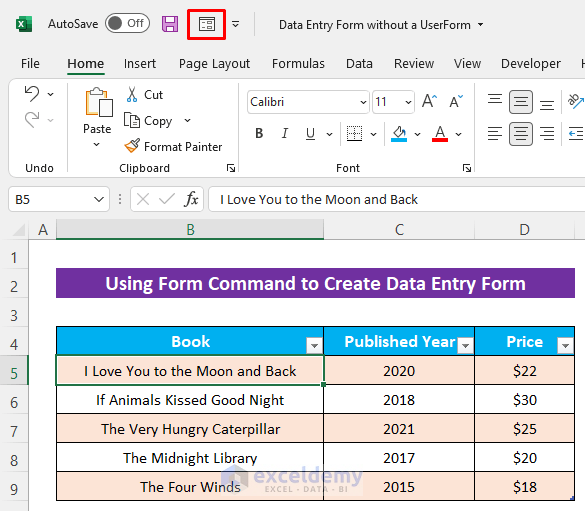
The following dataset contains some bestseller books, their published year, and prices. Using the Form command, we have created a data entry form.
Create an Excel Data Entry Form Without a UserForm: Step-by-step Procedure
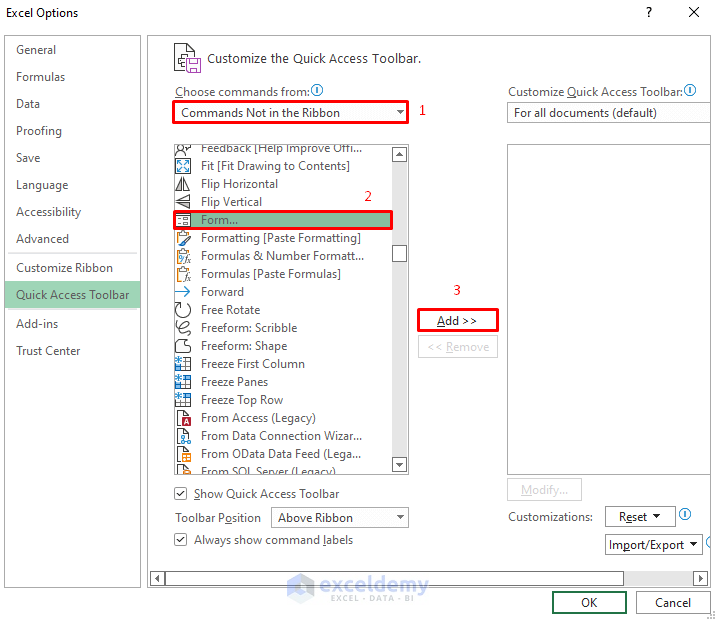
Step 1 – Insert the Form Command in the Quick Access Toolbar
- Click on the Customize Quick Access Toolbar icon on the top-left side of the Excel window.
- Select More Commands from the drop-down list.

- The Excel Options window will appear.
- In the Excel Options window:
- Go to the Quick Access Toolbar tab.
- Choose commands from field > Commands Not in the Ribbon.
- Then scroll down and select Form.
- Press the Add >> button.
- The Form command will be added accordingly. Press OK.
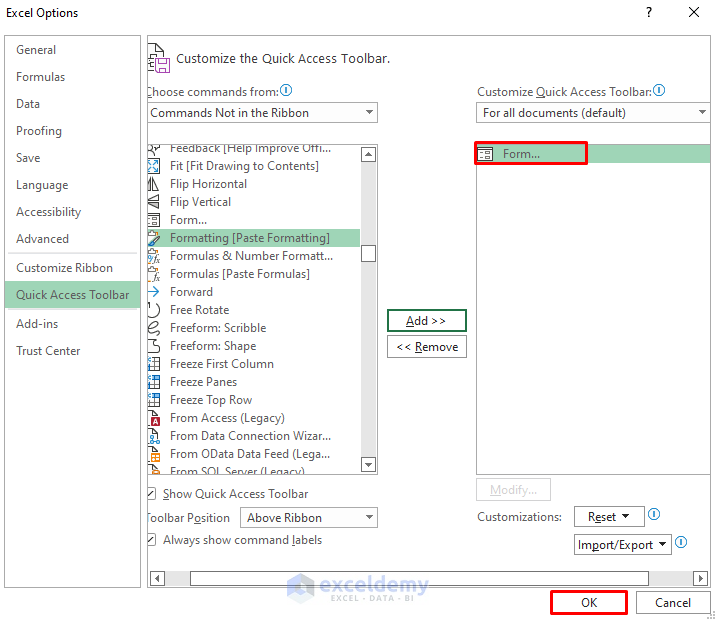
The Form command icon will be visible on the Quick Access Toolbar.

Step 2 – Create a Table
- Click any cell in the data range.
- Press Ctrl + T. The Create Table dialog box will appear.
- Recheck the data range.
- Check the box My table has headers.
- Press OK.
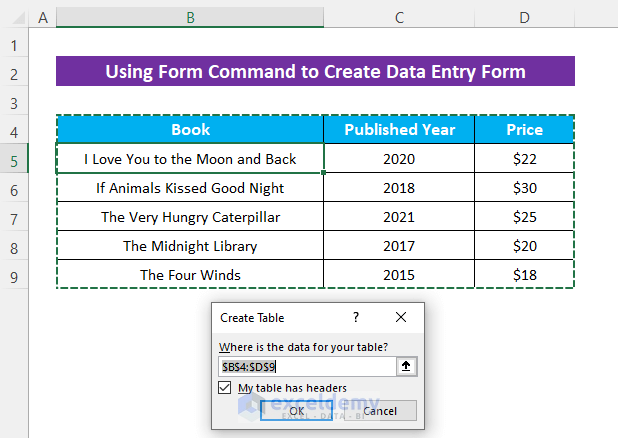
The data range will be converted to a table.

Read More: How to Create an Excel Data Entry Form That Includes Checkboxes
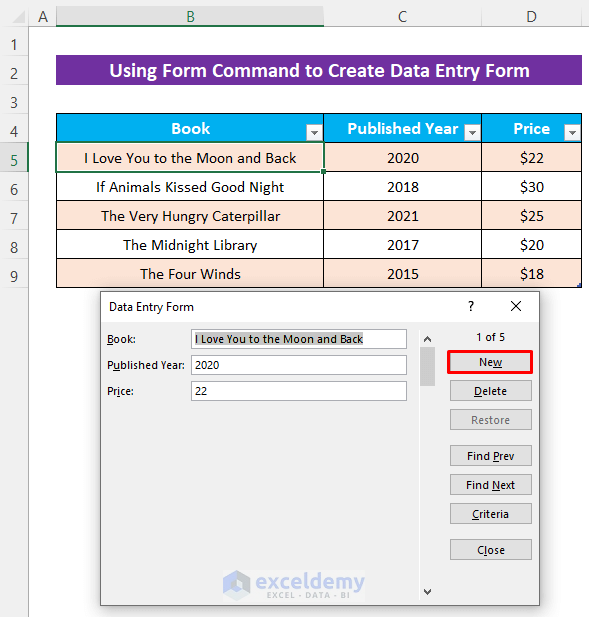
Step 3 – Use the Form Command to Create a Data Entry Form
- Select any data in the table.
- Click the Form command icon from the Quick Access Toolbar.
The Data Entry Form dialog box will appear, and the title of the dialog box will be the same as the sheet name.
Read More: How to Create Data Entry Form in Excel VBA
How to Use the Excel Data Entry Form
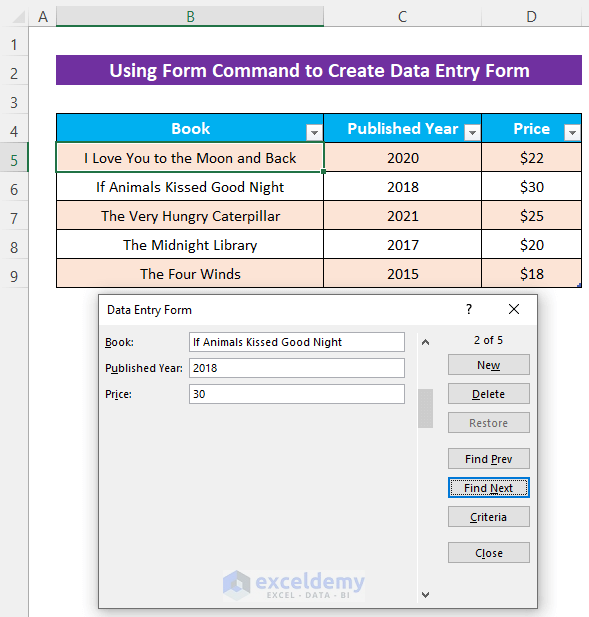
Navigate through Entries
- To move to the next entry, press the Find Next button.

It moved to the next entry.
 To go back to the previous entry, press the Find Prev button.

It goes back to the previous entry.

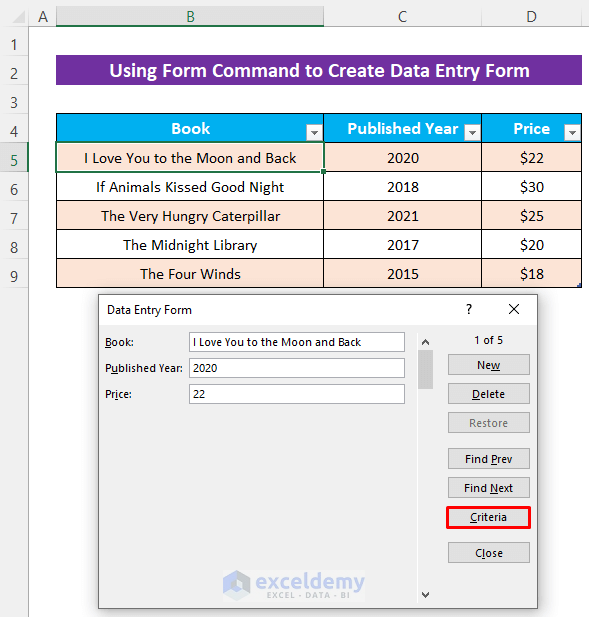
Search an Entry
- Click on the Criteria button.
All the fields will be empty.
- Type the keyword to search for in the desired field. Here, the keyword to search for is 2015 in the Published Year field.
- Press Enter.
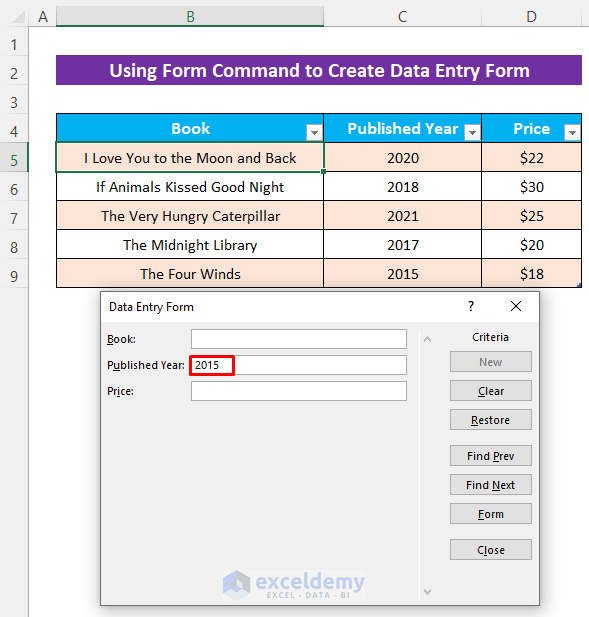
The Data Entry Form will return all the corresponding data matching the searched keyword. If there is more than one search result, you can navigate the result using the Find Next and Find Prev buttons.

Add New Entry
- Click on the New button.
- Add new data in all the fields and press Enter.

The newly inserted data will be added to the Excel table.

Edit an Entry
- Write the new data in the corresponding field. We wrote 2019 in the Publishing Year field of the first entry.
- Press Enter.
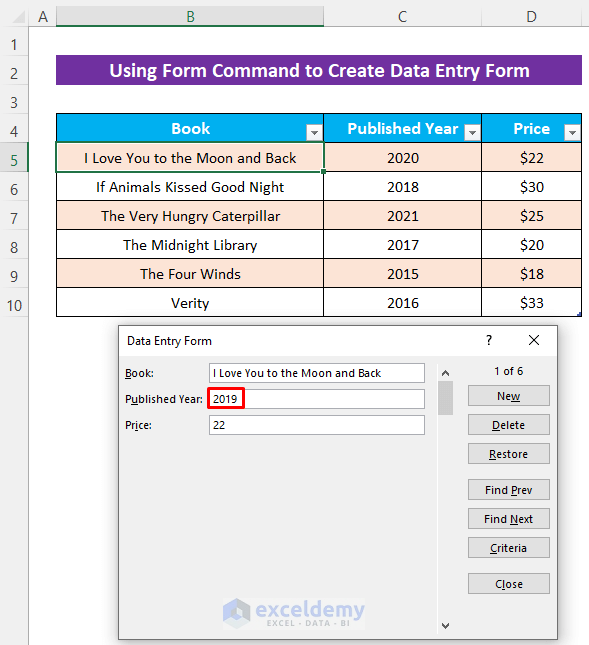
The data will be updated accordingly in the Excel Table.

Restore an Entry
To restore any entry in the Data Entry Form, click the Restore button.
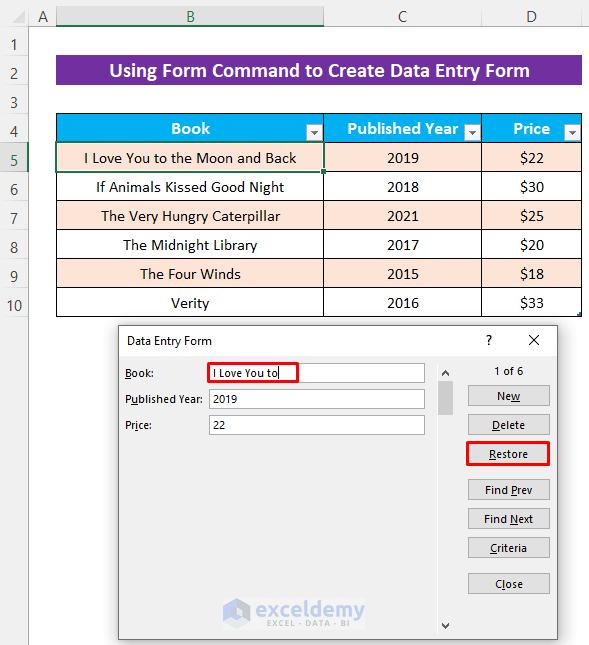
It will go back to the previous state.

Delete an Entry
- Navigate to the data that you want to delete.
- Click the Delete button.
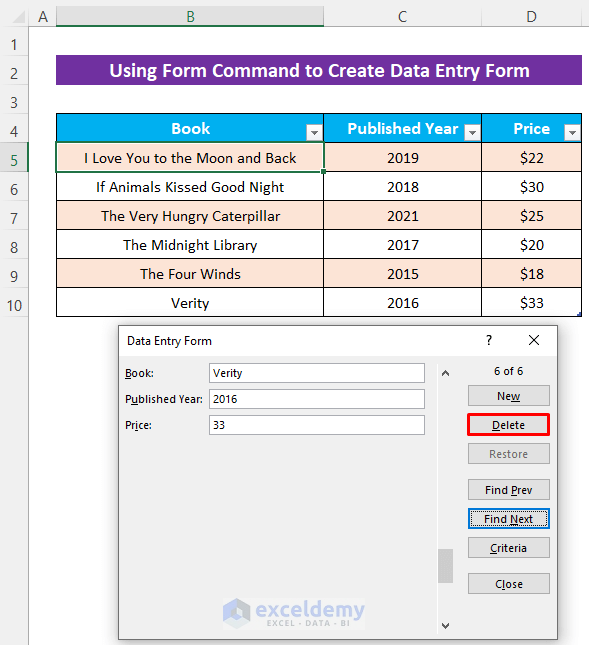
- A warning message box will appear.
- Press OK.
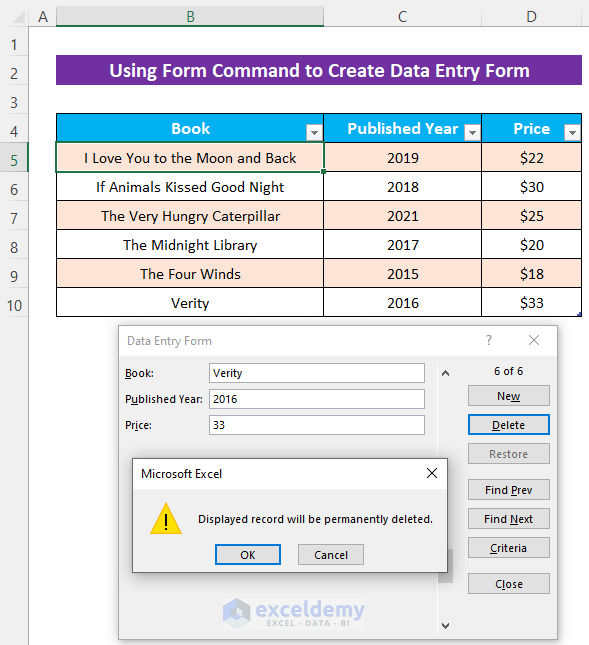
The selected data will be deleted from the Excel table as well.

Download the Practice Workbook
Frequently Asked Questions
Can I customize the data entry form created using the Form feature?
The Form feature has limited customization options. You can only customize the fields that correspond to the column headers in your Excel sheet. For more advanced customization, consider using UserForms or other Excel features.
How do I create a fillable form in Excel for data entry?
To create a fillable form in Excel for data entry:
- Make a quick Excel table.
- Add the Form command to the Excel ribbon.
- Enter form data.
- Restrict data entry based on conditions using the Data Validation feature.
Go to the Data tab > Data Tools group > Data Validation to open the feature. - Start collecting data.
Related Articles
- How to Populate an Excel Spreadsheet from a Web Form
- Create Data Entry Form with Drop Down List in Excel
- How to Make a Fillable Form in Excel
- How to Create Data Entry Form in Excel
- How to Create an Autofill Form in Excel
- How to Design Form in Excel
- How to Create a Printable Form in Excel
- Make an Excel Spreadsheet Look Like a Form
<< Go Back to Data Entry Form in Excel | Data Entry in Excel | Learn Excel
Get FREE Advanced Excel Exercises with Solutions!
