Step 1 – Change the Settings of the Workbook
- Open your workbook and go to the File tab.
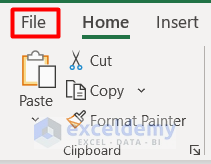
- Click on the Save As option.
- Select Excel Macro-Enabled Workbook as the file type.
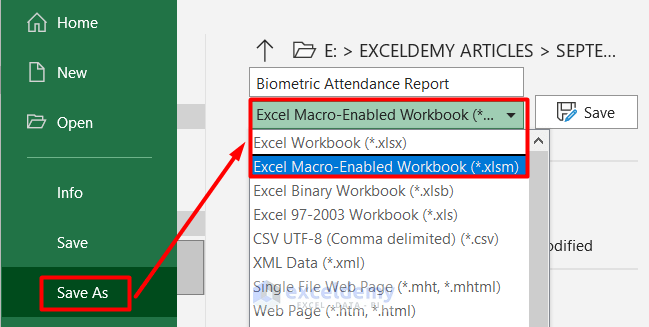
- Press Save.
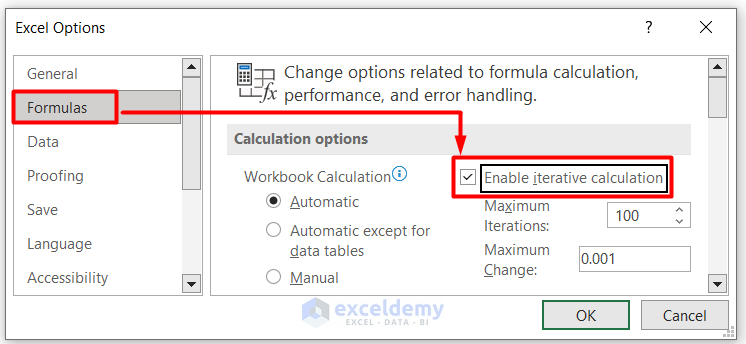
- Go to File and Options.

- Select the Formulas option in the Excel Options window.
- Check the Enable iterative calculation box.
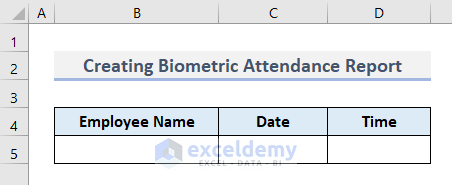
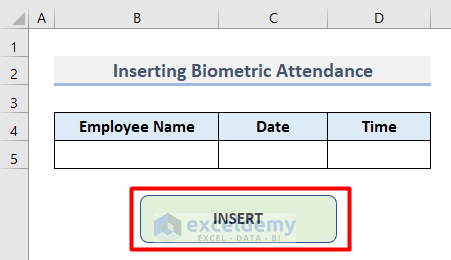
Step 2 – Prepare the Worksheets for Data Entry
- Create a worksheet to insert individual Biometric Attendance.

- Create another worksheet to make the overall Biometric Attendance Report.
Read More: How to Create Employee Attendance Sheet with Time in Excel
Step 3 – Insert Formula for Date and Time Entry
- Select cell C5 and insert this formula.
=IF(B5<>””,IF(C5<>””,C5,NOW()),””)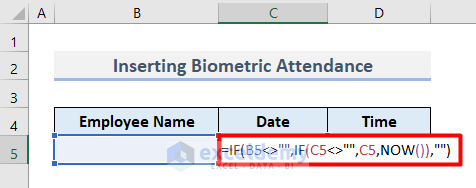
- Press Enter.
- Use the Autofill tool to put the formula in cell D5.
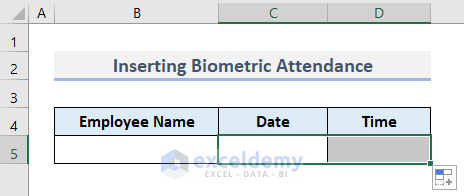
- Type any Employee Name in cell B5.
- You will see that the Date and Time values are automatically generated in the adjacent cells.
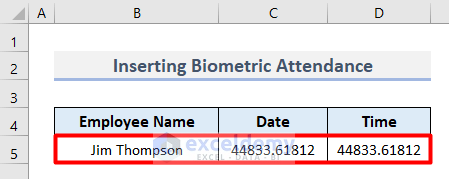
We applied the IF function to determine a condition for cell B5. According to the condition, we will have the present date and time in cells C5 and D5 with the help of the NOW function.
Read More: Attendance Sheet in Excel with Formula for Half Day
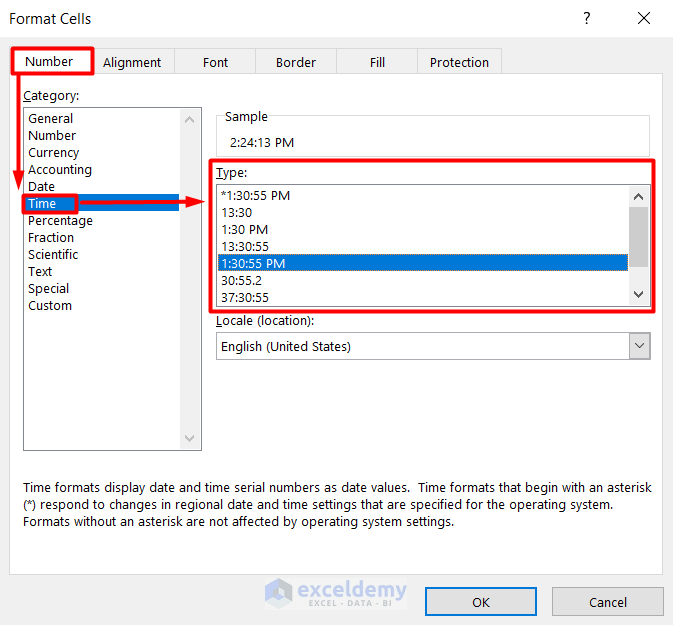
Step 4 – Format the Cells for the Date and Time Entry
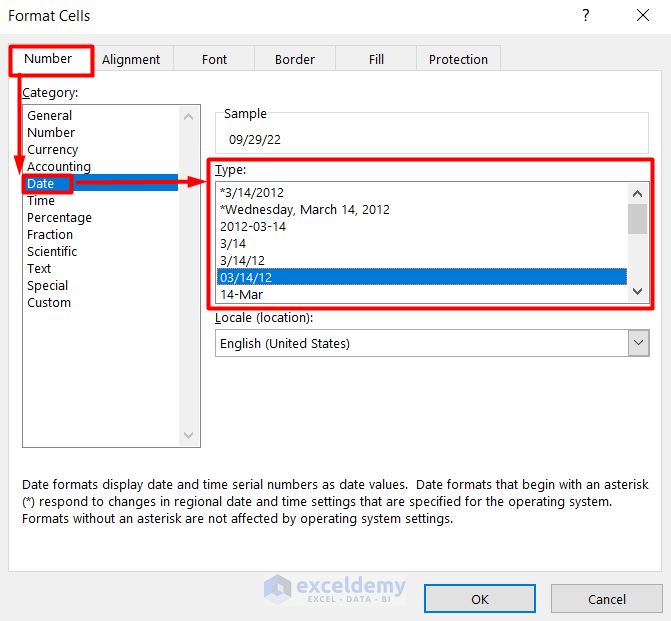
- Right-click on cell C5 and select Format Cells from the Context Menu.

- You will see the Format Cells dialogue box.
- Select Date from the Category list.
- Choose any Type for the date format as shown below.
- Set the Time format accordingly.
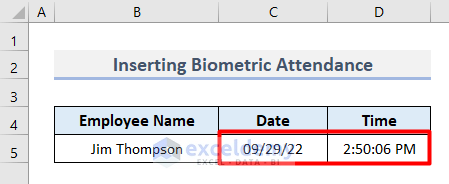
- You will get the information in the individual Biometric Attendance sheet in the correct format.
Read More: How to Create Attendance Sheet with Time in and Out in Excel
Step 5 – Record a Macro and Transfer the Data to the Attendance Report Sheet
- Select the first worksheet for individual Biometric Attendance.
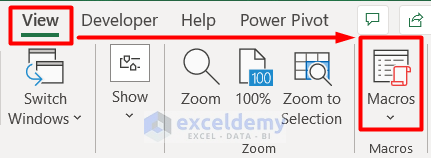
- Go to the View tab and click on the Macros icon.
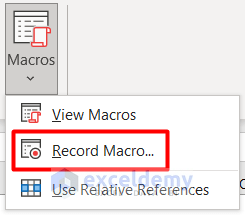
- Select Record Macro from the drop-down menu.
- You will see the Record Macro window.
- Insert the Macro name according to your preference.
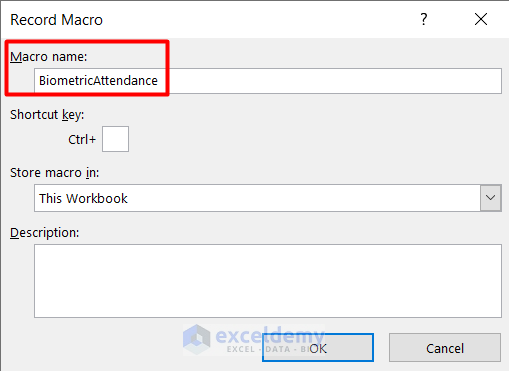
- Press OK.
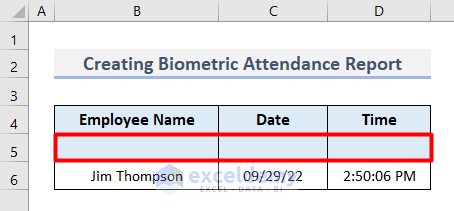
- Select cell range B5:D5 and press Ctrl + C to copy it.
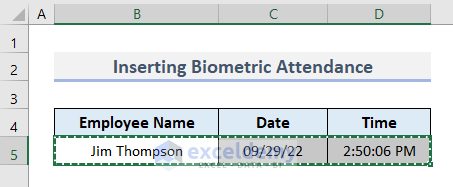
- Go to the second sheet and right-click on cell B5.
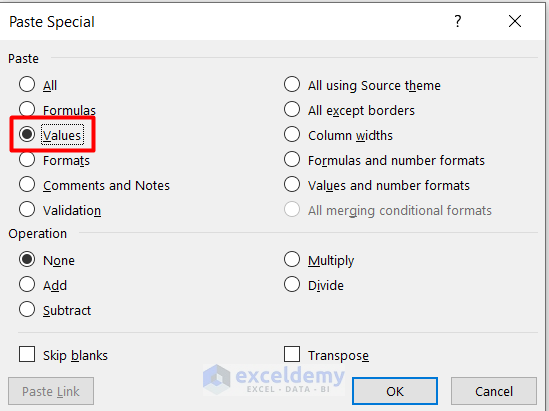
- Select Paste Special from the Context Menu.

- Select Values in the Paste Special window and press OK.
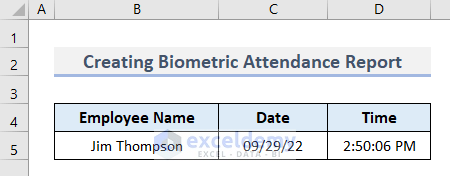
- Change the Date and Time format as in step 4 to see the output below.
- Go to the Home tab and select Insert from the Cells group.
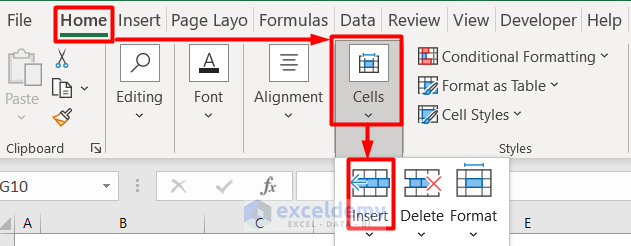
- You will see a new row before the previous one.
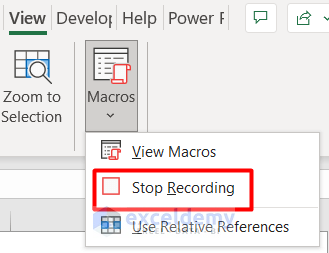
- Go to View and Macros again and press Stop Recording.
Step 6 – Create an Insert Button in the Biometric Attendance Sheet
- Go to the Insert tab and click on Shapes from the Illustrations group.
- Select any shape.

- You will see the selected shape shown on the Biometric Attendance worksheet.
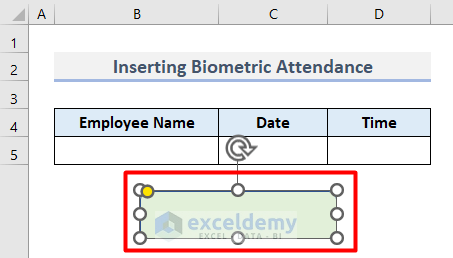
- Type any name that you want to place for the button. We put INSERT as the button name.
- Right-click on it and select Assign Macro.
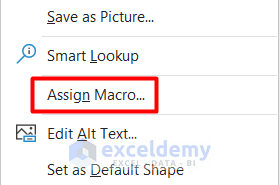
- Select the Macro name set in step 5.
- Press OK to close the Assign Macro window.

Step 7 – Insert Continuous Data
- Insert the Employee Name in cell B5.
- This will automatically generate the Date and Time.

- Press the INSERT button.
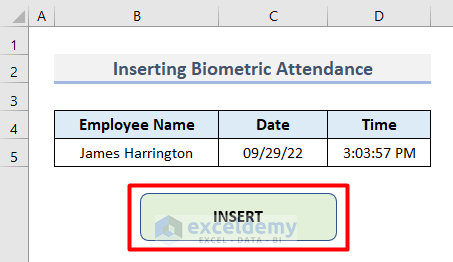
- You will see the data is moved to the Biometric Attendance Report sheet.
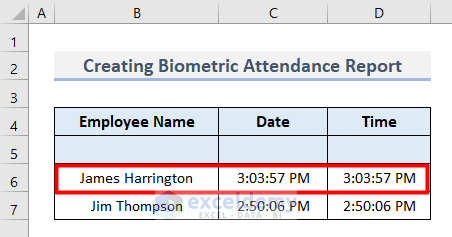
- Every employee can input their in and out time in Excel.
Download the Practice Workbook
Related Articles
- Attendance and Overtime Calculation Sheet in Excel
- How to Create Monthly Attendance Sheet in Excel with Formula
- how to Prepare a Meeting Attendance Sheet in Excel
- Labour Attendance Sheet Format in Excel
- How to Create a Monthly Staff Attendance Sheet in Excel
- How to Create Training Attendance Sheet in Excel
<< Go Back to Employee Attendance Sheet Excel | Excel HR Templates | Excel Templates
Get FREE Advanced Excel Exercises with Solutions!
