This article illustrates how to automate consolidation in Excel. You can consolidate data from different worksheets or files in Excel. Data consolidation using Excel is very useful to accumulate data, create sales reports, and so on. It is necessary to automate consolidation in Excel to update the consolidated data automatically when the source data changes. Follow the article to learn how to do that in Excel.
How to Automate Consolidation in Excel: with Easy Steps
Follow the steps below to automate data consolidation in Excel:
📌 Step 1: Prepare Source Data
- Assume you have the following dataset. Here, the worksheets Y2021 and Y2022 contain the sales of the first quarter of the respective years.
- If the top row and left column are the same across all sheets, then the values will be added to the same cells. Otherwise, the data will be added to the adjacent rows or columns.
- Here, the worksheets are in the same workbook (Automate Consolidation). It is better to open all spreadsheets before data consolidation if you want to do that from different files.

📌 Step 2: Use the Consolidate Feature
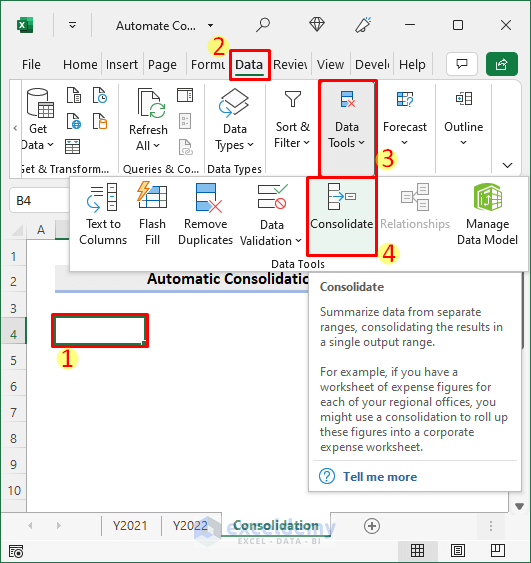
- Now select the cell where you want to consolidate data from multiple ranges. Then select Consolidate in the Data Tools group from the Data tab as shown in the picture below.
📌 Step 3: Choose Function & Add References
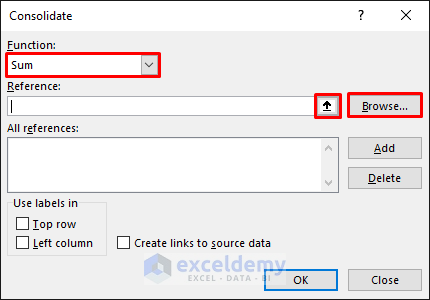
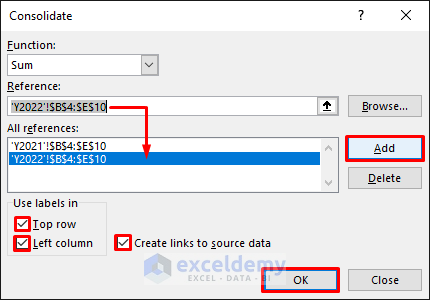
- Next, choose the function for consolidation from the dropdown list. After that, click on the upward arrow to add the references for the source data to consolidate.
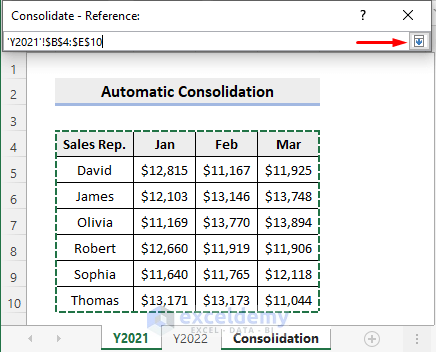
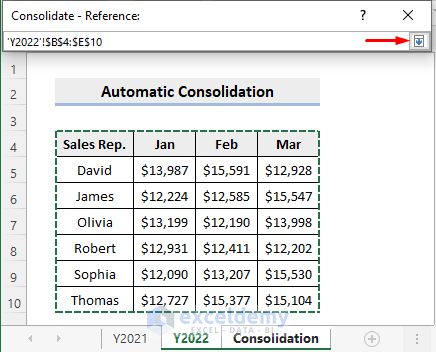
- Then go to the first source data (Y2021) and select the range within the data that you want to consolidate. Next, click on the downward arrow.
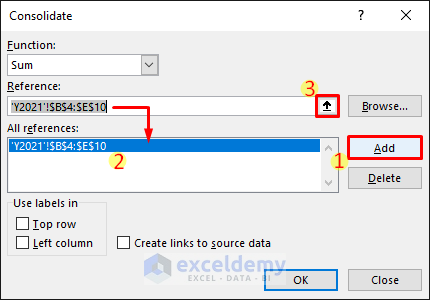
- Now, you must click on the Add button to add the reference. Then, click on the upward arrow again to add more references.
- After that, go to the second source of data (Y2022). Then, select the range within the data that you want to consolidate, as in the earlier method. Next, click on the downward arrow.
📌 Step 4: Automate Consolidation
- After that, click on the Add button as earlier to add this reference. You will see a list of the added references in the Consolidate dialog box.
- Then you need to check the checkboxes for the Top Row and the Left column labels. You can keep them unchecked if your dataset has no labels.
- Now the most important thing to automate consolidation is to check the “Create links to source data” Otherwise, the consolidated data won’t get updated if the source data changes.
- After that, press the OK button.
📌 Step 5: Observe the Results
- Finally, you will see the following results. Notice that some groups have been created automatically, as there are some + signs at the left.
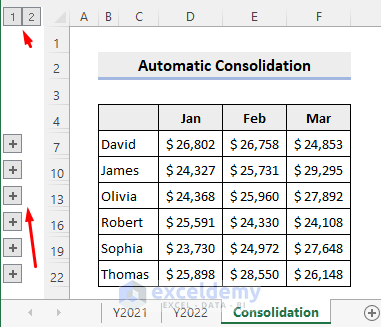
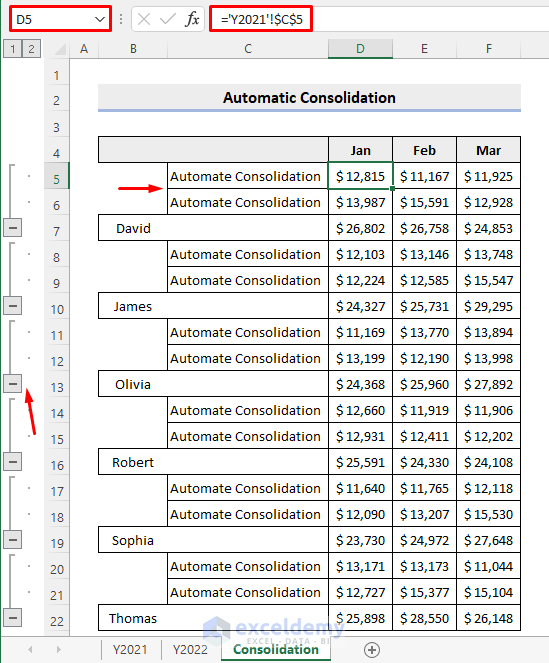
- Expand the groups to see the source data and their locations. Now, any changes made in the source data will automatically update the consolidated data. Because you can see that the consolidated data is directly linked to the source data.
Things to Remember
- You must check the “Create links to source data” checkbox to automatically update the consolidated data with any changes made to the source data.
- If you need to add more rows or columns to the source data in the future, then add the labels for those rows and columns before consolidation. Then, populate the cells in the respective rows and columns with zeros. If you update those cells containing zeros in the future, the consolidated data will also update.
Download Practice Workbook
You can download the practice workbook from the download button below.
Conclusion
Now you know how to automate consolidation in Excel. Do you have any further queries or suggestions? Please let us know in the comment section below.
<< Go Back To Consolidation in Excel | Merge Sheets in Excel | Merge in Excel | Learn Excel
Get FREE Advanced Excel Exercises with Solutions!
