For transposing rows to columns in Excel, there are many ways but we can do it smartly with lots of customization using VBA. From this article, we’ll learn 4 useful examples to transpose rows to columns using Excel VBA with simple steps and clear images.
4 Examples to Transpose Rows to Columns Using Excel VBA
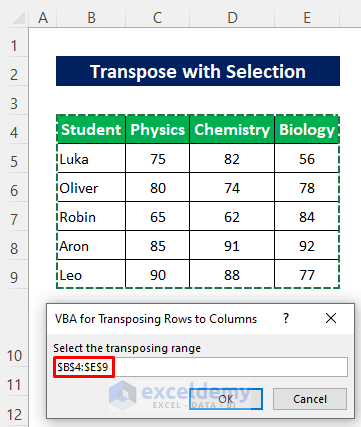
To demonstrate the examples, we’ll use the following dataset that represents 5 students’ obtained marks out of 100 in 3 subjects.
![]()
1. Use VBA Transpose Function in Excel to Transpose Rows to Columns
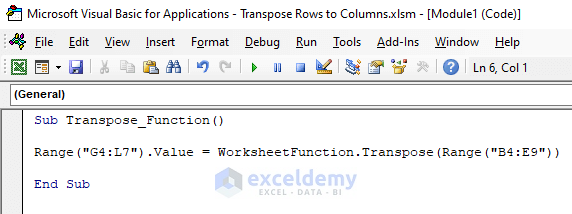
In our very first example, we’ll use the Transpose function of VBA to transpose rows to columns. Here, we’ll need to set the source range and destination range in the codes.
Steps:

- Then type the following codes in the module-
Sub Transpose_Function()
Range("G4:L7").Value = WorksheetFunction.Transpose(Range("B4:E9"))
End Sub- After that, go back to the sheet.
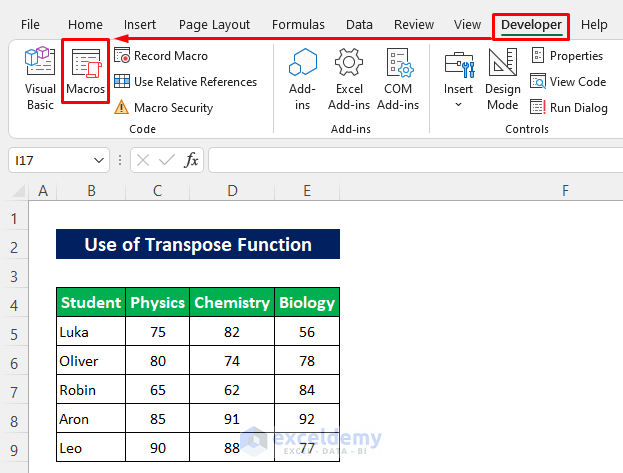
- After appearing the Macros dialog box, select the specified Macro name and press Run.
![]()
Here’s the transposed data in the destination range G4:L7. This macro can’t keep the formats.
![]()
Read More: Excel VBA: Transpose Multiple Rows in Group to Columns
2. Use of VBA PasteSpecial in Excel to Transpose Rows to Columns
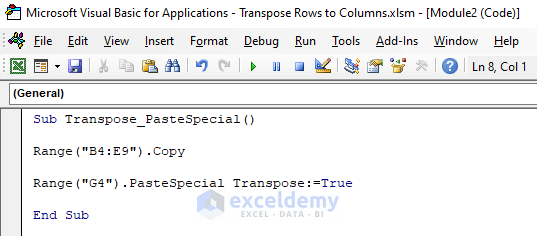
Now we’ll use the Paste Special method in Excel VBA to do the task. This macro will also need the defined range. It will be able to keep the whole format.
Steps:
- Follow the first two steps from the first example to open the VBA window and insert a new module.
- Later, write the following codes–
Sub Transpose_PasteSpecial()
Range("B4:E9").Copy
Range("G4").PasteSpecial Transpose:=True
End Sub- Then go back to your sheet.
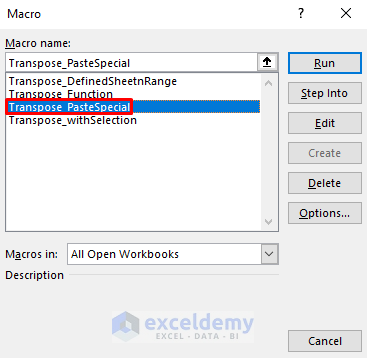
- Next, follow the fourth step from the first example to open the Macros dialog box.
- Then just select the Macro name and press Run.
Soon after, you will get the output including formats in the destination range like the image below.
![]()
Read More: How to Transpose in Excel VBA
3. Transpose Rows to Columns with Defined Sheet and Range Using VBA
The previous Macros were working in the active sheet. In this example, we’ll use a Macro that will work on a defined sheet and defined range. But it won’t be able to keep the formats.
Steps:
- First, follow the first two steps from the first example to open the VBA window and insert a new module.
- Next, write the following codes–
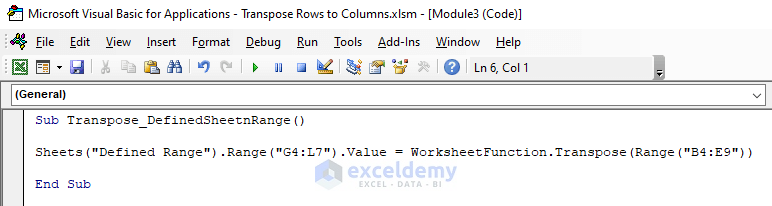
Sub Transpose_DefinedSheetnRange()
Sheets("Defined Range").Range("G4:L7").Value = WorksheetFunction.Transpose(Range("B4:E9"))
End Sub- After that go back to your sheet.
- Later, follow the fourth step from the first example for opening the Macros dialog box.
- Finally, just select the Macro name and then press Run.

Now see, the Macro has transposed the data properly excluding formats.
![]()
Read More: VBA to Transpose Multiple Columns into Rows in Excel
4. Transpose Rows to Columns By Selecting Range After Running the Macro
Here, we’ll transpose rows to columns by using VBA differently. First, we’ll run the Macro then we’ll select the source range and destination range. It is more user-friendly than the previous examples.
Steps:
- Open the VBA window and insert a new module by following the first two steps from the first example.
- Then type the following codes–
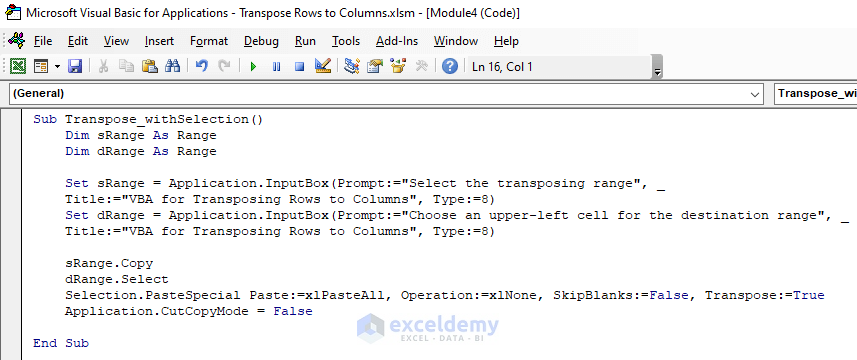
Sub Transpose_withSelection()
Dim sRange As Range
Dim dRange As Range
Set sRange = Application.InputBox(Prompt:="Select the transposing range", _
Title:="VBA for Transposing Rows to Columns", Type:=8)
Set dRange = Application.InputBox(Prompt:="Choose an upper-left cell for the destination range", _
Title:="VBA for Transposing Rows to Columns", Type:=8)
sRange.Copy
dRange.Select
Selection.PasteSpecial Paste:=xlPasteAll, Operation:=xlNone, SkipBlanks:=False, Transpose:=True
Application.CutCopyMode = False
End Sub- Later, go back to the sheet.
Code Breakdown
- First, I created a Sub procedure Transpose_withSelection.
- Then defined two variables- sRange and dRange as Range.
- Next, I used InputBox to set the operation name for the input box.
- And used Title to define the title for the input boxes.
- Finally, applied PasteSpecial to paste the selected data in transposed form.
- After that follow the fourth step from the first example to open the Macros dialog box.
- Then just press Run after selecting the Macro name.
Soon after, you will get an input box to select the source range.

- Select the source range and press OK.
Next, you will get another Input box to set the cell from where the output will start.
- Select the cell and press OK.
![]()
Then you will get the transposed data including the formats as shown in the image below.
![]()
Read More: VBA to Transpose Array in Excel
Download Practice Workbook
You can download the free Excel template from here and practice on your own.
Conclusion
I hope the procedures described above will be good enough to transpose rows to columns using Excel VBA. Feel free to ask any question in the comment section and please give me feedback.
Related Articles
- How to Transpose Every n Rows to Columns in Excel
- Convert Columns to Rows in Excel Using Power Query
- How to Convert Columns to Rows in Excel Based On Cell Value
- How to Convert Column to Comma Separated List With Single Quotes
- Conditional Transpose in Excel
- How to Transpose Columns to Rows In Excel
- How to Transpose in Excel

