Excel treats an inserted object floating over the worksheet. Sometimes it is okay for demonstrations. But in some cases, you may need to associate one with a cell i.e. your object needs to move or resize when the cell is moved or resized. Excel has the property to do so. In this article, I am going to show you how to move and size objects with Cells in Excel with examples.
How to Move and Size with Cells in Excel: 3 Examples
To move and size objects with cells, in Excel there is a property called Move and size with cells. Checking this option is the primary method to achieve such a result. Here, in this tutorial, I will show you how to use this method in different scenarios- for pictures, checkboxes, and shapes. Follow along to see each case, or find the one you need from the table of contents above.
1. Move and Size Pictures with Cells in Excel
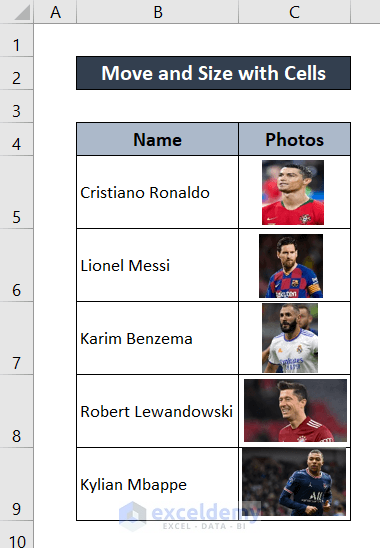
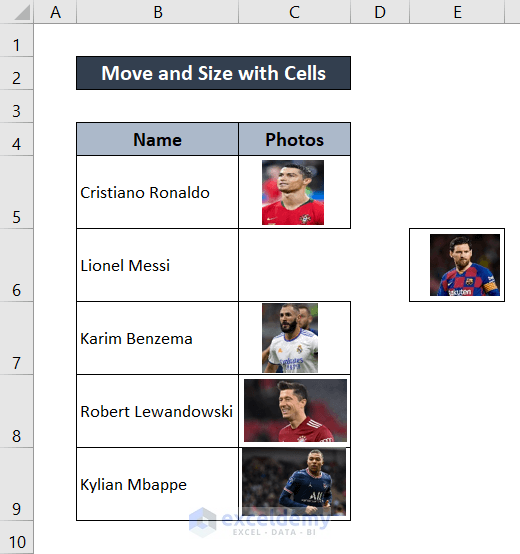
Let’s take a dataset with pictures included in cells. I have taken the following dataset with soccer players with their photos in them.
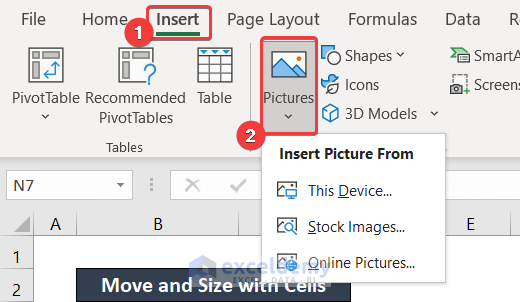
First of all, if you need to know how to insert images into cells go to the Insert tab. Click on Pictures and select the source and picture you want to add.
But added pictures may not move or size when the cell is moved or resized.
To enable the feature where the pictures move if the cell is moved or be smaller or larger when the cell dimensions are changed, follow these steps.
Steps:
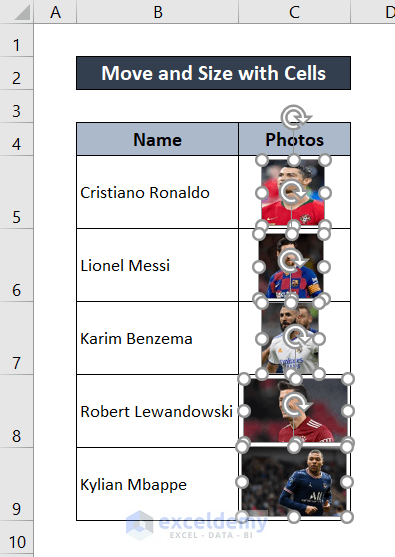
- First, select all the images which you want to situate with the cell.
- Then right-click on one and in the context menu select Format Objects. Doing so, a Format Picture window will pop up.
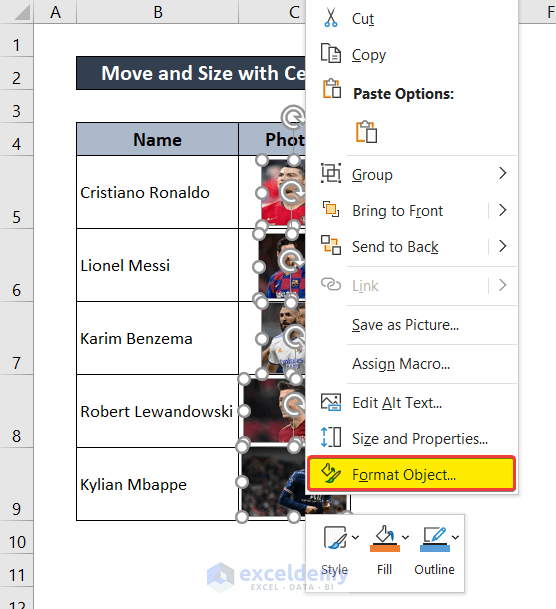
- In the Format Picture window, go to the Size & Properties tab and select Properties in it.
- Under the Properties options, check the Move and size with cells option.

- After that, close the window and you will have your objects move and size with cells in an Excel spreadsheet.
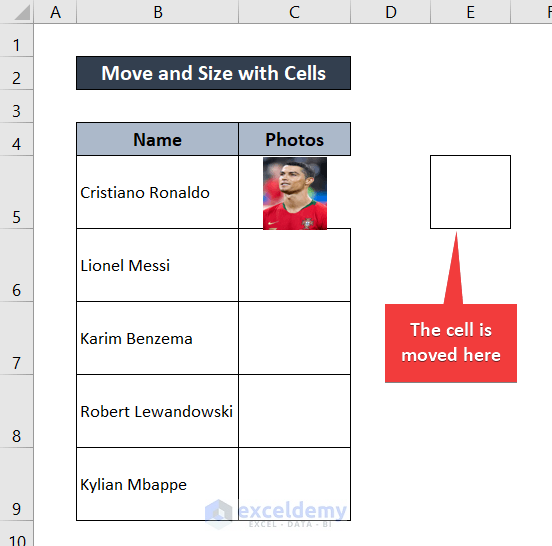
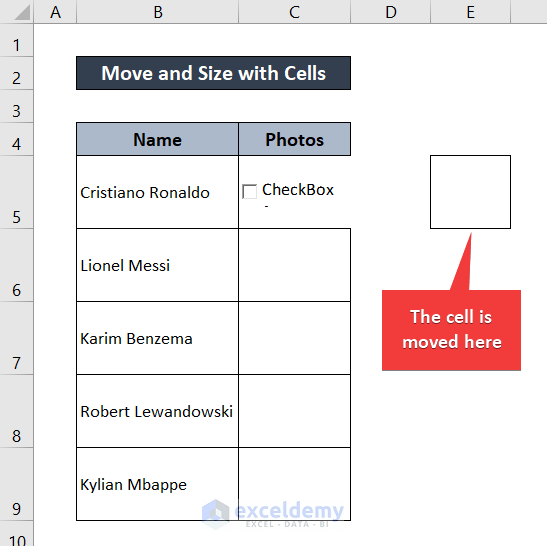
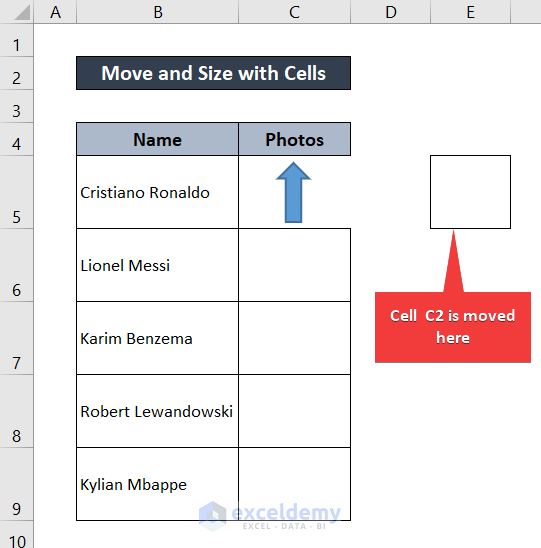
Now you can try moving a particular cell, the image will move with it. I am moving cell C6 by clicking and dragging.
2. Move and Size Checkboxes with Cells in Excel
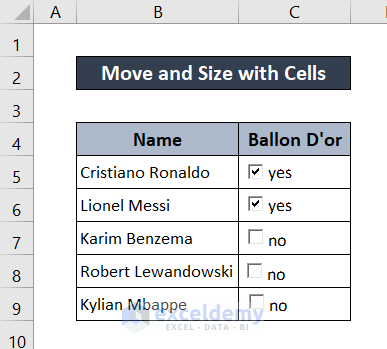
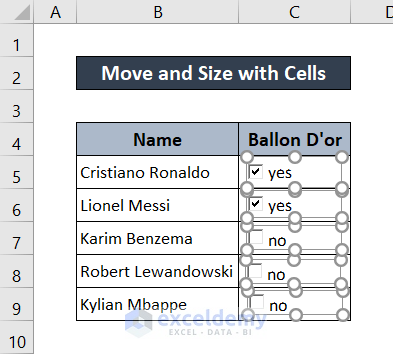
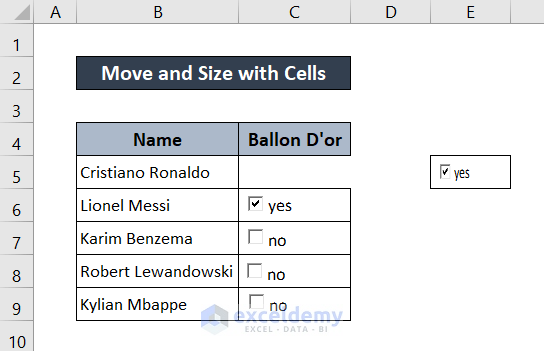
You can associate checkboxes with cells too to move and size with cells in Excel. For demonstration, I am using the dataset below.
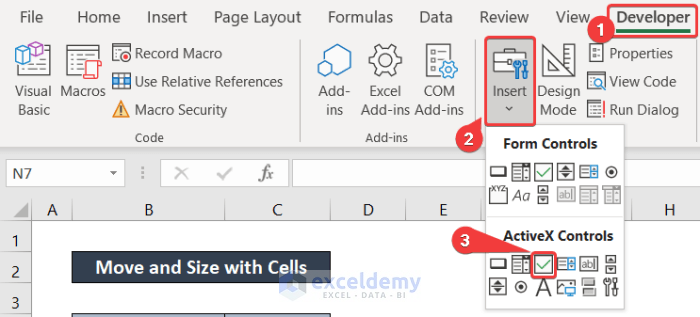
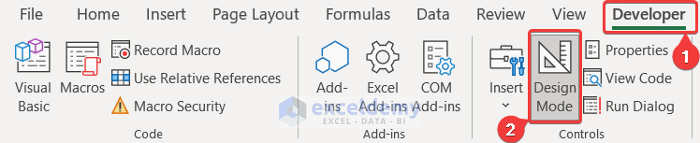
If you don’t know how to add a checkbox, go to the Developer tab on your ribbon. Then go to Controls > Insert and select the checkbox under ActiveX Controls.
But the checkboxes may not move or size with the cell after you have moved or resized the cell.
It contains whether the soccer players had won the Ballon D’or trophy or not. I have used checkboxes to indicate such results. To learn how checkboxes move and size with cells in Excel follow these steps.
Steps:
- First, make sure the checkboxes are in Design Mode.
- Then select all the checkboxes you want to associate with particular cells.
- Now right-click on one and select Format Object from the context menu.
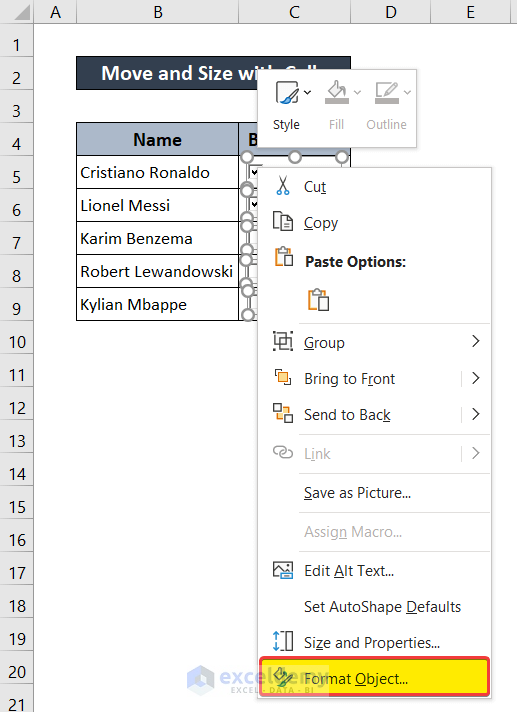
- A Format Control box will appear. In it, go to the Properties tab, and under Object positioning, select the Move and Size with cells option.

- Finally, click on OK.
The checkboxes will now move and size with cells when it is moved or reshaped.
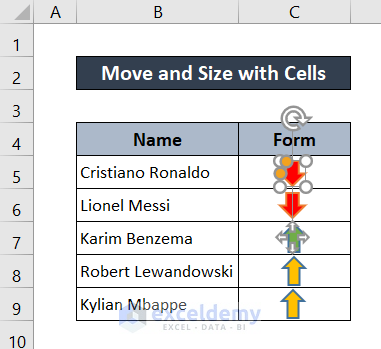
3. Move and Size Shapes with Cells in Excel
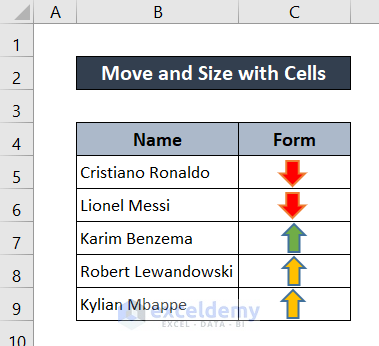
You can also move and size shapes with cells. Let’s take a dataset containing different shapes like the one below.
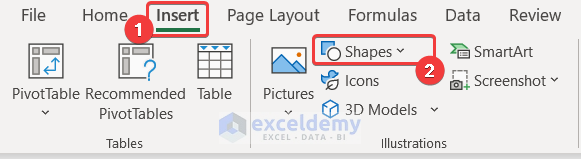
If you don’t know how to add arrows/shapes, then from your ribbon go to the Insert tab. Then click on Shapes and select the shape you want to insert.
But shapes inserted this way may not move or size when the cell is moved or resized.
To associate these shapes with the cells so that you can move and size with cells in Excel, you need to follow these steps.
Steps:
- First, select the shapes you want to move and size with cells. I have selected the one in cell C5 for demonstration.
- Then right-click on the shape and select Format Shape from the context menu.
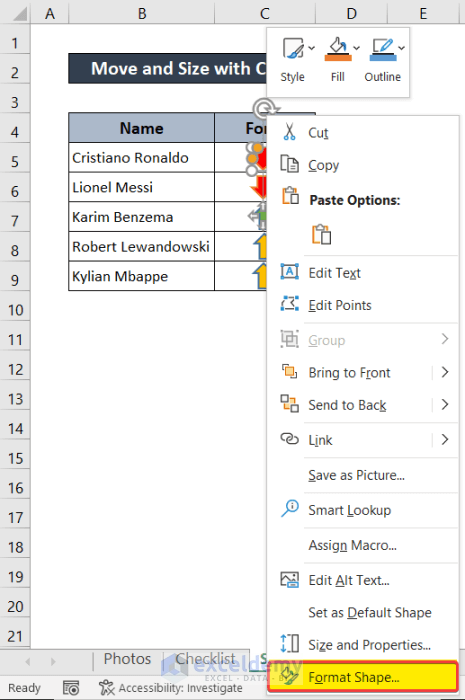
- In the Format Shape window, go to the Size & Properties tab.
- Under Properties, check the Move and Size with cells option.
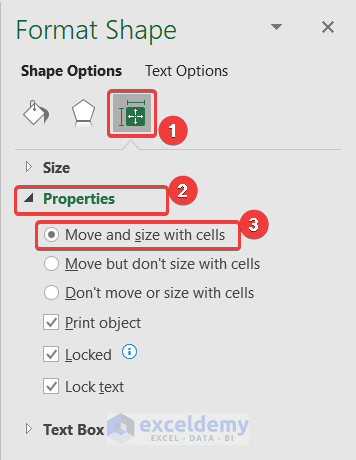
- After that close the window.
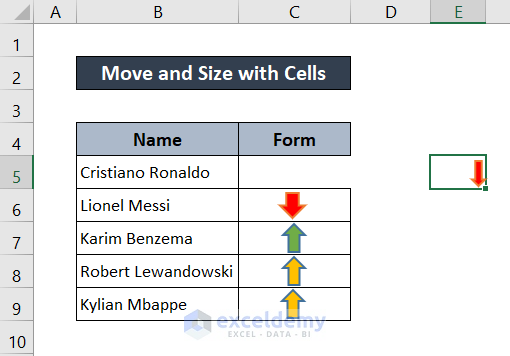
You are done formatting the shape to move and size with cells in Excel. You can repeat the process for as many shapes as you want. Now the shapes with the move and resize if you move the cell or resize it.
Read More: How to Move Cells without Replacing in Excel
Move and Size with Cells Not Working in Excel
There is a common problem you can run into while formatting checkboxes to move and size in Excel- you may find the Move and size with cells option in the Format Control box greyed out.
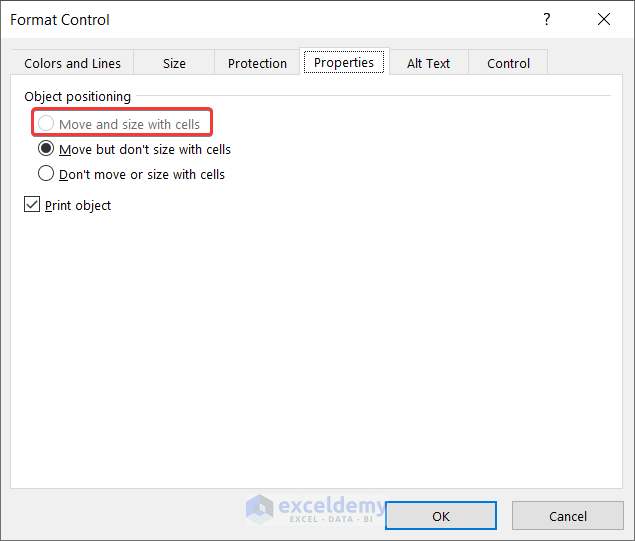
This may usually occur when you insert Check Box(Form Control) instead of Check Box (ActiveX Control) while you insert it from the Developer tab. To insert the correct type of checkbox so that you can format it to move and size with cells, you need to select it from the selected option in the picture (under the ActiveX Controls).
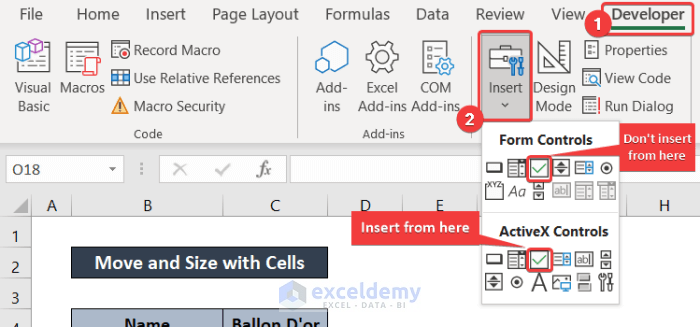
If you select checkboxes from here, you can have the format option to move and size with cells.
Read More: [Fixed!] Unable to Move Cells in Excel
Download Practice Workbook
You can download the workbook used for this demonstration with different datasheets included in different spreadsheets below. Download and try it yourself while you go through the steps.
Conclusion
These were the different scenarios where you can format content to move and size with cells in Excel, including a common possible error. Hope you have found this article helpful and informative. If you have any questions or suggestions, let us know down below.
Related Articles
- How to Move Cells in Excel with Arrow Keys
- How to Move Cells with Keyboard in Excel
- How to Move Filtered Cells in Excel
- How to Move Highlighted Cells in Excel
- How to Move a Group of Cells in Excel
- How to Use the Arrows to Move Screen Not Cell in Excel
- How to Make Excel Move Automatically to the Next Cell
<< Go Back to Move Cells | Excel Cells | Learn Excel
Get FREE Advanced Excel Exercises with Solutions!
