Method 1 – Print Workbook to PDF & Save File Name Automatically in Excel
In this example we will print the whole workbook and save the file name as the name on our code.
STEPS:
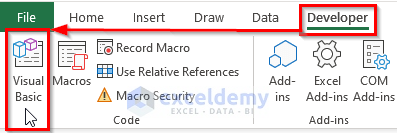
- Go to the Developer tab from the ribbon.
- Click on Visual Basic to open the Visual Basic Editor, or press Alt + F11 to open the Visual Basic Editor.
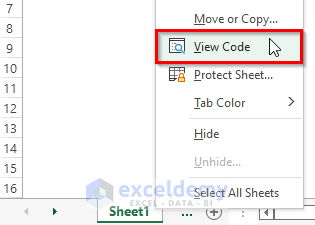
- Alternatively right-click on the worksheet and go to View Code.
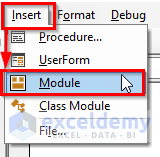
- Click on Insert and select Module from the drop-down menu bar.
- Copy and paste the VBA code shown below.
VBA Code:
Sub Print_Workbook()
Dim loc As String
loc = "E:\Workbook.pdf"
ActiveWorkbook.ExportAsFixedFormat Type:=xlTypePDF, _
filename:=loc
End Sub- Run the code by pressing the F5 key.
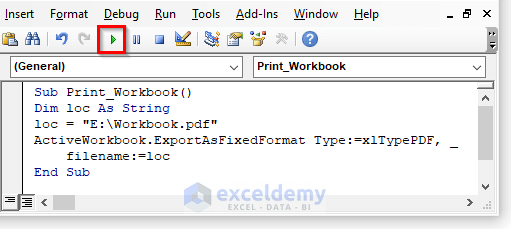
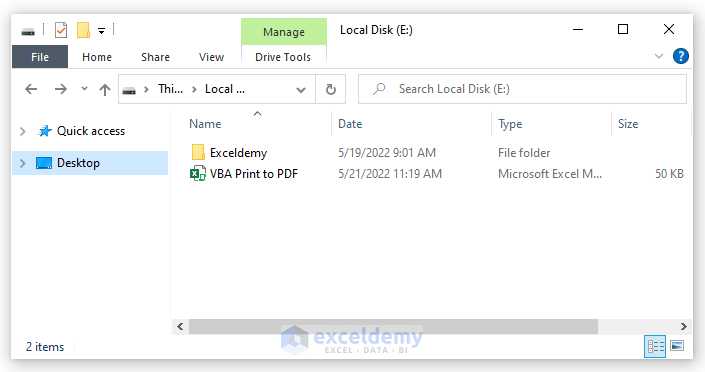
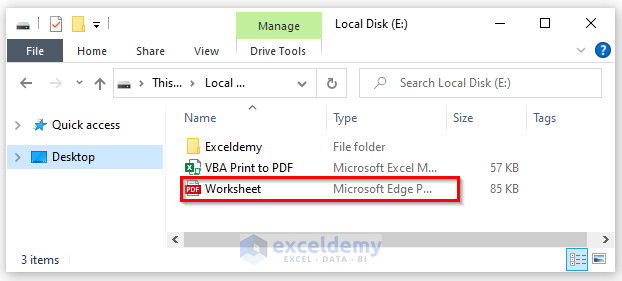
- The PDF with the name Workbook is now located in the local drive.
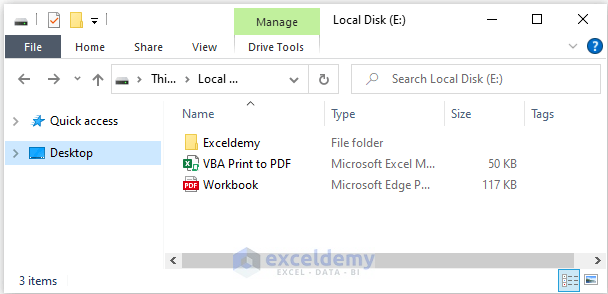
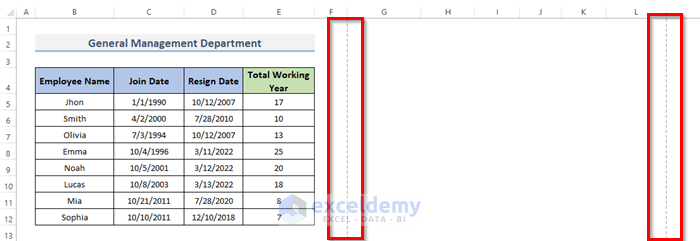
- Dotted lines are visible in the workbook because the file is now ready for printing.
VBA Code Explanation
Sub Print_Workbook()Sub is part of the code that will not return any value. It is also known as subprocedure. So we name our procedure Print_Workbook().
loc = "E:\Workbook.pdf" This line is to select the location and the pdf file name. Here, we save our file in E: on our computer and name the file Workbook.
ActiveWorkbook.ExportAsFixedFormat Type:=xlTypePDF, filename:=locThis line of code is for exporting the excel file as PDF and making it ready for print.
End SubThis will end the procedure.
Method 2 – Save Active Worksheet Automatically as PDF
STEPS:
- Go to the Developer tab from the ribbon.
- Click on Visual Basic to open the Visual Basic Editor.
- Go to Insert and select Module from the drop-down menu.
- Copy and paste the VBA code below.
VBA Code:
Sub Print_Sheet()
Dim loc As String
loc = "E:\Worksheet.pdf"
ActiveSheet.ExportAsFixedFormat Type:=xlTypePDF, _
filename:=loc
End Sub- Press the F5 key or click on the Run Sub button to run the code.
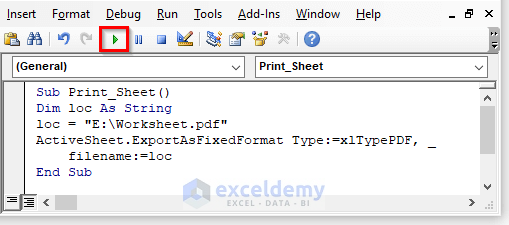
- The file has been saved as a PDF with the automatic file name.
Method 3 – Print PDF File from Excel with VBA in Range
STEPS:
- Click the Developer tab on the ribbon.
- Select Insert and then Module from the drop-down box.
- Enter the following code there.
VBA Code:
Sub PrntPDF()
ActiveWindow.SelectedSheets.PrintOut Copies:=1, _
Collate:=True, ActivePrinter:="Adobe PDF"
Dim fnam As String
fnam = Range("B4").Value
End Sub- Press the F5 key to run the code.
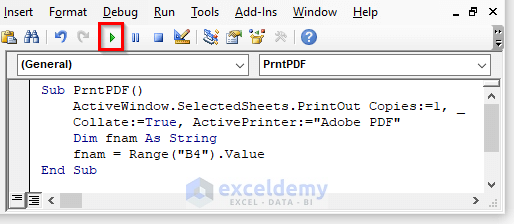
- A PDF file with the name Workbook has been added to the requested location.
Read More: Print Range to PDF with VBA in Excel
Method 4 – Excel VBA to Loop Across Selected Sheet and Print PDF
STEPS:
- Select the Developer option on the ribbon.
- To access the Visual Basic Editor, click on Visual Basic.
- From the Insert drop-down option select Module.
- Copy and paste the following VBA code.
VBA Code:
Sub PrntPDF1()
Dim wrksht As Worksheet
Dim sht As Variant
Set sht = ActiveWindow.SelectedSheets
For Each wrksht In sht
wrksht.Select
wrksht.ExportAsFixedFormat Type:=xlTypePDF, _
filename:=ThisWorkbook.Path & "/" & wrksht.Name & ".pdf"
Next wrksht
sht.Select
End Sub- Run the code by pressing the F5 key.
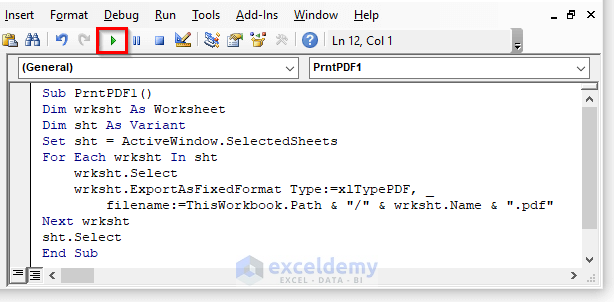
- A PDF file has been added to the requested location.

This will save the file as the sheet number of the workbook.
VBA Code Explanation
For Each wrksht In sht
    wrksht.Select
    wrksht.ExportAsFixedFormat Type:=xlTypePDF, filename:=ThisWorkbook.Path & "/" & wrksht.Name & ".pdf"
Next wrksht
This line of code is for exporting the excel file as a pdf and printing the file.
Method 5 – Print to PDF and Save the File Name in Excel
STEPS:
- Choose Developer from the Ribbon drop-down menu.
- Select Visual Basic to open the Visual Basic Editor.
- Select Module from the Insert drop-down menu.
- Copy and paste the following VBA code.
VBA Code:
Sub PrntPDF2()
Dim loc As String
loc = "E:\Sheet6.pdf"
ActiveSheet.ExportAsFixedFormat _
Type:=xlTypePDF, _
filename:=loc, _
OpenAfterPublish:=False, _
IncludeDocProperties:=True, _
IgnorePrintAreas:=False, _
Quality:=xlQualityStandard, _
From:=1, To:=2
End Sub- Run the code by pressing F5.
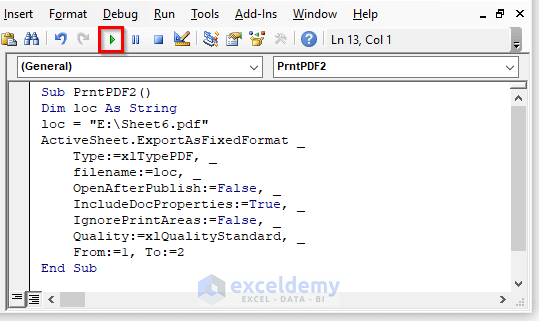
- A PDF file with the name Workbook has been added to the requested location.
This will also save the pdf file as the sheet number.
VBA Code Explanation
ActiveSheet.ExportAsFixedFormat Type:=xlTypePDF, filename:=loc, OpenAfterPublish:=False, IncludeDocProperties:=True, IgnorePrintAreas:=False, Quality:=xlQualityStandard, From:=1, To:=2This code block is for printing and saving the excel file as a pdf.
Method 6 – VBA Function to Print PDF and Save File Name Automatically
STEPS:
- Go to the Developer tab.
- Select Insert and then Module.
- Paste the following VBA code.
VBA Code:
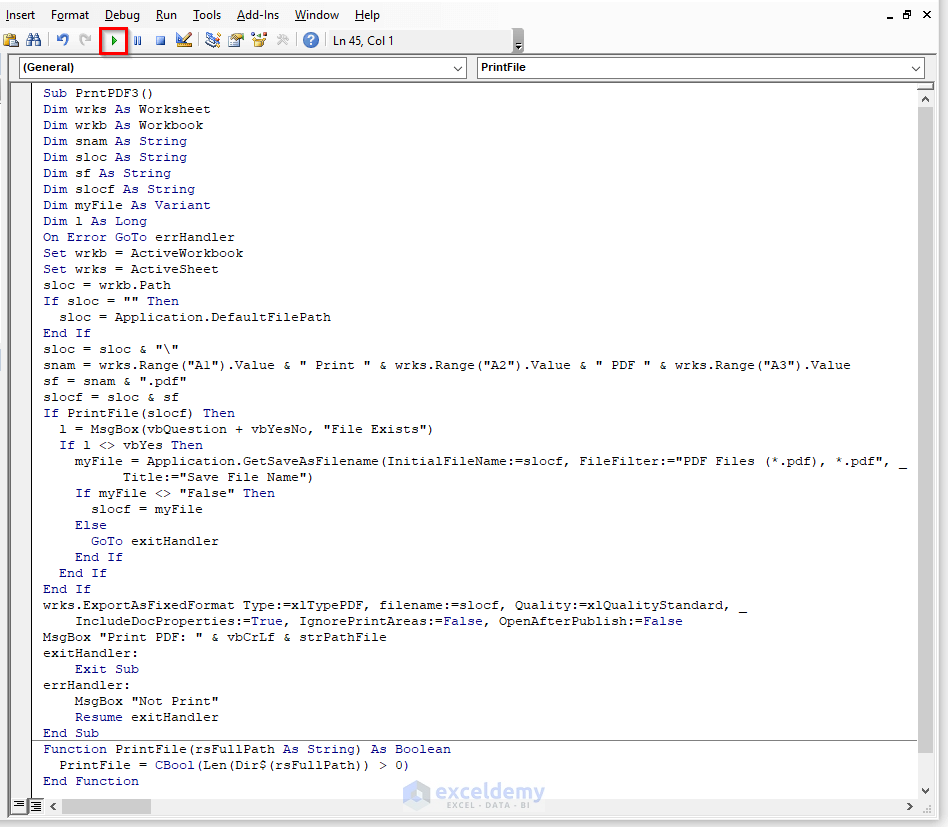
Sub PrntPDF3()
Dim wrks As Worksheet
Dim wrkb As Workbook
Dim snam As String
Dim sloc As String
Dim sf As String
Dim slocf As String
Dim myFile As Variant
Dim l As Long
On Error GoTo errHandler
Set wrkb = ActiveWorkbook
Set wrks = ActiveSheet
sloc = wrkb.Path
If sloc = "" Then
    sloc = Application.DefaultFilePath
End If
sloc = sloc & "\"
snam = wrks.Range("A1").Value & " Print " & wrks.Range("A2").Value & " PDF " & wrks.Range("A3").Value
sf = snam & ".pdf"
slocf = sloc & sf
If PrintFile(slocf) Then
    l = MsgBox(vbQuestion + vbYesNo, "File Exists")
    If l <> vbYes Then
        myFile = Application.GetSaveAsFilename(InitialFileName:=slocf, FileFilter:="PDF Files (*.pdf), *.pdf", _
                 Title:="Save File Name")
        If myFile <> "False" Then
            slocf = myFile
        Else
            GoTo exitHandler
        End If
    End If
End If
wrks.ExportAsFixedFormat Type:=xlTypePDF, filename:=slocf, Quality:=xlQualityStandard, _
IncludeDocProperties:=True, IgnorePrintAreas:=False, OpenAfterPublish:=False
MsgBox "Print PDF: " & vbCrLf & strPathFile
exitHandler:
Exit Sub
errHandler:
MsgBox "Not Print"
Resume exitHandler
End Sub
Function PrintFile(rsFullPath As String) As Boolean
PrintFile = CBool(Len(Dir$(rsFullPath)) > 0)
End Function- Run the code by pressing the F5 key.
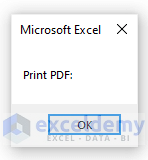
- This will appear in Msgbox and indicates that the PDF file is now ready for printing.
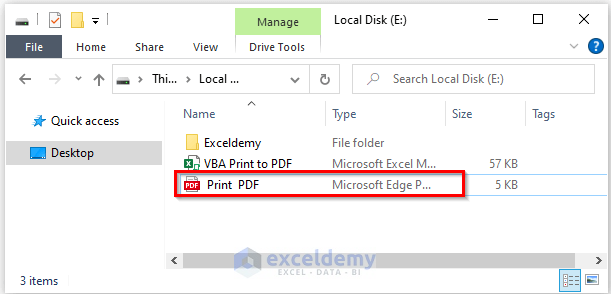
- A PDF file with the name Print PDF has been added to the requested location.
Method 7 – Excel VBA Code to Print to PDF And Save the File Name Automatically
STEPS:
- Select the Developer tab on the ribbon
- From the Insert drop-down menu bar select Module.
- Copy and paste the VBA code shown below.
VBA Code:
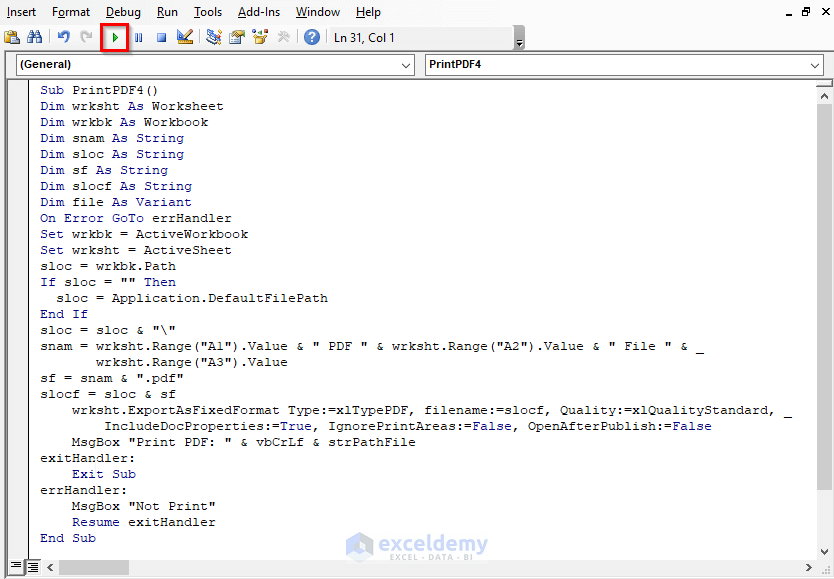
Sub PrintPDF4()
Dim wrksht As Worksheet
Dim wrkbk As Workbook
Dim snam As String
Dim sloc As String
Dim sf As String
Dim slocf As String
Dim file As Variant
On Error GoTo errHandler
Set wrkbk = ActiveWorkbook
Set wrksht = ActiveSheet
sloc = wrkbk.Path
If sloc = "" Then
    sloc = Application.DefaultFilePath
End If
sloc = sloc & "\"
snam = wrksht.Range("A1").Value & " - " & wrksht.Range("A2").Value & " - " & wrksht.Range("A3").Value
sf = snam & ".pdf"
slocf = sloc & sf
wrksht.ExportAsFixedFormat Type:=xlTypePDF, filename:=slocf, Quality:=xlQualityStandard, _
IncludeDocProperties:=True, IgnorePrintAreas:=False, OpenAfterPublish:=False
MsgBox "Print PDF: " & vbCrLf & strPathFile
exitHandler:
Exit Sub
errHandler:
MsgBox "Not Print"
Resume exitHandler
End Sub- Hit the F5 key to run the code.
- This Msgbox will appear.
- The file is saved as a PDF with the same automated file name as in the previous example.
VBA Code Explanation
sloc = wrkbk.Path
If sloc = "" Then
sloc = Application.DefaultFilePath
End If
sloc = sloc & "\"
snam = wrksht.Range("A1").Value & " - " & wrksht.Range("A2").Value & " - " & wrksht.Range("A3").Value
This pulls up the active workbook folder where the workbook is saved.
sf = snam & ".pdf"
slocf = sloc & sf
This will create the default name for saving files.
wrksht.ExportAsFixedFormat Type:=xlTypePDF, filename:=slocf, Quality:=xlQualityStandard, _
IncludeDocProperties:=True, IgnorePrintAreas:=False, OpenAfterPublish:=False
That block exports the excel file to PDF in the current folder.
MsgBox "Print PDF: " & vbCrLf & strPathFile
exitHandler:
Exit Sub
errHandler:
MsgBox "Not Print"
Resume exitHandler
This will create a confirmation message with file information.
Method 8 – Print a Specific Excel Sheet with Automatic File Name
STEPS:
- Select the Developer tab from the ribbon.
- Select Module from the Insert drop-down menu bar.
- Copy and paste the VBA code below.
VBA Code:
Sub PrintPDF5()
Dim loc As String
Dim r As Range
loc = "E:\PDF File.pdf"
Set rng = Sheets("IT").Range("A1:F13")
rng.ExportAsFixedFormat Type:=xlTypePDF, _
filename:=loc
End Sub- Run the code by clicking the RubSub button or using the F5 keyboard shortcut.

- This file is saved as a PDF with the same name as the previous example.
Method 9 – Save File Name Automatically While Printing to PDF in Excel VBA
STEPS:
- Select the Developer tab from the ribbon.
- Select Module from the Insert drop-down menu bar.
- Copy and paste the below VBA code.
VBA Code:
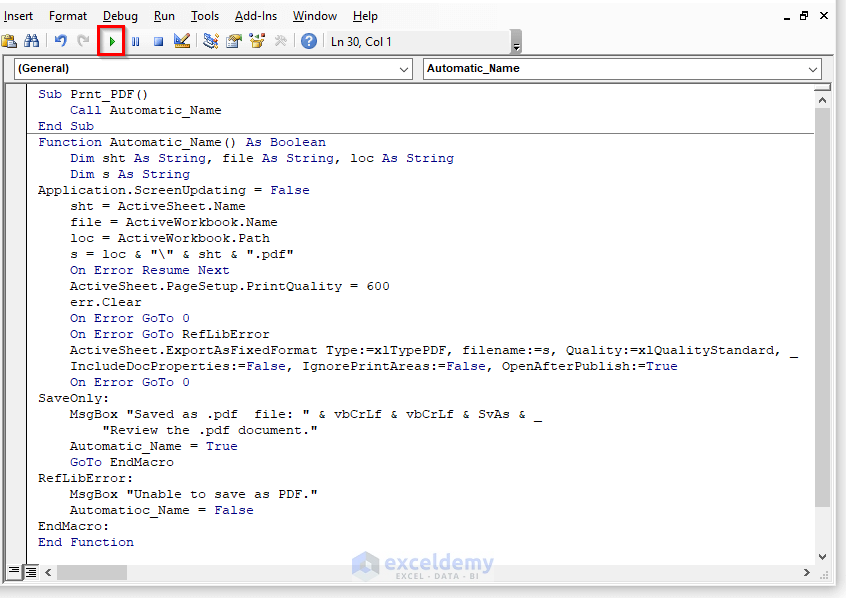
Sub Prnt_PDF()
    Call Automatic_Name
End Sub
Function Automatic_Name() As Boolean  ' Copies sheets into new PDF file for e-mailing
    Dim sht As String, file As String, loc As String
    Dim s As String
Application.ScreenUpdating = False
    sht = ActiveSheet.Name
    file = ActiveWorkbook.Name
    loc = ActiveWorkbook.Path
    s = loc & "\" & sht & ".pdf"
    On Error Resume Next
    ActiveSheet.PageSetup.PrintQuality = 600
    err.Clear
    On Error GoTo 0
    On Error GoTo RefLibError
    ActiveSheet.ExportAsFixedFormat Type:=xlTypePDF, filename:=s, Quality:=xlQualityStandard, IncludeDocProperties:=False, IgnorePrintAreas:=False, OpenAfterPublish:=True
    On Error GoTo 0
SaveOnly:
    MsgBox "Saved as .pdf  file: " & vbCrLf & vbCrLf & SvAs & _
    "Review the .pdf document."
    Automatic_Name = True
    GoTo EndMacro
RefLibError:
    MsgBox "Unable to save as PDF."
    Automatioc_Name = False
    EndMacro:
End Function- Click the RubSub button or using the F5 keyboard shortcut.
Download Practice Workbook
You can download the workbook and practice with them.
Related Articles
- Print to PDF Using Macro Button in Excel
- Excel VBA: ExportAsFixedFormat PDF with Fit to Page
- How to Print to PDF in Excel VBA : With Examples and Illustrations
- Print Multiple Excel Sheets to Single PDF File with VBA


PrintPDF4 is buggy.
1. variable snam is not declared.
2. variable strPathFile is neither declared or initialized.
I was able to fix error 1.
I have no idea what your logic for strPathFile was.
Hello, Jim!
Thanks for your comment!
Glad that you noticed!
But it’s not a problem or it’s not even any bug, as I set snam to sf and sf is declared.
I did not set any path where I would put the pdf to print it. That’s the reason I did not set any file path location or declare the strPathFile variable. This code will automatically save into your active disk location. If you want to save the file in a specific file path you can initialize strPathFile and put your path manually.
I will suggest that you please download the workbook and run the codes. After that, if you have any queries you can ask!
Good Luck!