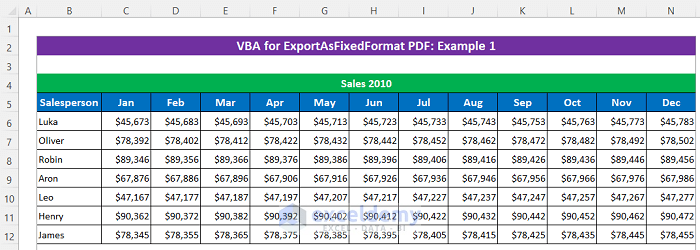
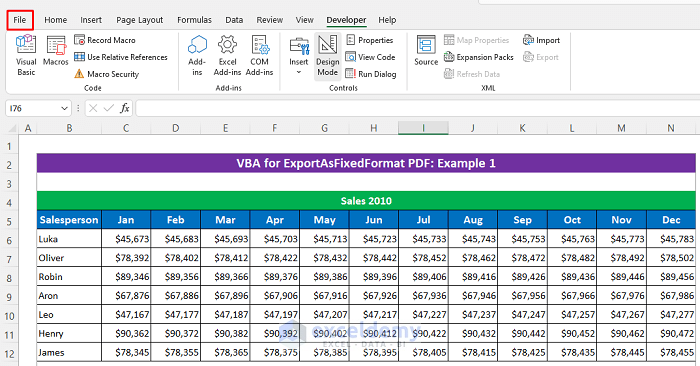
Dataset Overview
Let’s start by introducing our dataset, which represents sales for a salesperson over 12 months for the years 2010 to 2015.
Method 1 – Use the Command Button
Steps
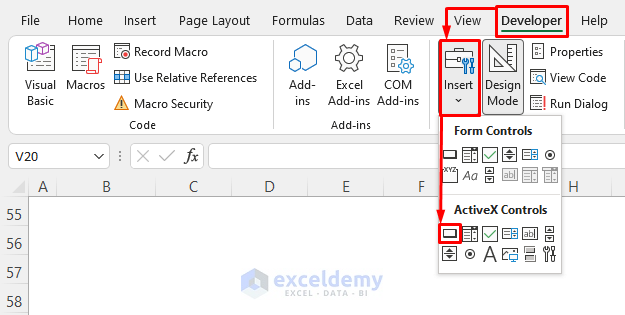
- Insert a Command button:
- Go to the Developer tab and select Insert.
- Select the Square box from the ActiveX Controls section.
- You’ll see a plus icon on your cursor.
-
- Drag the cursor anywhere in your sheet to create the button of your desired size.
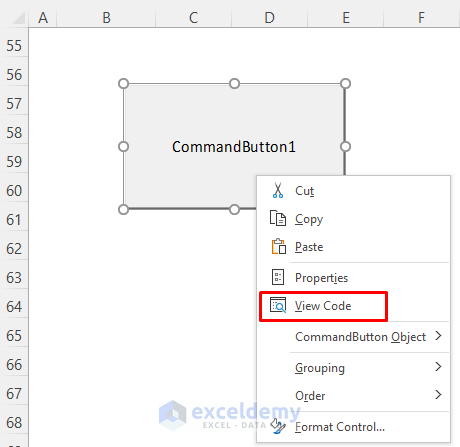
- Add VBA code:
- Right-click the button and select View Code from the Context Menu.
-
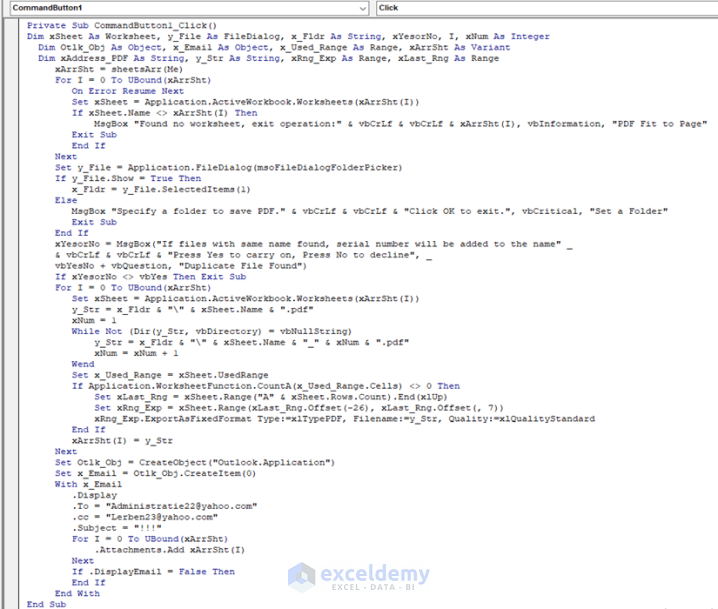
- In the VBA window that appears, enter the following code:
Private Sub CommandButton1_Click()
Dim xSheet As Worksheet, y_File As FileDialog, x_Fldr As String, xYesorNo, I, xNum As Integer
Dim Otlk_Obj As Object, x_Email As Object, x_Used_Range As Range, xArrSht As Variant
Dim xAddress_PDF As String, y_Str As String, xRng_Exp As Range, xLast_Rng As Range
xArrSht = sheetsArr(Me)
For I = 0 To UBound(xArrSht)
On Error Resume Next
Set xSheet = Application.ActiveWorkbook.Worksheets(xArrSht(I))
If xSheet.Name <> xArrSht(I) Then
MsgBox "Found no worksheet, exit operation:" & vbCrLf & vbCrLf & xArrSht(I), vbInformation, "PDF Fit to Page"
Exit Sub
End If
Next
Set y_File = Application.FileDialog(msoFileDialogFolderPicker)
If y_File.Show = True Then
x_Fldr = y_File.SelectedItems(1)
Else
MsgBox "Specify a folder to save PDF." & vbCrLf & vbCrLf & "Click OK to exit.", vbCritical, "Set a Folder"
Exit Sub
End If
xYesorNo = MsgBox("If files with same name found, serial number will be added to the name" & vbCrLf & vbCrLf & "Press Yes to carry on, Press No to decline", _
vbYesNo + vbQuestion, "Duplicate File Found")
If xYesorNo <> vbYes Then Exit Sub
For I = 0 To UBound(xArrSht)
Set xSheet = Application.ActiveWorkbook.Worksheets(xArrSht(I))
y_Str = x_Fldr & "\" & xSheet.Name & ".pdf"
xNum = 1
While Not (Dir(y_Str, vbDirectory) = vbNullString)
y_Str = x_Fldr & "\" & xSheet.Name & "_" & xNum & ".pdf"
xNum = xNum + 1
Wend
Set x_Used_Range = xSheet.UsedRange
If Application.WorksheetFunction.CountA(x_Used_Range.Cells) <> 0 Then
Set xLast_Rng = xSheet.Range("A" & xSheet.Rows.Count).End(xlUp)
Set xRng_Exp = xSheet.Range(xLast_Rng.Offset(-26), xLast_Rng.Offset(, 7))
xRng_Exp.ExportAsFixedFormat Type:=xlTypePDF, Filename:=y_Str, Quality:=xlQualityStandard
End If
xArrSht(I) = y_Str
Next
Set Otlk_Obj = CreateObject("Outlook.Application")
Set x_Email = Otlk_Obj.CreateItem(0)
With x_Email
.Display
.To = "[email protected]"
.cc = "[email protected]"
.Subject = "!!!"
For I = 0 To UBound(xArrSht)
.Attachments.Add xArrSht(I)
Next
If .DisplayEmail = False Then
End If
End With
End Sub
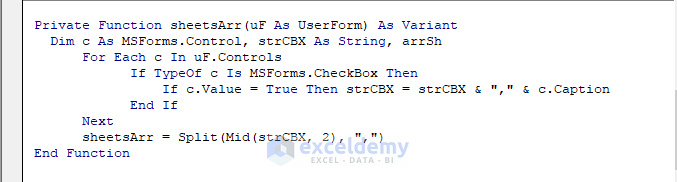
Private Function sheetsArr(uF As UserForm) As Variant
Dim c As MSForms.Control, strCBX As String, arrSh
For Each c In uF.Controls
If TypeOf c Is MSForms.CheckBox Then
If c.Value = True Then strCBX = strCBX & "," & c.Caption
End If
Next
sheetsArr = Split(Mid(strCBX, 2), ",")
End Function- Return to your sheet and test the Command button.
Code Breakdown:
-
-
- Created a Private Sub CommandButton1_Click.
- Used sheetsArr and created it atthe bottom of the existing code.
- Used the IF statement within the For Loop to check whether the Sheet is empty or not.
- If the Sheet is not Empty then it will open a folder to Save the PDF
- To name the created PDF file and Fitted the dataset on one page while Exporting it from Excel Export.
- Used emails to send the created PDF.
-
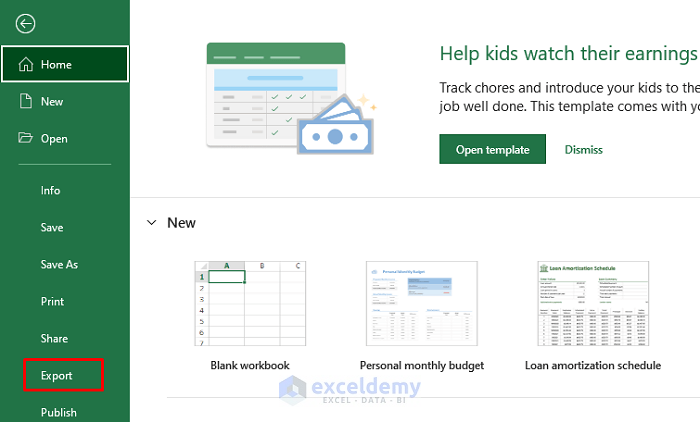
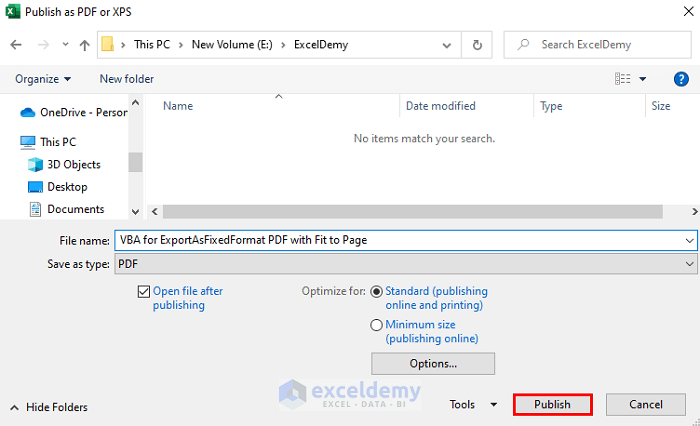
- Click on the File tab.
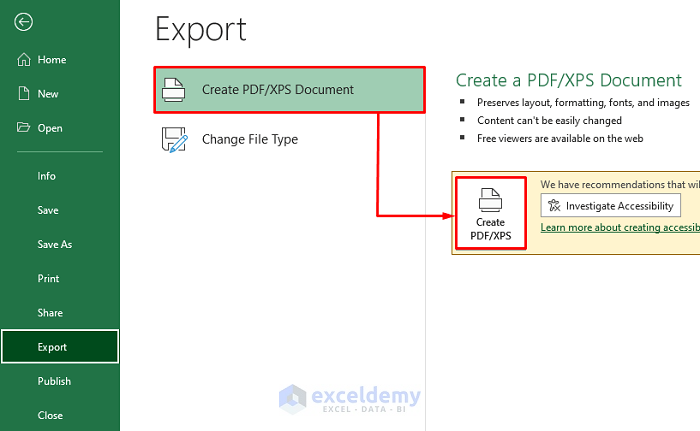
- Click Export.
- Select Create PDF/XPS Documents and click on Create PDF/XPS.
- Choose your desired folder and name.
- Press Publish.
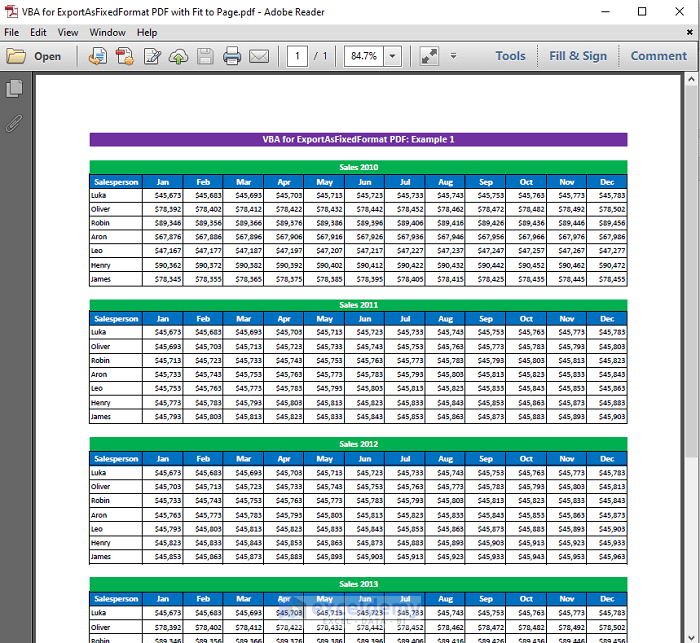
- Verify that the dataset is fitted to one page in the printed PDF successfully.
Method 2 – Export PDF with Fit to Page for a Specific Range
Steps
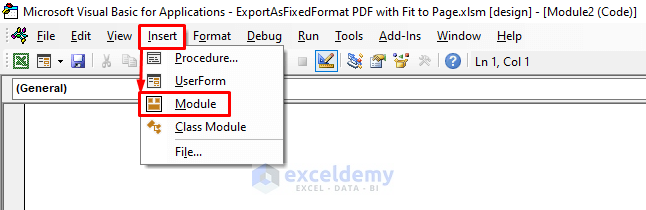
- Press Alt + F11 to open the VBA window.
- Click Insert and select Module to create a new module.
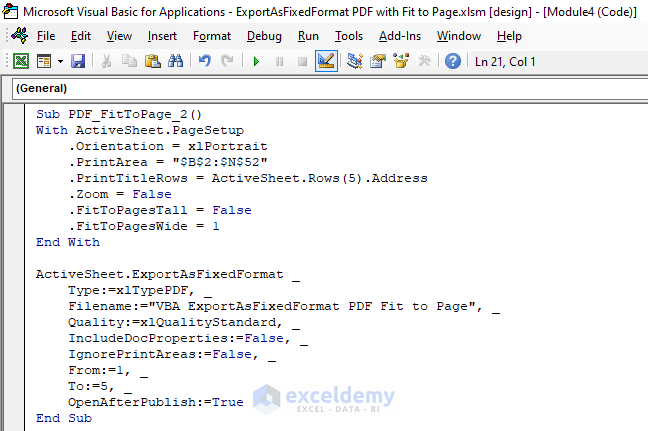
- Enter the following code:
Sub PDF_FitToPage_2()
With ActiveSheet.PageSetup
    .Orientation = xlPortrait
    .PrintArea = "$B$2:$N$52"
    .PrintTitleRows = ActiveSheet.Rows(5).Address
    .Zoom = False
    .FitToPagesTall = False
    .FitToPagesWide = 1
End With
ActiveSheet.ExportAsFixedFormat _
    Type:=xlTypePDF, _
    Filename:="VBA ExportAsFixedFormat PDF Fit to Page", _
    Quality:=xlQualityStandard, _
    IncludeDocProperties:=False, _
    IgnorePrintAreas:=False, _
    From:=1, _
    To:=5, _
    OpenAfterPublish:=True
End Sub- Return to your sheet.
Code Breakdown:
-
-
- Created a Sub procedure PDF_FitToPage_2.
- Used the With statement and PageSetup to set the page layout for the active sheet.
- Used ExportAsFixedFormat to set the file type, name, and other criteria for the PDF.
-
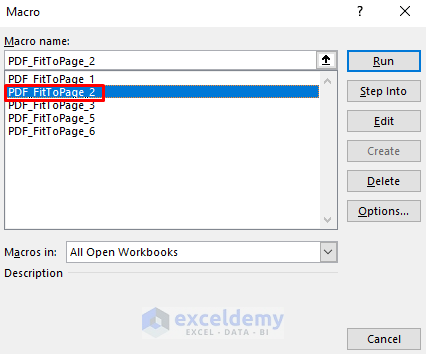
- To run the Macro, open the Macros dialog box by clicking Developer and selecting Macros.
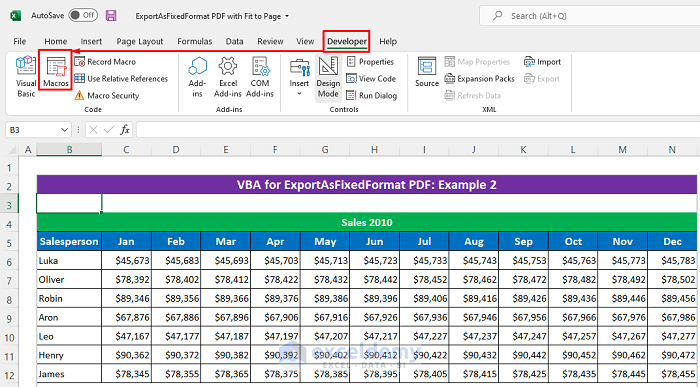
- Select the mentioned Macro name and press Run.
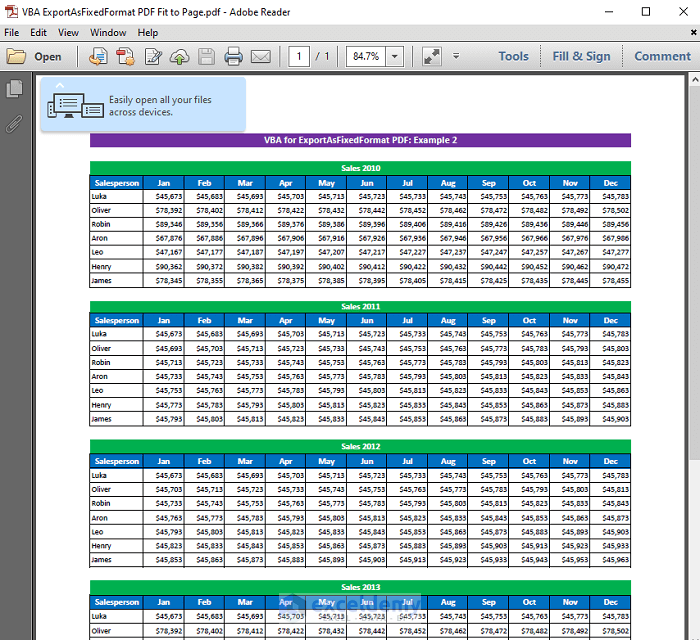
Below shows the printed PDF with fitted width on one page:
Read More: Print Range to PDF with VBA in Excel
Method 3 – Export All Sheets in Separate PDF Files
Steps
- Creating the Macro:
- Follow the first two steps from Method 2 to insert a VBA module.
- Writing the VBA Code:
- Enter the following code:
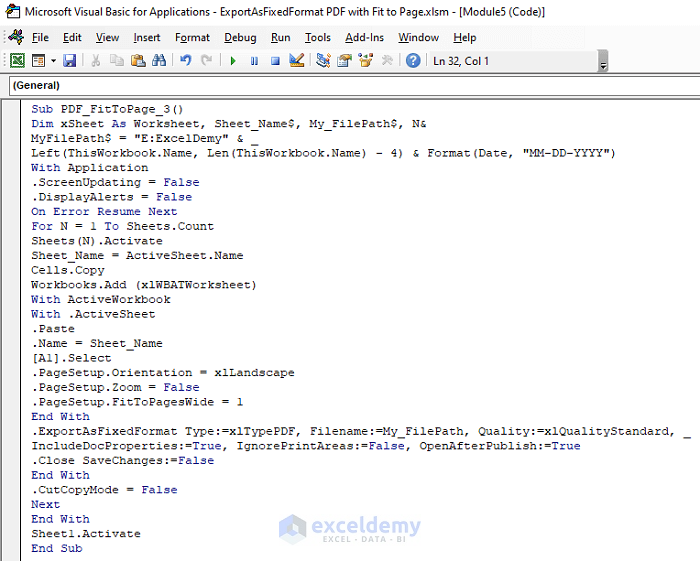
Sub PDF_FitToPage_3()
Dim xSheet As Worksheet, Sheet_Name$, My_FilePath$, N&
MyFilePath$ = "E:ExcelDemy" & _
Left(ThisWorkbook.Name, Len(ThisWorkbook.Name) - 4) & Format(Date, "MM-DD-YYYY")
With Application
    .ScreenUpdating = False
    .DisplayAlerts = False
    On Error Resume Next
    For N = 1 To Sheets.Count
        Sheets(N).Activate
        Sheet_Name = ActiveSheet.Name
        Cells.Copy
        Workbooks.Add (xlWBATWorksheet)
        With ActiveWorkbook
            With .ActiveSheet
                .Paste
                .Name = Sheet_Name
                [A1].Select
                .PageSetup.Orientation = xlLandscape
                .PageSetup.Zoom = False
                .PageSetup.FitToPagesWide = 1
            End With
            .ExportAsFixedFormat Type:=xlTypePDF, Filename:=My_FilePath, Quality:=xlQualityStandard, _
            IncludeDocProperties:=True, IgnorePrintAreas:=False, OpenAfterPublish:=True
            .Close SaveChanges:=False
        End With
        .CutCopyMode = False
    Next
End With
Sheet1.Activate
End Sub- Running the Macro:
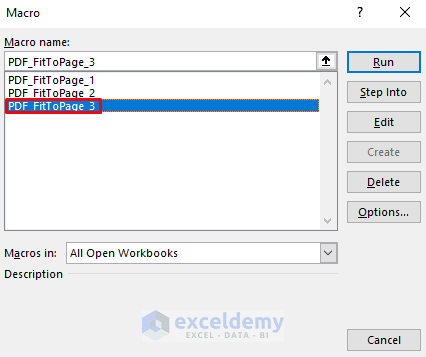
- Return to your sheet and open the Macro dialog box.
Code Breakdown:
-
-
- Created a Sub procedure PDF_FitToPage_3.
- Declared some variables.
- Used For loop to count every sheet and print them.
- Completed the required page setups.
-
-
- Select the specified macro and press Run.
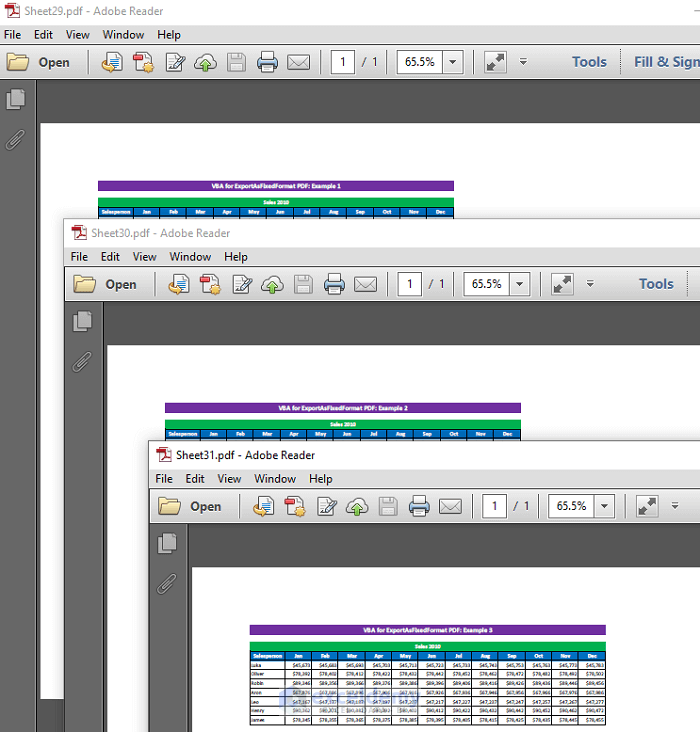
Excel has printed all the sheets of your workbook as separate PDF files, each fitted to one page.
Download Practice Workbook
You can download the practice workbook from here:
Related Articles
- Print to PDF Using Macro Button in Excel
- Excel VBA to Print As PDF and Save with Automatic File Name
- How to Print to PDF in Excel VBA : With Examples and Illustrations
- Print Multiple Excel Sheets to Single PDF File with VBA

