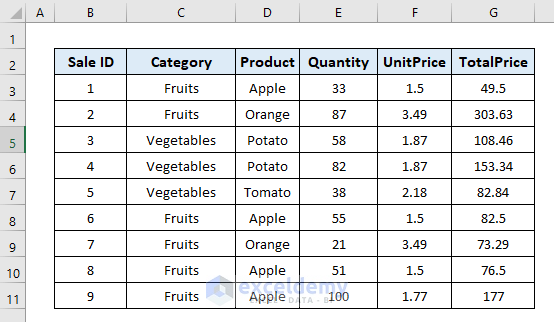
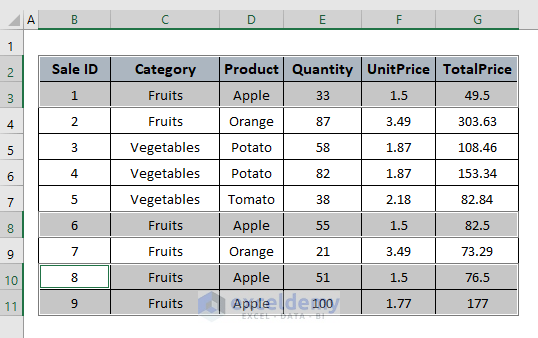
This is the sample dataset.
Enter the Code in Visual Basic Editor
- Go to the Developer tab.
- Click Visual Basic.

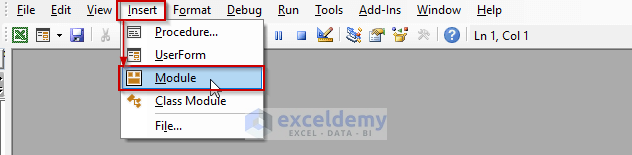
- In the Visual Basic For Applications window, click Insert and select New Module.
- Enter the code and press F5 to run it.
Method 1 – Set the Print Area based on a range Using VBA in Excel
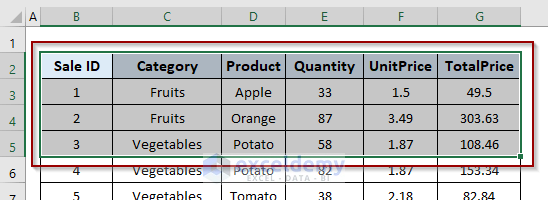
1.1 Continuous Range
Selected Range:
B2:G5 is set as the print area.
Enter the following code and press F5 to run it.
Sub PrintAreaToSelection()
With Sheets("Sheet1")
.PageSetup.PrintArea = Selection.Address
End With
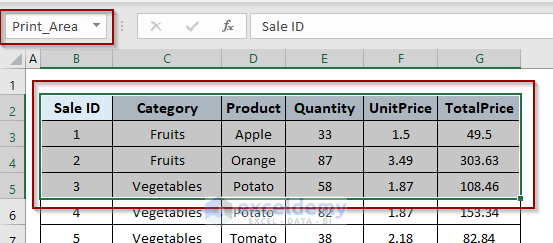
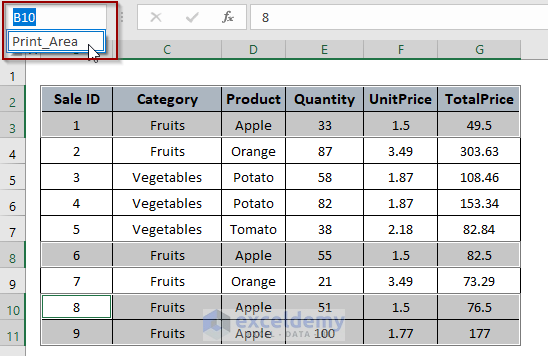
End Sub- Click the namebox.

- Click and select “Print_Area”. It displays the selected print area.
Print:
- Add the Sheets.PrintOut method to the code:
Sub PrintAreaToSelection()
With Sheets("Sheet1")
.PageSetup.PrintArea = Selection.Address
.PrintOut
End With
End Sub- Run the code.
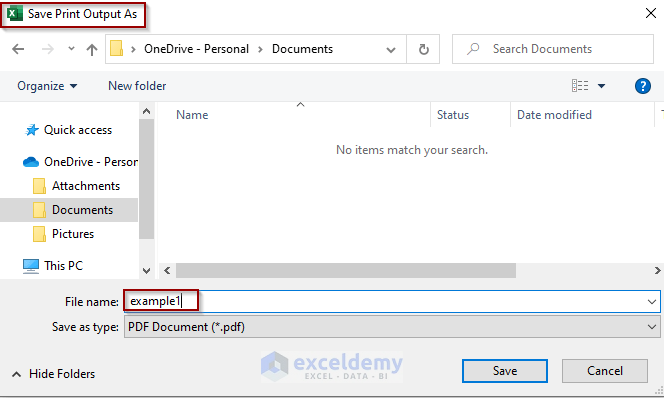
- Save the print area as a pdf.
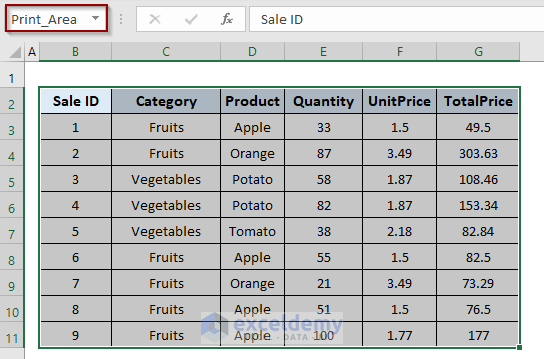
1.2 Discontinuous Range
Selected Range:
The print area is the sales data for the product “Apple”.
- Run the same code and follow the steps described in 1.1 to see the selected print area.
Read More: Excel VBA: Set Print Area for Multiple Ranges
Method 2 – Use the Usedrange to Set the Print Area Using Excel VBA
- Enter the following code and press F5 to run it.
Sub PrintAreaToSelection()
With Sheets("Sheet1")
.PageSetup.PrintArea = ActiveSheet.UsedRange.Address
End With
End Sub- Click the name box and select “Print_Area”. The whole used range in Sheet1 was selected.
- Add the Sheets.PrintOut method in the above code to enable the print option.
Sub PrintAreaToSelection()
With Sheets("Sheet1")
.PageSetup.PrintArea = ActiveSheet.UsedRange.Address
.PrintOut
End With
End Sub
Method 3 – Running a VBA Code to Set the Print Area with a Pre-Defined Range in Excel
- Enter the following code and press F5 to run it.
Sub PrintAreaToSelection()
With Sheets("Sheet1")
.PageSetup.PrintArea = .Range("B2:G7").Address
End With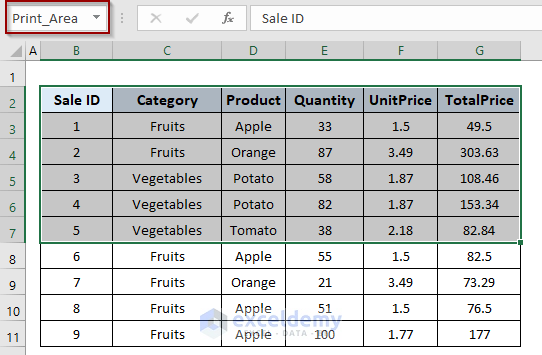
End Sub- Click name box and select “Print_Area”. The predefined range B2:G7 in Sheet1 was selected.
- Add the Sheets.PrintOut method to the code to enable the print option.
Sub PrintAreaToSelection()
With Sheets("Sheet1")
.PageSetup.PrintArea = .Range("B2:G7").Address
.PrintOut
End With
End Sub
Read More: Excel VBA: Print Range of Cells
Things to Remember
You can also use the Sheets.PrintPreview method to enable the print option. To use the PrintPreview method, replace the .Printout with .PrintPreview in the code.
Download Practice Workbook
Download this practice workbook to exercise.
Related Articles
- Excel VBA: Print Preview for Selected Range
- How to Display Print Preview with Excel VBA
- Excel VBA: How to Set Print Area Dynamically
- VBA Code for Print Button in Excel
- How to Print Specific Sheets Using VBA Macro in Excel

