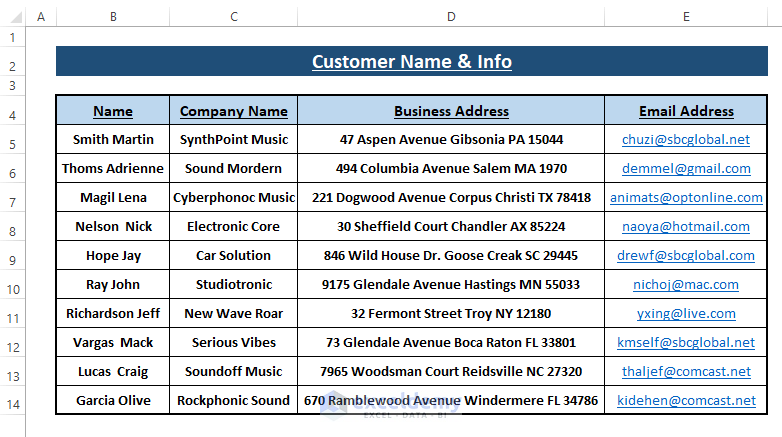
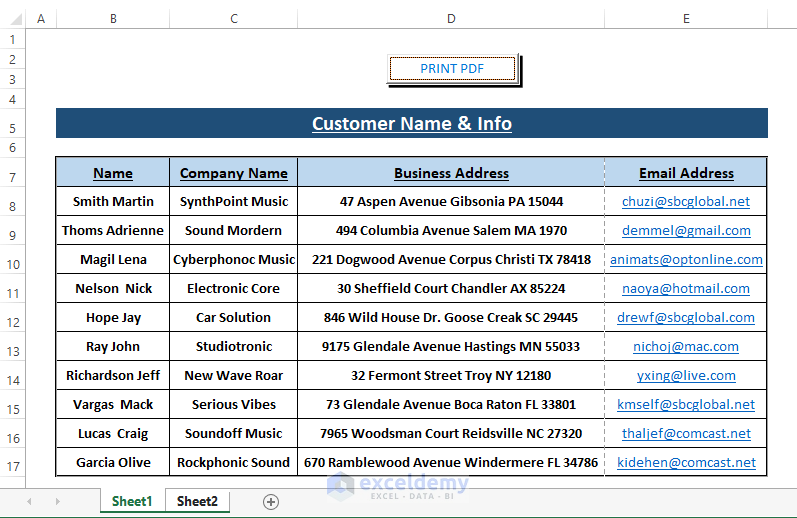
For this tutorial, we’ll assume you have an Excel Worksheet titled Customer Name and Info, and you want to print the worksheet using the Macro CommandButton.
Macro Button & Its Insertion
Typically, Excel uses leverage the Keyboard Shortcuts key (i.e., F5) or Microsoft Visual Basic’s Run Toolbar > Run to execute a macro. As Excel users typically have to print Worksheets in PDF, they can use a Macro Button to instantly Save or Print.
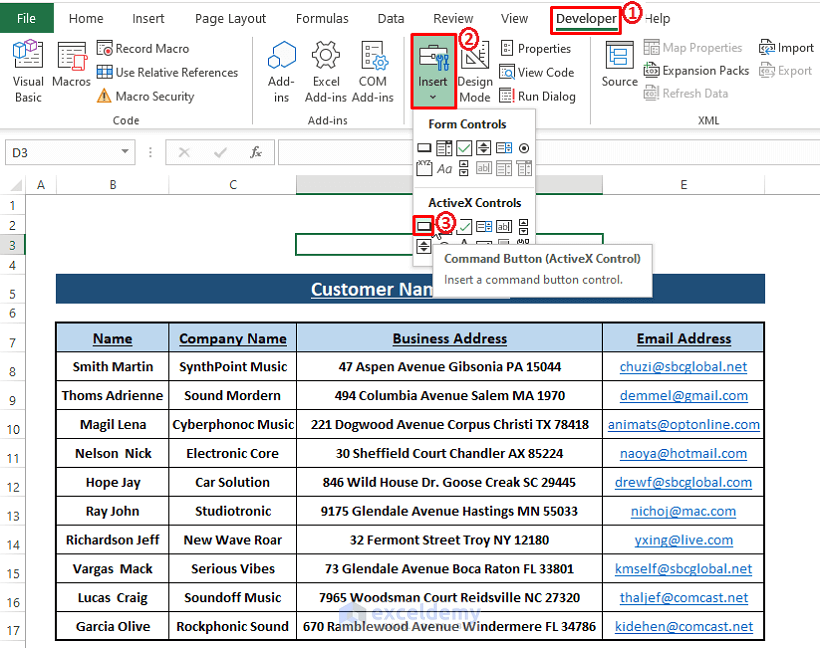
Go to the Developer tab > Insert section > Click on Command Button (under ActiveX Controls).
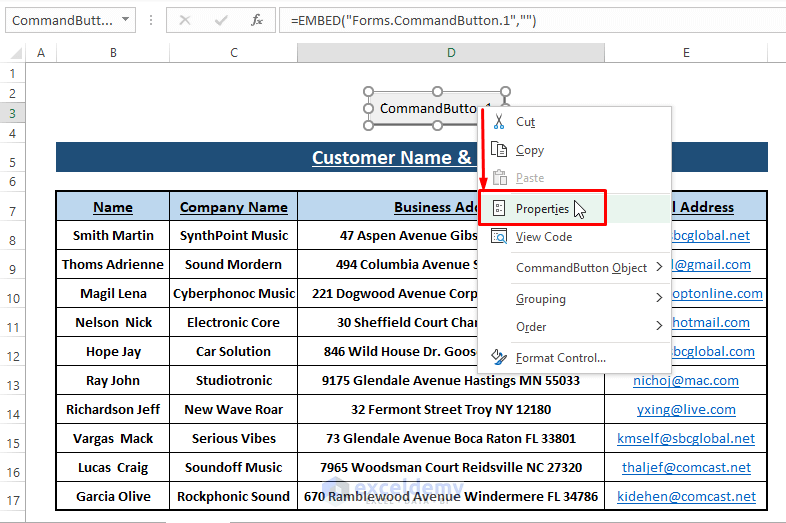
Excel inserts a Command Button. Right-click on the Button. Select Properties from the Context Menu options.
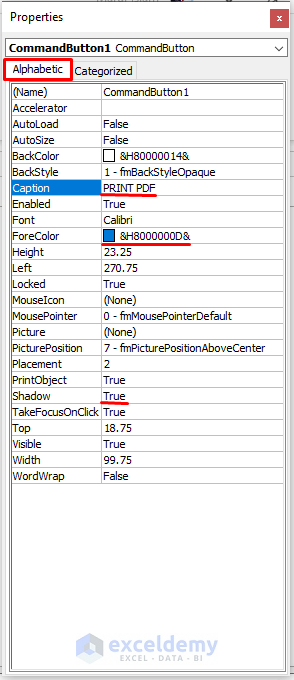
The Properties window opens up. Edit the Caption or other Options according to your requirements.
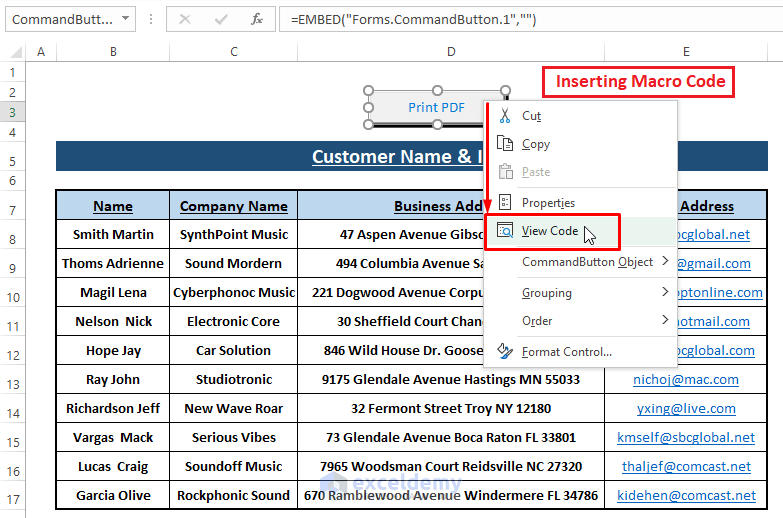
To insert and assign a macro to this Command Button, right-click on it. Select View Code from the options.
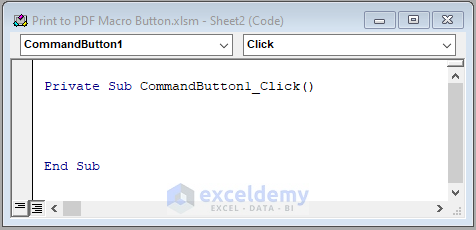
Excel brings up the Microsoft Visual Basic window and you see a similar depiction as shown in the image below.
After inserting a macro into this Microsoft Visual Basic window, you can simply run the macro using the Command Button.
Print to PDF through Macro Button in Excel: 5 Macro Alternatives
If you’d like an alternative to the above method, the following are five more methods you can try in Excel.
Method 1 – Use Macro Code to Print a Specific Worksheet in Excel
Step 1: Write the following macro in the Microsoft Visual Basic window.
Private Sub CommandButton1_Click()
Dim PrintFile As String
PrintFile = Application.DefaultFilePath & "\" & _
ActiveWorkbook.Name & ".pdf"
Sheets("Sheet1").Select
ActiveSheet.PageSetup.PrintArea = "B7:E17"
ActiveSheet.ExportAsFixedFormat Type:=xlTypePDF, _
Filename:=PrintFile, Quality:=xlQualityStandard, _
IncludeDocProperties:=True, IgnorePrintAreas:=False, _
OpenAfterPublish:=True
End Sub 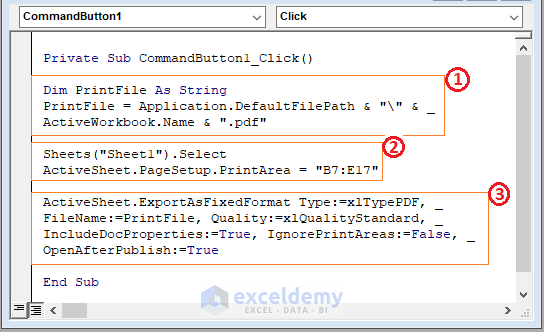
➤ in the code:
1 – Declare the variable and assign the File type as PDF.
2 – The VBA Sheets.Select statement takes Sheet1 as about to print-worksheet. Also, the print area is supplied (i.e., B7:E17).
3 – Export the file as a PDF and ensure Print Properties as required.
Step 2: Click on the PRINT PDF Macro Button to run the macro.
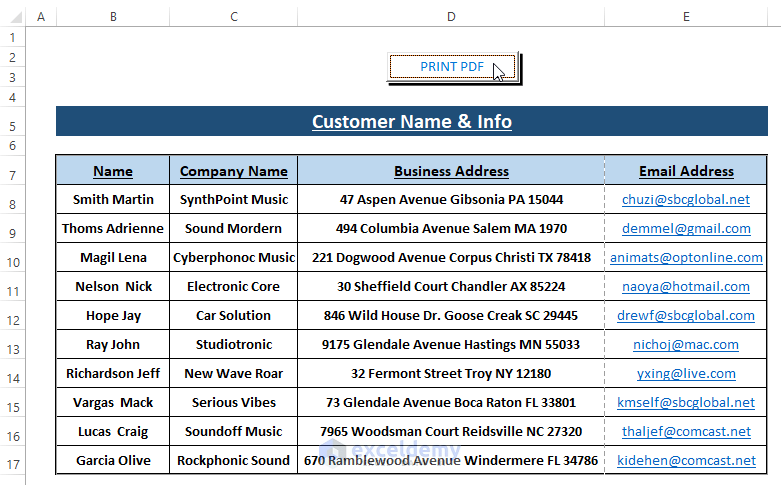
Step 3: Excel publishes the worksheet as PDF and converts the data into PDF format. Click on the Print Icon as shown in the below image to print the worksheet instantly.
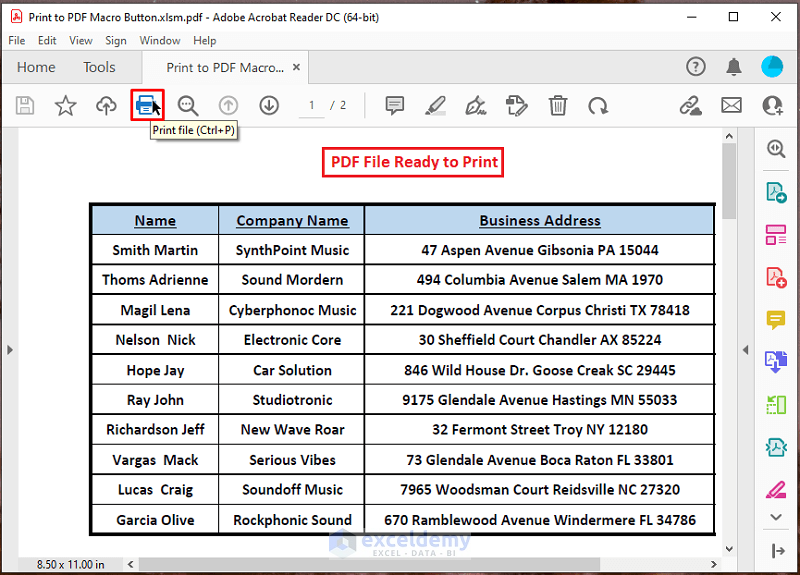
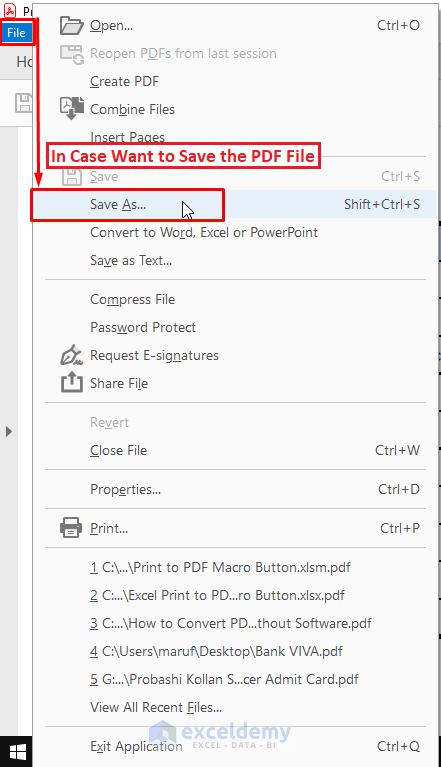
If you want to save the file go to File > Save As or Save.
Read More: Excel VBA to Print As PDF and Save with Automatic File Name
Method 2 – Print Multiple Sheets Using Macro Button
Step 1: Paste the following Macro into the Visual Basic window.
Private Sub CommandButton1_Click()
Dim PrintPDF As String
PrintPDF = Application.DefaultFilePath & "\" & _
ActiveWorkbook.Name & ".pdf"
Sheets(Array("Sheet1", "Sheet2")).Select
ActiveSheet.PageSetup.PrintArea = "B7:E17"
ActiveSheet.ExportAsFixedFormat Type:=xlTypePDF, _
Filename:=PrintPDF, Quality:=xlQualityStandard, _
IncludeDocProperties:=True, IgnorePrintAreas:=False, _
OpenAfterPublish:=True
End Sub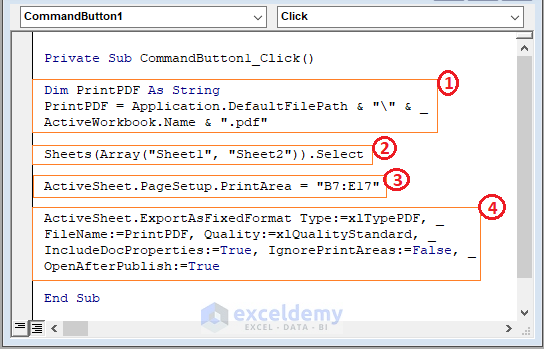
➤ From the above image, in the sections,
1 – Introduce the variable and assign value to the variable.
2 – The VBA Sheets.Select statement takes multiple sheets using the VBA Array function.
3 – Set the Print Area to a specific range.
4 – Assign the PDF file properties and load the file after conversion as the OpenAfterPublish command is set to True.
Step 2: Use the Macro Button to run the macro. Repeat Step 3 of Method 1 to Save and Print the Worksheets in PDF format.
Method 3 – Macro Button to Save a Specific Range Using Macro Code to Print
Step 1: Type the below macro in the Code section.
Private Sub CommandButton1_Click()
Dim PrintRng As Range
Dim SavePDF As String
Set PrintRng = Range("B7:E17")
SavePDF = ThisWorkbook.Path
PrintRng.ExportAsFixedFormat Type:=xlTypePDF, _
FileName:=SavePDF, _
Quality:=xlQualityStandard, _
IncludeDocProperties:=True, _
IgnorePrintAreas:=False, _
OpenAfterPublish:=False
End Sub 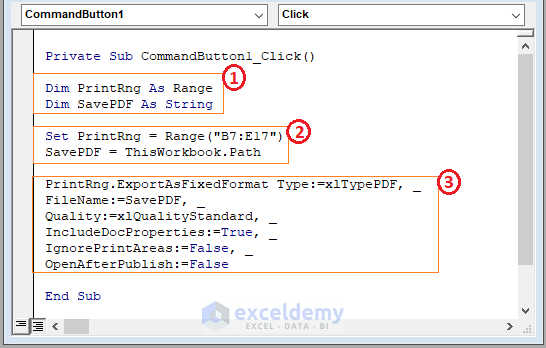
➤ The code’s sections,
1 – Initiate the macro declaring the variables.
2 – Set the variables. One of them directs the macro to save the PDF in the Workbook path.
3 – Generate the worksheet as a PDF file maintaining various properties. Don’t open the PDF file, as the OpenAfterPublish command is turned False.
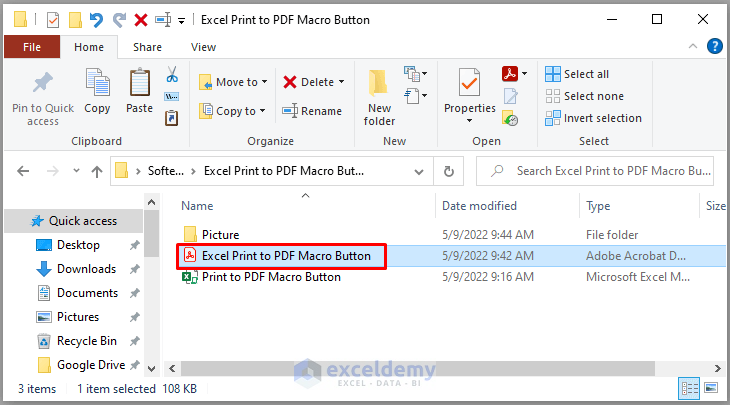
Step 2: Click on the Macro Button and Excel saves the PDF file in the Workbook path. Open the PDF file then Follow Step 3 of Method 1 to print the file.
Read More: Print Range to PDF with VBA in Excel
Method 4 – Print Active Sheet Using Macro Button
Step 1: Use the below macro in the Code section.
Private Sub CommandButton1_Click()
Application.ScreenUpdating = False
ActiveSheet.ExportAsFixedFormat Type:=xlTypePDF, _
Filename:="C:\Users\maruf\Desktop\Softeko\Excel Print to PDF Macro Button\PrintPDF.pdf", _
OpenAfterPublish:=False
Application.ScreenUpdating = True
End Sub 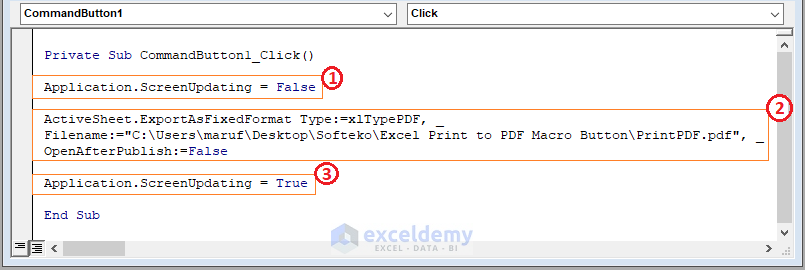
➤ The numbered sections:
1 – Fix the Active sheet screening.
2 – Export the worksheet content as a PDF with a name (i.e., PrintPDF) and save it in the assigned location.
3 – Reverse the worksheet screening.
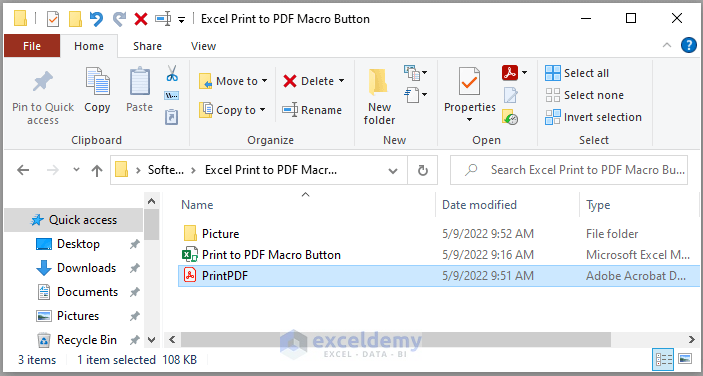
Step 2: Click the Macro Button to save the worksheet content with an assigned name in PDF format. Excel stores the file in the assigned location.
Method 5 – Print Active Worksheet with Error Handling
Step 1: Insert the following macro in the Code section.
Private Sub CommandButton1_Click()
Dim wrkSheet As Worksheet
Dim wrkBook As Workbook
Dim FileName As String
Dim FilePath As String
Dim PDFFile As String
Dim PDFFilePath As String
Dim mrfFile As Variant
On Error GoTo errHandler
Set wrkBook = ActiveWorkbook
Set wrkSheet = ActiveSheet
FilePath = wrkBook.Path
If FilePath = "" Then
FilePath = Application.DefaultFilePath
End If
FilePath = FilePath & "\"
FileName = Replace(wrkSheet.Name, " ", "")
FileName = Replace(FileName, ".", "_")
PDFFile = FileName & "_" & ".pdf"
PDFFilePath = FilePath & PDFFile
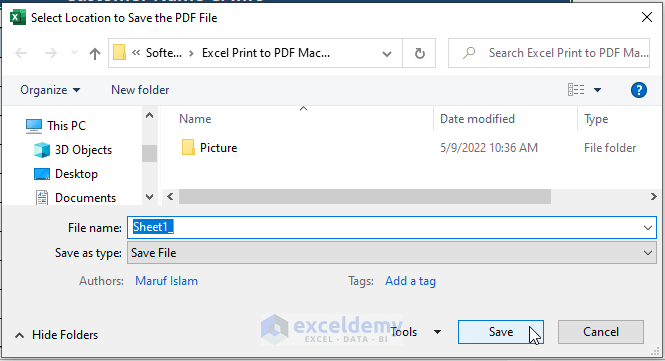
mrfFile = Application.GetSaveAsFilename _
(InitialFileName:=PDFFilePath, _
FileFilter:="Save File (*.pdf), *.pdf", _
Title:="Select Location to Save the PDF File")
If mrfFile <> "False" Then
wrkSheet.ExportAsFixedFormat _
Type:=xlTypePDF, _
FileName:=mrfFile, _
Quality:=xlQualityStandard, _
IncludeDocProperties:=True, _
IgnorePrintAreas:=False, _
OpenAfterPublish:=False
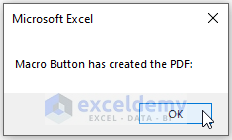
MsgBox "Macro Button has created the PDF: "
End If
exitHandler:
Exit Sub
errHandler:
MsgBox "Error:Macro Button has created the PDF"
Resume exitHandler
End Sub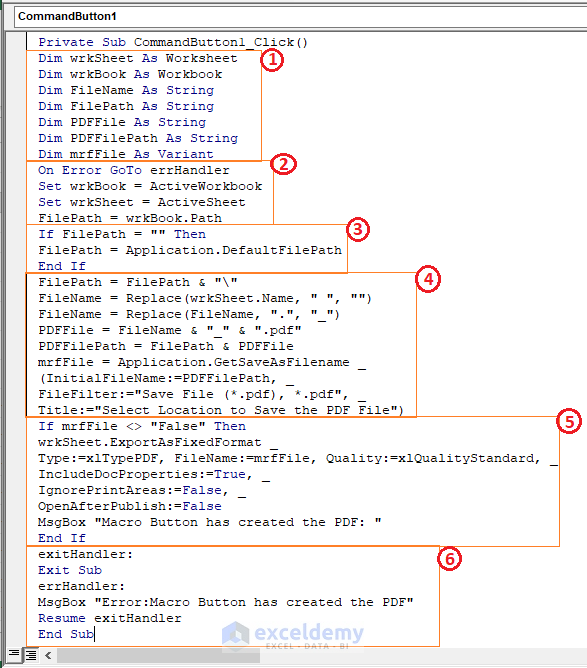
➤ From the above image, the code’s sections are as follows:
1 – Declare the variables.
2 – Assign the worksheet and workbook to values and direct the macro to go to the error handler in case any error occurs.
3 – Assign the file path as default.
4 – Set variables to values.
5 – Using the VBA IF function macro exports the worksheet contents as PDF and display a confirmation message using VBA Message Box after finishing.
6 – Error handler displays a preset notification in case any error occurs.
Step 2: After the macro insertion, click on the Macro Button to save the Excel content in PDF and error handle if any error occurs. The macro brings up the device directory to offer the location to save the PDF file.
Step 3: Excel displays a confirmation notification saying it has saved the PDF. Open the PDF the follow Step 3 of Method 1 to print the PDF.
You can modify the macro if you want to direct print the PDF file by switching the OpenAfterPublish option from False to True.
Download Excel Workbook
Practice with the following Workbook. Replace added Macro with the alternative variants to compare outcomes.
Related Articles
- Excel VBA: ExportAsFixedFormat PDF with Fit to Page
- How to Print to PDF in Excel VBA : With Examples and Illustrations
- Print Multiple Excel Sheets to Single PDF File with VBA

