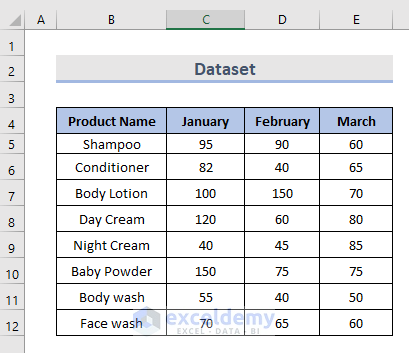
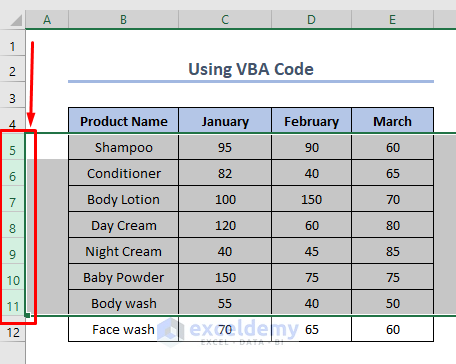
The sample dataset showcases item names and sales from January to March.
Method 1 – Show Hidden Rows Using the Context Menu in Excel
Steps:
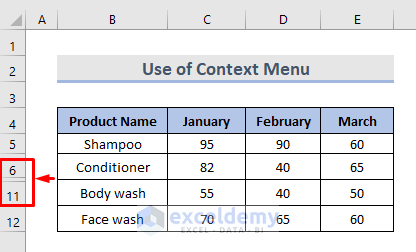
Select the rows: one above and one row below the row or rows you want to see. Right-click and choose unhide..
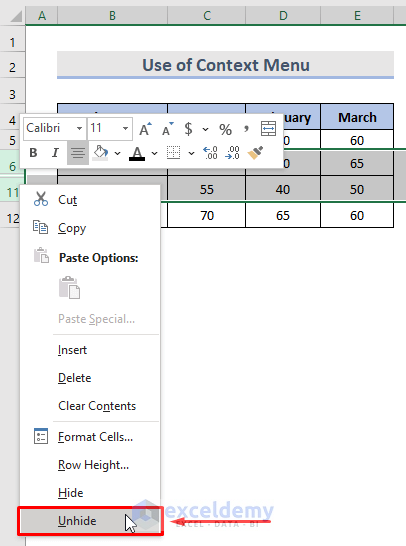
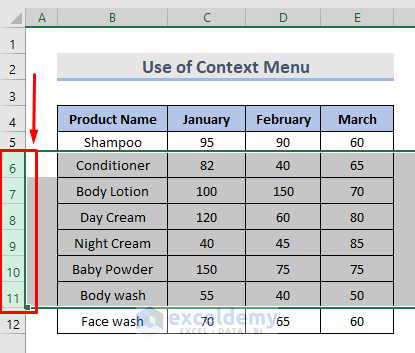
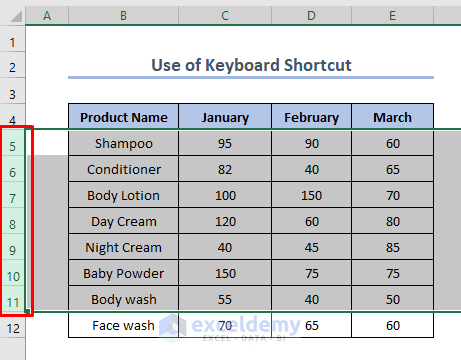
- Rows unhide.
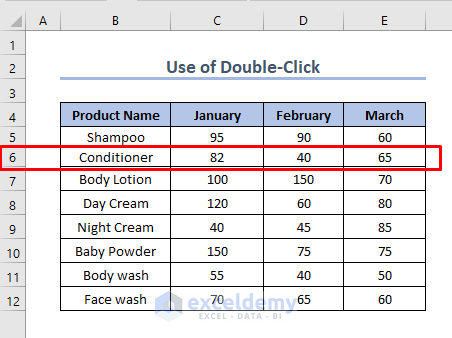
Method 2 – Unhide Rows by Double Clicking
Steps:
- Place the cursor over the hidden row and double-click until a split two-headed arrow is displayed.
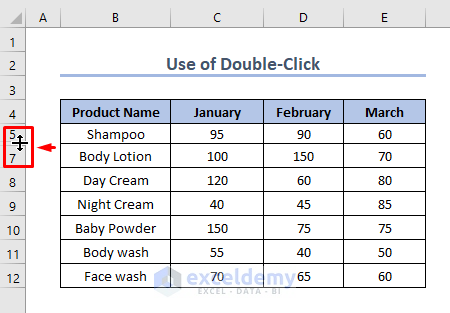
- The row is visible.
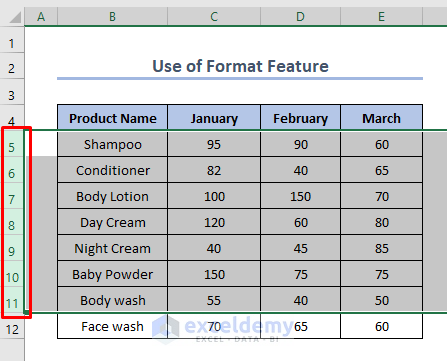
Method 3 – Unhide Rows using the Format Feature
Steps:
- Select the rows you want to unhide.
- Go to the Home tab > Cells > Format > Hide & Unhide.
- Click Unhide Rows.
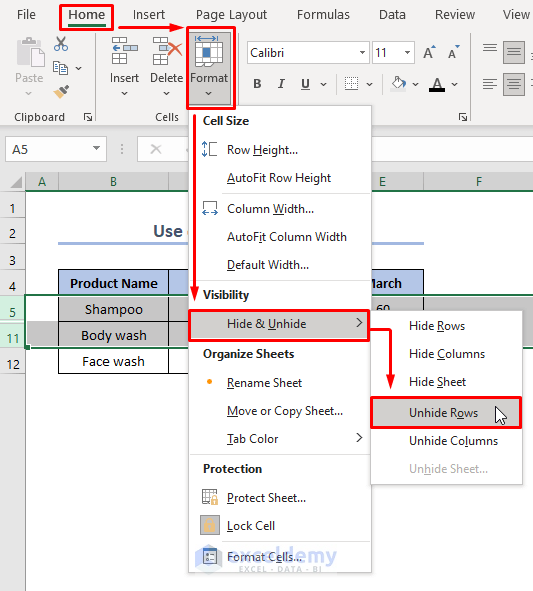
- Hidden rows are visible.
Read More: [Fixed!] Excel Rows Not Showing but Not Hidden
Method 4 – Unhide a Specific Row Using the Name Box in Excel
The Name Box is an infobox that shows the location of the “dynamic/active cell” in the worksheet.
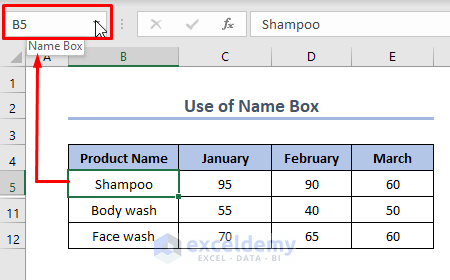
Steps:
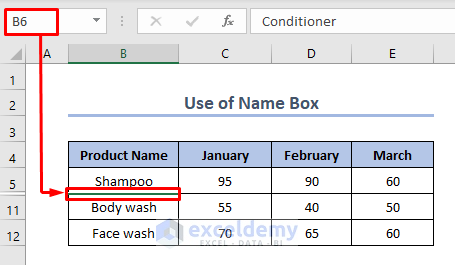
- Enter B6 in the name box.
- Press Enter.
- The green line indicates B6 is selected.
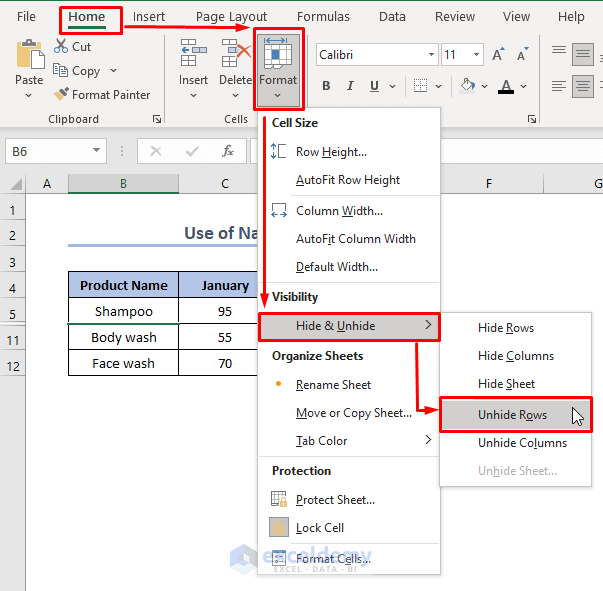
- Go to the Home tab > Format > Hide and Unhide > Unhide Rows.
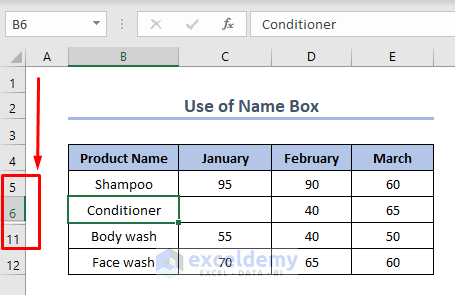
- The whole row containing B6 is visible.
Method 5 – Disclose Rows using a Keyboard Shortcut
Steps:
- Select the hidden rows including one row above and one below.
- Press Ctrl, Shift, 9.
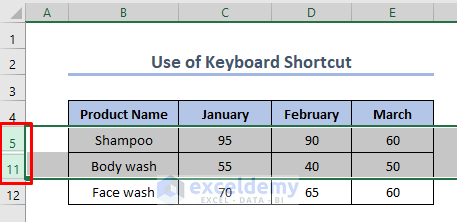
- Hidden rows will be displayed.
Read More: Shortcut to Unhide Rows in Excel
Method 6 – Making Rows Visible by Changing the Row Height
Steps:
- Click the top left corner and select the whole spreadsheet.
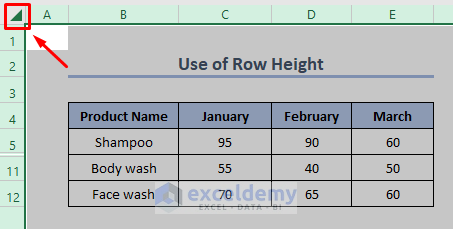
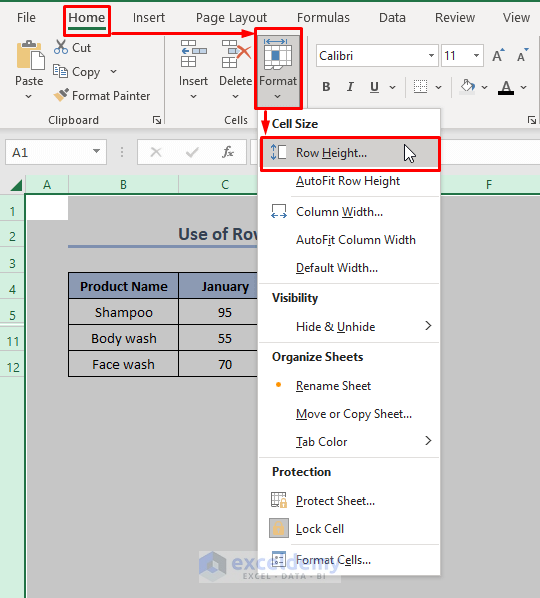
- Go to the Home tab and choose Format .
- Select Row Height.
- In the new window, enter a row height. Here, 18.
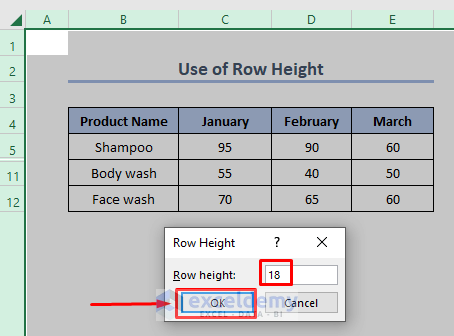
- Hidden rows will be displayed.

Method 7 – Show All Hidden Rows in the Whole Excel Spreadsheet
Steps:
- ➣Click the top left corner of your sheet.

- Right-click and select Unhide.
Read More: Unhide All Rows Not Working in Excel
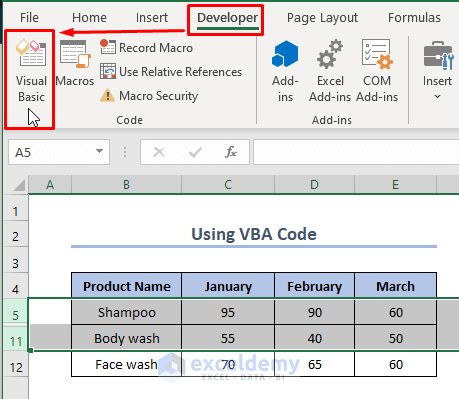
Method 8 – Unhide Rows Using a VBA Code in Excel
Use a VBA code to unhide all the rows in Excel.
Steps:
- Select the rows you want to unhide.
- Go to the Developer tab and choose Visual Basic to open the visual basic editor.
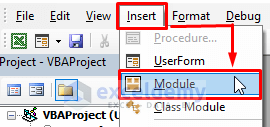
- Click Insert and select ‘Module’. A new module window will open.
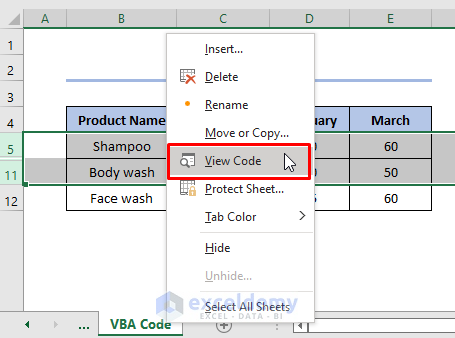
- You can also right-click the spreadsheet bar and go to View Code.
- Enter the VBA code.
VBA Code:
Sub UnhideAllRows()
Selection.EntireRow.Hidden = False
End Sub- Click Run or press F5 to run the macro.
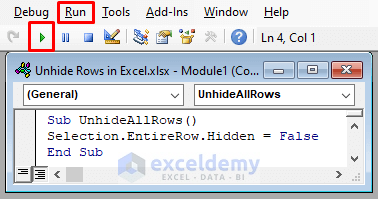
- Hidden rows will be displayed.
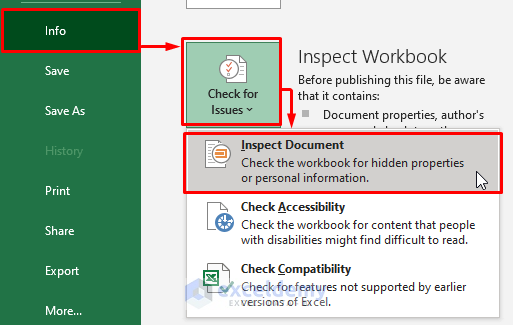
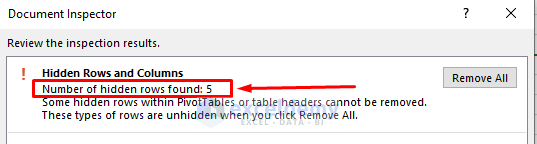
Check the Number of Hidden Rows
In ‘Inspect Document‘ you can quickly see the number of hidden columns or rows in the worksheet.
Steps:
- Select the File tab.
- Go to Info.
- Click ‘Check for Issues‘.
- Click Inspect Document.
- To make sure the Hidden Rows and Columns option is enabled in the Document Inspector, click Inspect.
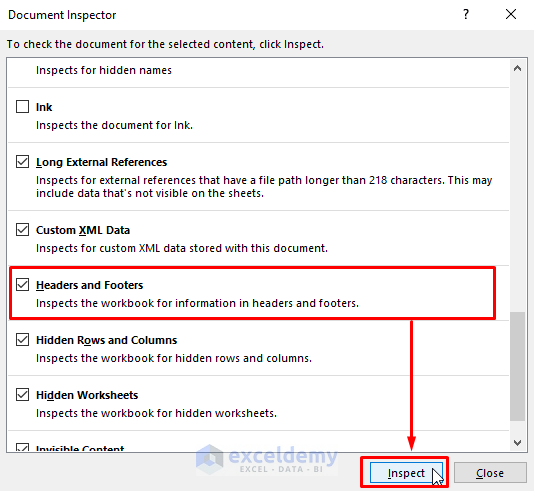
- You will see the total number of hidden rows and columns.
Reasons Why Rows in Excel Cannot Be Unhidden
- The Worksheet is protected
Go the Review tab > select Changes > click Unprotect Sheet.
Click Protect Sheet in the Review tab, choose Format rows and click OK to keep the worksheet protected.
- Small Row height, but Not Zero
Check the height of the rows.
- Filtered out Rows
When row numbers become blue, it means that some rows have been filtered. Remove all filters.
Tips:
To unhide all rows and columns, select the entire spreadsheet and press Ctrl + Shift + 9 to see hidden rows. Press Ctrl + Shift + 0 to see hidden columns.
Download Practice Workbook
Download the workbook here.
Related Articles
<< Go Back to Hide Rows | Rows in Excel | Learn Excel
Get FREE Advanced Excel Exercises with Solutions!

Thanks for sharing these methods to unhide rows in Excel! I was particularly impressed with the ‘AutoFit’ method, it wasn’t something I knew existed. Saves me so much time when working with large datasets.
Dear,
You are most welcome.
Regards
ExcelDemy