In Excel, sometimes we see that in a worksheet there is a date column with a timestamp. There are some easy approaches to remove time from date in Microsoft Excel.
1. Using ‘Format Cells’ Feature to Remove Time from Date in Excel
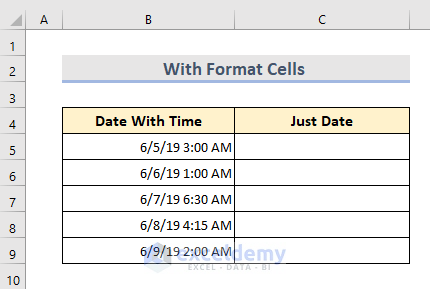
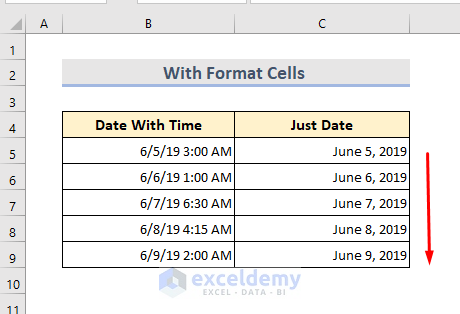
With the Format Cells option, we can easily remove time from date in Excel. Assuming we have a dataset of Time with a date. We are going to remove the time part in the next cell.
STEPS:
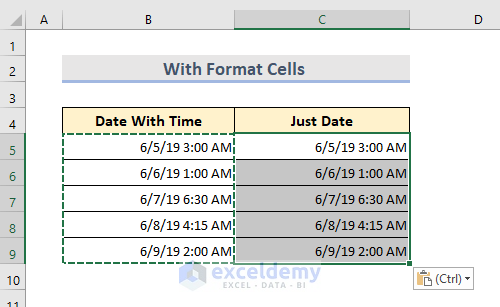
- Select the cells and copy-paste them to the next cells by pressing Ctrl+C & Ctrl+V.
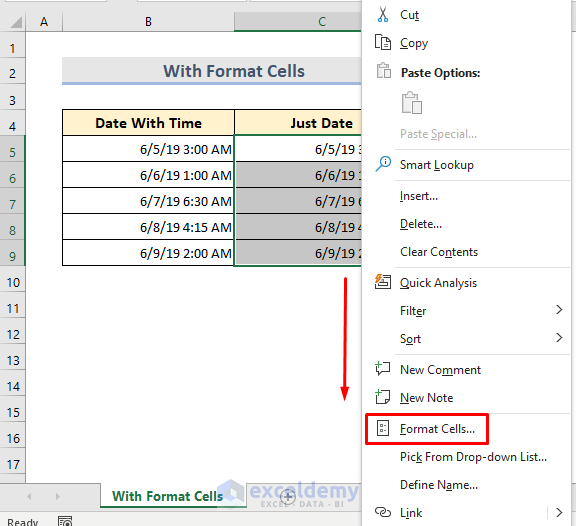
- Now on the selected cells, Right-click the mouse.
- Select Format Cells.
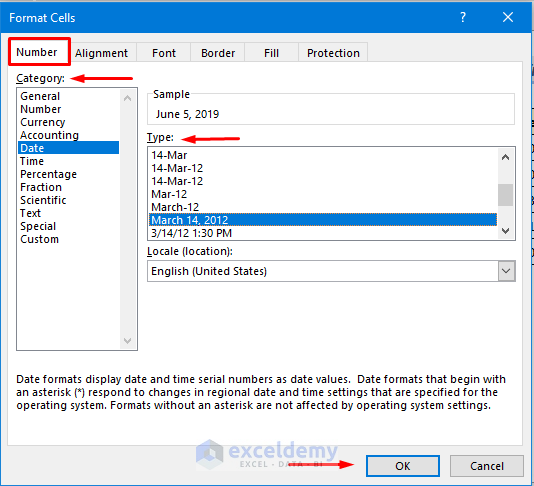
- Here the Format Cells window opens up.
- Go to the Number tab.
- Then from the Category, select Date.
- In Type, select the date format we want to input.
- Finally, press OK.
- We can see the date without time.
Read More: How to Insert Static Date in Excel
2. Using Excel Find and Replace Tool for Removing Time from Date
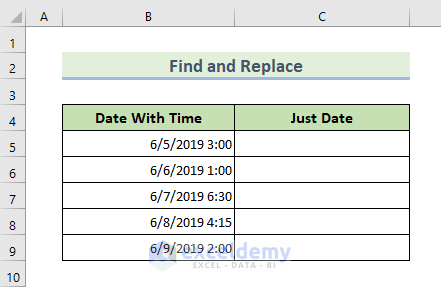
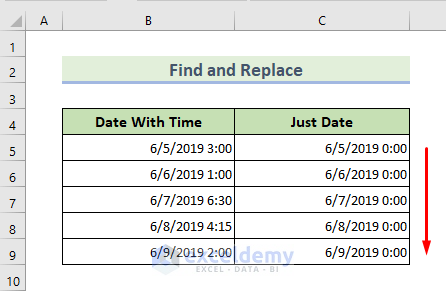
The Find and Replace tool is one of the most important tools in Microsoft Excel. In the following dataset, we are going to use this to find out how it works.
STEPS:
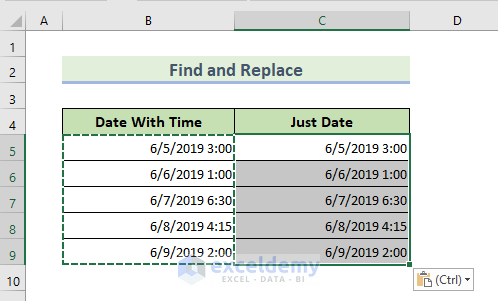
- Select the cells and copy them by pressing Ctrl+C.
- Paste them to the next cells by pressing Ctrl+V.
- Keep the new cells selected.
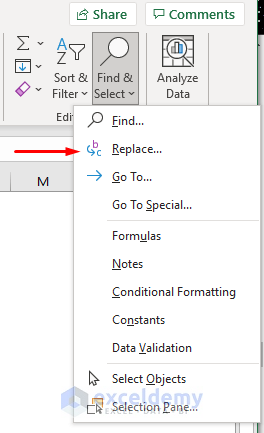
- Go to the Home tab.
- From the Find & Select drop-down, select Replace.
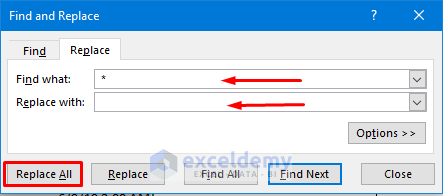
- A dialogue box is showing.
- Now in the Find what box put a Spacebar and an Asterisk (*) symbol.
- Leave the Replace with box empty.
- Click on the Replace All.
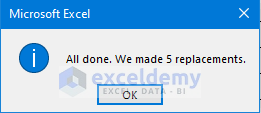
- A confirmation box pops up.
- Click OK.
- Close the dialogue box.
- At last, the time is removed from the cell.
3. Applying VBA Code to Remove Time from Date in Excel
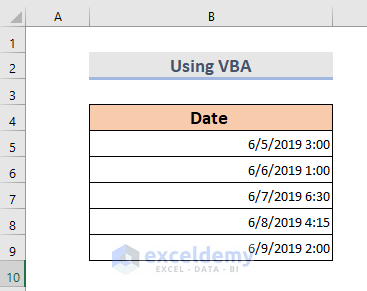
Assuming the data imported to the Spreadsheet with time and date. We are going to use a VBA code to remove the time.
STEPS:
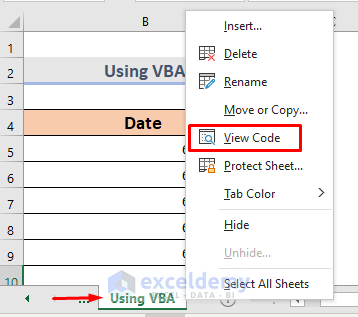
- In the sheet bar, select the spreadsheet and Right-click on the mouse.
- Select View Code.
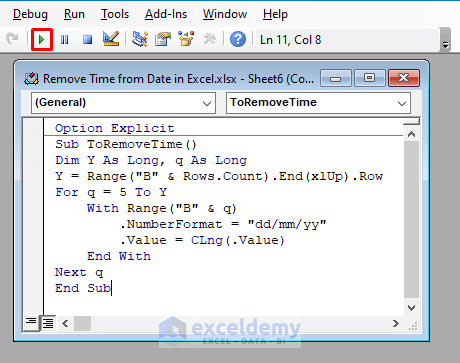
- A VBA Module opens up.
- Type this code:
Option Explicit
Sub ToRemoveTime()
Dim Y As Long, q As Long
Y = Range("B" & Rows.Count).End(xlUp).Row
For q = 5 To Y
With Range("B" & q)
.NumberFormat = "dd/mm/yy"
.Value = CLng(.Value)
End With
Next q
End Sub- Click the Run option.
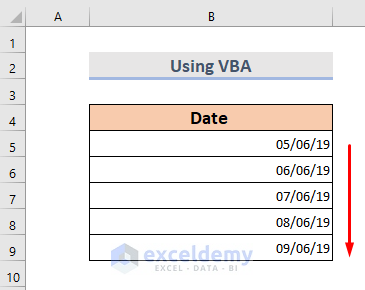
- Now we can see the date without time.
Read More: How to Insert Date in Footer in Excel
4. Applying ‘Text to Columns’ Feature to Remove Time
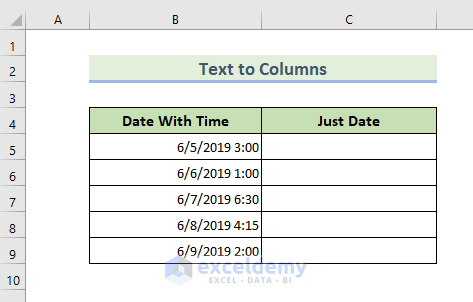
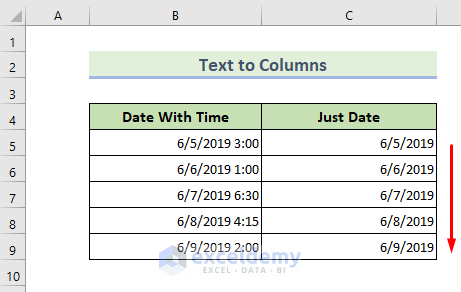
Here we have a dataset containing the date and time. We are going to use Text to Columns to remove time from date.
STEPS:
- Select all the cells.
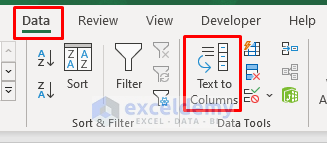
- Now from the ribbon section, go to Data > Text to Columns.
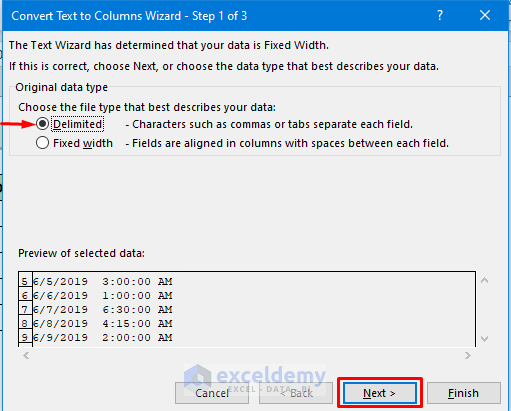
- A Wizard Step 1 window opens up.
- Select Delimited.
- Now Click on Next.
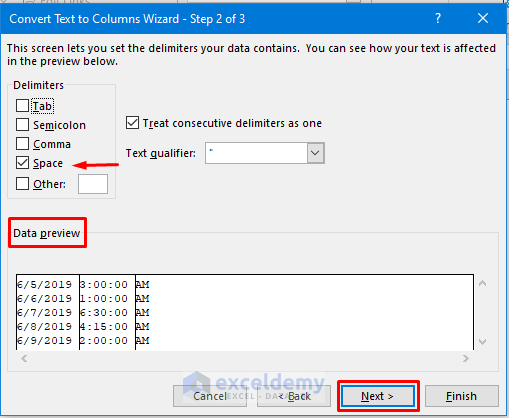
- In Wizard Step 2 window, select Space from the Delimiters box.
- We can see the preview in the Data preview box.
- Then select Next.
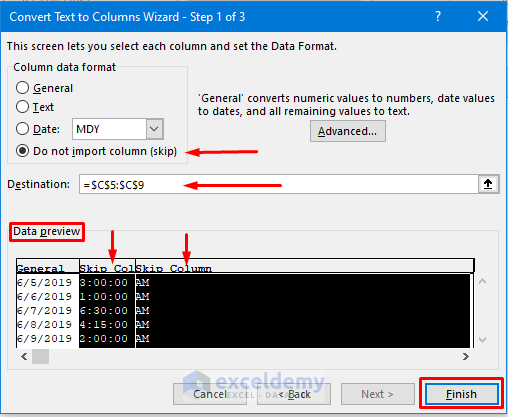
- From the Wizard Step 3 window, select the time values columns from the Data preview box.
- Click on the “Do not import column (skip)”.
- After that, select the destination where we want to see the result in the Destination box.
- Click on Finish.
- The time is removed from the date cells.
5. Using DATEVALUE and TEXT Functions to Remove Time from Date in Excel
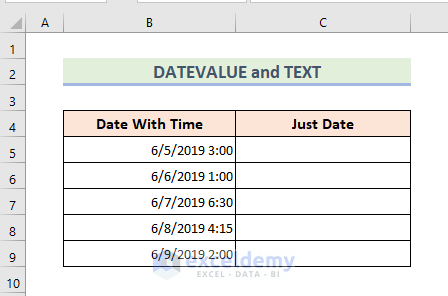
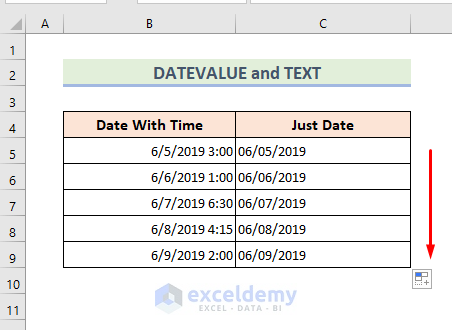
To convert a date with the DATEVALUE function, it needs to be stored in TEXT format. That’s why we are going to use the combination of DATEVALUE & TEXT functions for the removal of time from the date in Excel. Here’s the dataset:
STEPS:
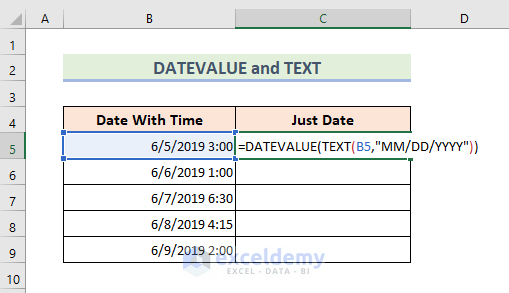
- Select Cell C5.
- Type the formula:
=DATEVALUE(TEXT(B5,"MM/DD/YYYY"))➤ NOTE: The TEXT function takes the value and specifies it into TEXT format. The DATEVALUE function returns to the position only with the date value.
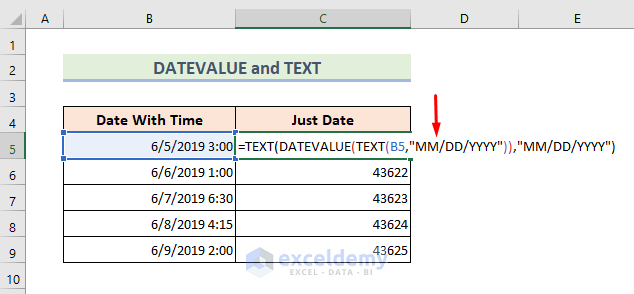
- Hit Enter and drag down the cursor. Then we can see the numeric value of the date.
- We can manually change the value into the date from the Number format in the Home tab.
Home > Number Format > Short Date/Long Date.
➤ NOTE: We can use the formula to avoid the manual process.
Formula:
=TEXT(DATEVALUE(TEXT(B5,"MM/DD/YYYY")),"MM/DD/YYYY")Lastly, hit Enter and use the Fill Handle tool to see the result.
Read More: Formula for Weekly Dates in Excel
6. Inserting INT Function to Remove Time
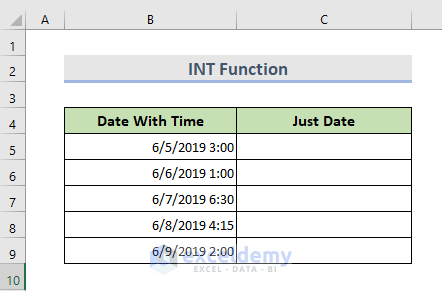
INT or Integer function is very easy and simple in Microsoft Excel. By rounding down, the INT function returns the integer part of a decimal value. Excel accepts date as an integer portion and time as a fraction. So we can use this function for the below dataset to remove time from date.
STEPS:
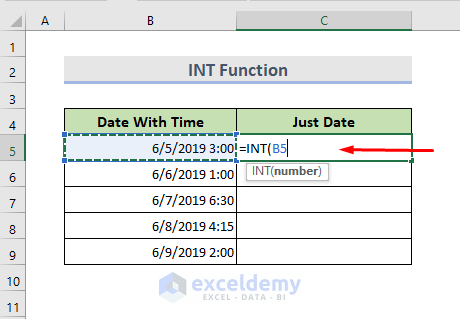
- Select Cell C5.
- Type the formula:
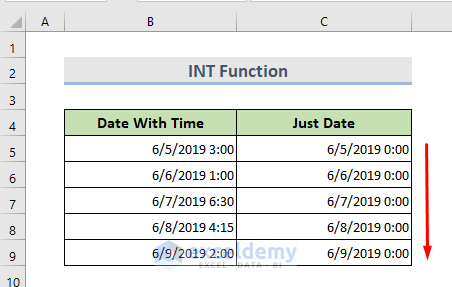
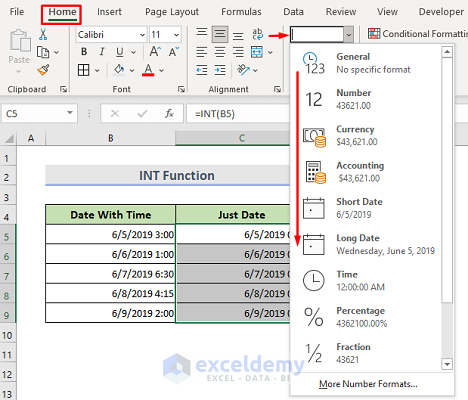
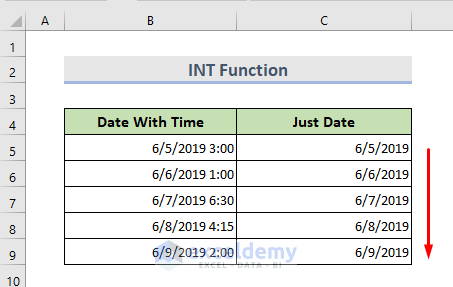
=INT(B5)- Hit Enter and drag down the cursor to the cells.
- Now select the cells and go to the Home tab.
- Select Number Format > Short Date/Long Date.
- Use Fill Handle to see the rest of the results.
Download Practice Workbook
Download the following workbook and exercise.
Conclusion
By following these methods, we can remove time from date in Excel. There is a practice workbook added. Go ahead and give it a try. Feel free to ask anything or suggest any new methods.
Related Reading
- How to Display Day of Week from Date in Excel
- How to Insert Last Saved Date in Excel
- How to Insert Drop Down Calendar in Excel
<< Go Back to Insert Date | Date-Time in Excel | Learn Excel
Get FREE Advanced Excel Exercises with Solutions!