Step 1 – Prepare Data
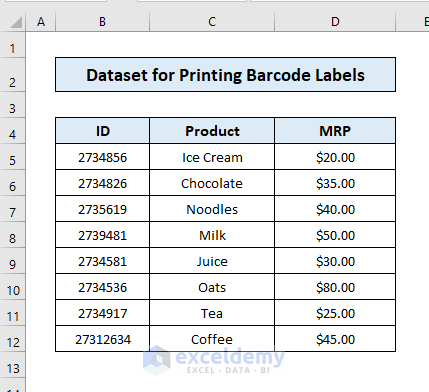
The dataset showcases products and their price.
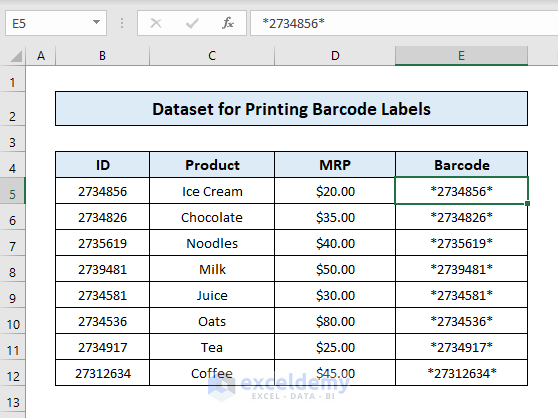
- Add a column with the heading “Barcode” and enter the values of the column ID adding an asterisk(*) at the beginning and the end of the value.
Read More: How to Use Barcode Scanner in Excel
Step 2 – Preparing a Barcode Template in Word
- Open a new Word document.
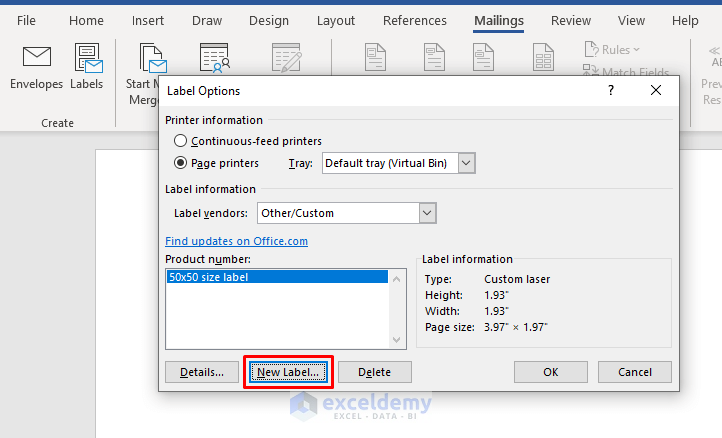
- Go to the Mailings tab, and click Start Mail Merge> Labels.

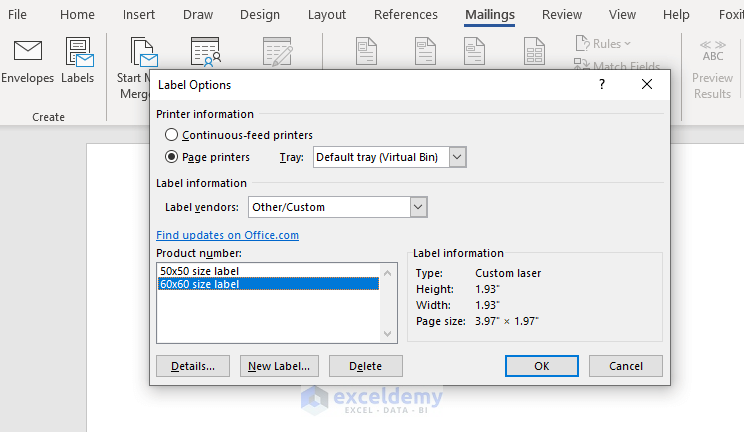
- Select New label.
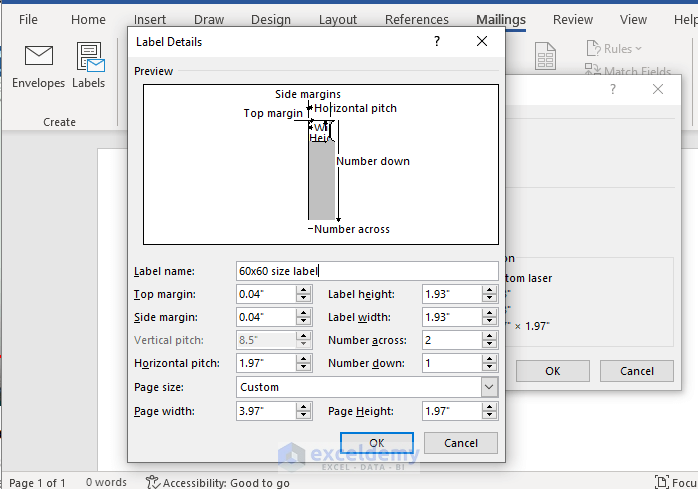
- Customize the dimension of the Label details dialog box and click OK.
- Select the label you created and click OK.
Read More: How to Use Barcode Scanner for Inventory in Excel
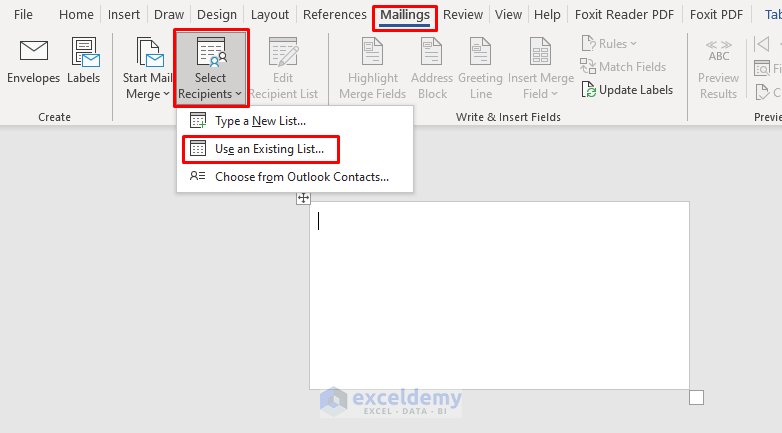
Step 3 – Importing Data from Excel
- Go to Select Recipients and choose Use an Existing List.
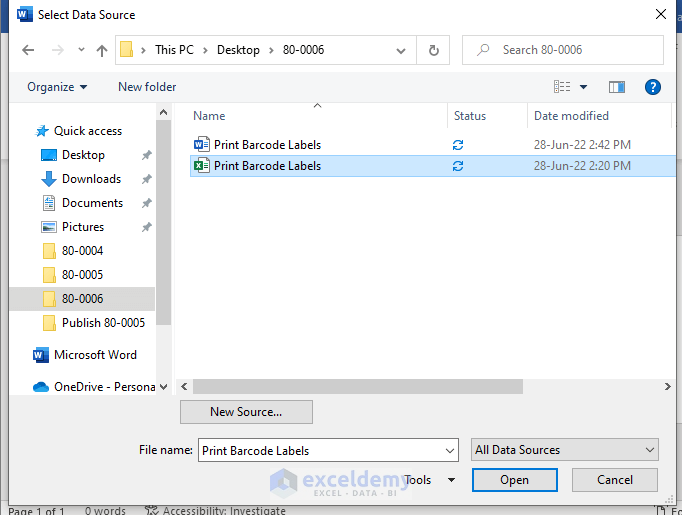
- Select your Excel workbook and click Open.
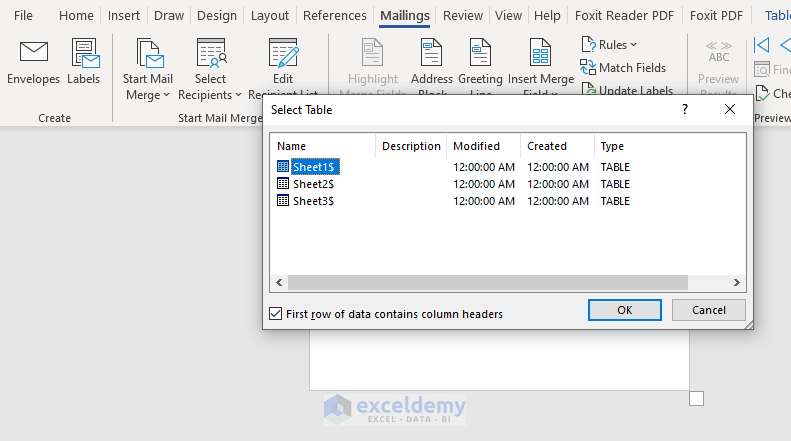
- Choose the worksheet.
- Go to Insert Merge Field and select ID.
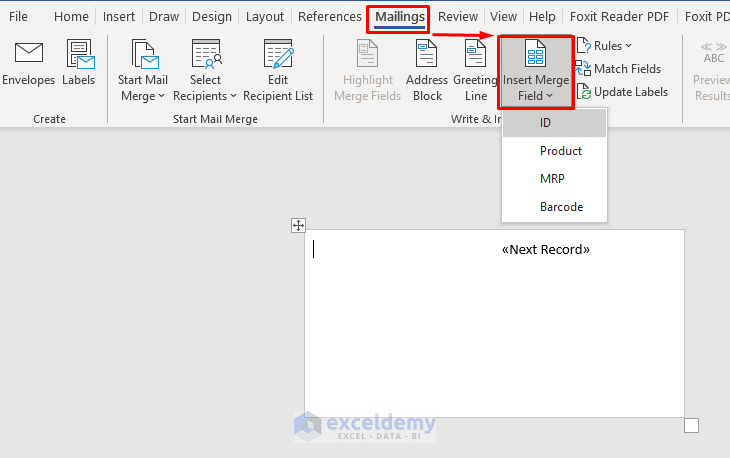
- Select the other headings one by one.

Read More: Barcode Scanner Entry to Excel Database with Timestamp
Step 4 – Generating and Printing Barcode Labels
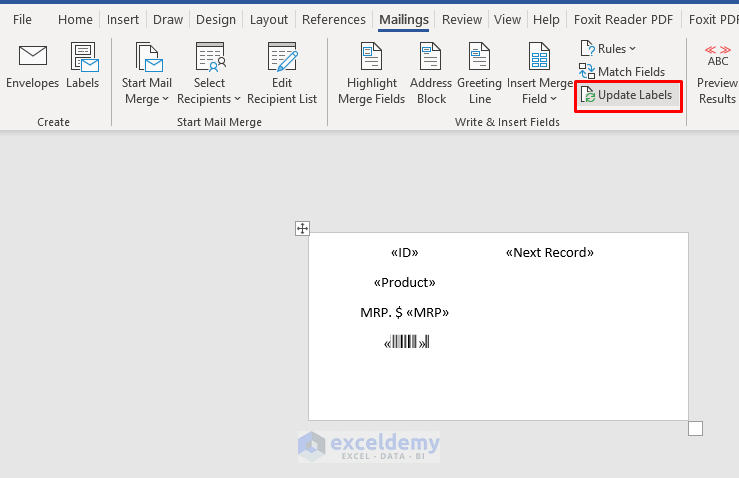
- Select <<Barcode>> and change the text format to BARCODE.
- Use the font Code128.
- Install the font with the help of Microsoft Support.

- The Barcode format will be displayed. Click Update Labels.
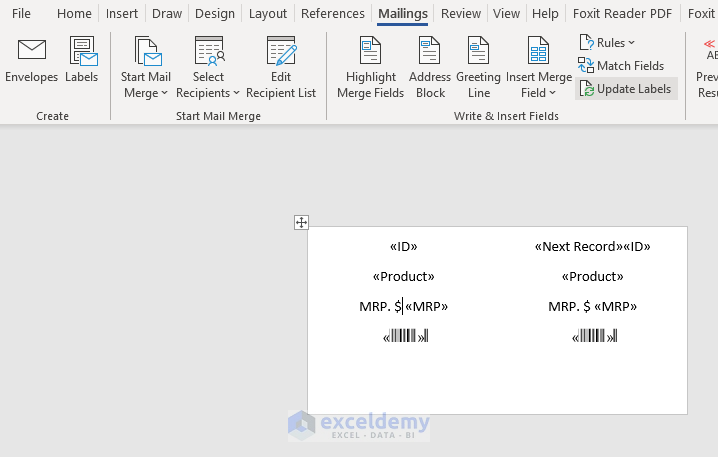
Your data is updated.
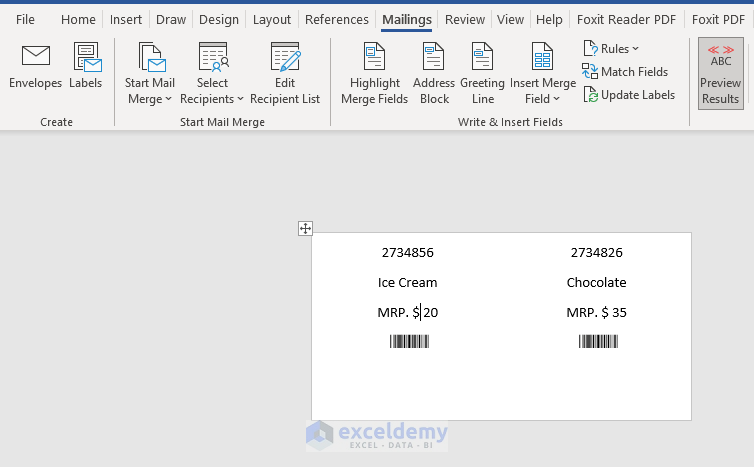
- Click Preview Results and you will see Barcodes for different items.
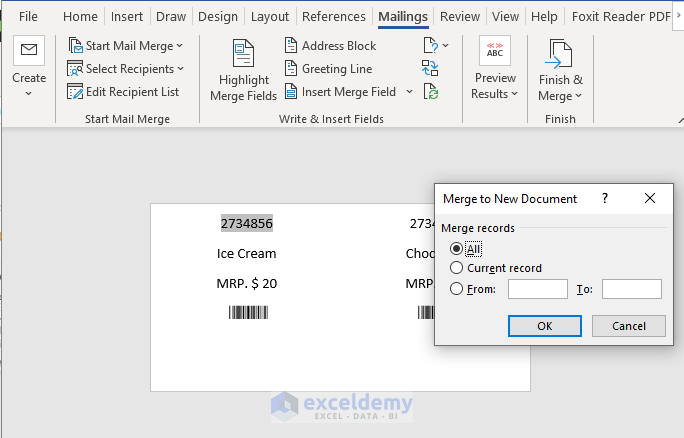
- Go to Finish & Merge>Edit Individual Document.
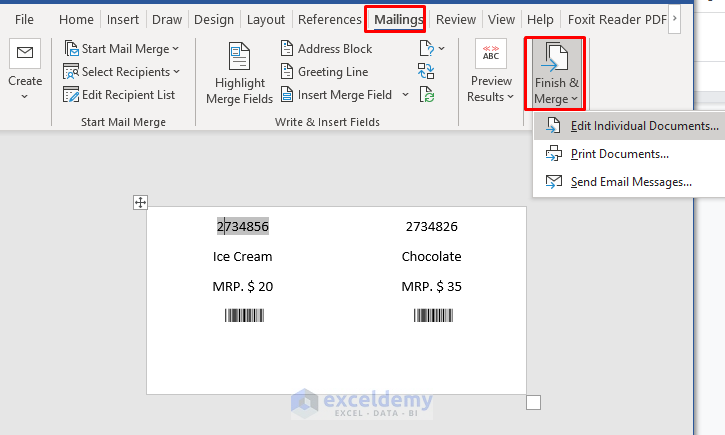
- Select All and click OK.
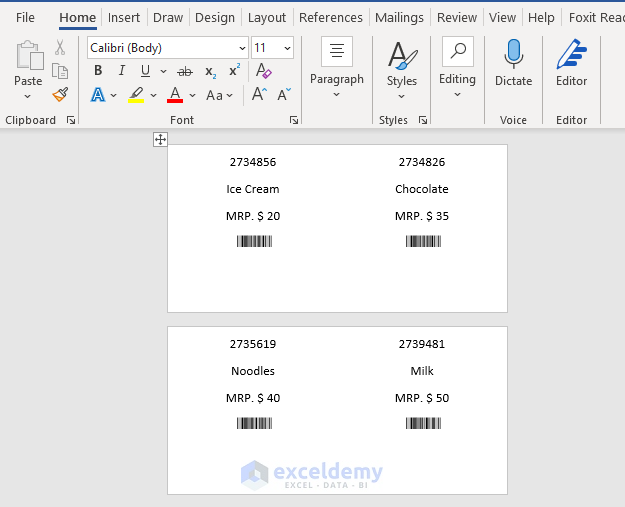
This is the output.
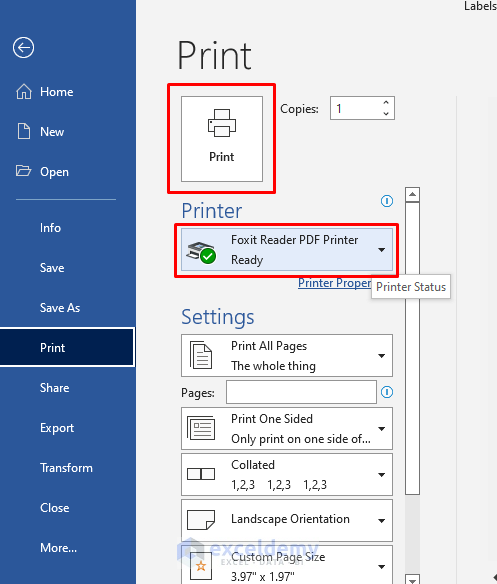
- Press CTRL+P, select your printer, and click Print.
Read More: How to Move Barcode Scanner to Next Row in Excel
Download Practice Workbook
Related Articles
- How to Make Auto Enter with Barcode Scanner in Excel
- Creating Barcode Scanner to Track Check in & Check out Time in Excel.
- [Solved] Barcode Scanner Not Going to Next Line in Excel
- Creating a Barcode Scanner Macro in Excel
<< Go Back to Barcode in Excel | Learn Excel
Get FREE Advanced Excel Exercises with Solutions!

Hi,
I got it to work the very first time but when I go back to do it again it’s not working, when click on the next records the Font Code128 just changes back to the normal font, is there something I am missing. I try changing the labels manually but the final result is only the text. I want to print 51 labels per A4 sheet.
Thanks
Ken
Hi KEN,
This may encounter from several reasons.
1. If you have protected the worksheet or specific cells, it can prevent changes to the font settings. Try unprotecting the cells or the entire worksheet to see if that resolves the issue.
2. If there are any conflicting formatting applied to the cells, it might cause the barcode font to revert. Select the cells and clear any formatting such as bold, italic, or color changes. Then, set the font to “Code128” again.
3. Ensure that the page setup and print preview are correctly configured. Check the scaling options to make sure that the labels fit properly on the A4 sheet. Adjust the margins and other settings as needed to accommodate 51 labels per sheet.
4. If the above steps don’t solve the problem, try creating a new Excel file and follow the barcode printing steps from scratch. This can help identify if the issue is specific to your existing file.
Regards,
Rafiul Hasan
ExcelDemy Team
Thanks for Sharing this information. it is very helpful for me
Hello Nick,
You are most welcome.
Regards
ExcelDemy