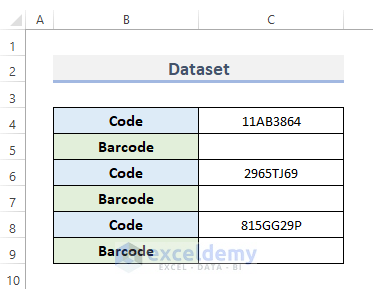
Let’s look at the ways to move the barcode scanner to the next row in Excel. We’ll use a simple dataset with random product codes.
Method 1 – Utilize Excel Options to Shift the Barcode Scanner to the Next Row
Steps:
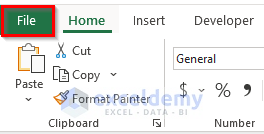
- Go to the File tab from the ribbon.
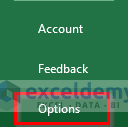
- Click on the Options menu.
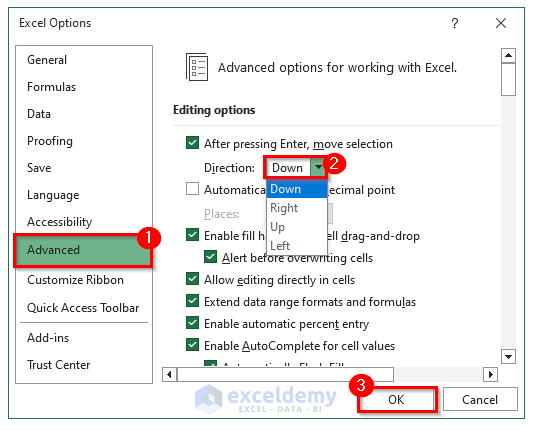
- The Excel Options dialog box will appear.
- Go to the Advanced option.
- In the Editing options group, checkmark After pressing Enter, move selection.
- Select the direction Down from the Direction drop-down menu.
- Press the OK button to complete the process.
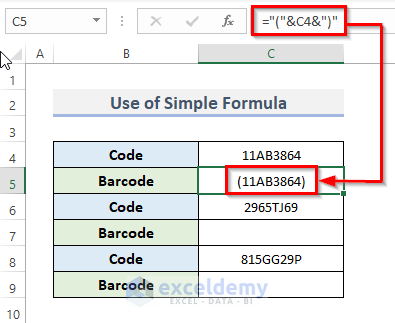
- Select the next row where the barcode is located to move it. In our case, we selected cell C5.
- Use this formula for that cell.
="("&C4&")"- Press the Enter key from your keyboard.
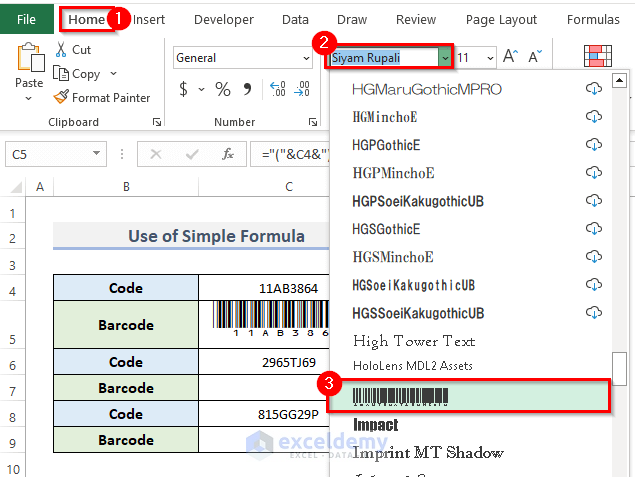
- Go to the Home tab from the ribbon.
- Under the Font category, select the font IDAutomationHC39M.
Note: If you do not have that font in Excel, download it. This font is available online.
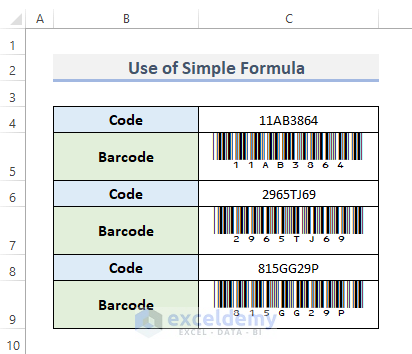
- You can see that the barcode scanner moves to the next row of the code.
Read More: How to Use Barcode Scanner for Inventory in Excel
Method 2 – Apply Excel VBA to Move the Barcode Scanner to the Next Row
Steps:
- Go to the Developer tab from the ribbon.
- Click on Visual Basic from the Code category to open the Visual Basic Editor. Or, press Alt + F11 to open the Visual Basic Editor.

- You can also right-click on your worksheet and go to View Code. This will also take you to Visual Basic Editor.
- This will open up the visual basic window.
- Copy and paste the VBA code below.
VBA Code:
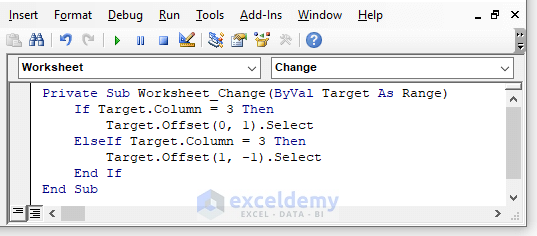
Private Sub Worksheet_Change(ByVal Target As Range)
    If Target.Column = 3 Then
        Target.Offset(0, 1).Select
    ElseIf Target.Column = 3 Then
        Target.Offset(1, -1).Select
    End If
End Sub- Save the code by pressing the Ctrl + S keys.
Code Explanation
Private Sub Worksheet_Change(ByVal Target As Range)If Target.Column = 3 Then
Target.Offset(0, 1).Select
ElseIf Target.Column = 3 Then
Target.Offset(1, -1).Select
End IfStart by moving from cell C4 to cell C5 and selecting cell C4 using the If Else statement and Offset property. Finally, go to the following line in the C5 cell by using the Offset attribute.
End Sub
Note: You don’t need to change the code. All you can do is just change the range as per your requirements.
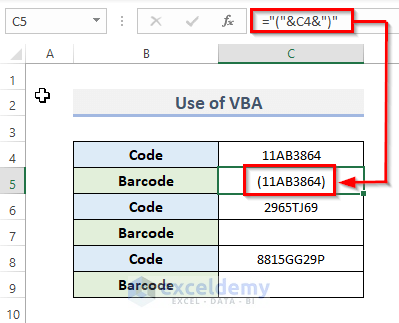
- The barcode can be moved by selecting the subsequent row. We chose C5.
- Copy the formula into that cell.
="("&C4&")"- Press Enter.
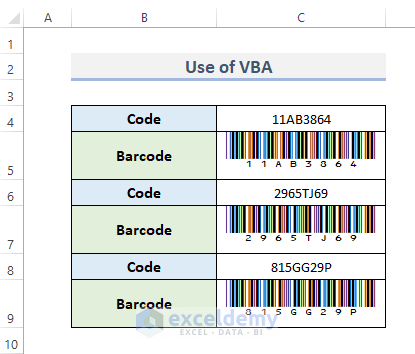
- Go to the Home tab on the ribbon.
- Select the font IDAutomationHC39M from the Font category after that.
- The barcode scanner moved to the row after the code.
Read More: Barcode Scanner Entry to Excel Database with Timestamp
Download the Practice Workbook
Related Articles
- How to Make Auto Enter with Barcode Scanner in Excel
- Creating Barcode Scanner to Track Check in & Check out Time in Excel
- How to Print Barcode Labels in Excel
- [Solved] Barcode Scanner Not Going to Next Line in Excel
- Creating a Barcode Scanner Macro in Excel
<< Go Back to Use Barcode Scanner | Barcode in Excel | Learn Excel
Get FREE Advanced Excel Exercises with Solutions!
