The List of ID and Barcodes dataset shown in the B4:C13 cells contain the ID number and the corresponding Barcode.

Solution 1: Use the TAB and ENTER Keys
Steps:
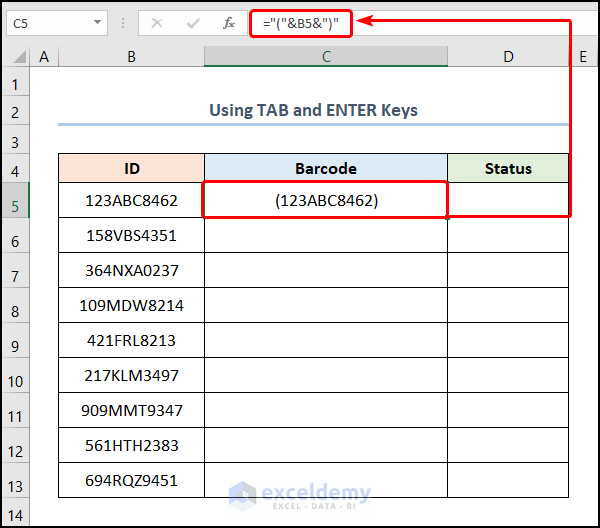
- Go to cell C5 and enter the following formula:
="("&B5&")"
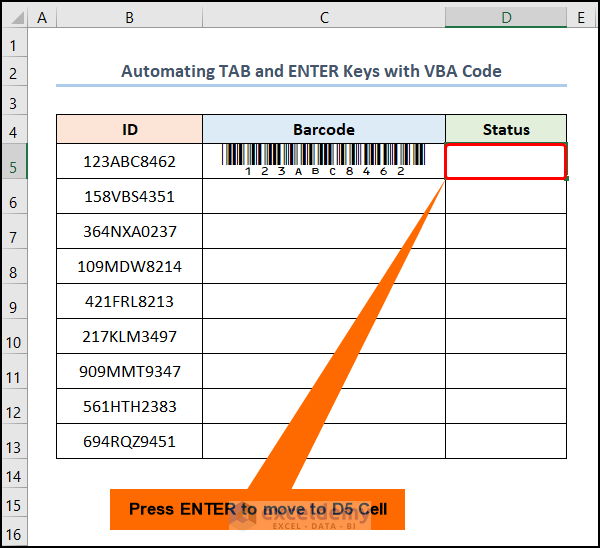
Here, the B5 cell refers to the ID which is 123ABC8462.
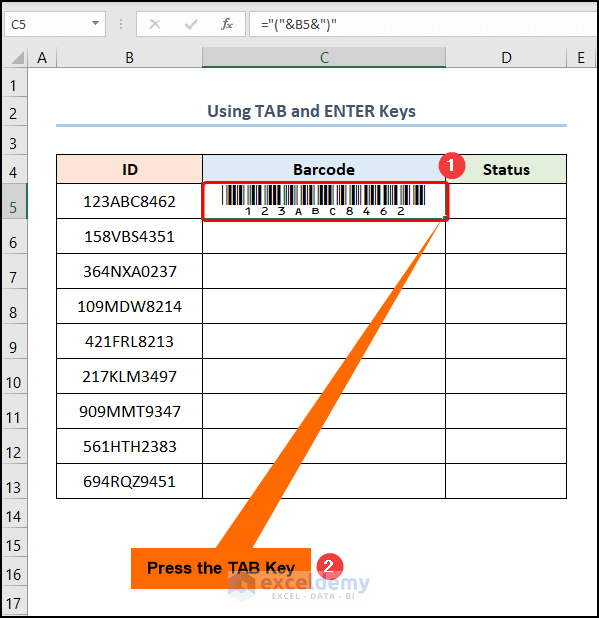
- Press TAB to move to cell D5.
- Enter “OK” to confirm the scanning >> press ENTER to jump to the next line.
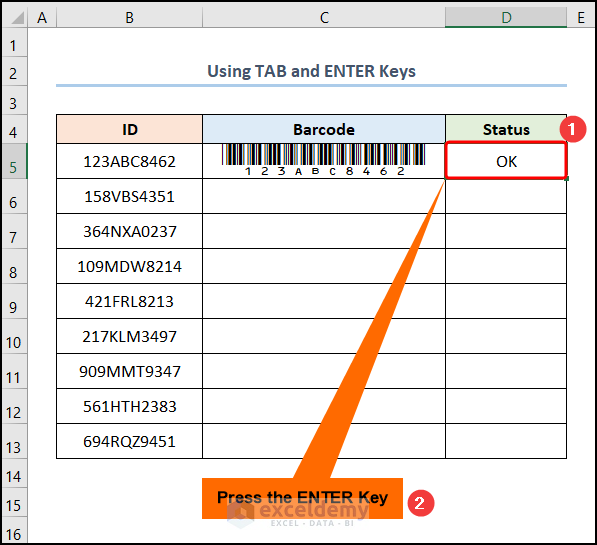
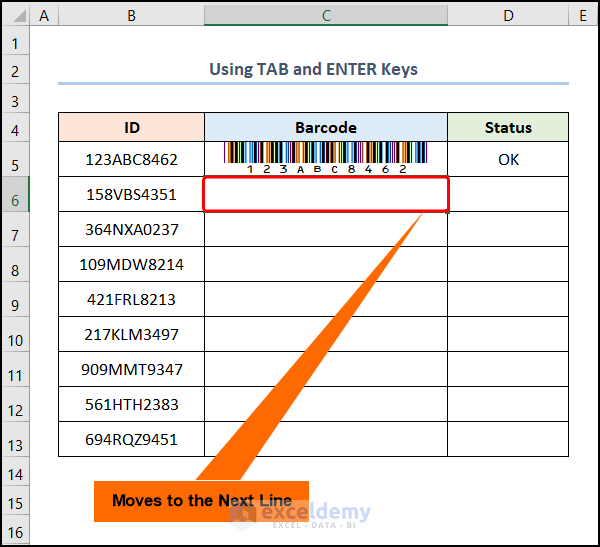
The cursor moves to the next line in cell C6, ready to store the next barcode.
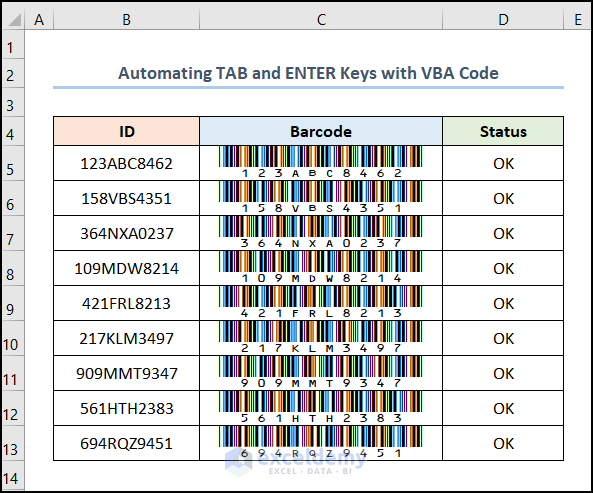
- Repeat the same procedure for the other cells to obtain the results shown in the image below.

Read More: How to Use Barcode Scanner for Inventory in Excel
Solution 2: Automating the TAB and ENTER Keys with VBA Code
Steps:
- Go to the Developer tab >> click the Visual Basic button.
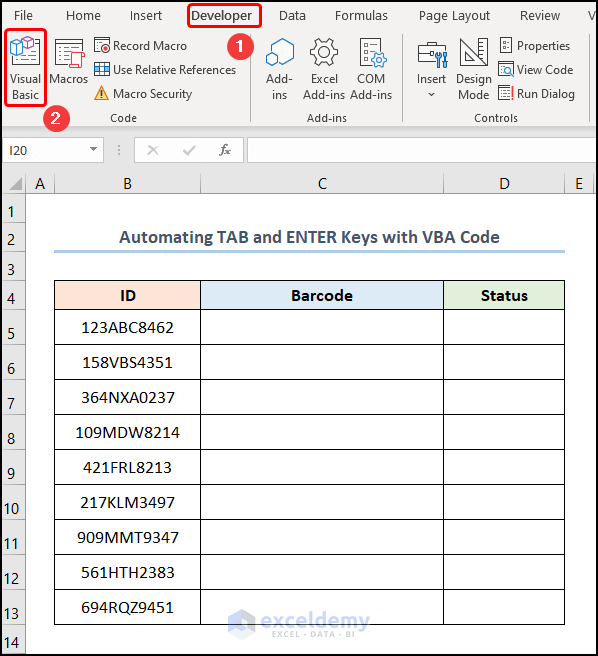
Now, this opens the Visual Basic Editor in a new window.
- Double-Click on the sheet name where you want to insert the VBA code.

Enter the following formula into the window:
Private Sub Worksheet_Change(ByVal Target As Range)
    If Target.Column = 2 Then
        Target.Offset(0, 1).Select
    ElseIf Target.Column = 3 Then
        Target.Offset(1, -1).Select
    End If
End Sub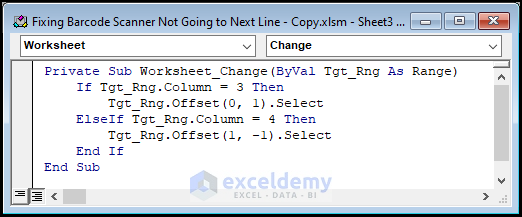
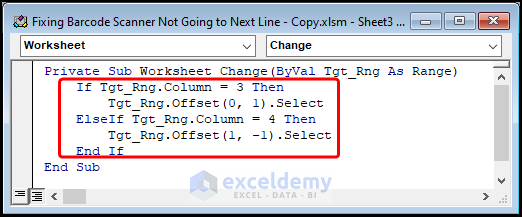
⚡ Code Breakdown:
Here, I will explain the VBA code in the following steps:
- Use the If Else statement and the Offset property to move from column C to column D and select cell D5.
- Use the Offset property to jump to the next line in the C6 cell.
- Go to the C5 cell and enter the following formula:
="("&B5&")"
In the above expression, cell B5 refers to the ID which is 123ABC8462.
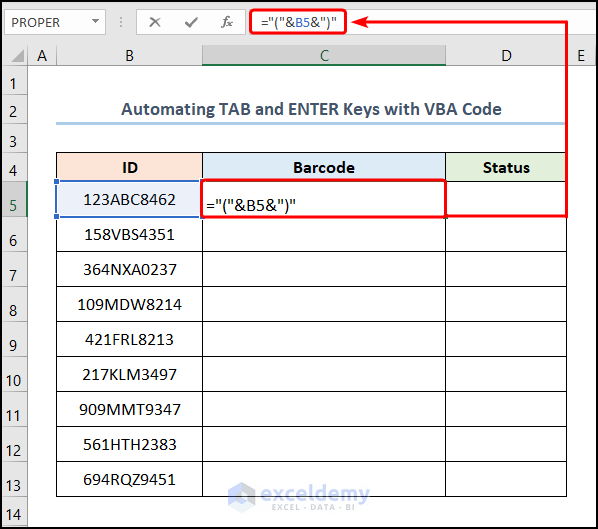
- Pressing ENTER moves the cursor to cell D5.
- Enter OK and press ENTER to move to the next line, i.e. cell C6.

Apply the same process and your output should look like the screenshot shown below.
Solution 3: Applying VBA code
Steps:
- Run beginning steps from the previous methods to open the Visual Basic editor and insert the code into the worksheet.
Private Sub Worksheet_Change(ByVal Target As Range)
Application.EnableEvents = False

If Left(Target.Address, 3) = "$B$" Then

   Range("C" & Target.Row).Value = Time()
   Range("D" & Target.Row).Select
ElseIf Left(Target.Address, 3) = "$D$" Then
   Range("B" & Target.Row + 1).Select
End If
Application.EnableEvents = True
End Sub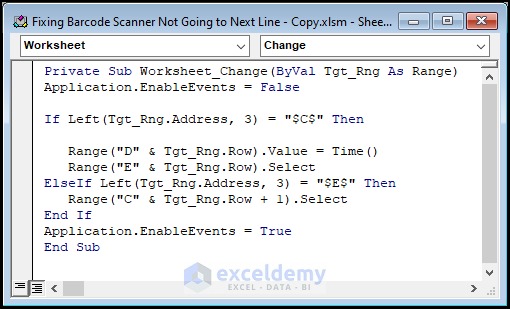
⚡ Code Breakdown:
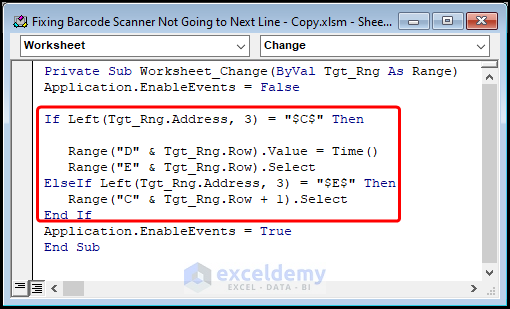
Here, I will explain the VBA code shown in the picture below.
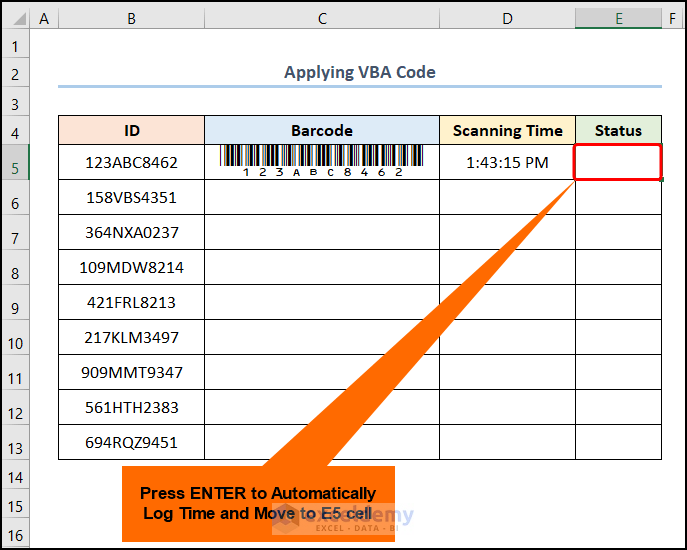
- Use the If Else statement and the Address property to move from column C to column D
- Enter the current time using the Time function
- Jump to column E and select the E5 cell.
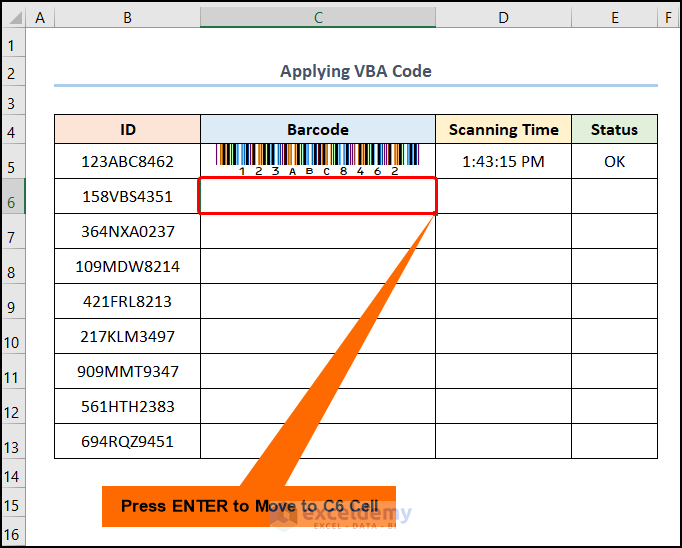
- Move to the next line in the C6 cell using Range.Select method.
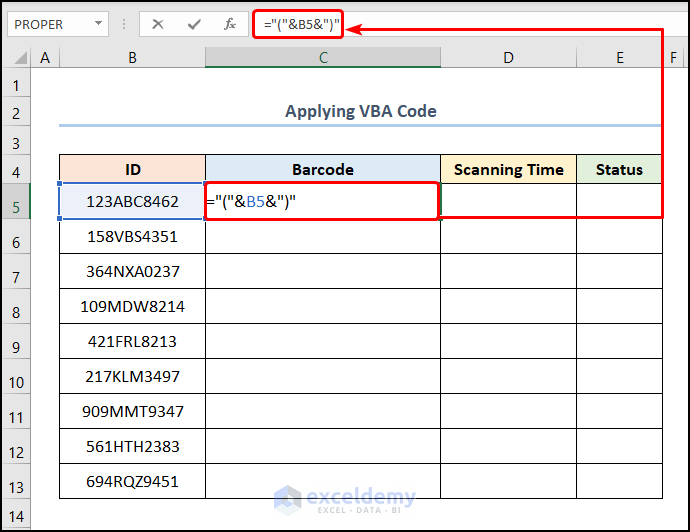
- Go to cell C5 and enter the following formula:
="("&B5&")"
In this equation, the B5 cell refers to the ID which is 123ABC8462.
- Press ENTER to insert the Time in cell D5 and select cell E5.
- Type in “OK” in the Status column and press the ENTER key to move to cell C6 in the next line.
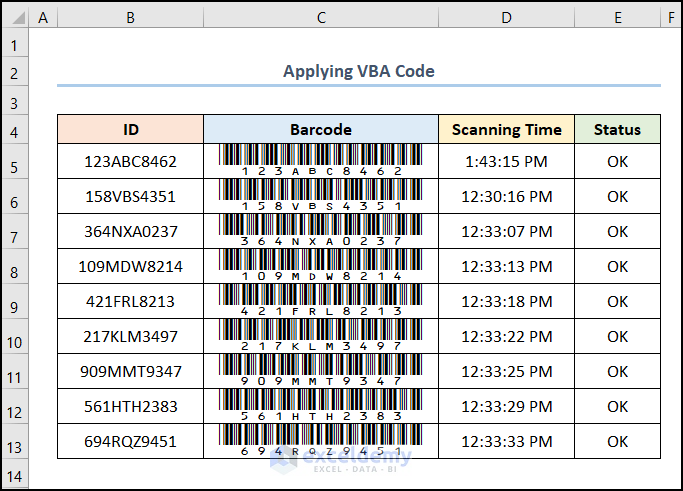
Repeat the same process for the other cells and the results should look like the image given below.
Read More: Creating Barcode Scanner to Track Check in & Check out Time in Excel
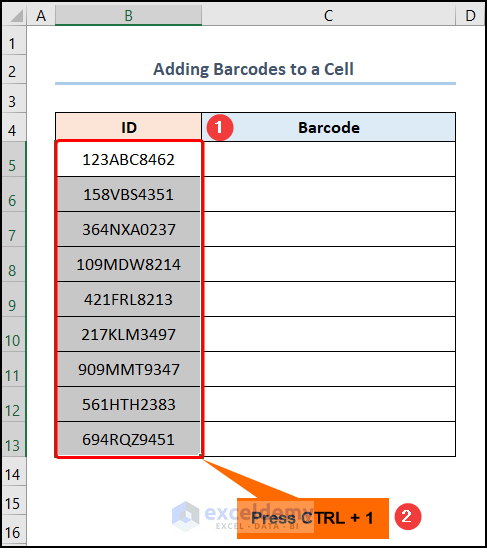
How to Add a Barcode to a Cell in Excel
Steps:
- Download the IDAHC39M font >> install the font on your computer >> restart Microsoft Excel on your computer.
- Select the B5:B13 range of cells >> press the CTRL + 1 keys to launch the Format Cells dialog box.
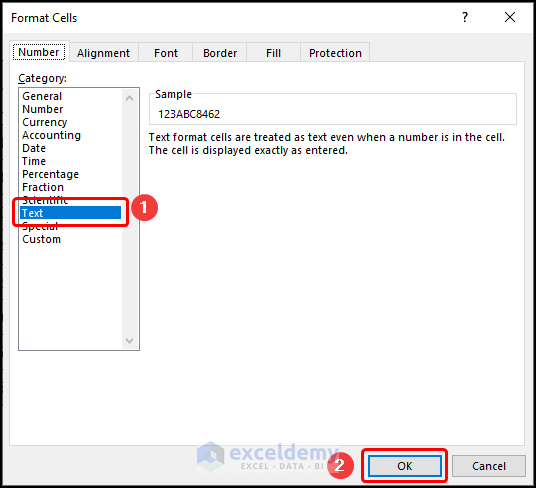
- Choose the Text option >> hit the OK button.
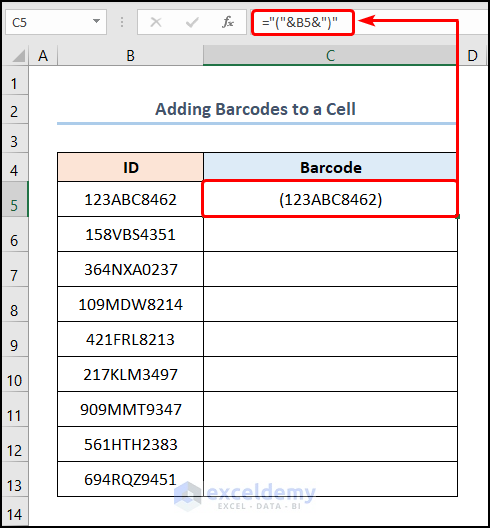
- Go to cell C5 and enter the following formula into the Formula Bar:
="("&B5&")"
Here, the B5 cell indicates the ID which is 123ABC8462.
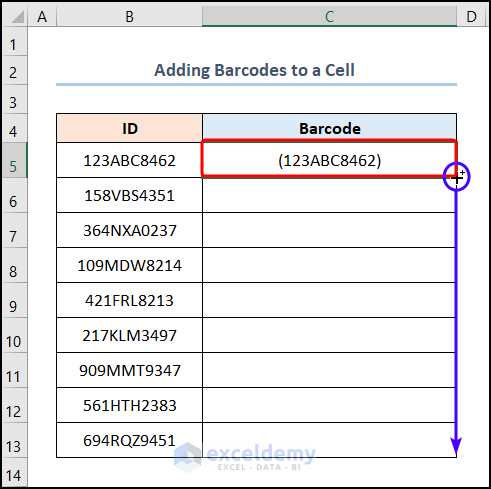
- Use the Fill Handle tool to copy the formula into the cells below.
- Select the C5:C13 range >> choose the IDAHC39M font from the list.
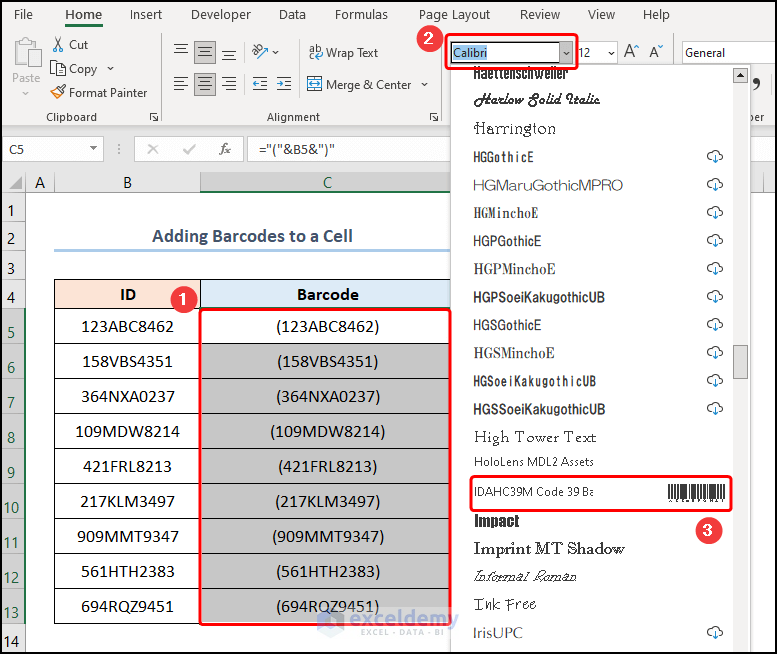
Your results should appear like the picture shown below.

Admittedly, I have skipped the detailed process of making Barcodes in Excel. You may explore it if you wish.
Read More: Barcode Scanner Entry to Excel Database with Timestamp
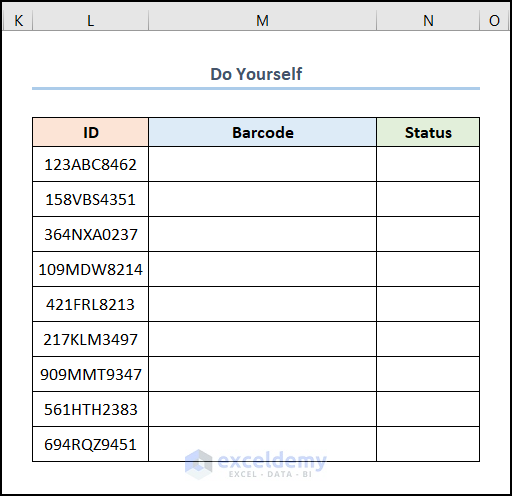
Practice Section
We have provided a Practice section on the right side of each sheet so you can practice.
Download the Practice Workbook
You can download the practice workbook from the link below.
Related Articles
- How to Move Barcode Scanner to Next Row in Excel
- How to Make Auto Enter with Barcode Scanner in Excel
- How to Print Barcode Labels in Excel
- Creating a Barcode Scanner Macro in Excel
<< Go Back to Use Barcode Scanner | Barcode in Excel | Learn Excel

