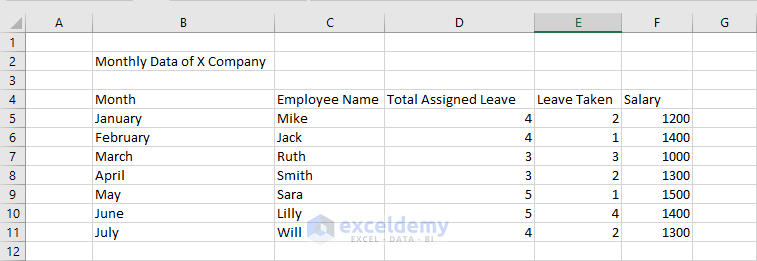
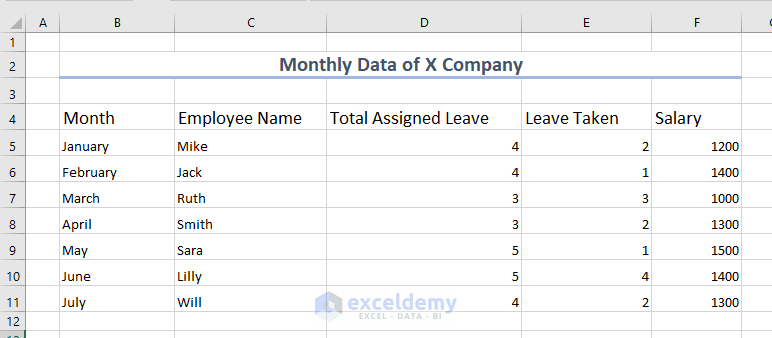
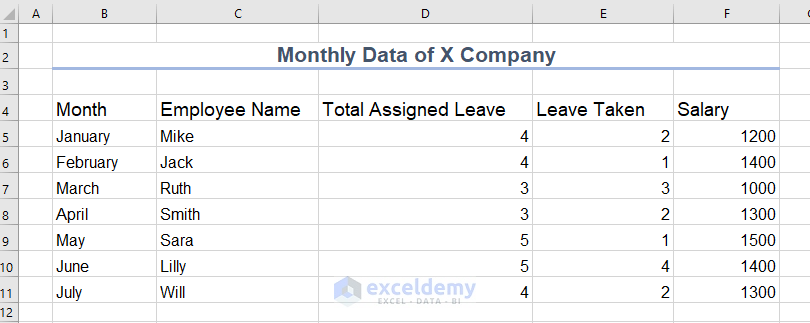
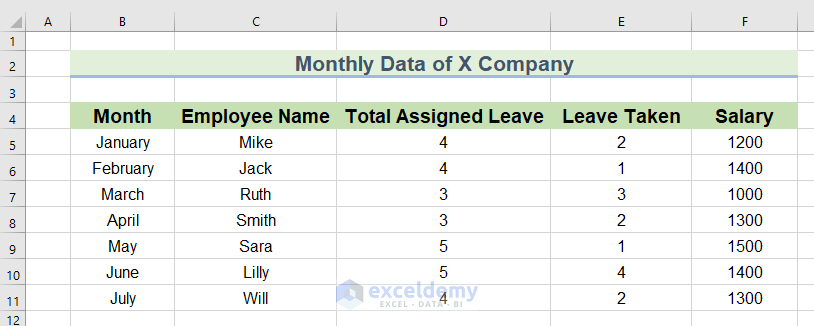
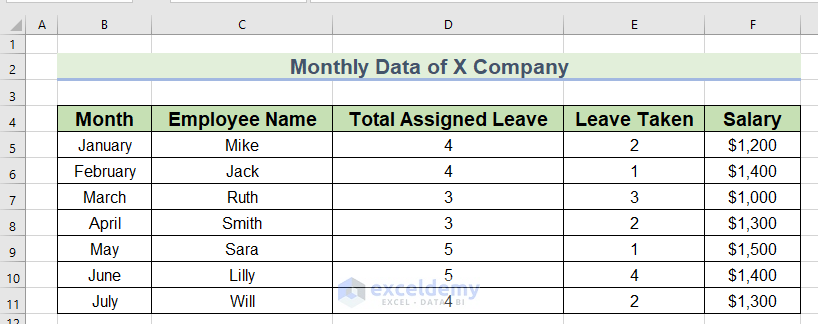
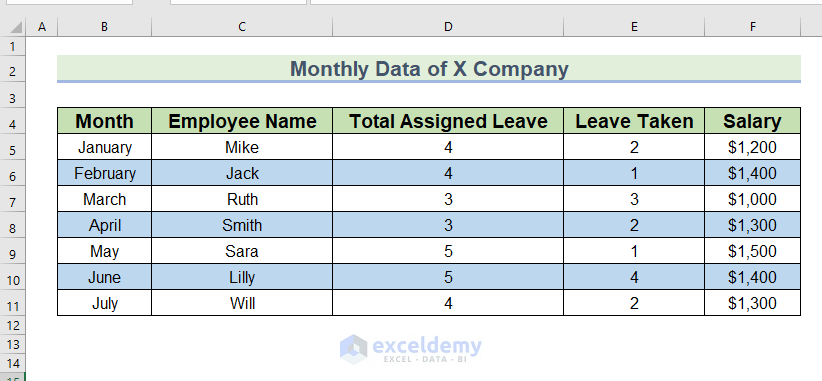
The following data table represents the monthly data of a company. The Month, Employee Name, Total Assigned Leave, Leave Taken, and Salary are the column headings. We will show you how to make Excel look pretty with 16 formatting suggestions.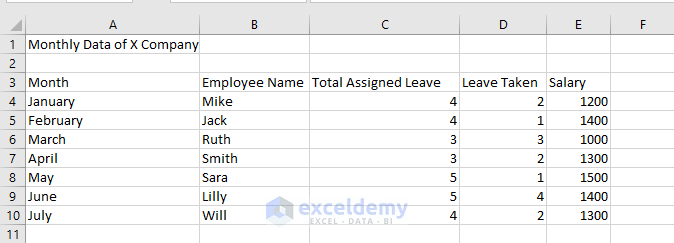
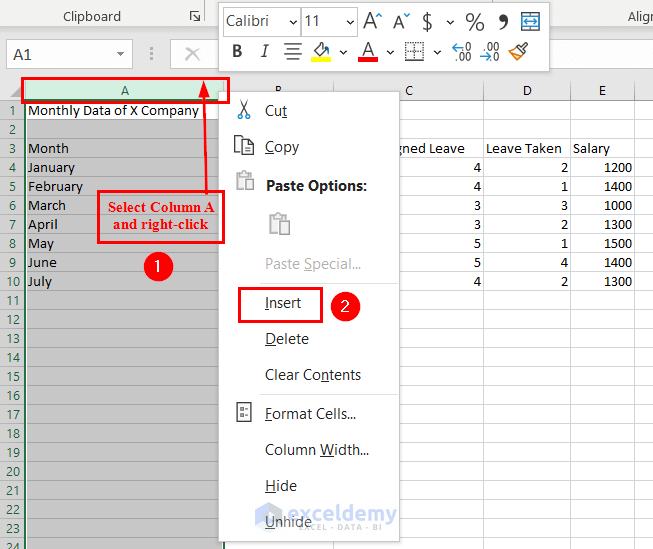
Method 1 – Starting the Dataset from Cell B2
- Select Column A and right-click on it.
- That select Insert from the Context Menu.
- This will insert a new column and shift the data toward the right.
You can also select Column A and use the keyboard shortcut Ctrl + Shift + plus(+) to insert a new column and shift the data toward the right.
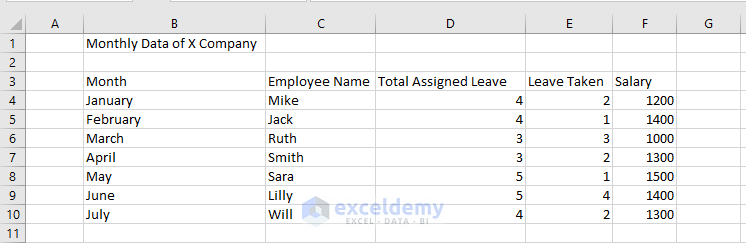
- The new starting column of the dataset is Column B.
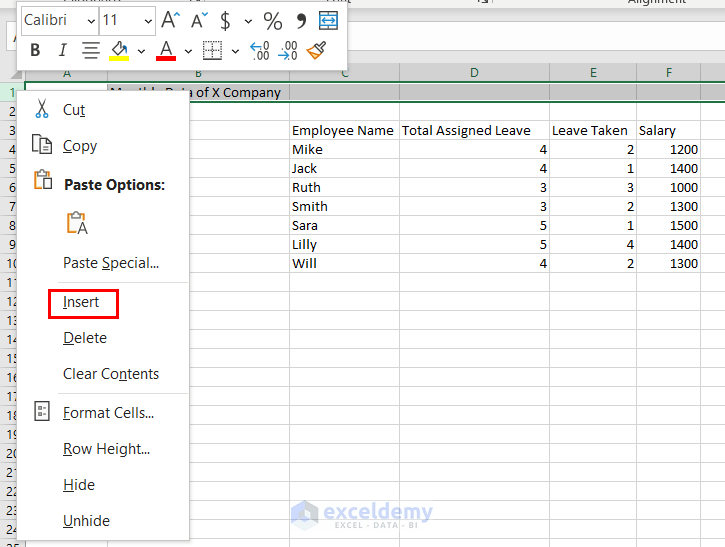
- Select Row 1 and right-click on it.

- Select Insert from the Context Menu.
- This will insert a new row and shift the data downward.
You can also select Row 1 and use the keyboard shortcut Ctrl + Shift + plus(+) to insert a new row.
- The new starting row of the dataset is Row 2.
Method 2 – Keeping the Row Height Constant to Make Excel Look Pretty
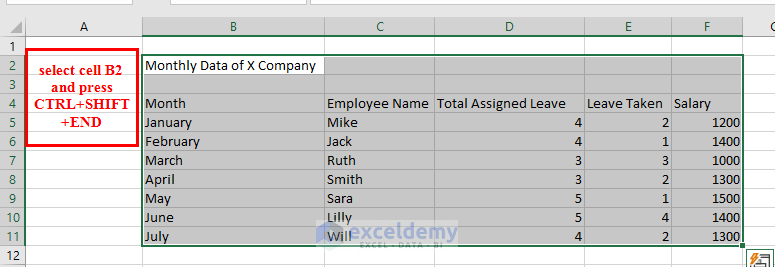
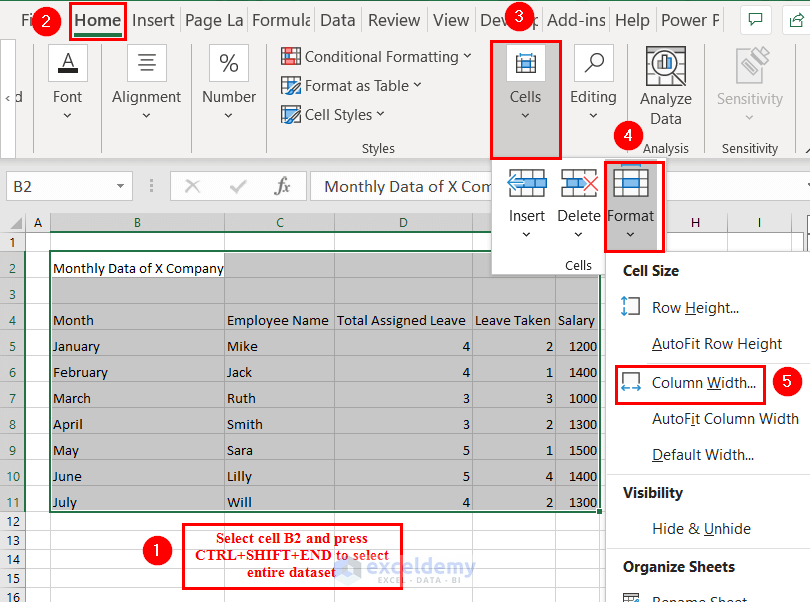
- Select cell B2 and press Ctrl + Shift + End to select the entire dataset.
- Go to the Home tab.
- Select Cells.
- From the Format group, select Row Height.
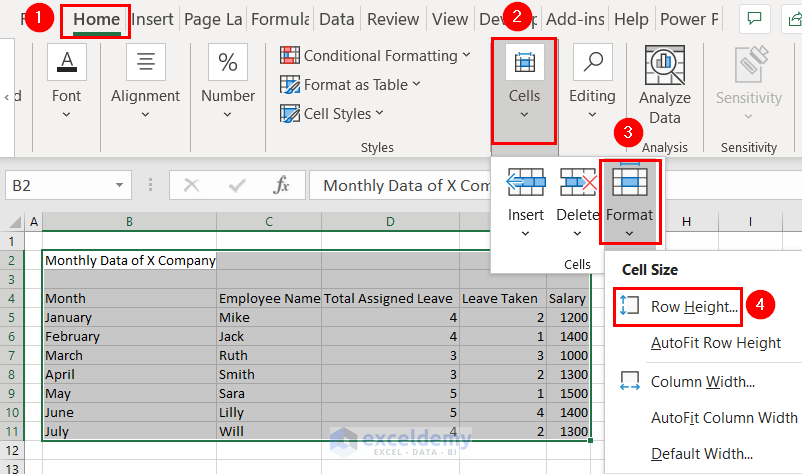
- A Row Height dialog box will appear.
- Set the Row Height to 20.
- Click OK.
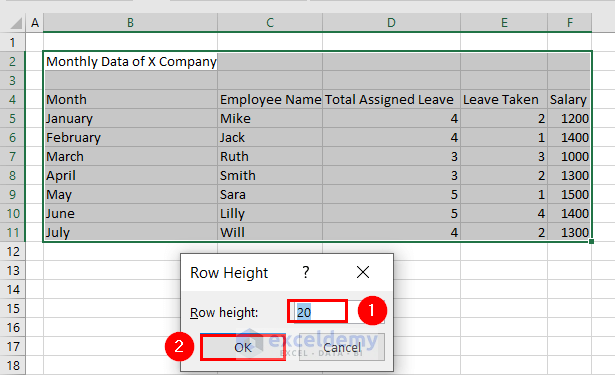
- The cells of the dataset have become larger and more visible.

Method 3 – Adjusting Column Width
- Select cell B2 and press Ctrl + Shift + End to select the entire dataset.
- Go to the Home tab.
- Select Cells.
- From the Format group, select Column Width.
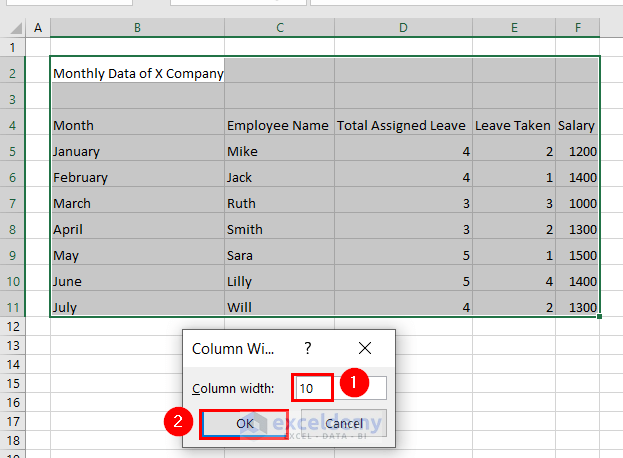
- A Column Width dialog box will appear.
- Put 10 in the Colum Width box.
- Click OK.
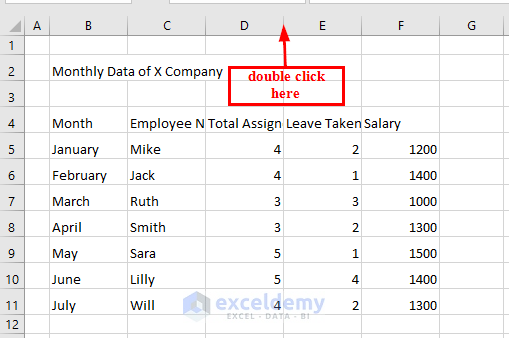
- To manually set column width, double-click in between the Column line.
- Repeat the procedure for all the Columns that need adjustment.
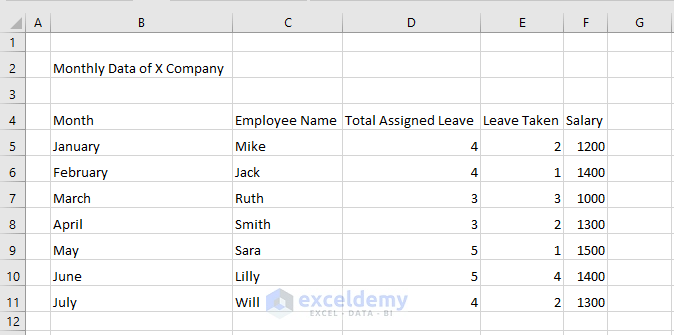
- You can see adjusted data in the cells.
Method 4 – Use the Merge and Center Feature to Make Excel Look Pretty
- Select cells B2, C2, D2, E2, and F2. This will keep the main heading on the top of cells B2 to F2.
- Go to the Home tab.
- From the Alignment group, select Merge & Center.
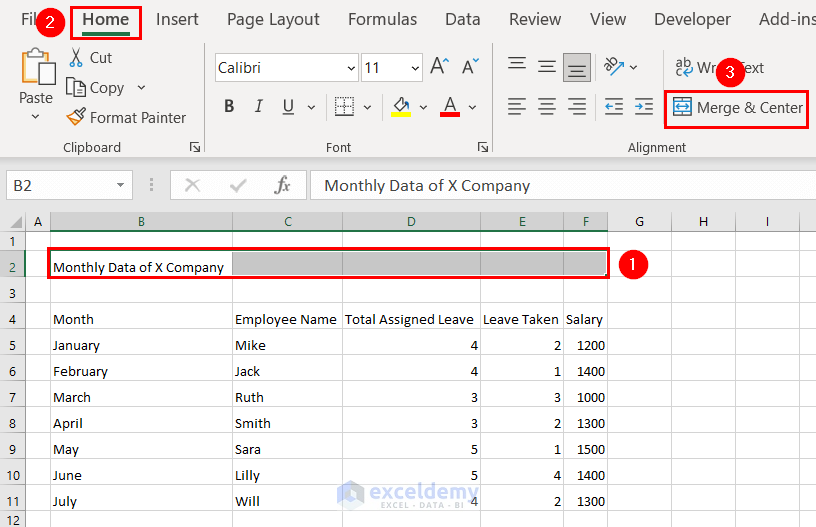
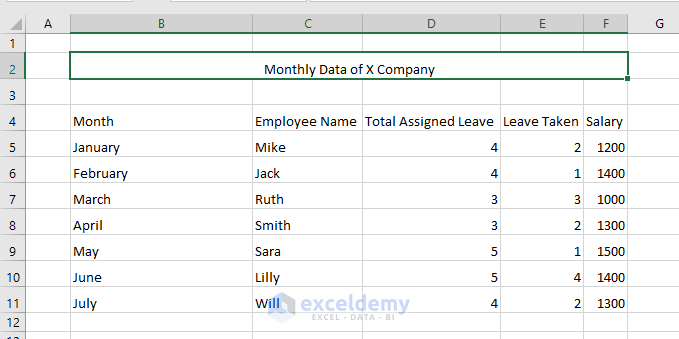
- The main heading takes on the top and center position of the dataset.
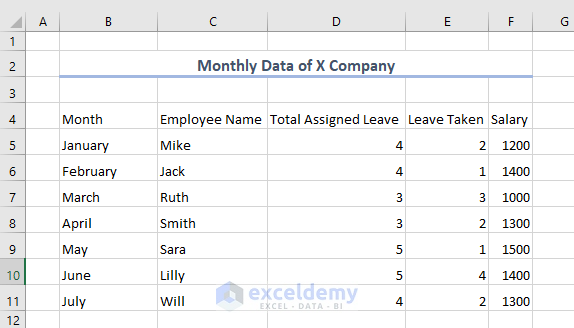
Method 5 – Using Cell Styles Features for Main Heading
- Select the main heading and go to the Home tab.
- From Cell Styles, select Heading 2.

- The main heading becomes more presentable.
Method 6 – Using Different Font Sizes for Main Heading, Column Heading, and Cell Content
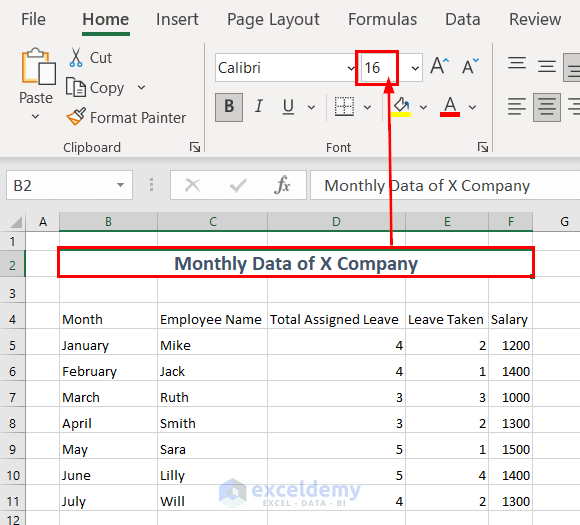
- Select the main heading and go to the Home tab.
- In the Font Size box, type 16.
You can also select Font Size 16 by clicking on the downward arrow of the Font Size box and selecting 16.
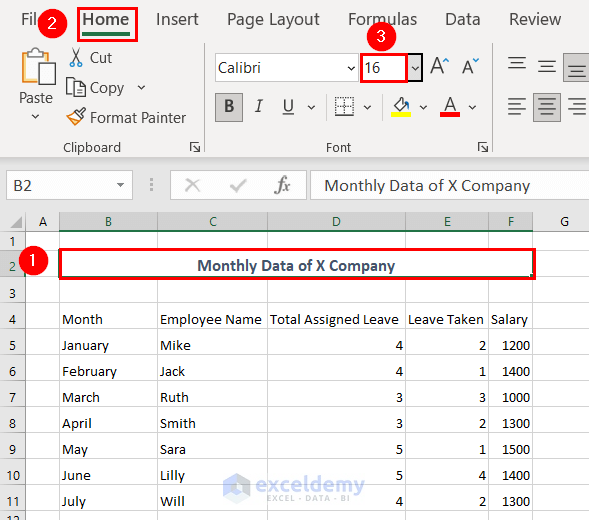
- You can see the Font Size of the main heading is set to 16.
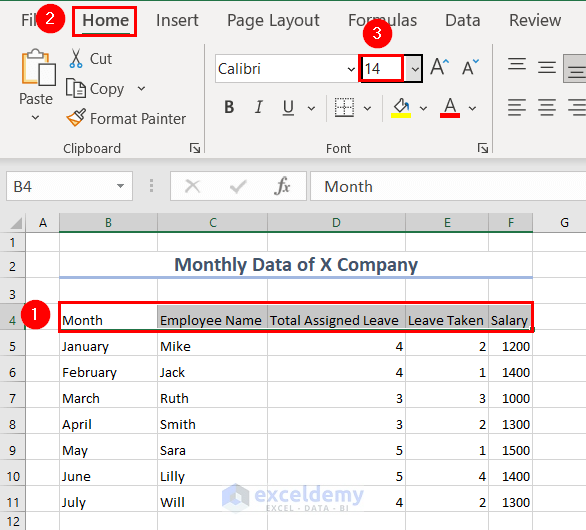
- Select the column headings and go to the Home tab.
- In the Font Size box, type 14.
You can also select Font Size 14 by clicking on the downward arrow of the Font Size box and selecting 14.
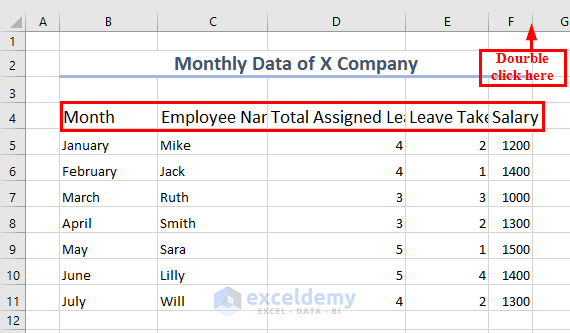
- Double-click on the line between the columns. This will make the column wide and adjust the cell content in it.
- Repeat this process for all the columns that need adjustment.
- You can see the adjusted column headings in the cells.
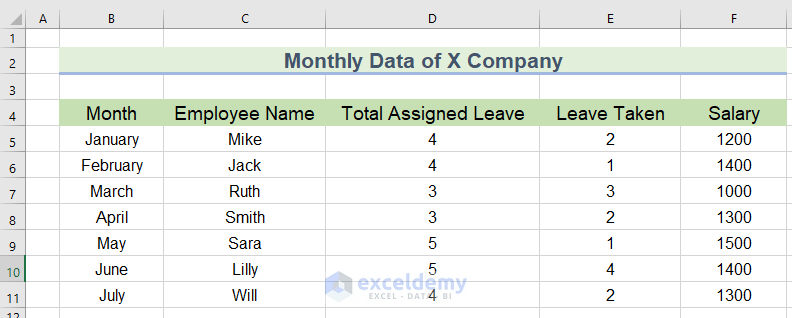
- Drag the column toward the right by left-clicking and holding. Drag the column until it looks large enough and release the mouse button.
- Repeat this process for every column to make them wider.
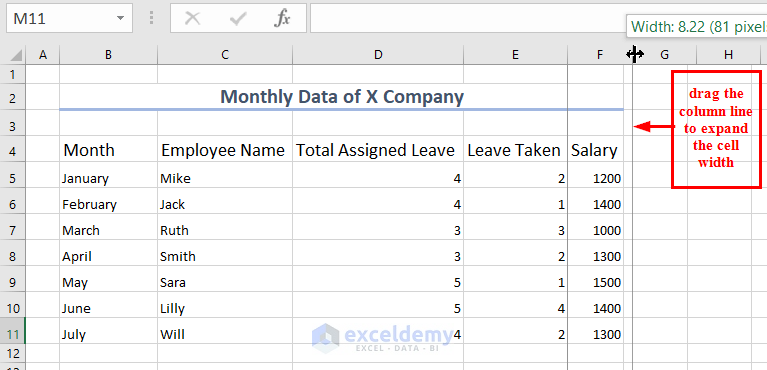
- You can see the columns now become much wider, and the dataset looks more readable.
- Select the cells of the dataset and go to the Home tab.
- In the Font Size box, type 12.
You can also select Font Size 12 by clicking on the downward arrow of the Font Size box and selecting 12.

- You can see the Font Size of the cells of the dataset is set to 12.
Read More: How to Make Picture Background Transparent in Excel
Method 7 – Use an Eye-Catching Font Type to Make Excel Look Pretty
- First of all, select the entire dataset along with the main heading >> go to the Home tab.
- Click on the downward arrow of the Font box.
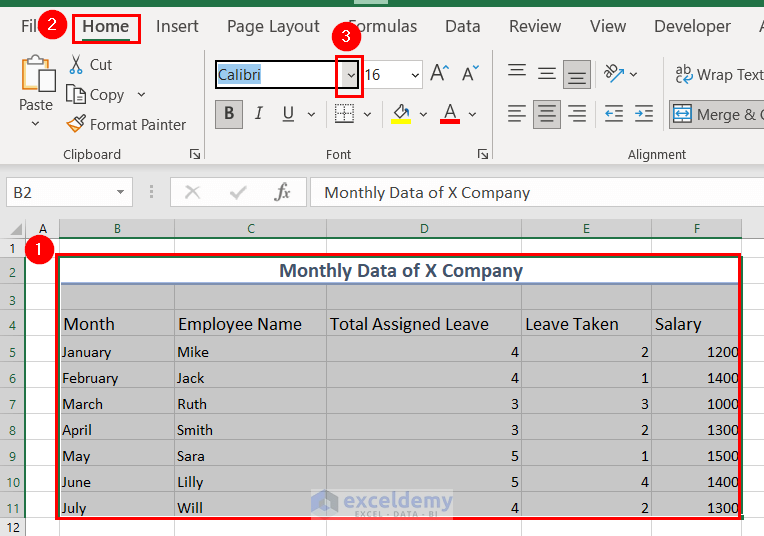
- Select a Font you like.
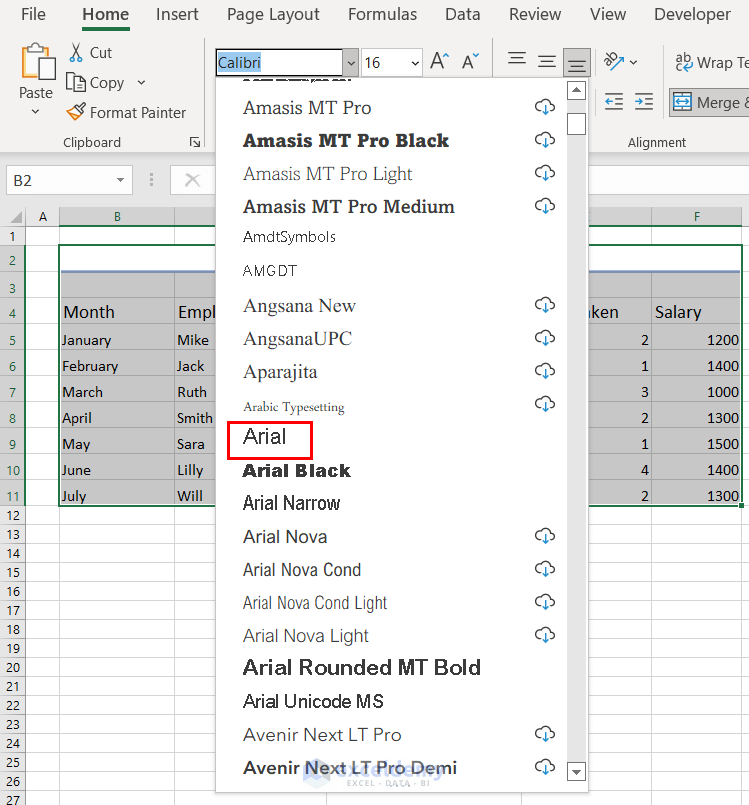
- The dataset looks more presentable.
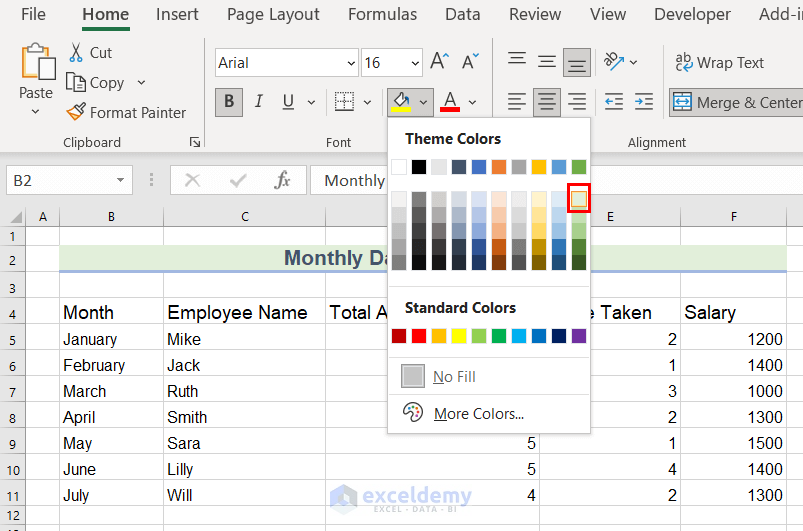
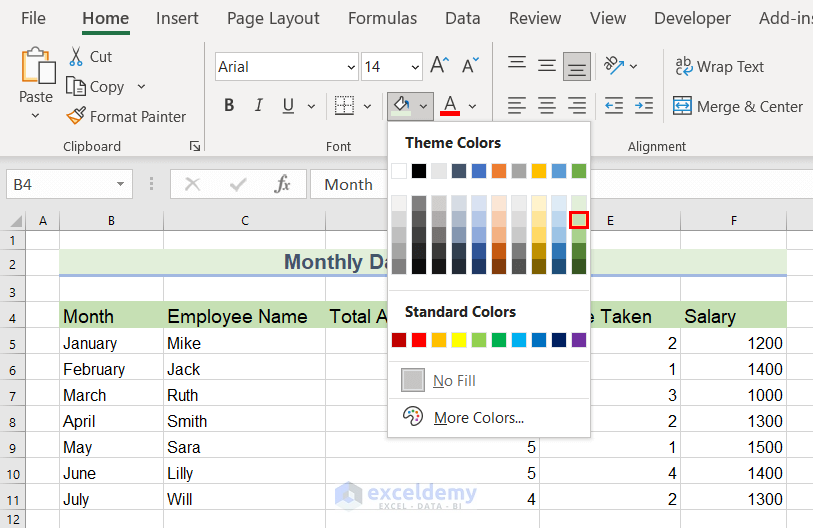
Method 8 – Applying Different Fill Colors for the Main Heading and Column Heading
- Select the main heading and go to the Home tab.
- From the Font group, click on Fill color.
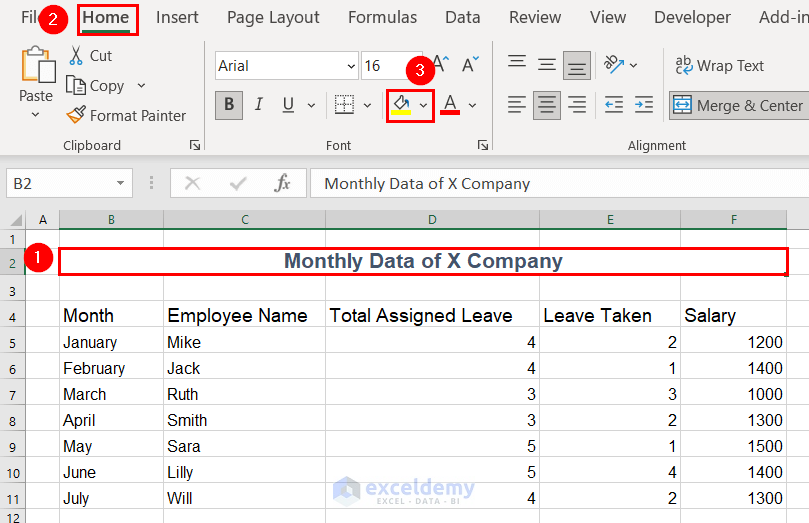
- Hover over different colors and you can see the live preview. Click to choose a color.
- We selected Green, Accent 6, and Lighter 80% for our main heading. You can see the preview of the color on the main heading cell.
- You can select any presentable color as the Fill Color.
- Select the main heading and go to the Home tab.
- From the Font group, click on the drop-down for Fill color.
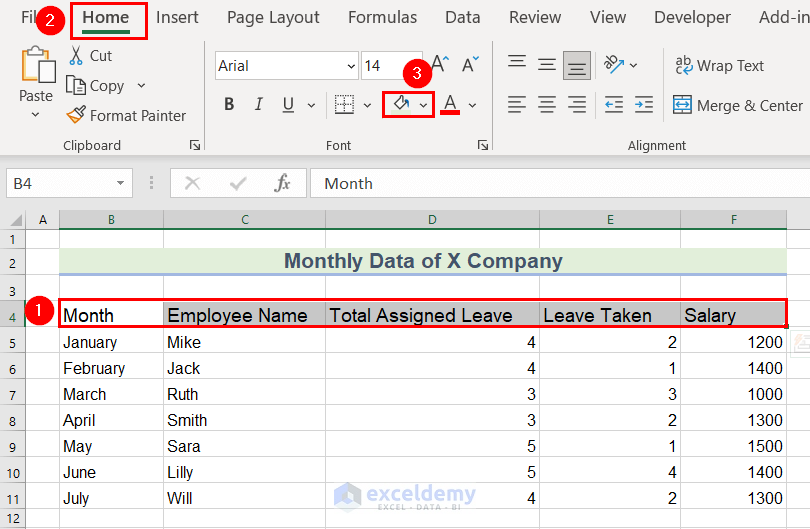
- Choose a color you like.
- Here’s how we formatted the cells:

Method 9 – Use the Middle and Center Alignment to Make Excel Look Pretty
- Select the entire dataset along with the main heading.
- Go to the Home tab.
- From the alignment group, select both the Middle and Center alignments.
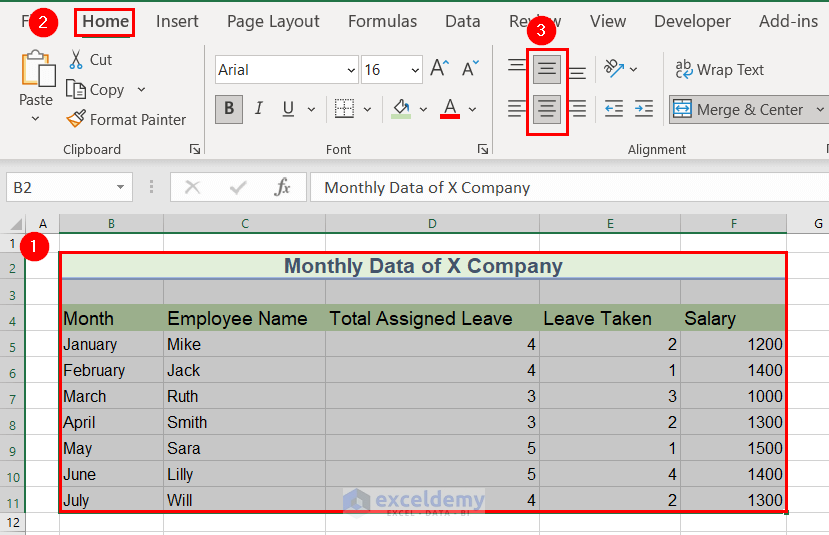
- The dataset looks more presentable.
Method 10 – Making the Column Headings Bold
- Select the column headings and go to the Home tab.
- From the Font group, select Bold.
You can also select the column headings and press Ctrl + B to Bold them.
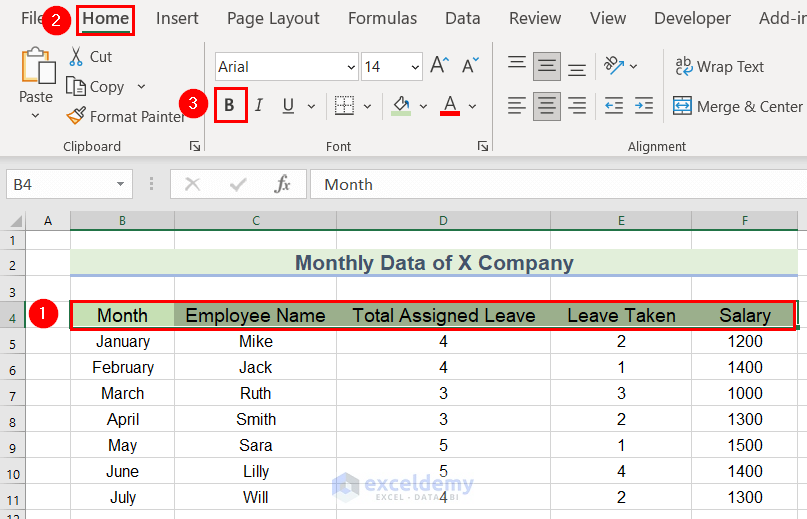
- You can see the column headings look more presentable.
Method 11 – Using the Number Format for Currency
- Select the entire cells of the Salary column and go to the Home tab.
- From the Number group, click on the downward arrow of the Number Format box.
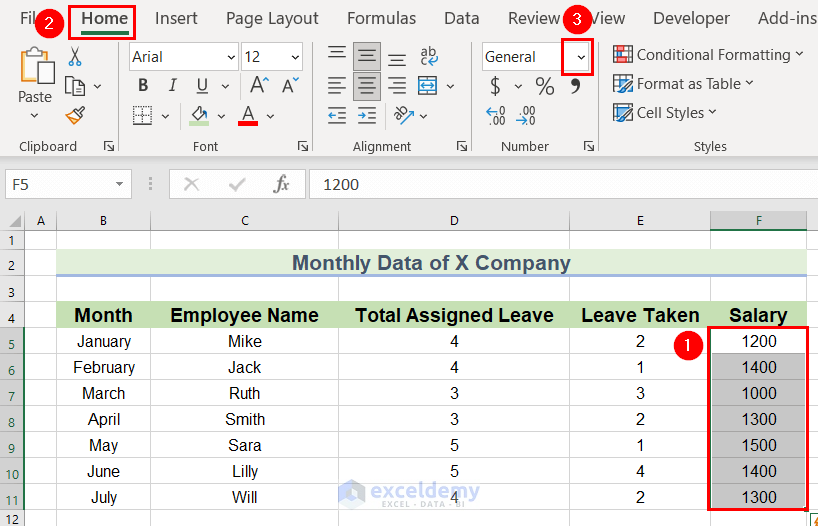
- Select Currency.
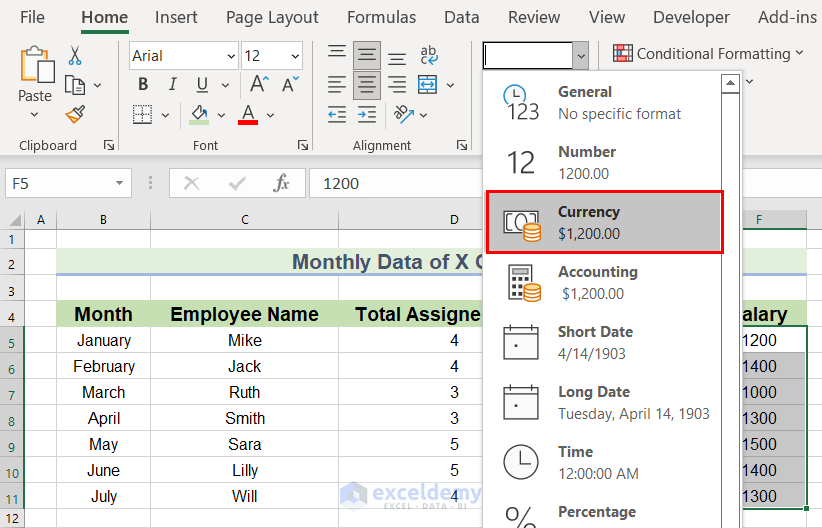
- You can see the Salary column has the Currency symbol in it.

Read More: How to Make Excel Spreadsheet Colorful
Method 12 – Adding Borders to Make Excel Look Pretty
- Select the entire dataset excluding the main heading.
- Go to the Home tab.
- From the Font group, click on the drop-down on the Borders box.
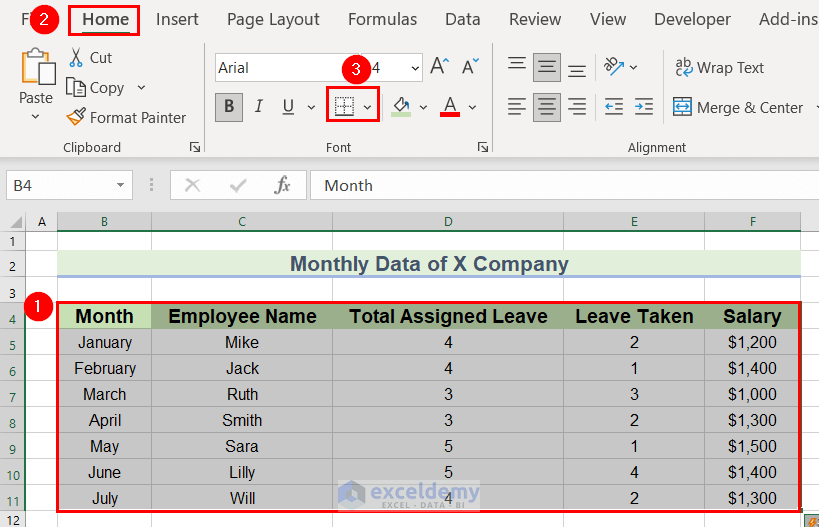
- Select All Borders.
- You can choose any other border type you like.
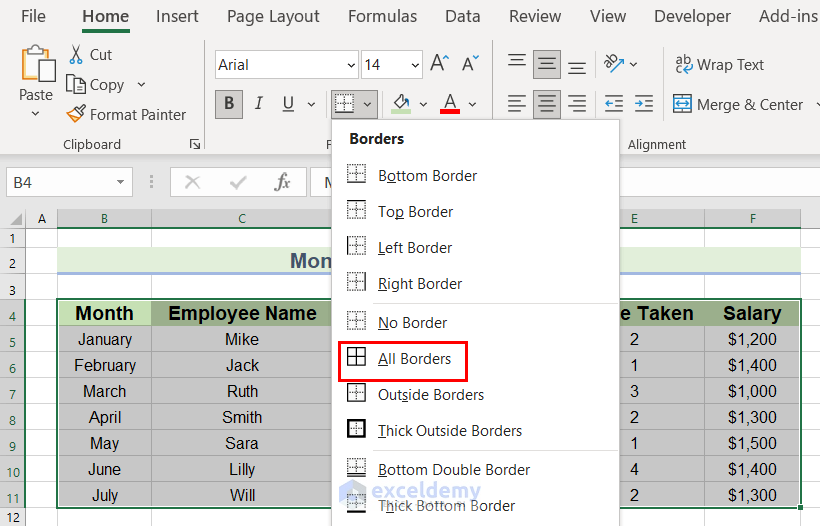
- The dataset looks more clear and more visible.
Method 13 – Use the Light Zebra Stripe Formatting for Data
- Select the dataset from cells B5:F11.
- Go to the Home tab.
- From the Styles group, select Conditional Formatting.

- Select New Rule.
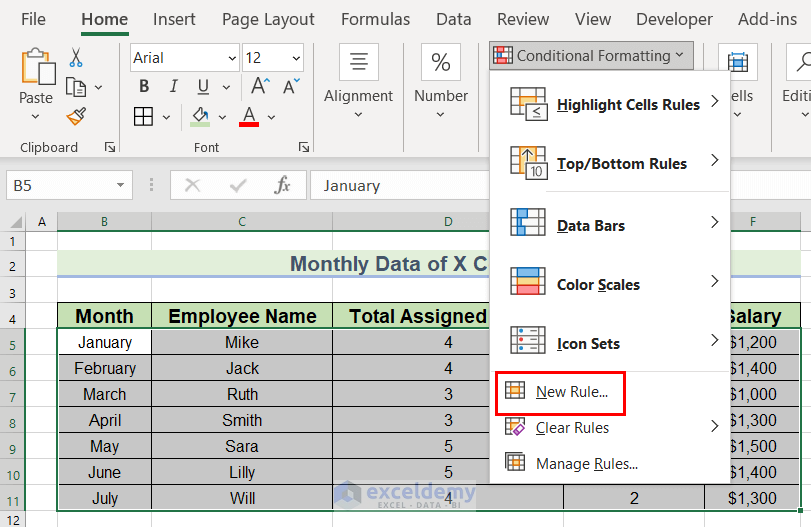
- A New Formatting Rule dialog box will appear.
- From Select a Rule Type select Use a formula to determine which cells to format.
- Put the following formula in the Format values where this formula is true box:
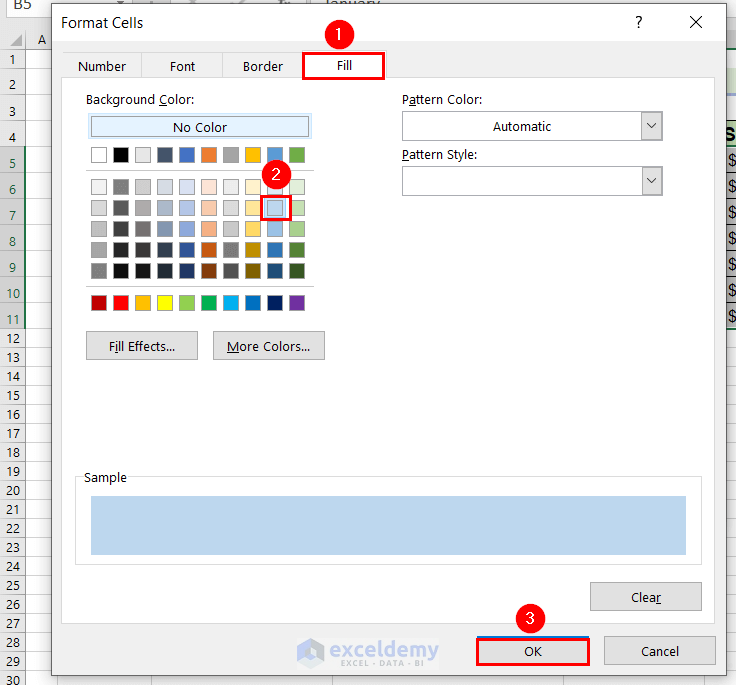
=MOD(ROW(),2)=0- Click on Format.
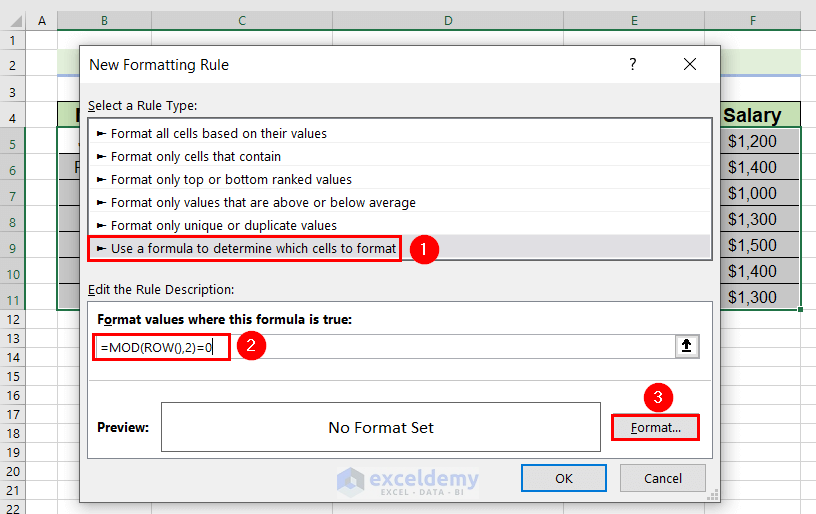
- Choose a Fill color from the Fill tab.
- Click OK.
- You can see the Preview of the color in the New Formatting Rule dialog box.
- Click OK.
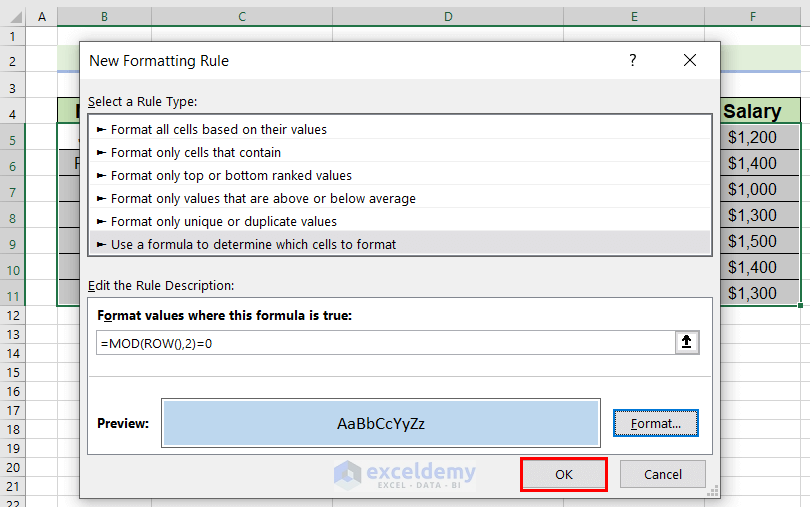
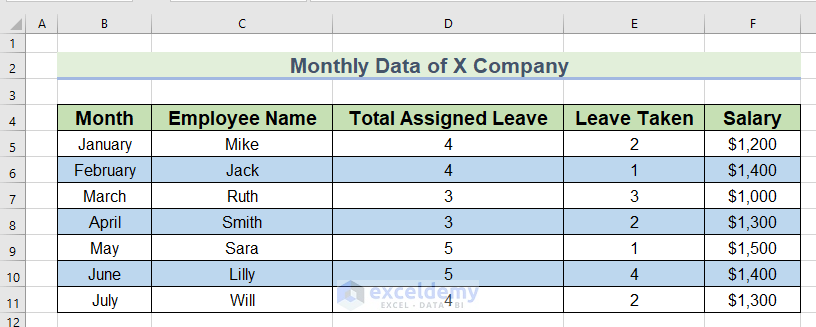
- There’s a light stripe in the dataset now for every second value.
Method 14 – Removing Grid Lines to Make Excel Look Pretty
- Go to the View tab.
- In the Show group, you can see that Gridlines is marked.
- Uunmark the Gridlines.
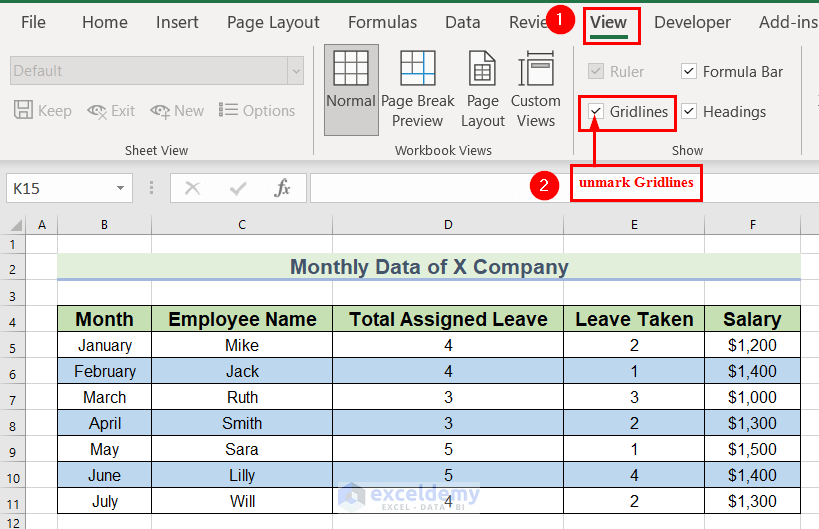
- Here’s the result.
Method 15 – Freeze the Column Heading
- Select cell B5.
- Go to the View tab.
- From the Freeze Panes group, select Freeze Panes.
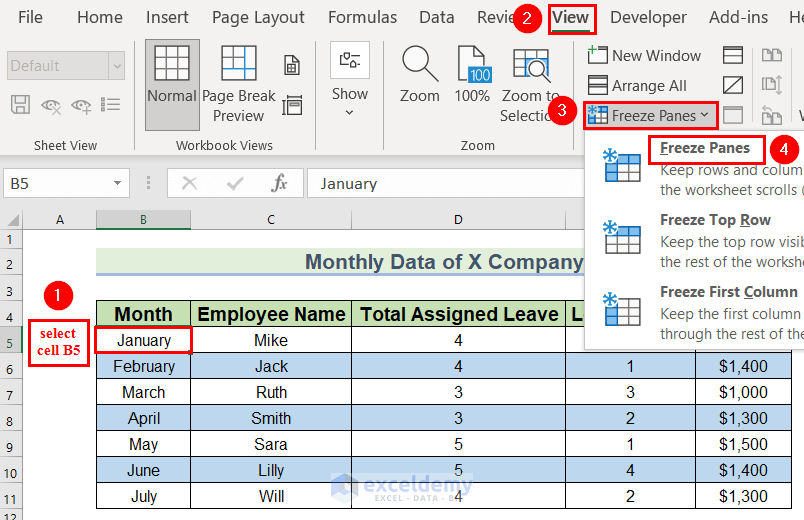
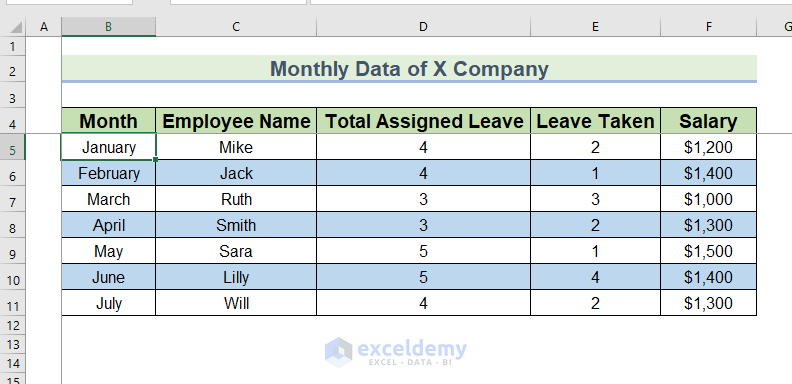
- The Row and Column before cell B5 get frozen.
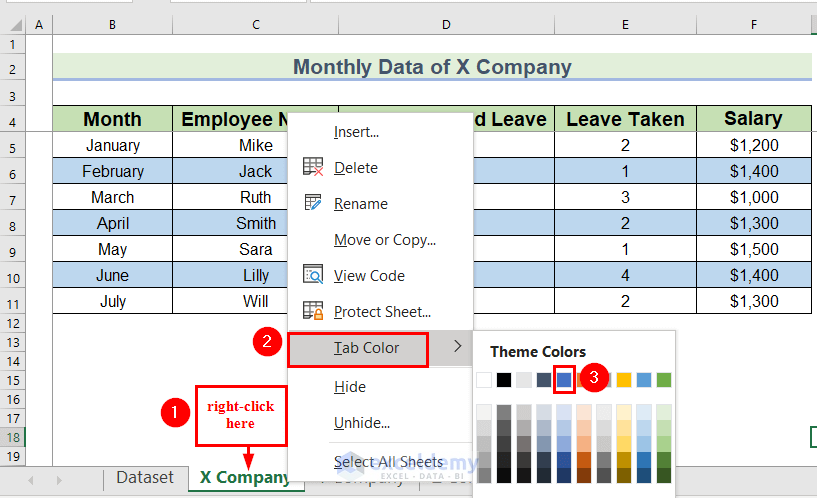
Method 16 – Use Colorful Tabs in the Workbook
We will add different colors to the sheet name to make Excel look pretty.
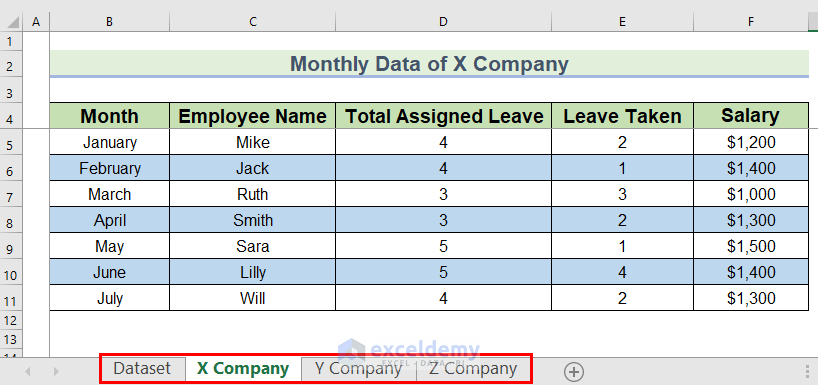
- Right-click on a Sheet Name.
- Select Tab Color from the Context Menu.
- Select a color.
We selected a Blue color. You can select any color that looks presentable.
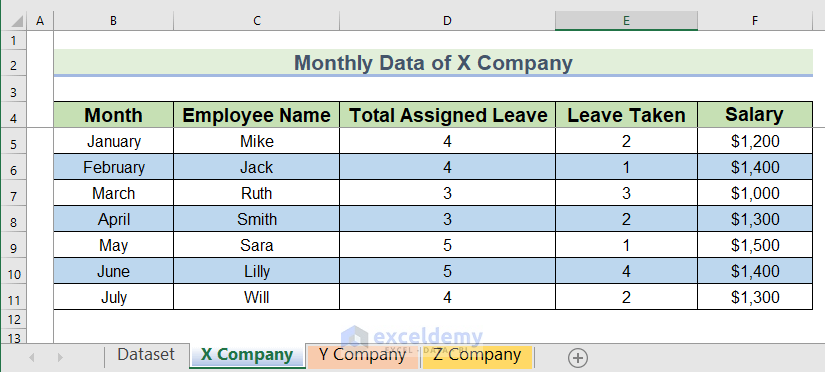
- We also selected colored tabs for sheets named Y Company and Z Company.
Things to Remember
- Make sure the Column Width is large enough to make your column wider. If, however, the columns still remain congested, you can always manually set a Column Width.
- If you choose a dark Fill Color for your main headings and column headings, make sure to choose a light Text Color. Otherwise, the Text will not be visible properly.
- Along with that, if you choose a light Fill Color for your main heading and column heading, keep the Text Color to a dark one.
- If you need, you can mark different cells with Text or Fill Color.
- Besides Arial, you can select any Font type for your dataset as long as they make Excel look pretty.
- If you have a large dataset, where you need to scroll down, you have to use Freeze Pane. Otherwise, for a small dataset, where you do not need to scroll down you should avoid adding Freeze Pane.
Practice Section
You can download the Excel file and go to the Do Yourself sheet. Format the following dataset to make Excel look pretty.

Download the Practice Workbook
Related Articles
<< Go Back to Excel Background | Learn Excel
Get FREE Advanced Excel Exercises with Solutions!

This was an awesome tutorial with very clear instructions. The information was exactly what I was looking for. Thank you for taking the time to put this information on line.
Pretty awesome . How can learn Excel with you? I want to have books and videos to learn
Hello Gohi Toyo,
Thanks a lot for your kind words! If you’d like to learn Excel with us, you can check out the step-by-step tutorials and practice files we share on ExcelDemy.
We also have video lessons covering Excel basics to advanced topics.
Regards
ExcelDemy
Hello Tracy,
Thanks for your appreciation, it means a lot to us. Keep learning Excel with us.
Regards
ExcelDemy