Reason Behind Background Color Not Changing in Excel
By default, the fill color of cells in an Excel worksheet cannot be modified. Each cell starts with no fill color. However, if you frequently create workbooks with specific cell fill colors, you can create an Excel template. Keep in mind that if a cell is locked, you won’t be able to change the background color for that cell.

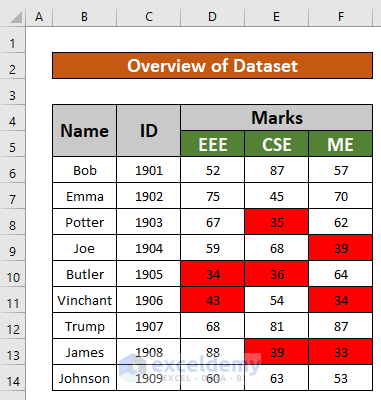
Dataset Overview
Here’s an overview of the dataset we’ll be working with:
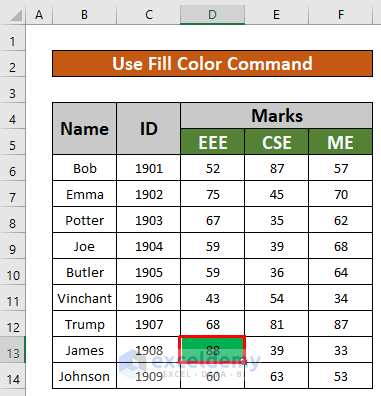
Solution 1 – Use the Fill Color Command to Change the Cell Background Color
Steps
- Select cell D13.
- From the Home ribbon, navigate to Home, choose Font and click on Fill Color.
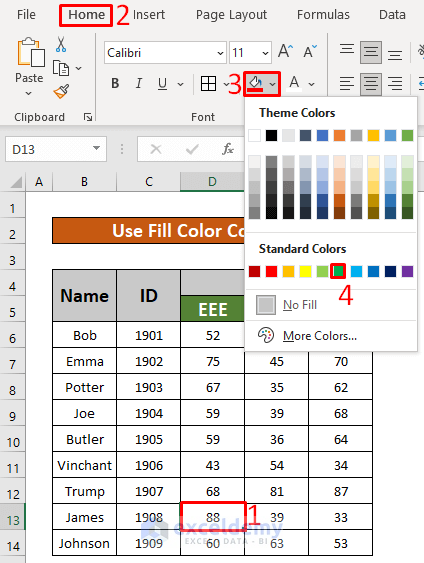
- You’ll be able to change the background color from No Fill to Green, as shown in the screenshot below.
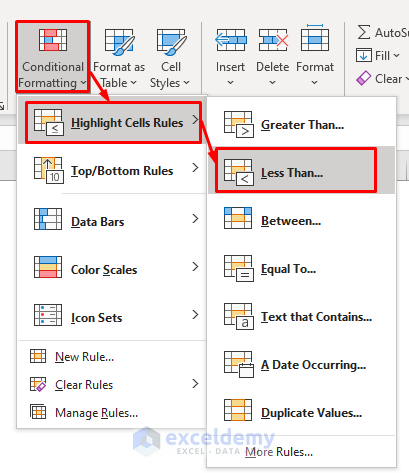
Solution 2 – Apply Conditional Formatting
Steps
- Select a cell range for your task (e.g., cells B4 to F14).
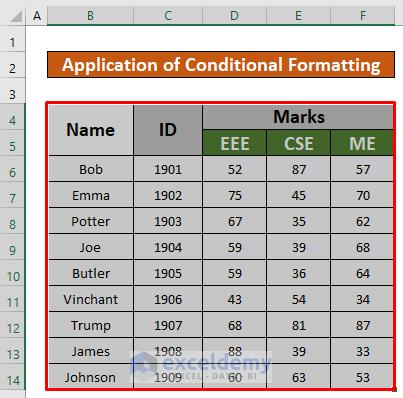
- Go to Home, choose Styles, click on Conditional Formatting and from the Highlight Cells Rules selection choose Less Than.
- In the Less Than dialog box:
- Enter 45 under Format cells that are LESS THAN.
- Choose a color (e.g., Light Red Fill with Dark Red Text) from the drop-down.
- Click OK.
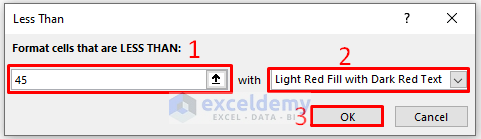
- This will change the background color for cells with values less than 45.

Read More: How to Change Background in Excel Sheet
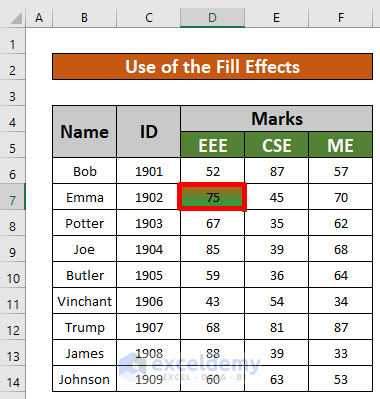
Solution 3 – Change Cell Background with Patterns or Fill Effects
Steps
- Right-click the cell where you want to change the background.
- Select Format Cells… from the Context Menu.
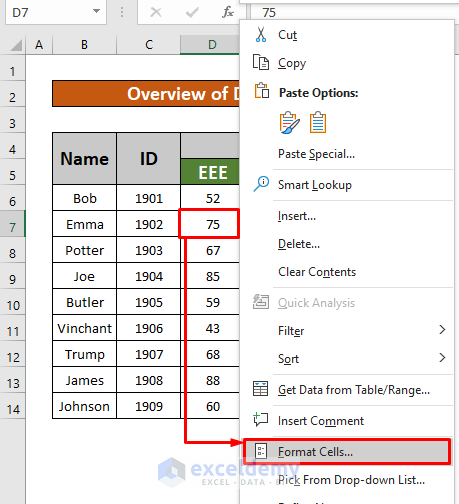
- In the Format Cells window:
- Go to the Fill tab.
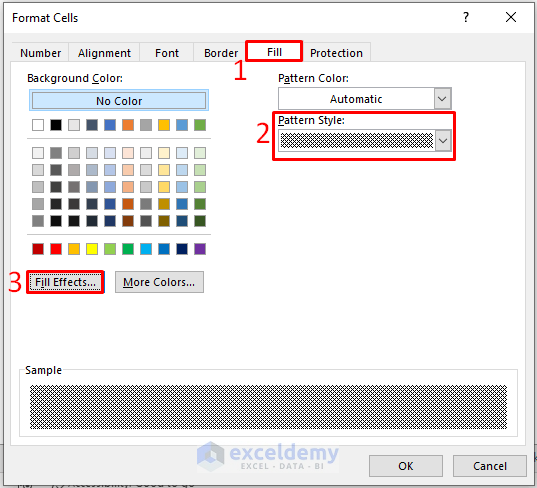
- Choose a pattern color from the Pattern Color dropdown.
- Select a pattern style from the Pattern Style dropdown.
- Click Fill Effects.
- In the Fill Effects dialog:
- Choose the Two colors option from the Colors list.
- Pick a shading style from the Shading styles options.
- Select a variant from the Variants samples.
- Click OK.
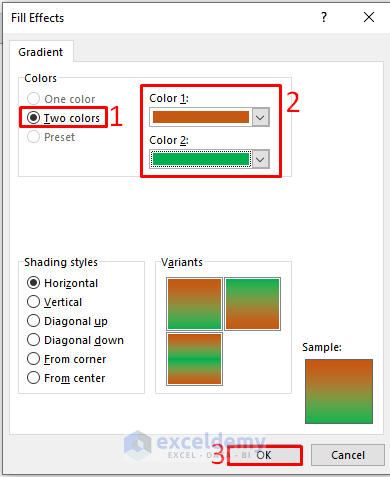
- Click OK again.
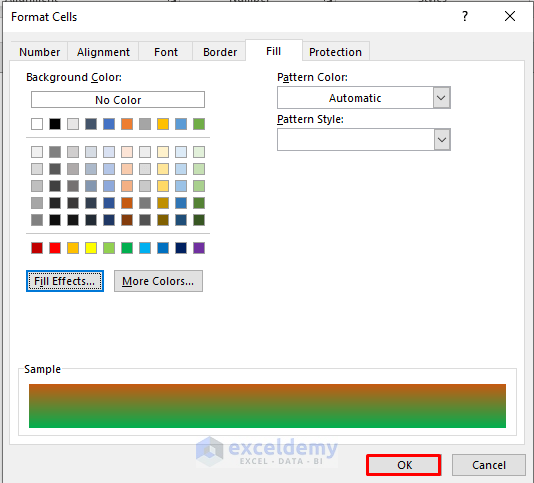
- You can now change the background color using fill effects.
Read More: How Do I Change the Default Background Color in Excel
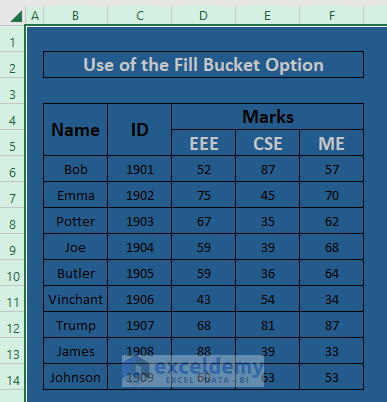
Solution 4 – Use Excel Paint Bucket to Color the Background of a Worksheet
Steps
- Select the entire worksheet by pressing Ctrl + A.
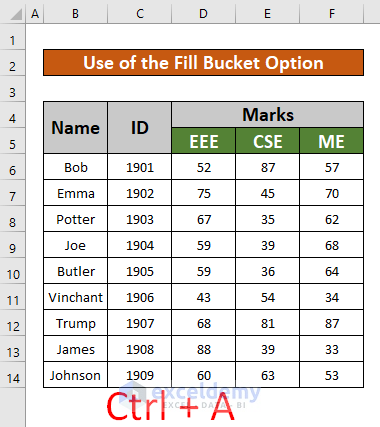
- From the Home ribbon, go to Home, select Font and click on Fill Color.
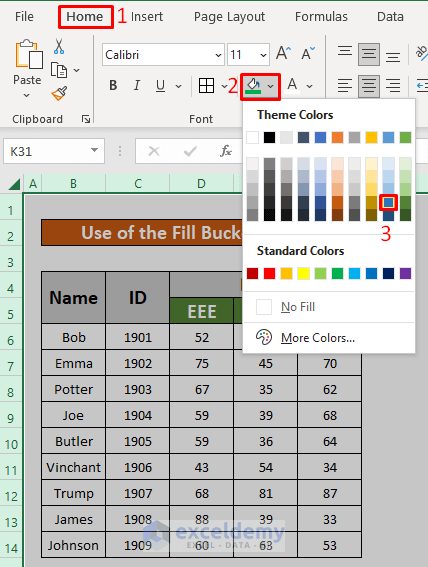
- Change the background color from No Fill to Dark Blue.
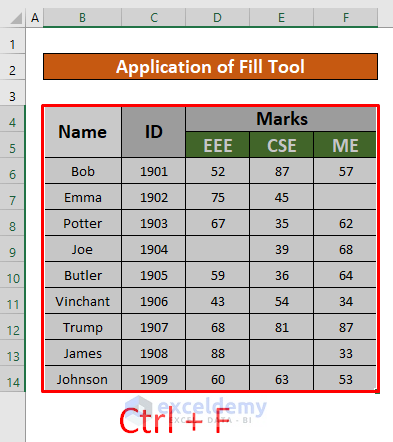
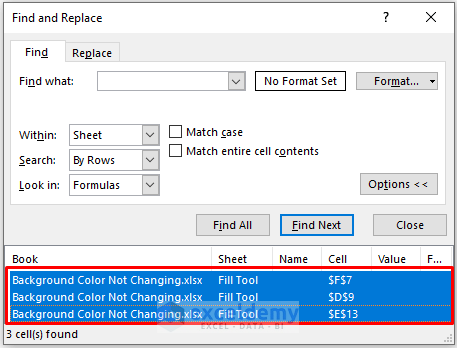
Solution 5 – Utilize the Find Tool
In this method, we’ll use the Find tool to change the background color. Follow the instructions below:
Steps
- Choose the cells where you want to change the background based on specific conditions.
- Press Ctrl + F on your keyboard to open the Find and Replace window.
- In the Find tab, leave the Find what text box empty (to find blank cells) and click Find All.
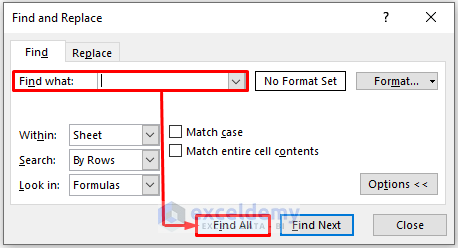
- The blank cell references will appear in an added section of the Find and Replace window. Drag and select all these cell references.
- From the Home ribbon, go to Home, select Font and click on Fill Color.
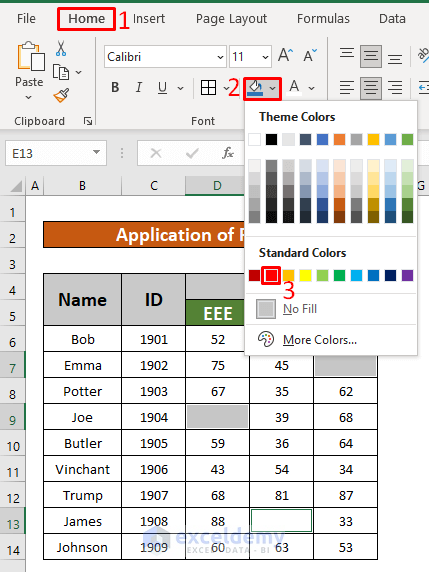
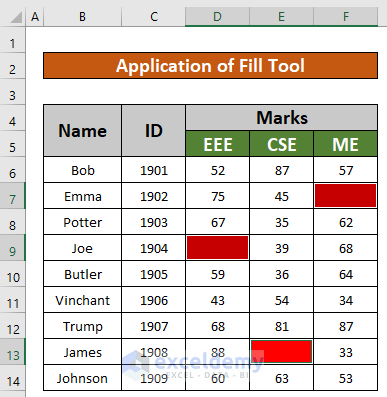
- You’ll be able to change the background color of the blank cells from No Fill to Red.
Read More: How to Change Background from Black to White in Excel
Solution 6 – Run a VBA Code to Change the Background Color in Excel
Now let’s explore how to change the background color using a simple VBA code. This method can be very helpful in specific situations. Follow these steps:
Steps
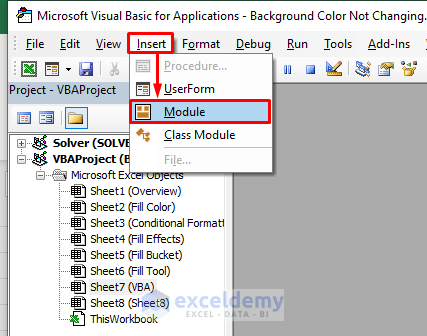
- From the Developer tab, click Visual Basic to open the Microsoft Visual Basic for Applications window.
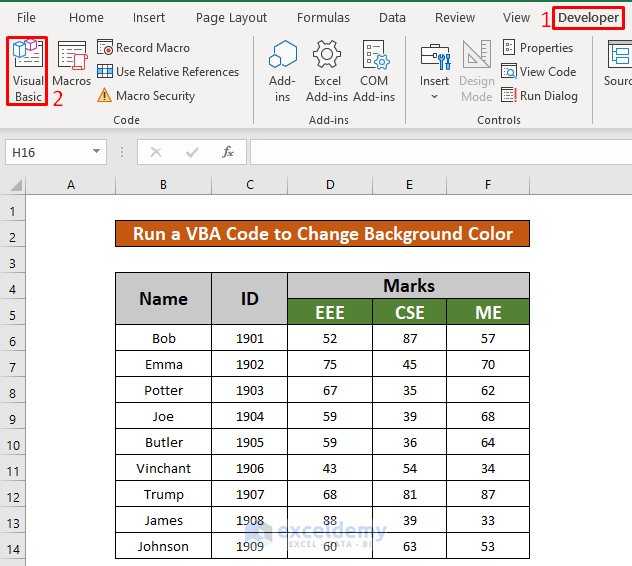
- Go to Insert and select Module to insert a module for applying our VBA code.
- In the Background Color Not Changing module, enter the below VBA code.
Private Sub Background_Color_Change(ByVal Target As Range)
Dim X As Range
Set X = Range("B6:F14")
If Not Intersect(Target, X) Is Nothing Then
Target.Interior.Color = rgbRed
Else
End If
End Sub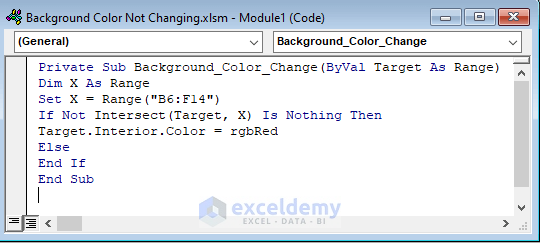
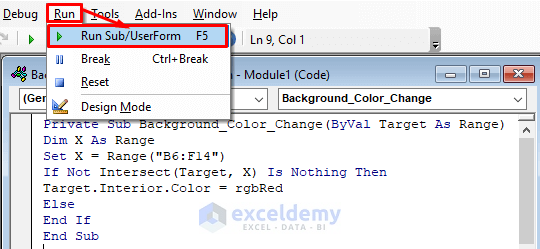
- Go to Run and click on Run Sub/UserForm to execute the VBA code.
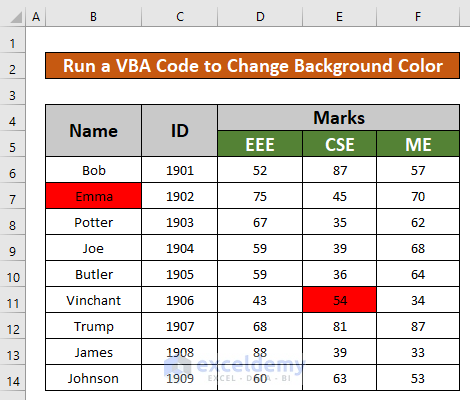
- Return to your Excel worksheet and select any cell. The background color of the cells will change from No Fill to Red.
Things to Remember
You can also unprotect a worksheet to change the background color using the Fill color option.
#N/A! error occurs when a formula or function fails to find the referenced data.
#DIV/0! error happens when a value is divided by zero (0) or the cell reference is blank.
Download Practice Workbook
You can download the practice workbook from here:
Related Articles
- How to Change Background Color to Grey in Excel
- How to Remove Background in Excel
- How to Remove Background Color in Excel
<< Go Back to Excel Background | Learn Excel
Get FREE Advanced Excel Exercises with Solutions!

While in Numbers, my cell color is white. When I add text to this cell, the background right behind all the text turns black leaving the rest of the cell color white. I would like the whole background to stay white. If I change the background color, everywhere there’s no text changes to the new color but behind the text stays black.
Hello Gene Bennington,
It seems like the issue you’re describing might be related to a shading or highlight effect, possibly caused by conditional formatting or the text highlight tool in Numbers. Try these steps:
1. Check for any conditional formatting rules and remove them if unnecessary. Go to Conditional Formatting >> select Clear Rules.
2. Verify if a text highlight color is applied or not. If applied set it to “None” or clear it.
3. Ensure the default background and text color settings are properly configured.
Let me know if this helps or if further clarification is needed!
Regards
ExcelDemy