In this article, we provide a detailed guide to creating and automating workflow in Excel using Excel’s built-in shapes.
Creating a workflow can be a powerful way to streamline and organize the sequence of operations for a specific job or process. By visually representing the steps in a flowchart format, you can easily track and manage the progress of tasks, ensuring efficient information exchange within your organization. Here is an example of a workflow progress tracker:

Download Practice Workbook
Workflow in Excel: 2 Suitable Ways
Method 1 – Creating a Workflow Using Shapes
Here we will use the Insert tab and select shapes to create a workflow. You can of course use your own shapes instead of the ones we use.
Steps:
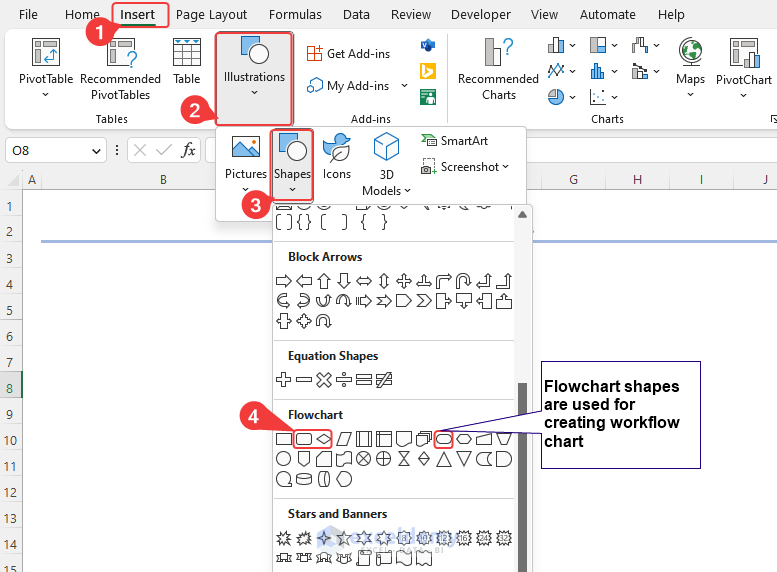
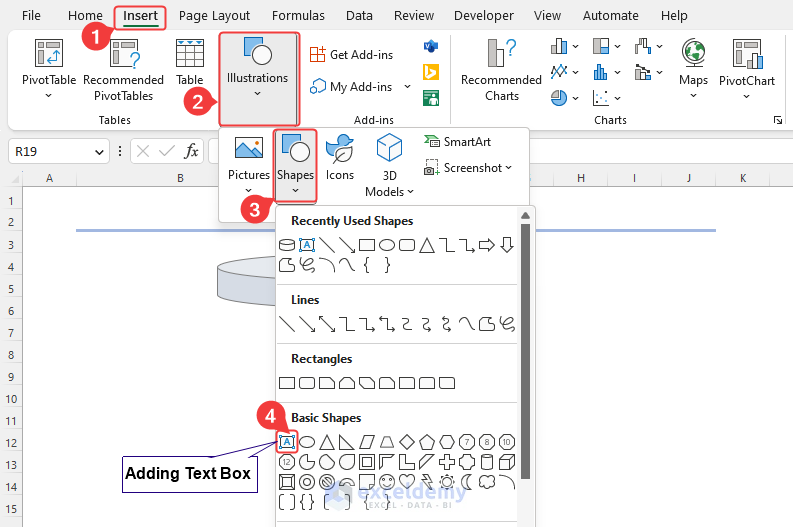
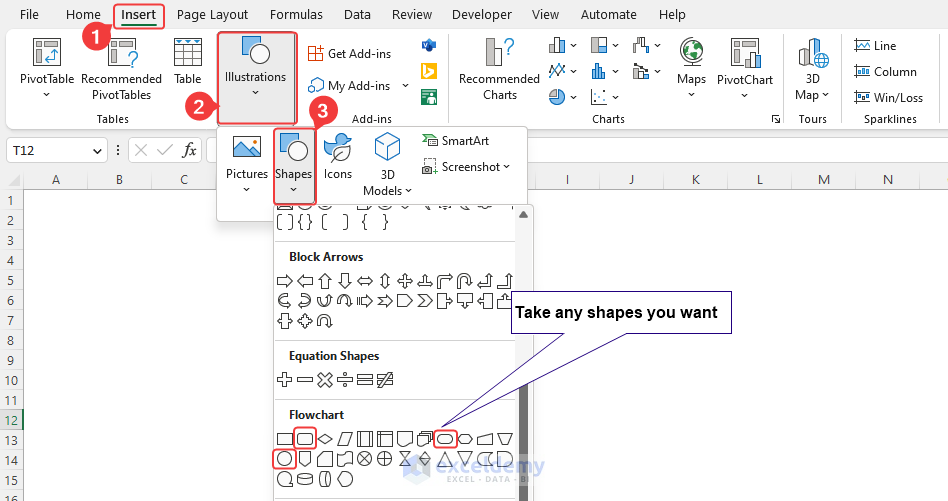
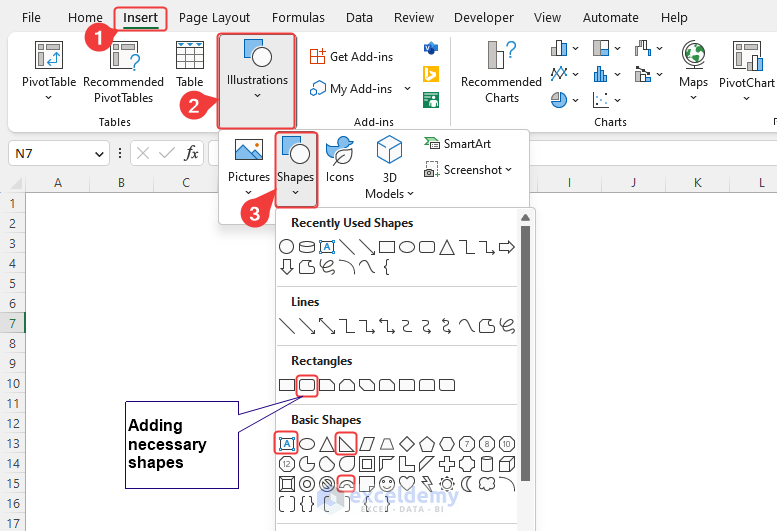
- To select shapes, choose Insert >> Illustrations >> Shapes >> Flowchart.
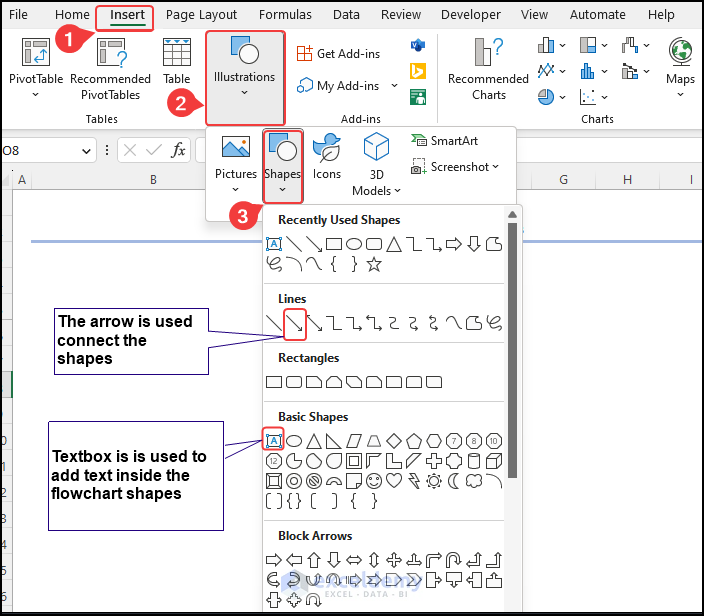
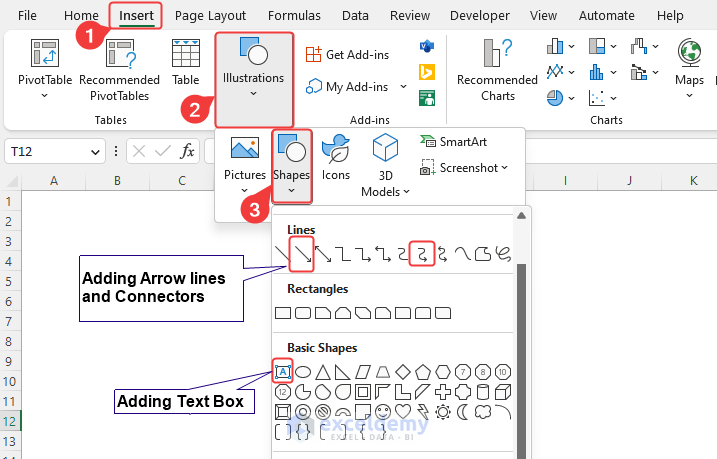
- Select a Text Box to create process and decision boxes, and connector lines to connect those boxes.
Using those shapes, connectors, and text boxes, we can create any type of creative workflow we want, like in the image below

Method 2 – Using SmartArt Graphic
Using SmartArt is the easiest way to add workflow in Excel.
Steps:
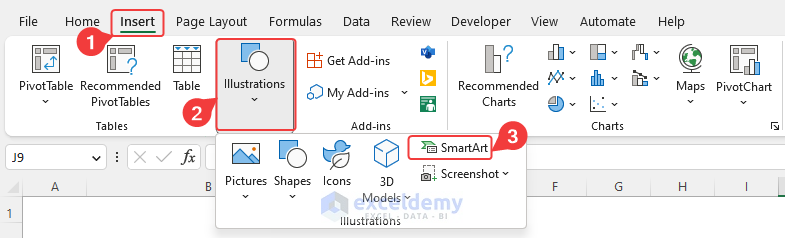
- Select Insert >> Illustrations >> SmartArt to insert SmartArt.
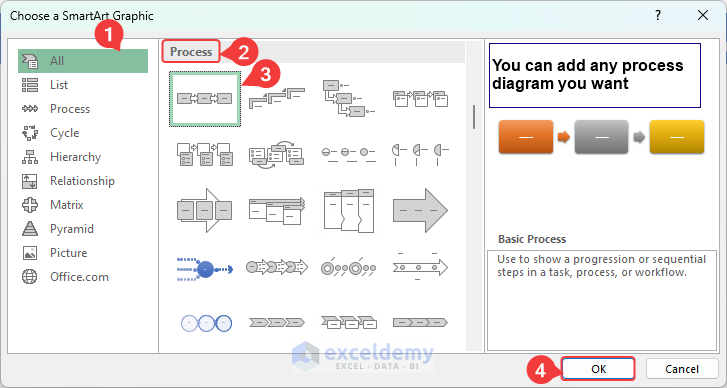
- Select All > Scroll Down > Select Process.
- Choose any process you like. Here, we selected the first one.
- Click OK.
We have created a workflow using SmartArt.

Workflow Chart in Excel: 3 Practical Examples
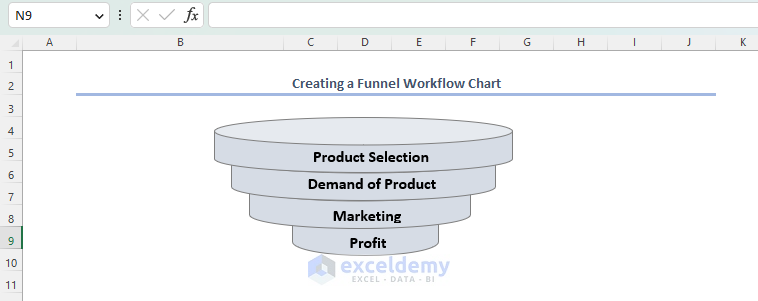
Example 1 – Funnel Workflow Chart
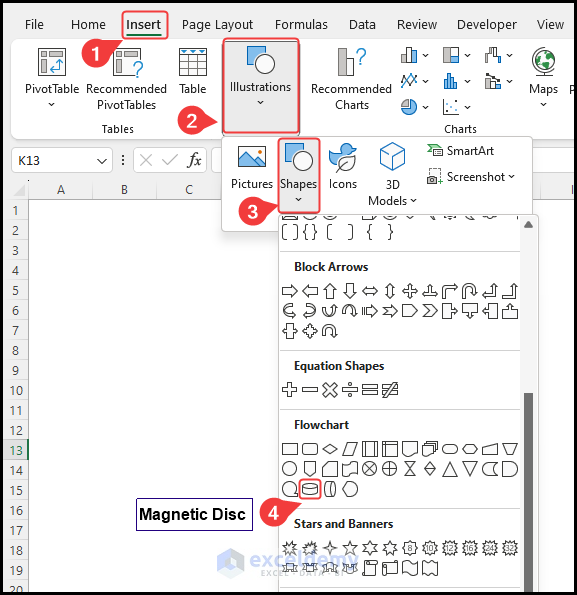
Using a magnetic disc, we can create a funnel flow chart.
Steps:
- Select Insert >> Illustrations >> Shapes >> Magnetic Disc to insert a magnetic disc.
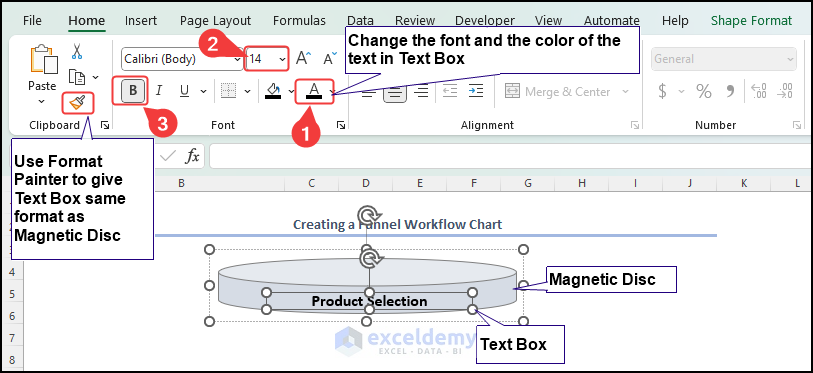
- Add a Text Box to insert text in the magnetic disc.
- Use Format Painter to have the same format as the Magnetic Disc in the Text Box.
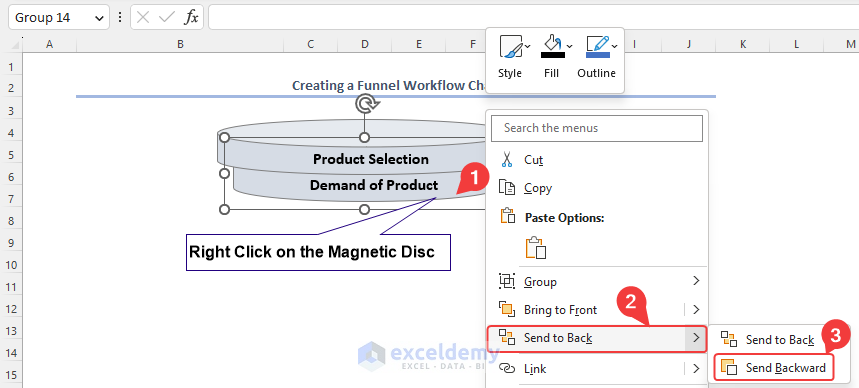
- Add a second disk like the first one.
- Right-click on the Magnetic Disc and Send to Back > Send Backward to get the embedded disc.
- Using the process above, add more discs to create a funnel workflow chart.
Example 2 – Timeline Workflow Chart
Steps:
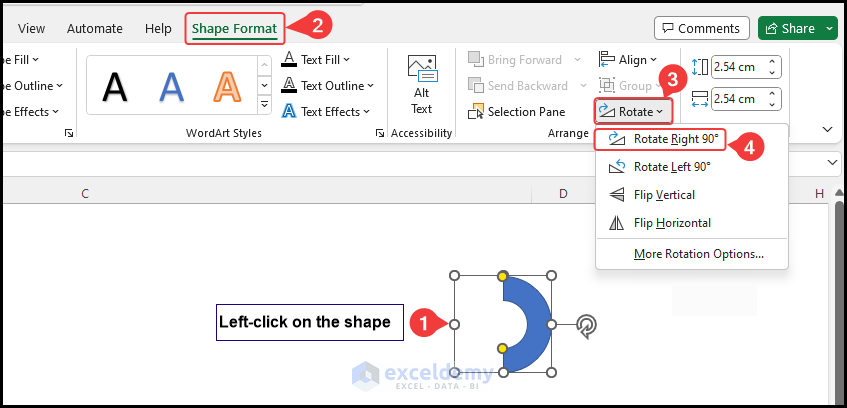
- Like before, insert the necessary shapes.
- Rotate the Block Arc to 90° to adjust the rectangular shapes.
- Stretch the rectangular shapes.
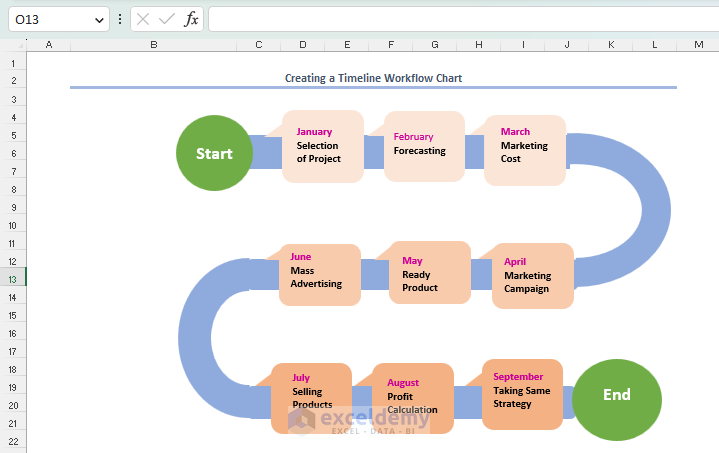
- Now create your own timeline workflow.
Here is an example:
Read More: Workflow Chart in Excel
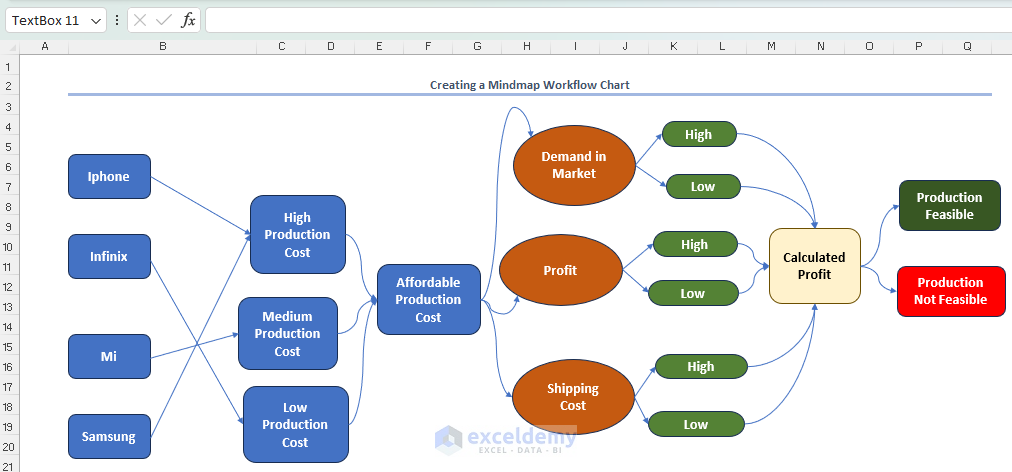
Example 3 – Simple Mind Map Workflow
Using shapes we can create any type of workflow we want. Here we’ll create a mind map workflow.
- Add shapes like before by going to Insert >> Illustration >> Shapes.
- Add a Text Box and connectors like before.
- Create your own map as you like.
Here is an example:
Read More: How to Create a Workflow in Excel
Things to Remember
- Choosing the type of workflow depends on your purpose and requirements.
- Save your created workflow so that you can use it as a template later.
- Adding a text box to describe the workflow diagram is good practice, but the text box should not be too wordy.
- To format a shape, simply right-click on the shape and access the formatting options from the context menu.
Frequently Asked Questions
1. Is it possible to insert images or icons into a workflow chart in Excel?
Yes. From the Insert tab, use the Pictures option to insert images from your computer, or use the Icons option to choose from a library of pre-designed icons. You can then position and resize them accordingly.
2. Can I create a hierarchical workflow chart in Excel?
Yes. By using shapes with different sizes or levels of indentation, you can represent a hierarchical structure. For example, use larger rectangles for main processes and smaller rectangles for sub-processes. Connectors can be used to link the shapes accordingly.
3. How can I align and distribute the shapes in my workflow chart evenly?
Excel provides alignment and distribution options to help you arrange the shapes in your workflow chart evenly. Select multiple shapes, right-click, and choose the alignment or distribution options from the context menu. You can align shapes horizontally or vertically and distribute them evenly in terms of spacing.
4. Can I link or add hyperlinks to specific shapes in a workflow chart?
A: Yes. Right-click on a shape, choose Hyperlink from the Context Menu, and enter the URL or select a location within the workbook to link to. This will allow you to navigate to external websites or other parts of the workbook.
5. Is it possible to create a dynamic workflow chart in Excel that updates automatically?
Excel has some features such as data validation and conditional formatting that allow you to create a dynamic workflow chart. By setting up rules and formulas based on the data, you can create a chart that updates automatically when changes occur. Additionally, you can use Excel’s VBA programming to create more advanced and interactive workflow charts.
Workflow in Excel: Knowledge Hub
- Workflow Management Template in Excel
- Workflow Automation in Excel
- How to Create Approval Workflow in Excel
- Workflow Tracker in Excel
<< Go Back to SmartArt in Excel | Learn Excel
Get FREE Advanced Excel Exercises with Solutions!
