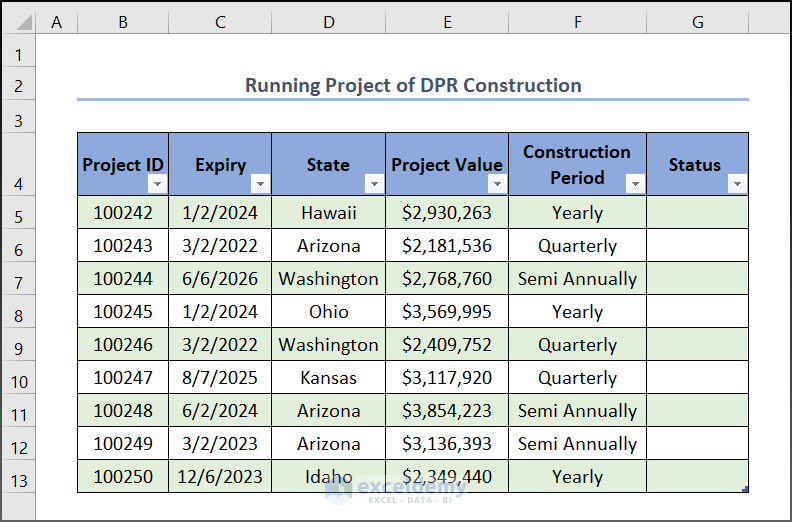
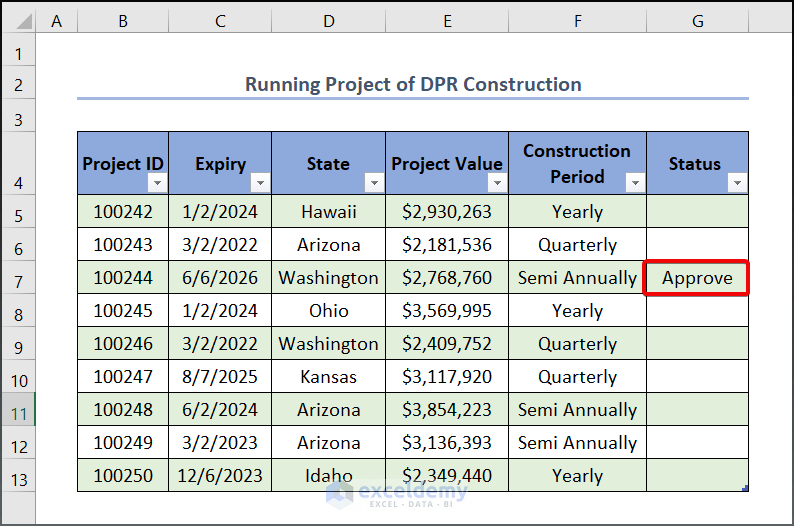
Below is our dataset called “Running Project of DPR Construction”.
Step 1: Open a Dataset from OneDrive Using Desktop App
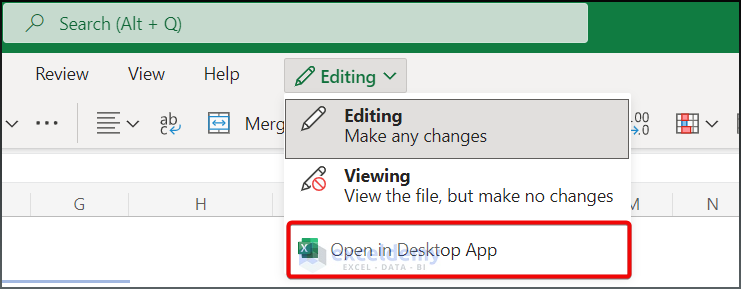
- Go to your dataset uploaded in OneDrive and open the file by selecting the Open in Desktop App option.
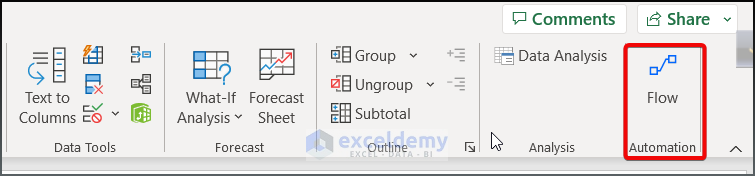
- If any Flow feature is available in the Data tab, as shown below, follow the next step to activate it, as we need it to complete our task later.
Step 2: Add the Microsoft Power Automate Feature
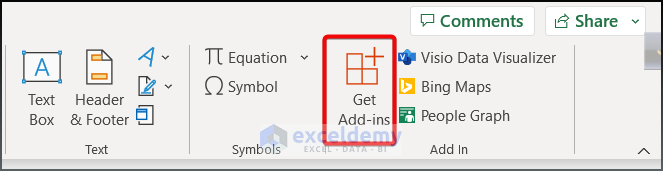
- To add this feature, Select Insert > Get Add-ins command.
- Type Microsoft Power Automated for Excel and press the Add button.

- Click on Continue to proceed.

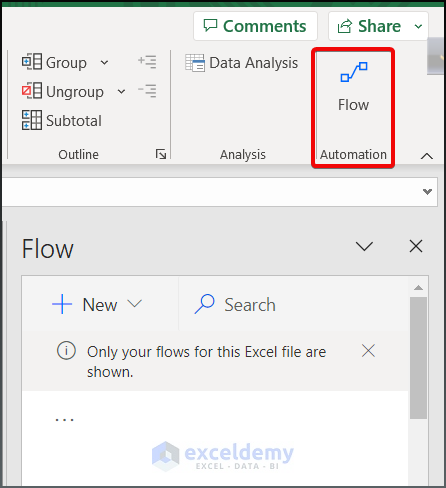
- You will get the feature under the Data tab. See the image attached below.
Step 3: Create an Approval Flow
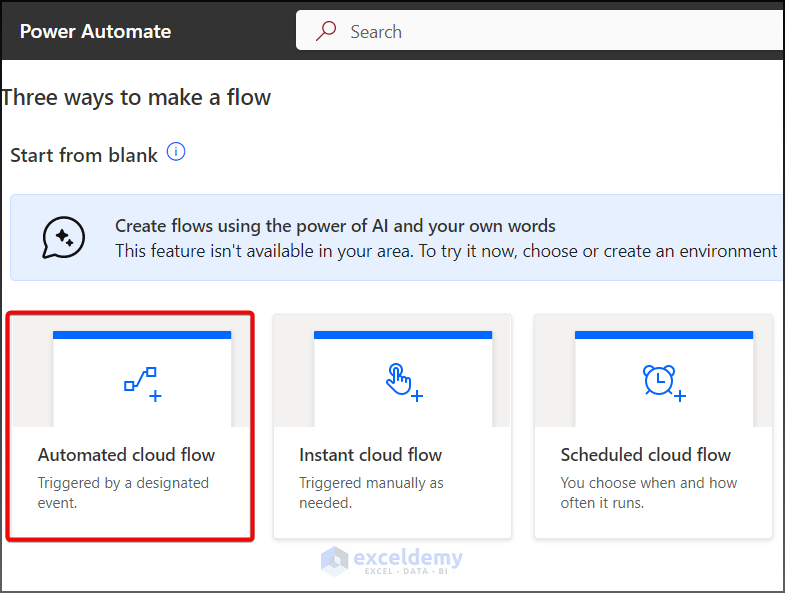
- Click on the Create option.

- Select the Automated cloud flow, as shown below.
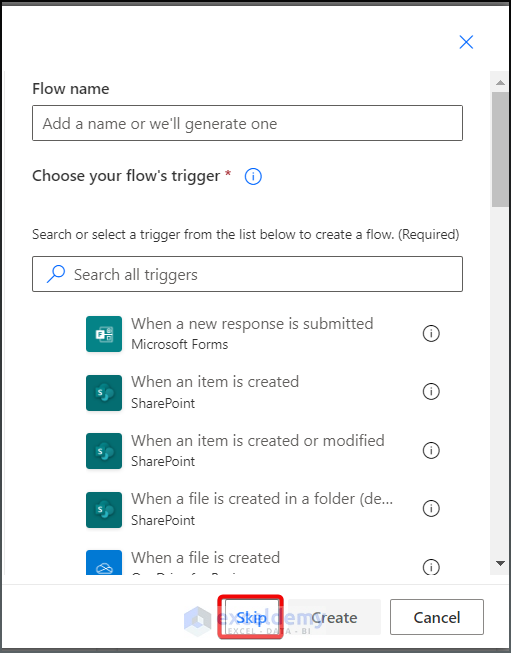
- Some triggers will appear. Click on Skip.
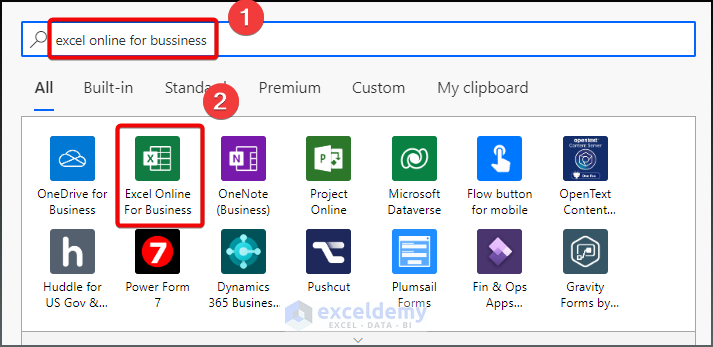
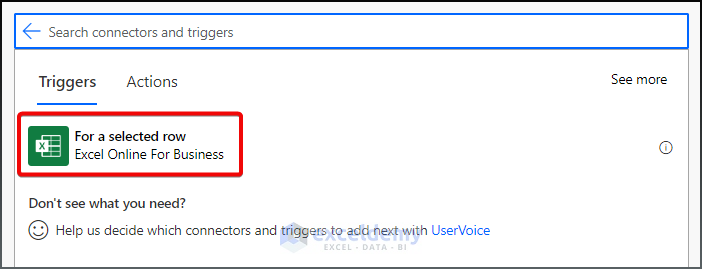
- A search box will appear. Type Excel online for business and select the icon as depicted below.
- Select the For a selected row as your Trigger.
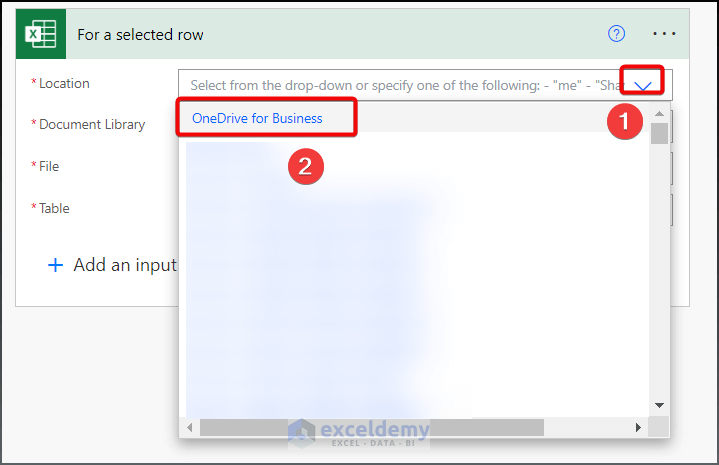
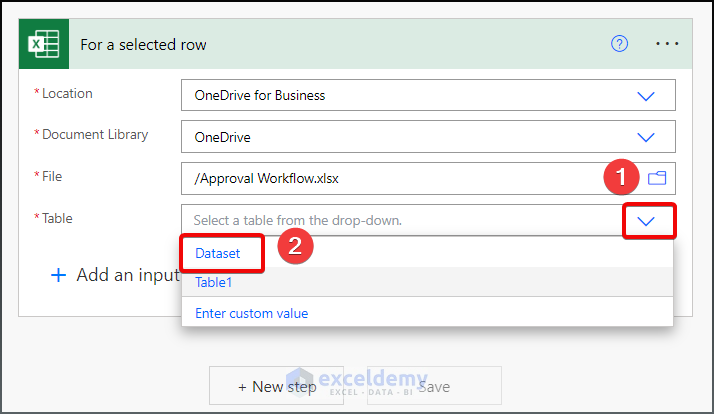
- You need to input some information into your Trigger The first option is for specifying your dataset location. We kept our data in the OneDrive, and clicked on the OneDrive for Bussiness after selecting the Downward icon.
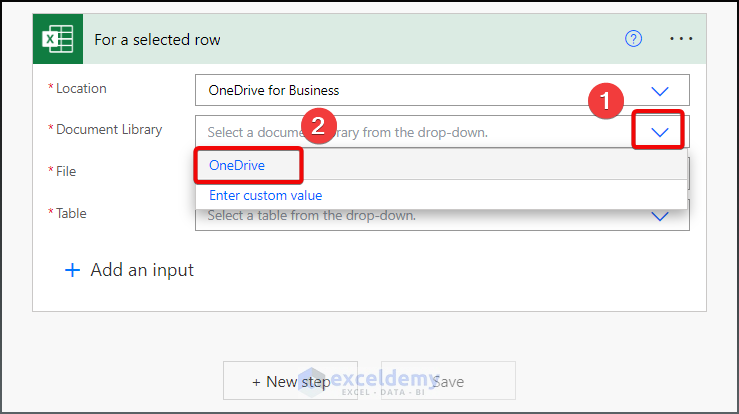
- In the Documented Library, select the OneDrive option.
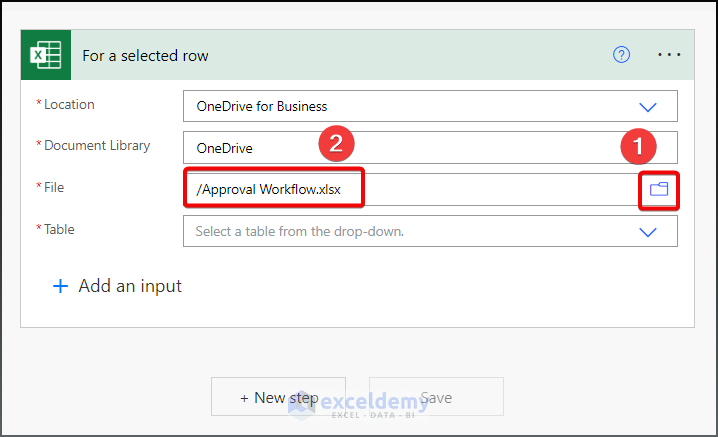
- Select File Icon to fetch the Excel file of our dataset into it.
- Select Dataset as your Table name.
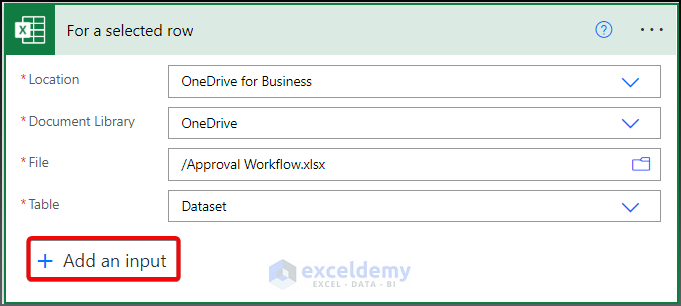
- Press Add an Input to add an Email box.
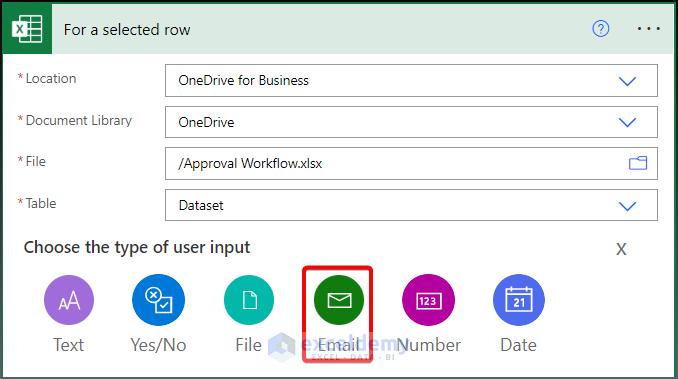
- Click on the Email option. You can also use the other option to decorate your flow but those are optional.
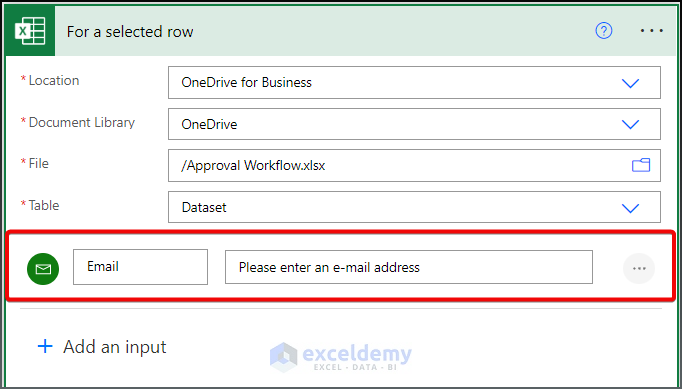
- We have an Email Box, as shown below.
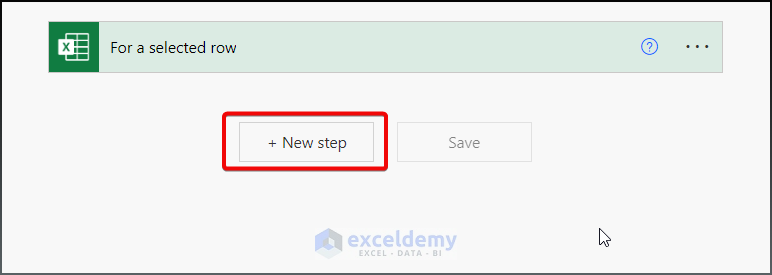
- Click the New Step to proceed.
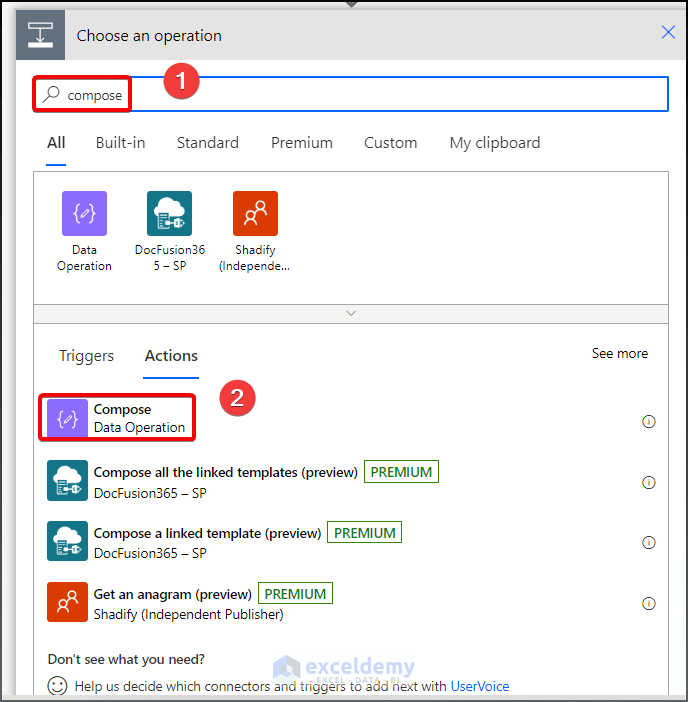
- Type and select the Compose option from the Choose an operation.
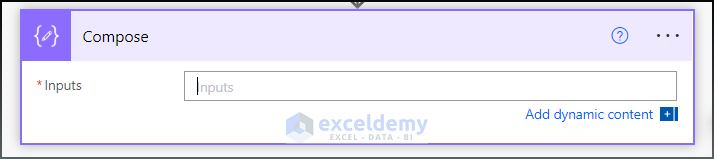
- An Inputs box will appear.
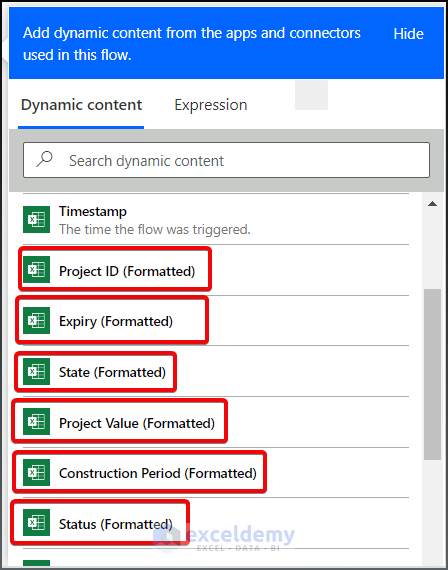
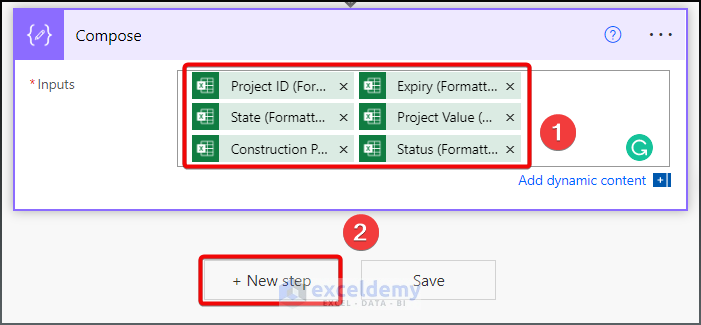
- Select all of your dataset Header, as below. Those options will be generated automatically from your dataset.
- See the output as given below. Click on New Step to proceed.
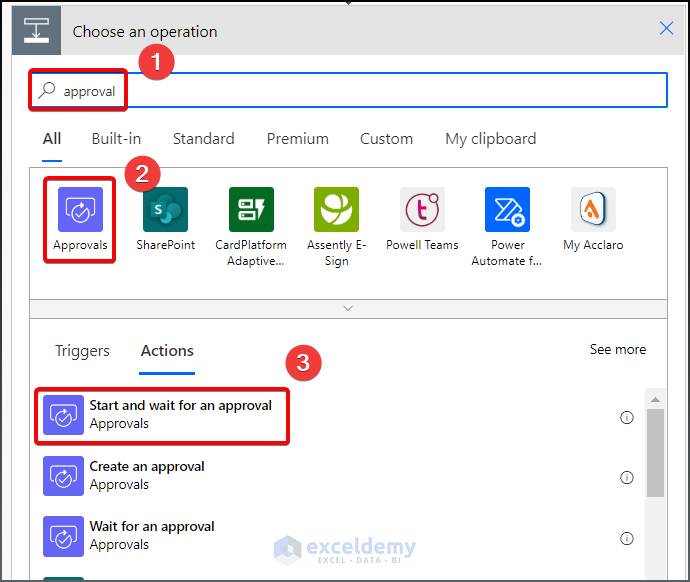
- Type and select the Approvals option as the prompt says below. Click on Start and wait for an approval as your actions.
- Select Approve/Reject – Everyone must approve as your Approval type.

- Select all of your dataset headers in the Title box.
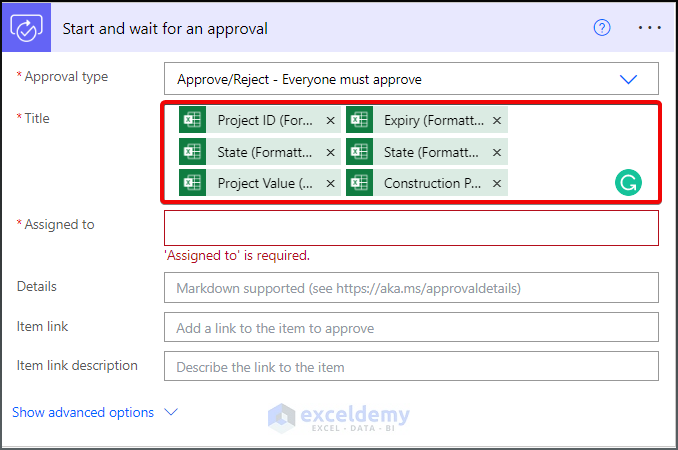
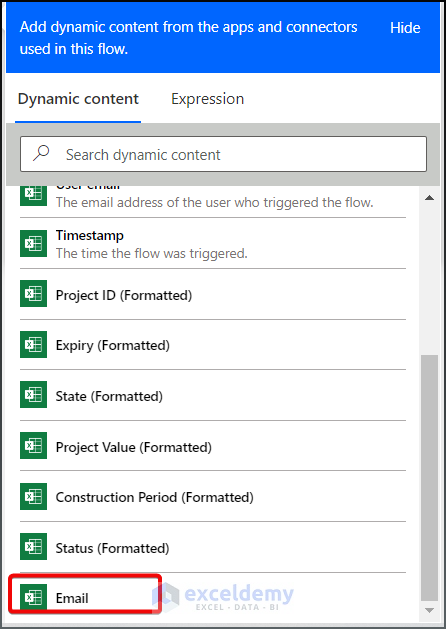
- In the Assigned to box select the Email option.
- See the output below.
- Click on to the New Step.

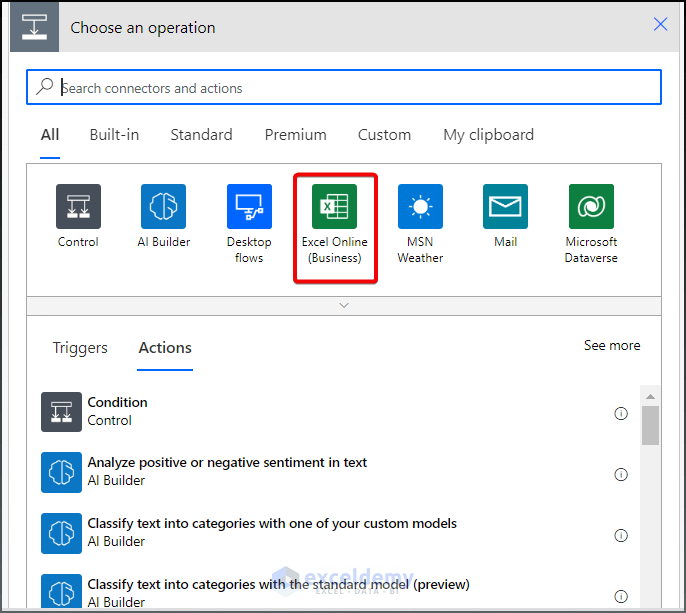
- Select Excel Online as your connector.
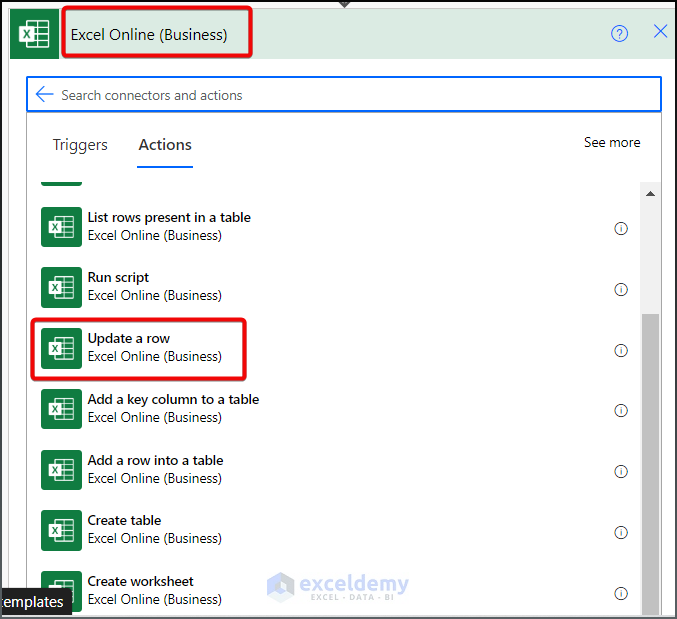
- Select Update a row from the Actions Bar.
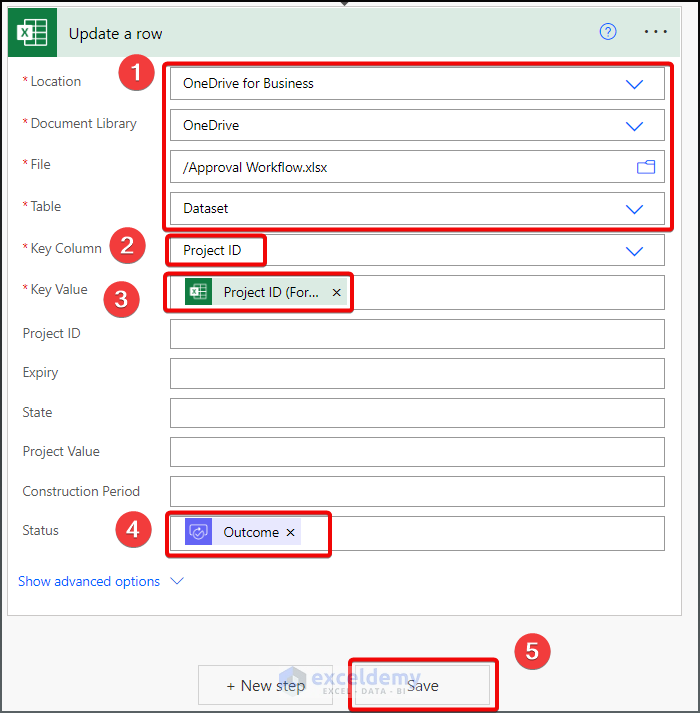
- In step 1 as depicted below, input all the required data and subsequently fill in the Key Column, Key-Value, and Status to get the output decision from the approver. Don’t forget to Save your approval flow before going to the next step.
Step 4: Run the Approval Workflow
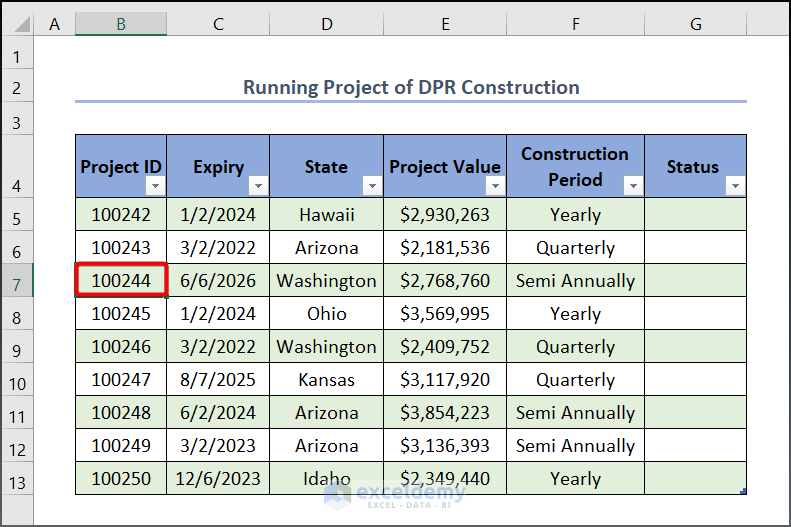
- Open your dataset from the Excel Desktop and select a Project ID, 100244, for instance.
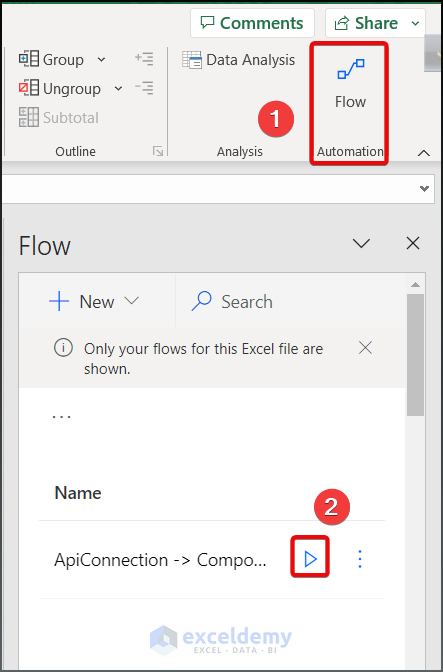
- Select Data > Flow from the Menu bar.
- Run your Approval Flow.
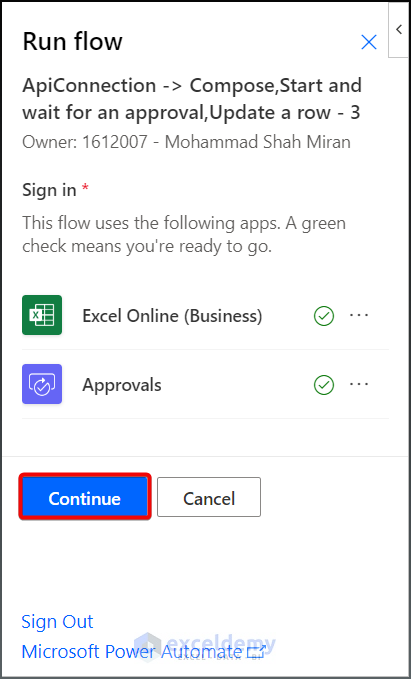
- Select the Continue button to proceed.
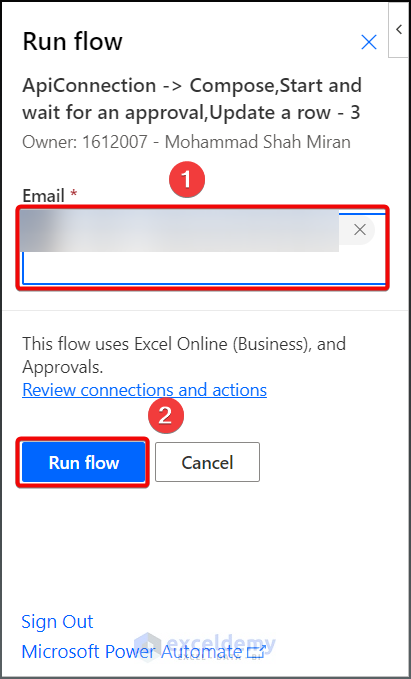
- In the Email box, type your recipient’s Email ID.
- Select Run Flow.
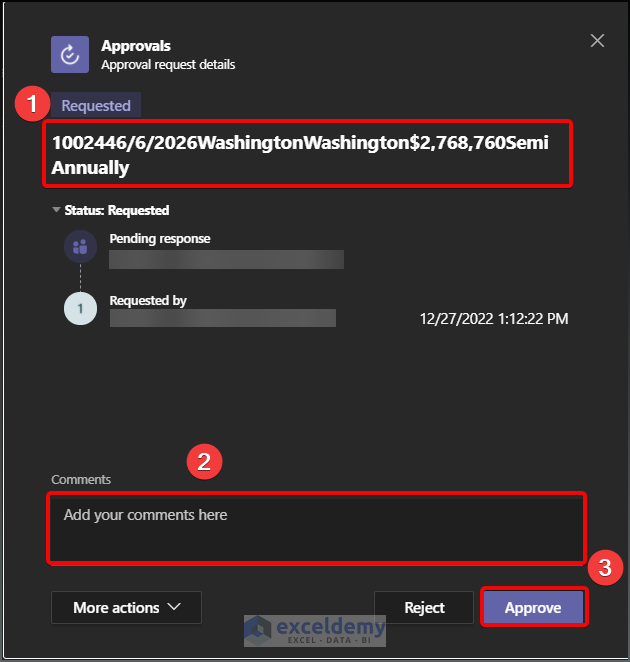
- Wait for 10 or 15 seconds to get a notification, and then open your Microsoft Team app to see the result from a Recipient’s perspective.
- The entire row of the cell containing 100244 Project ID is listed on the appeared box.
- Leave a comment if you have any.
- Select the Reject or Approve button to let them know your decision.
- See the Recipient’s response is listed in your Excel file as described below.
Things to Remember
- It is worth mentioning that you have to be specific to select your data and column header in the appeared boxes.
- Before running your flow, select the appropriate row for which you would like to let the recipient know. The cell has to be in the specified range. You will not get any output otherwise.
Practice Section
Below is a practice section on the dataset so that you can practice. 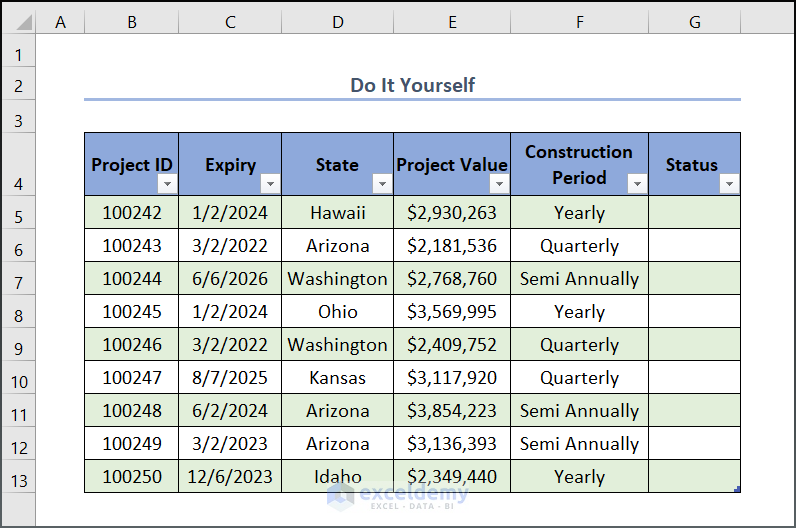
Download the Practice Workbook
Download the workbook to practice.
Related Articles
- How to Create Workflow Management Template in Excel
- How to Create a Workflow Tracker in Excel
- How to Create Workflow Chart in Excel
- How to Create a Workflow in Excel
- How to Perform Workflow Automation in Excel
<< Go Back to Workflow in Excel | SmartArt in Excel | Learn Excel
Get FREE Advanced Excel Exercises with Solutions!
