The following image shows one of the ways to separate two words in Excel. Read on to learn more.
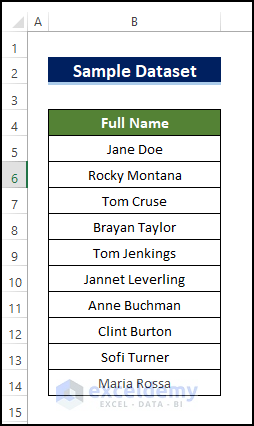
Let’s say we have a dataset containing a column of Full Name (consisting of a First Name and a Last Name), and we want to separate it into parts containing the First and Last Name.
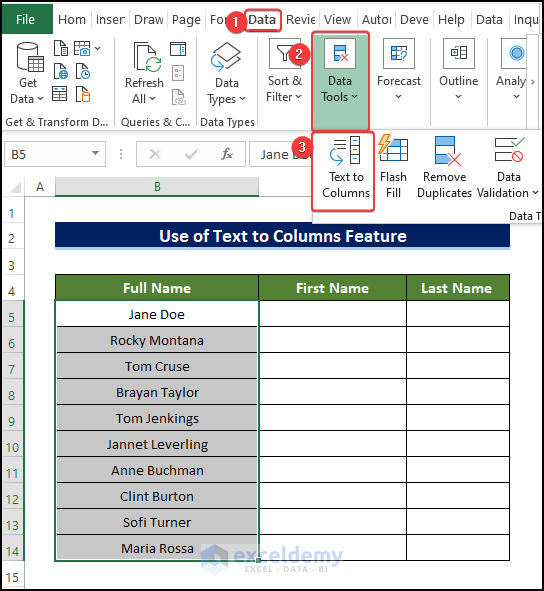
Method 1 – Use Text to Columns Feature to Separate Words
STEPS:
- Select the range of cells (B3:B12).
- Go to the Data tab and select Data Tools.
- Click on Text to Columns.
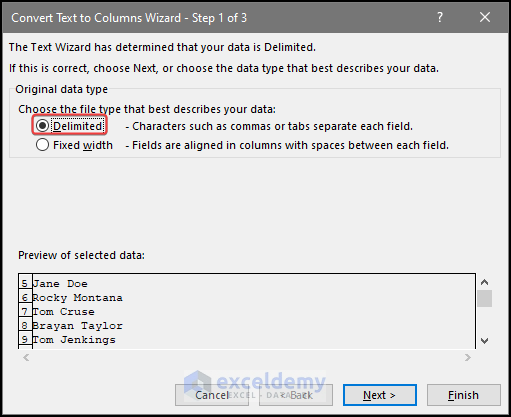
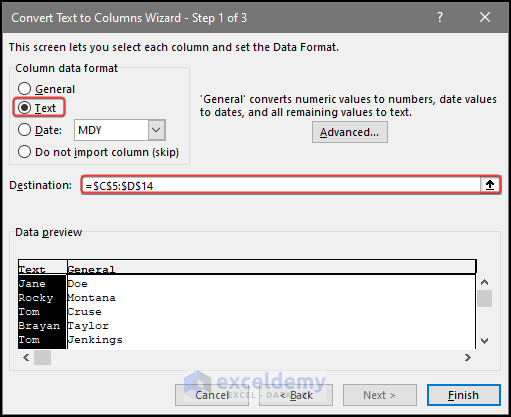
- In the popup window, for Choose the file type that best describes your data, choose Delimited.
- Click on Next.
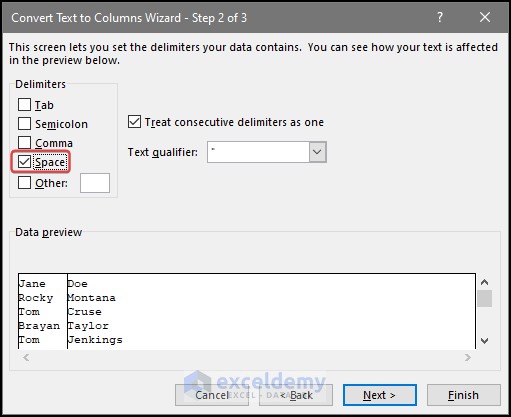
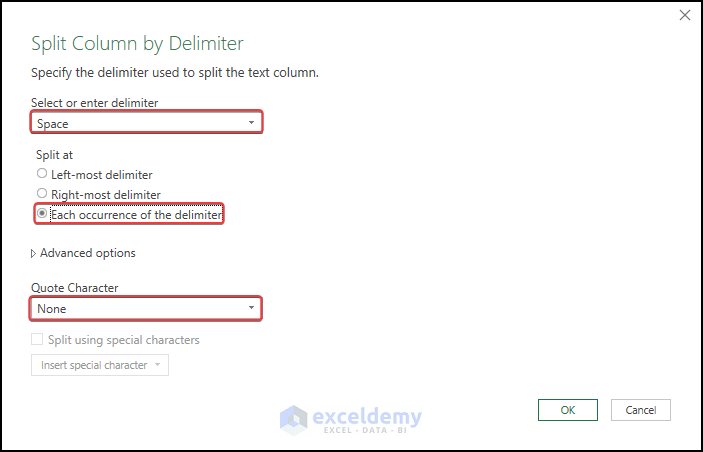
- Under Delimiters options, tick the Space option. Tick the box saying Treat consecutive delimiters as one.
- Select Next.
- Choose the resulting cell data format (i.e.Text). Select any Destination range you want the data to display (i.e. C5:D14).
- Press Finish.
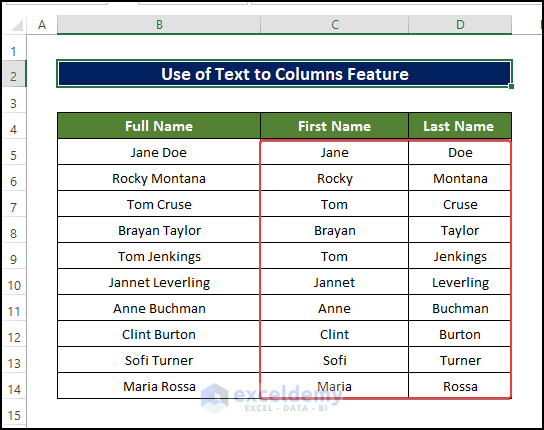
- The outcome should be the same as the image below.
Read More: How to Split Text in Excel Using Formula
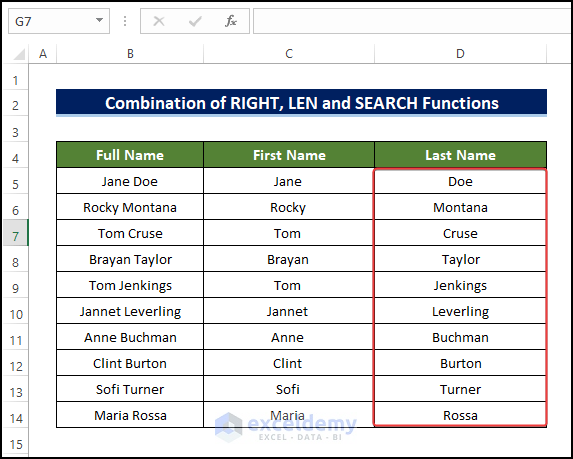
Method 2 – Combine LEFT, RIGHT, LEN, and SEARCH Functions for Splitting Words
STEPS:
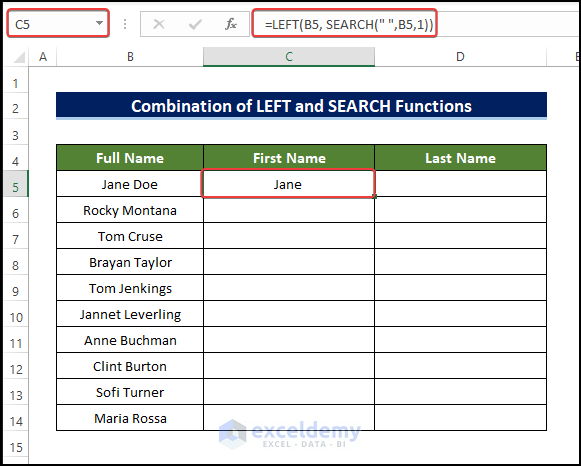
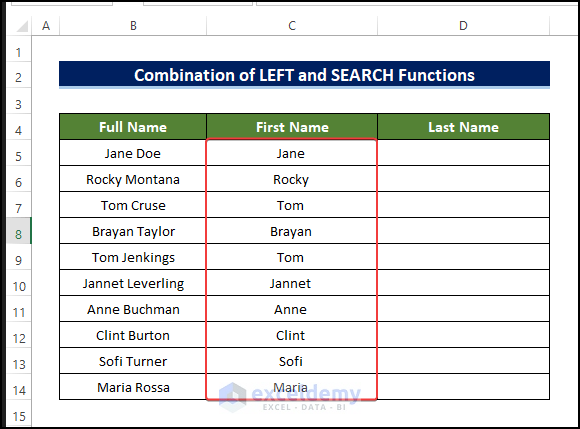
- Insert the below formula in the first blank cell (C5) for which you want to display the First Name:
=LEFT(B5, SEARCH(" ",B5,1))
- Press Enter.
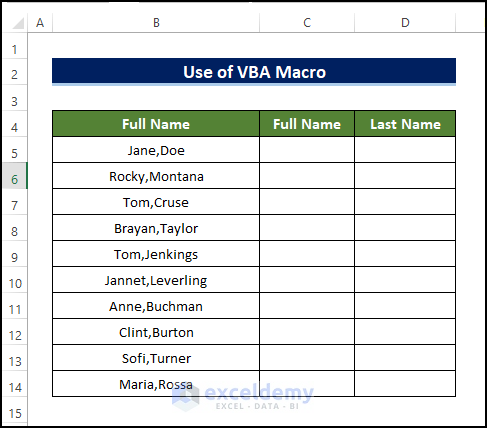
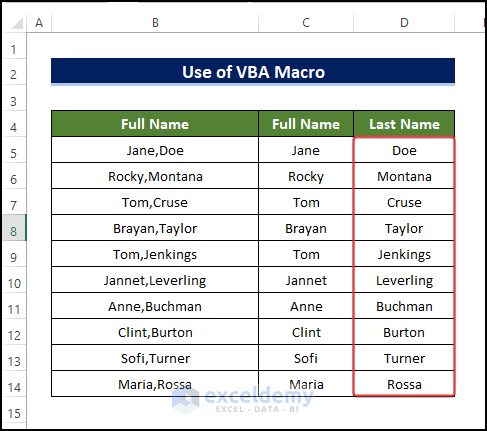
Formula Breakdown Formula Breakdown Read More: How to Split Text by Number of Characters in Excel STEPS: Formula Breakdown ➢ FIND(” “,B5): Inside the formula, the FIND function returns the string location (” “) of the text string in cell B5, ➢ LEFT(B5,FIND(” “,B5)-1): LEFT function displays the text strings from the beginning of cell B5 to the space. Formula Breakdown Read More: How to Split Text by Space with Formula in Excel Before running the VBA Macro Code, the dataset looks like the image below. STEPS: Read More: How to Split First And Last Name in Excel Steps: Read More: Split String by Character in Excel Steps: Read More: How to Split String by Length in Excel Download Practice Workbook Download this practice workbook to exercise.
<< Go Back to Splitting Text | Split in Excel | Learn Excel
=RIGHT(B5,LEN(B5)-SEARCH(" ",B5,SEARCH("",B5)+1))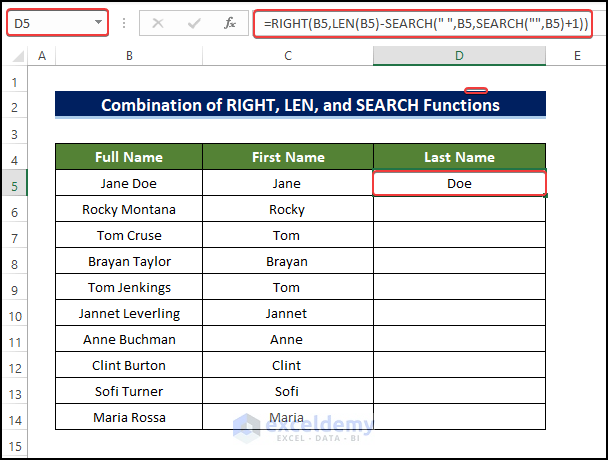
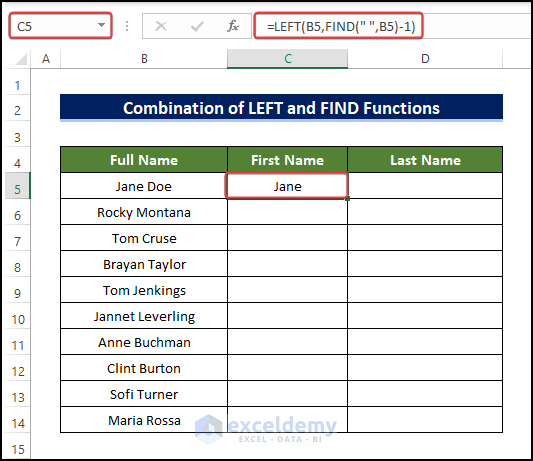
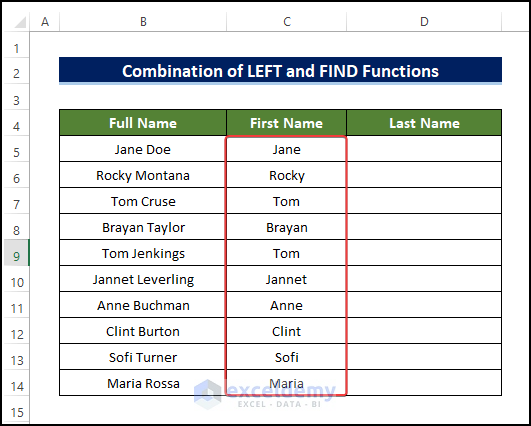
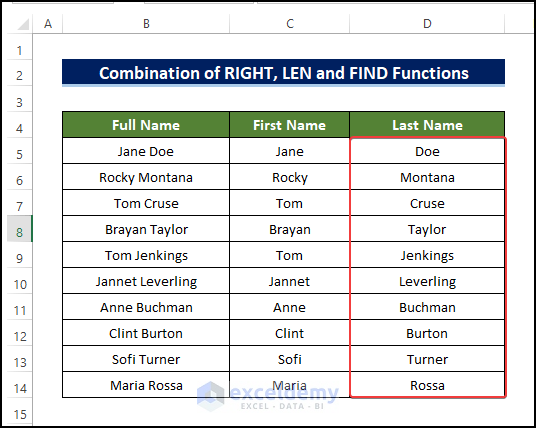
Method 3 – Apply LEFT, RIGHT, LEN, and FIND Functions to Divide Words
=LEFT(B5,FIND(" ",B5)-1)
=RIGHT(B5,LEN(B5)-FIND(" ",B5))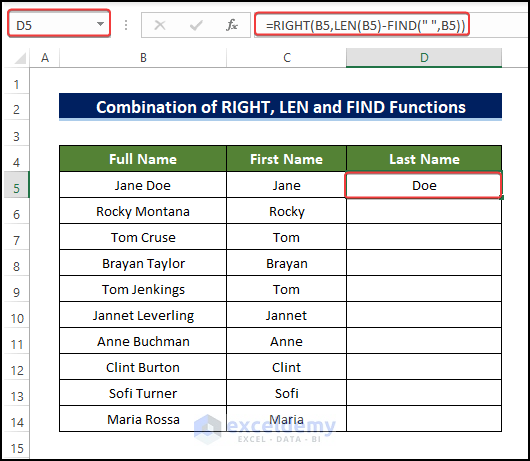
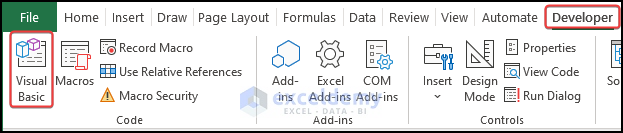
Method 4 – Separate Two Words Through VBA Code
Sub Word_Separate()
Dim Xarray() As String, C As Long, x As Variant
For n = 5 To 14
Xarray = Split(Cells(n, 2), ",")
C = 3
For Each x In Xarray
Cells(n, C) = x
C = C + 1
Next x
Next n
End Sub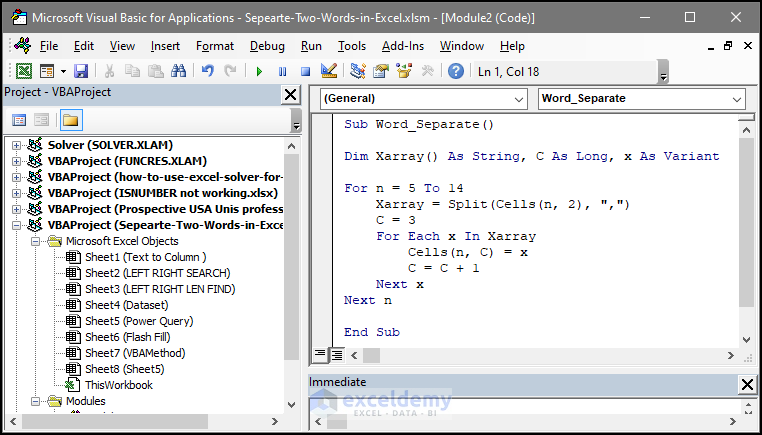
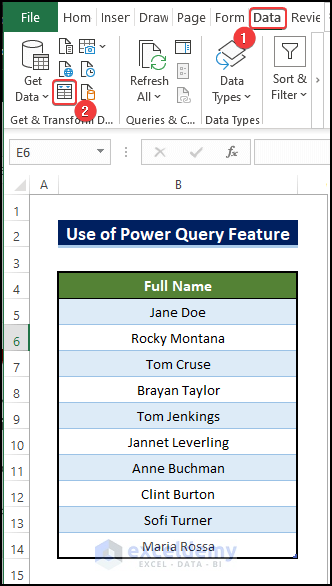
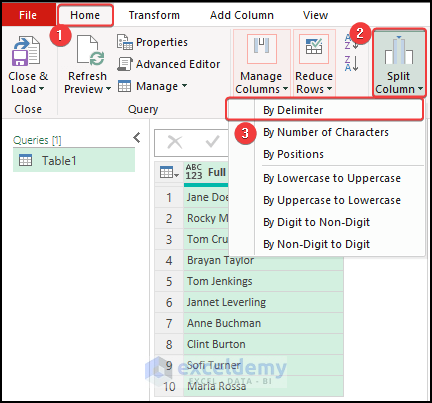
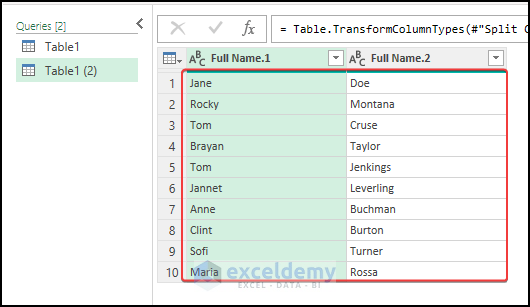
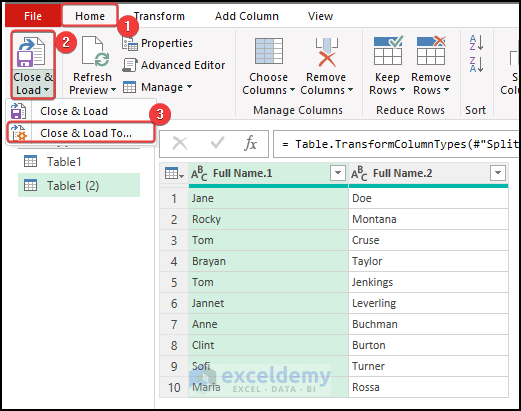
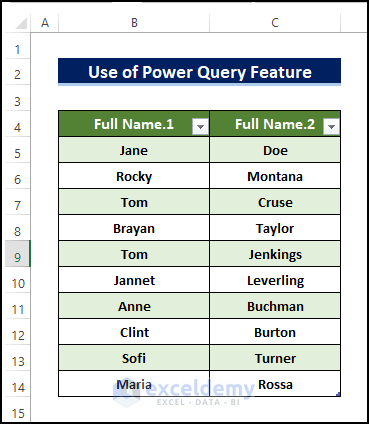
Method 5 – Utilize Excel Power Query Feature to Split Words
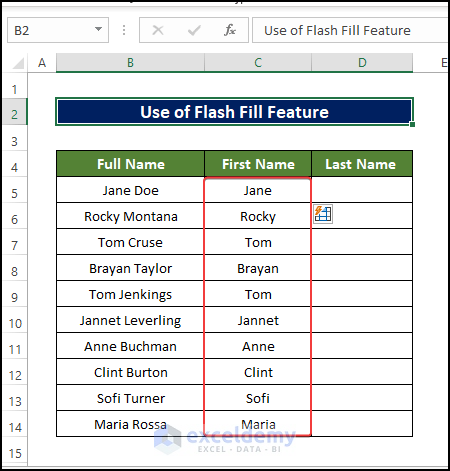
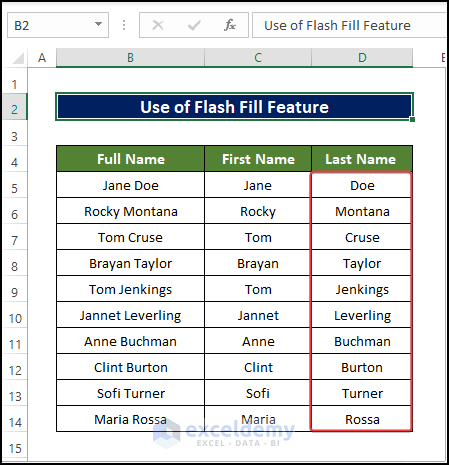
Method 6 – Separate Words Using Flash Fill Feature

Further Readings

