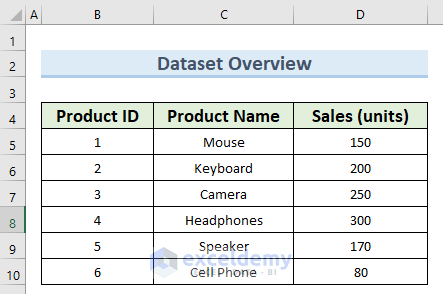
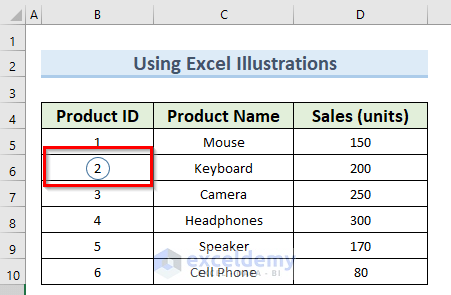
In the dataset below, we have 3 columns showing Product ID, Product Name, and Sales (units).
Method 1 – Using Excel Illustrations Feature to Put a Circle Around a Number
Steps:
- Go to the Insert tab and click on Shapes under Illustrations.
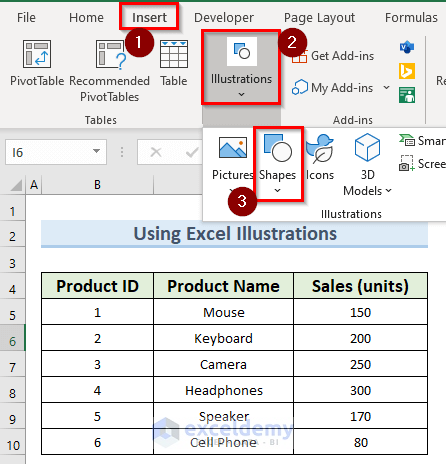
- Select the Oval shape from the list of available shapes.

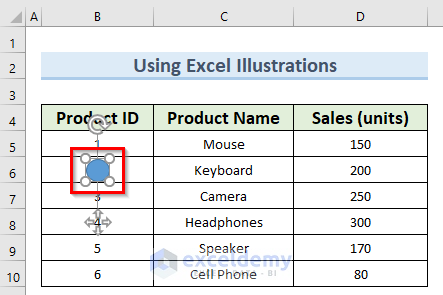
- This will insert the oval shape where you click on the sheet.
- Select the shape and navigate to the Shape Format tab at the top of the screen.
- Click on the Shape Fill drop-down and select No Fill.
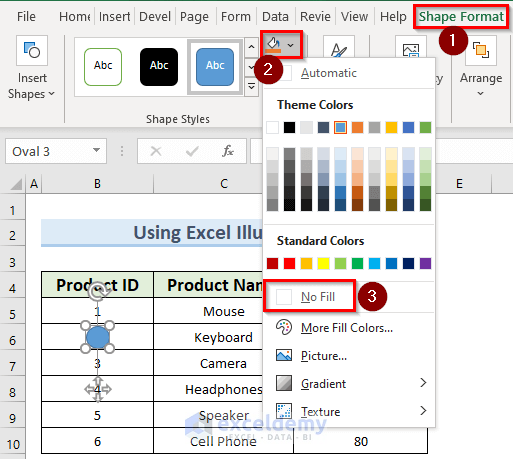
- This will create a circle around the number in the dataset.
Read More: How to Draw a Circle in Excel with Specific Radius
Method 2 – Inserting Excel Symbol to Put a Circle Around a Number
Steps:
- Go to the Insert tab and click on Text Box under Text.
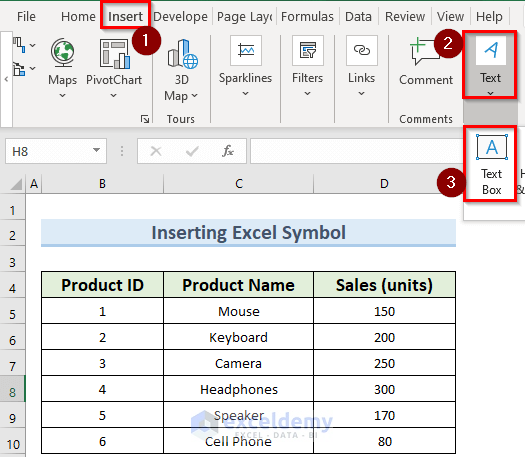
- This will insert a text box on the location you click on the sheet.
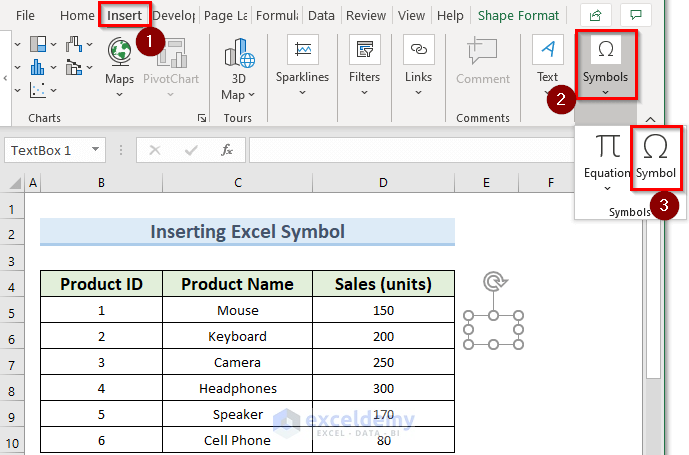
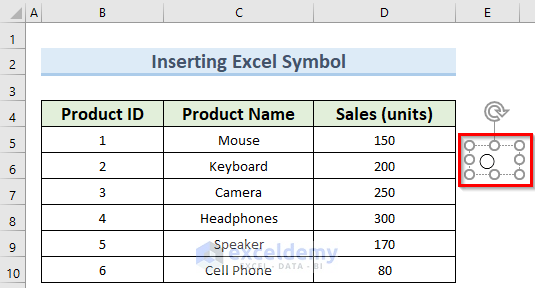
- Go to the Insert tab and click on Symbol under Symbols.
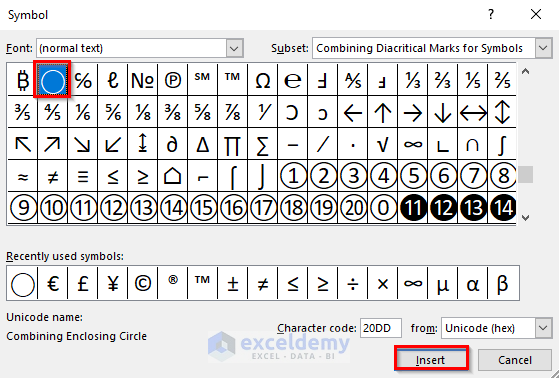
- In the Symbol window, select the Circle symbol and click Insert.
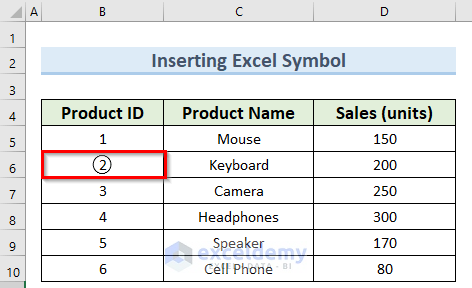
- You should see the circle shape inside the text box.
- Move the circle to the position you desire, and this will give you the final result.
Read More: How to Create Concentric Circle Chart in Excel
Method 3 – Using Quick Access Toolbar to Put a Circle Around a Number
Steps:
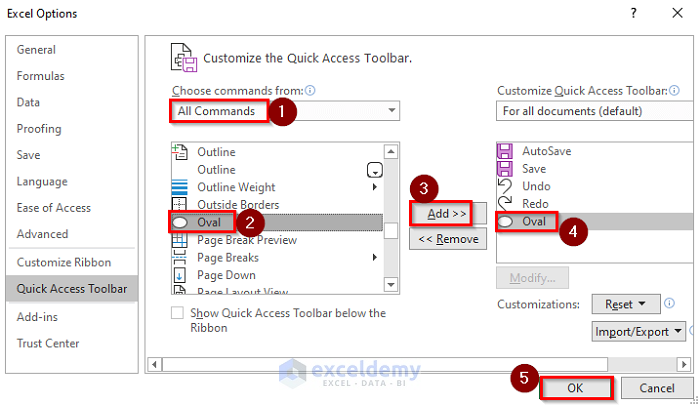
- Click on the Quick Access Toolbar icon at the top of the screen.
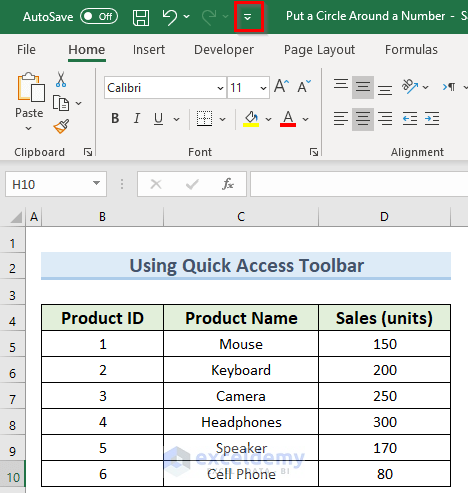
- Click on More Commands.
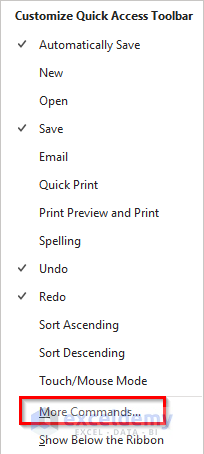
- In the Excel Options window, select All Commands under Choose commands from.
- Select the Oval option and click on Add.
- Click OK.
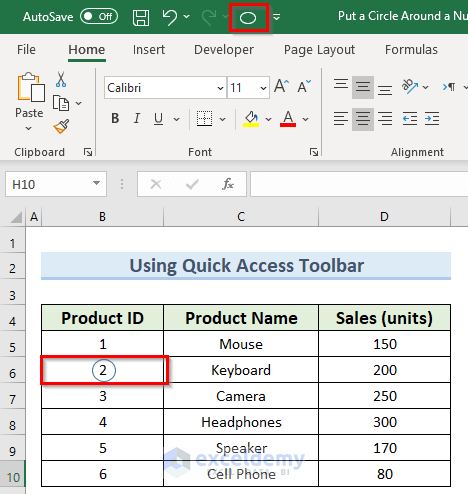
- This will add the Oval shape command in the Quick Access Toolbar as in the image below.
- Click on the Oval shape and again click on the sheet where you want to insert the shape.
- Format the shape as we saw before, and you should get the following result.
Read More: How to Draw a Mohr Circle in Excel
Method 4 – Applying Excel VBA to Put a Circle Around a Number
Steps:
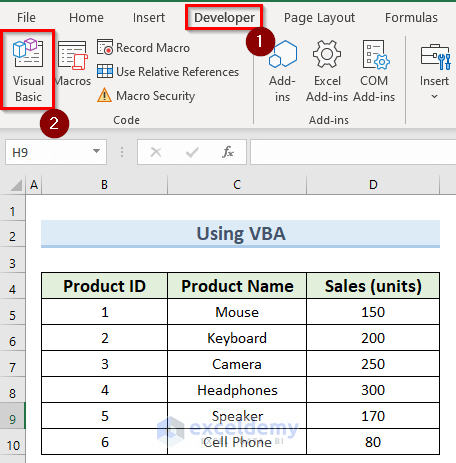
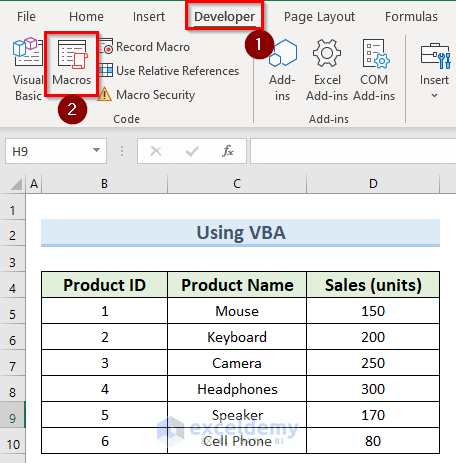
- Go to the Developer tab and click on Visual Basic.
- In the new window, click on Insert and select Module.
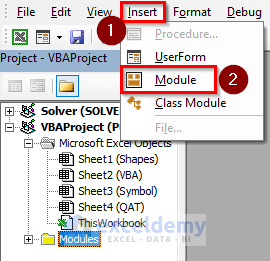
- In the Module window, enter the following code:
Sub CircleToNumber()
    Dim p, s As Single, Sh_area, Sh_oldrange As Range
    Set Sh_oldrange = Selection.Cells(1)
       For Each Sh_area In Selection.Areas
       With Sh_area
        p = .Height * 0.1
        s = .Width * 0.1
         ActiveSheet.Ovals.Add Top:=.Top - p, Left:=.Left - s, _
          Height:=.Height + 2 * p, Width:=.Width + 1.5 * s
        With ActiveSheet.Ovals(ActiveSheet.Ovals.Count)
                       .Interior.ColorIndex = xlNone
                       .ShapeRange.Line.Weight = 1.25
        End With
        End With
    Next Sh_area
Sh_oldrange.Select
End Sub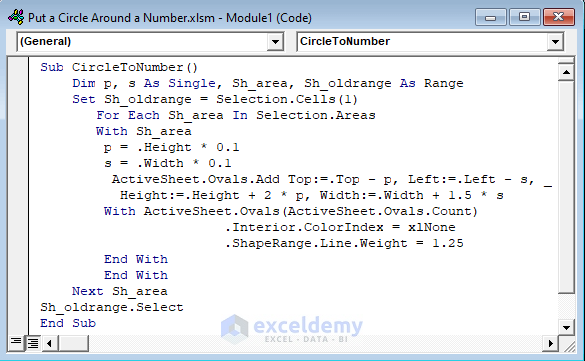
In the above code, we initially declare Single and Range type variables. The Selection method allows us to work with the selected cells. The ActiveSheet.Ovals.Add command adds the oval shape in the set location from the top and left. Finally, the Interior.ColorIndex portion sets the fill color of the shape to null.
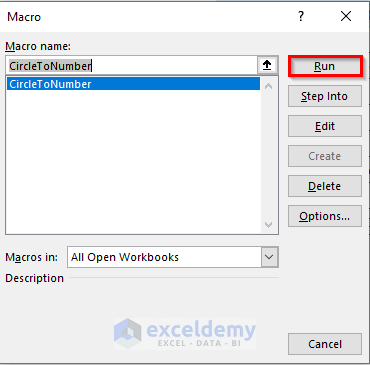
- Go to the Developer tab and click on Macros.
- In the new Macro window, select the macro CircleToNumber and click on Run.
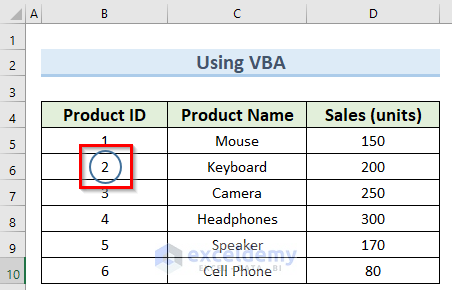
- This will add an oval to the cell you are currently in and you can convert this into a circle by resizing the shape.
Read More: How to Circle Text in Excel (3 Easy Ways)
Download the Practice Workbook
You can download the practice workbook from here.
Related Articles
<< Go Back to Circle in Excel | Learn Excel
Get FREE Advanced Excel Exercises with Solutions!
