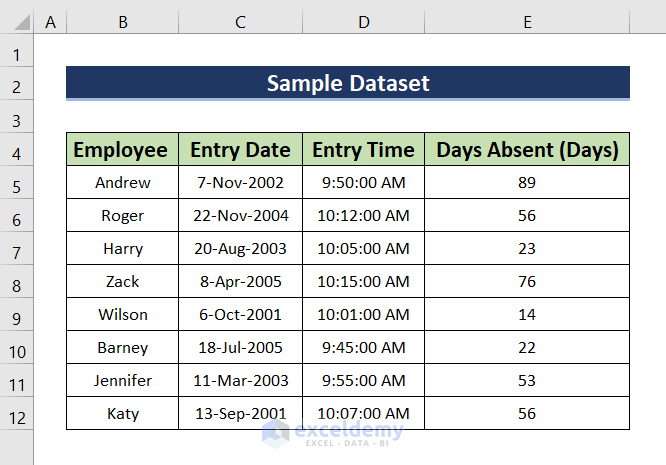
This is the sample dataset.
Method 1 -Using Basic Shapes to Circle a Text in Excel
Steps:
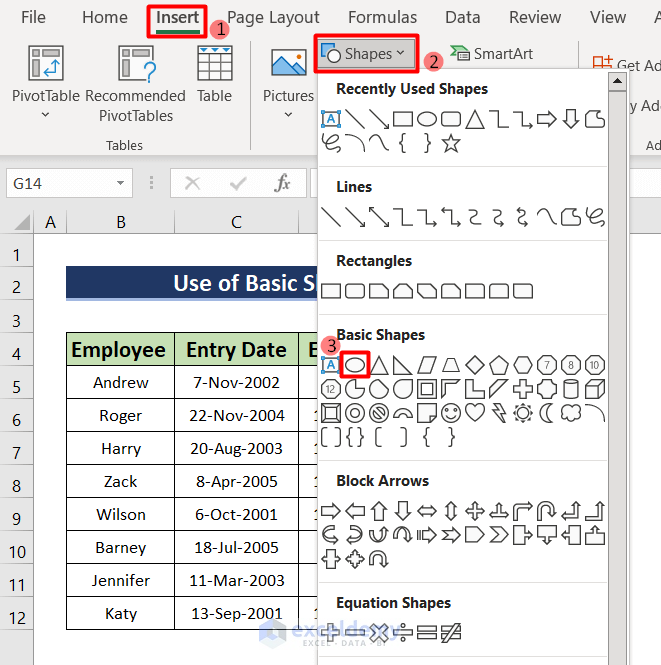
- Go to the Insert tab and click Shapes.
- Select Oval in Basic Shapes.
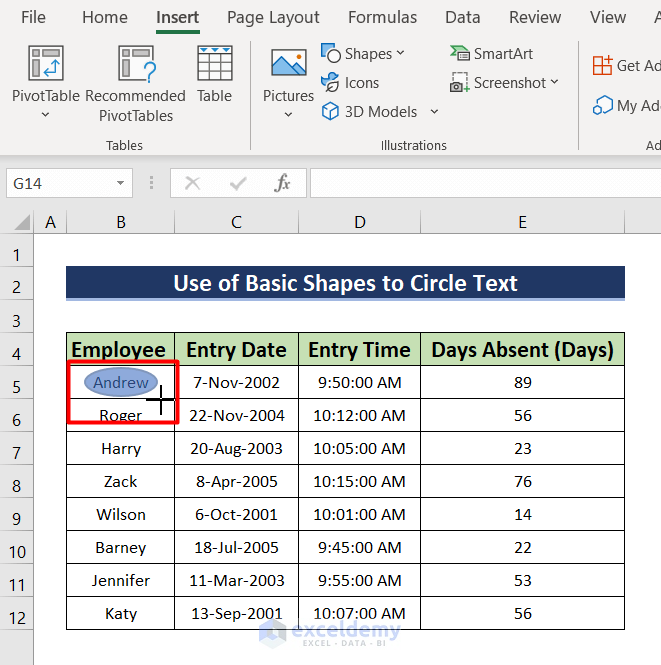
- Your cursor will display a “+” sign. Drag it to create an oval shape around the text.
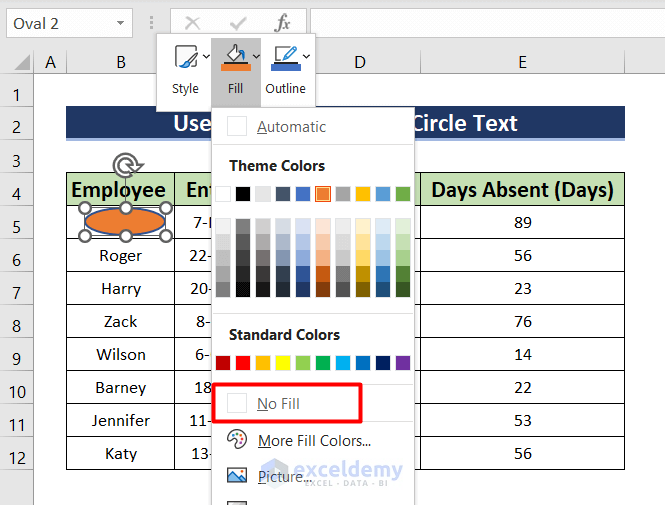
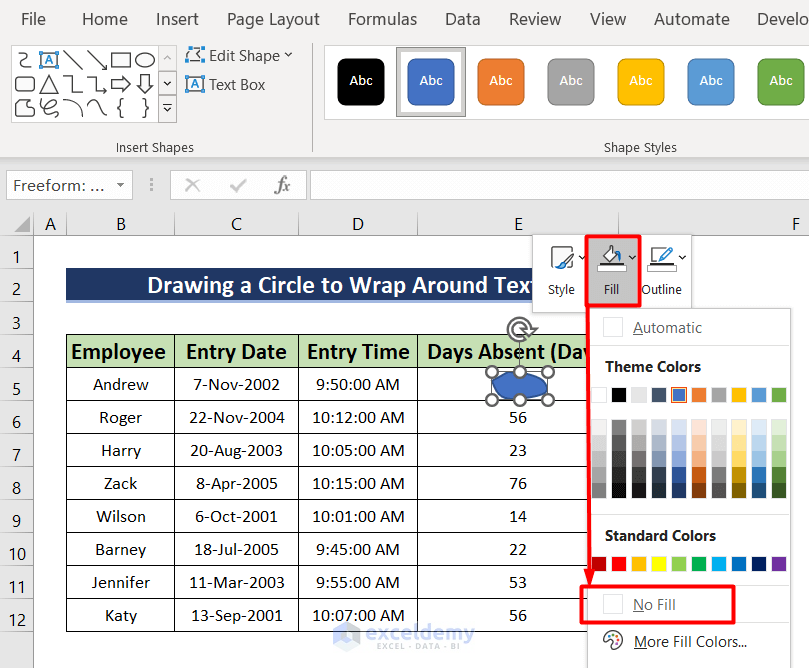
- The oval shape will be filled with color by default.
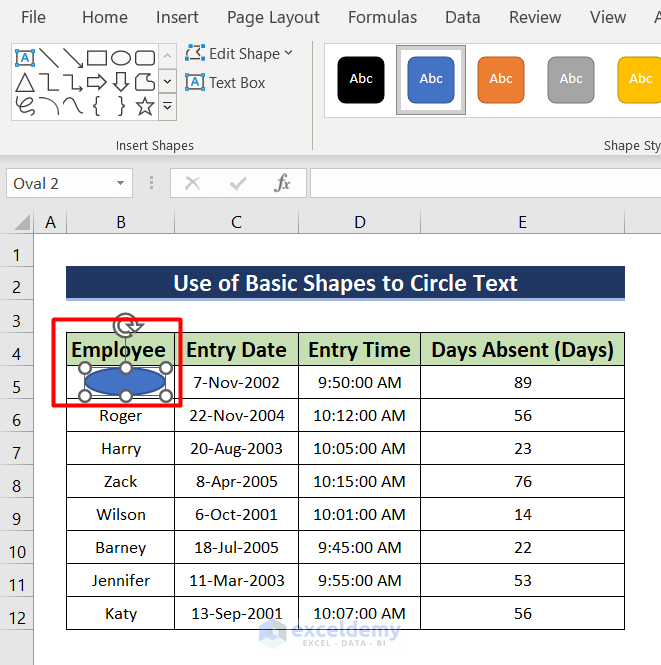
- To remove the color, right-click the shape and go to Format Shapes or directly to Fill.

- Select No Fill to make the text visible.
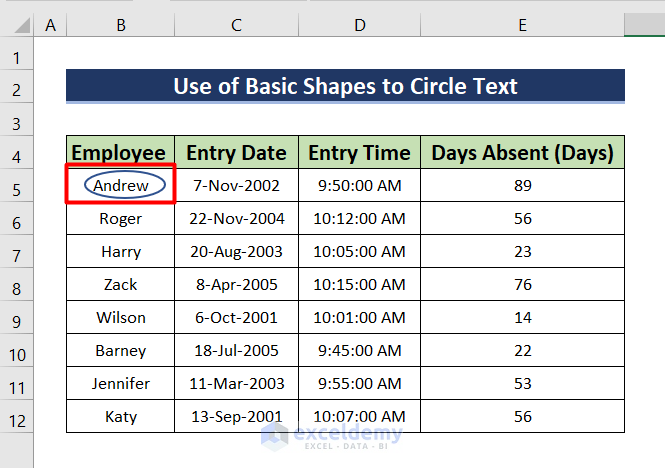
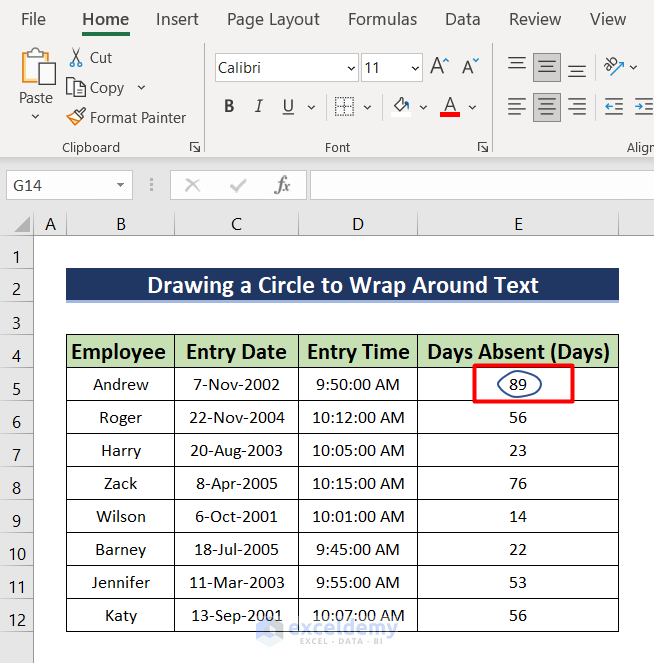
- You will have your text inside the circle.
- You can create a circle with text for the rest of the cells.
Notes
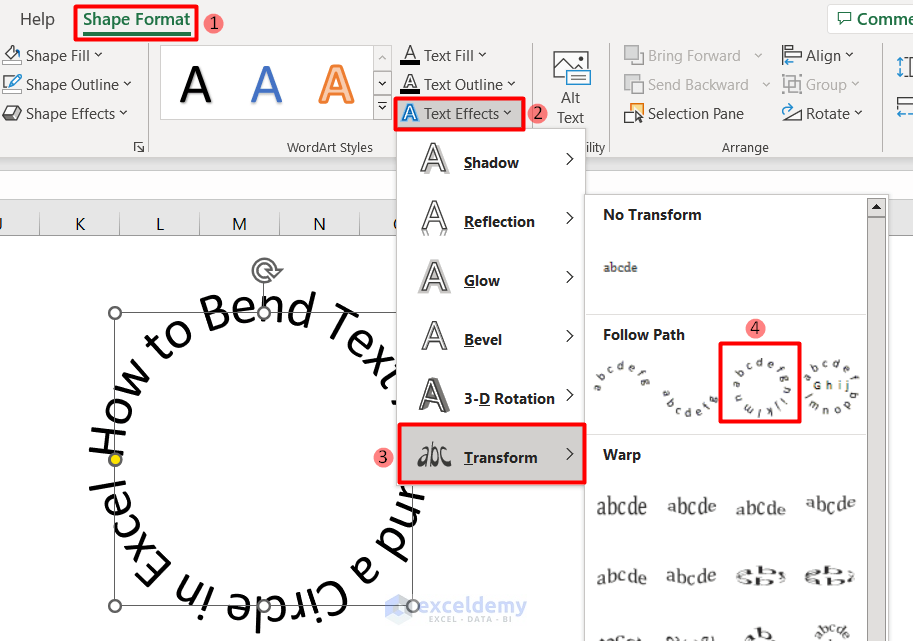
If you want to curve your text around a circle:
- Insert a Textbox in your worksheet and enter your text.
- Go to Text Effects in the Shape Format tab and select Transform.
- Choose Circle.
- Increase your text size until it makes a complete circle.
Read More: How to Circle Something in Excel
Method 2 – Drawing a Circle Around a Text in Excel
Steps:
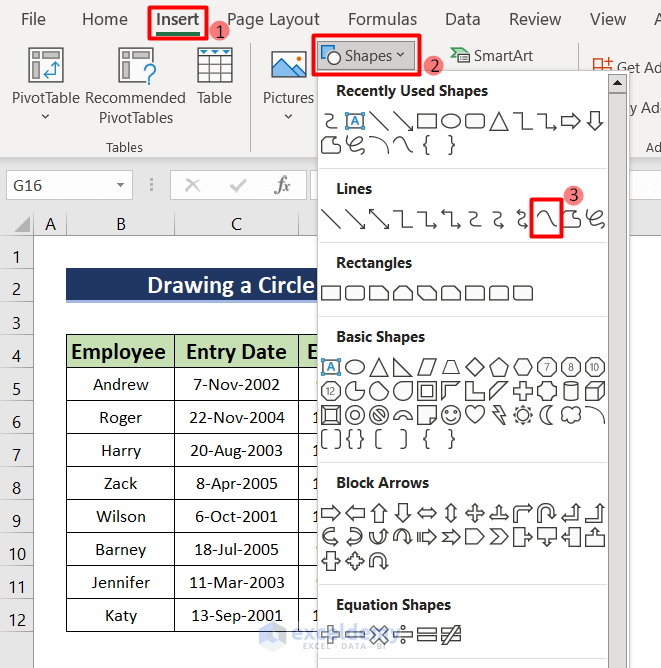
- Click Shapes in the Insert tab, and select Curve in Lines.
- Your cursor will display a “+” sign. Move it and left-click to create a circular shape around your text.
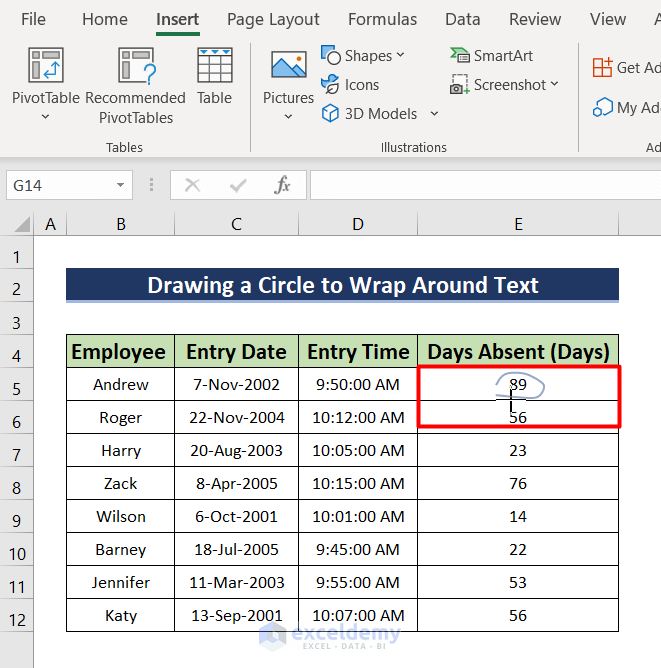
The shape will display a default fill color.

- To remove the fill color and make the text visible, click Fill and select No Fill.
You will see the text inside the circle.
Read More: How to Create Concentric Circle Chart in Excel
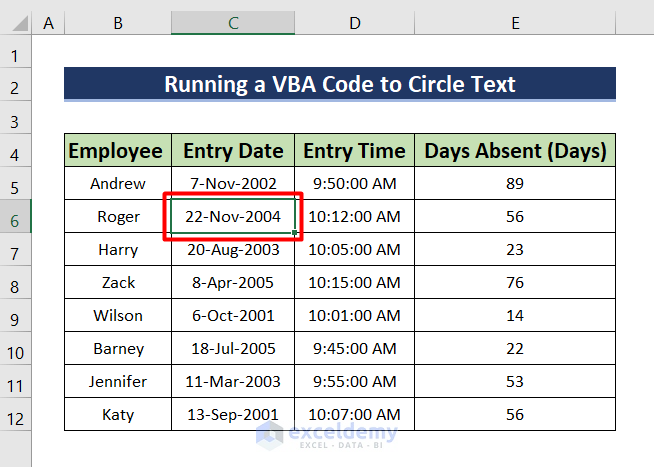
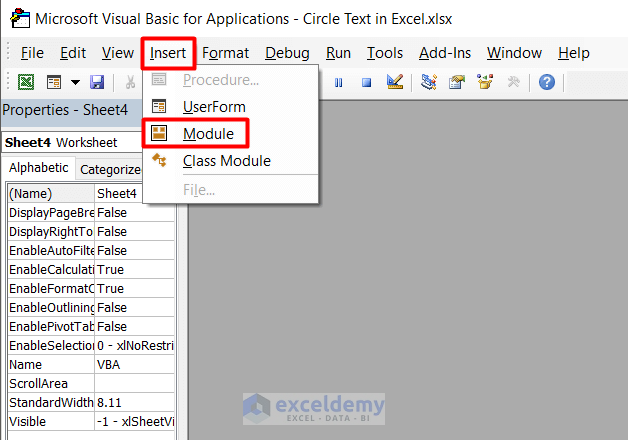
Method 3 – Running an Excel VBA to Circle Text
Steps:
- Select the cell you want to circle.
- Press Alt+F11 to open the Microsoft Visual Basic window.
- Click Module in the Insert tab.
- Enter the following VBA code in the Module.
Sub VBA_Circle_Text()
    Dim CircRNG As Range
    Dim JobRng As Range
    Set JobRng = Application.Selection
    For Each CircRNG In JobRng.Areas
        With CircRNG
            m = CircRNG.Height * 0.15
            n = CircRNG.Width * 0.2
            Application.ActiveSheet.Ovals.Add Top:=.Top - m, Left:=.Left - n, _
            Height:=.Height + 2.25 * m, Width:=.Width + 1.75 * n
            With Application.ActiveSheet.Ovals(ActiveSheet.Ovals.Count)
                .Interior.ColorIndex = xlNone
                .ShapeRange.Line.Weight = 2
            End With
        End With
    Next
    JobRng.Select
End Sub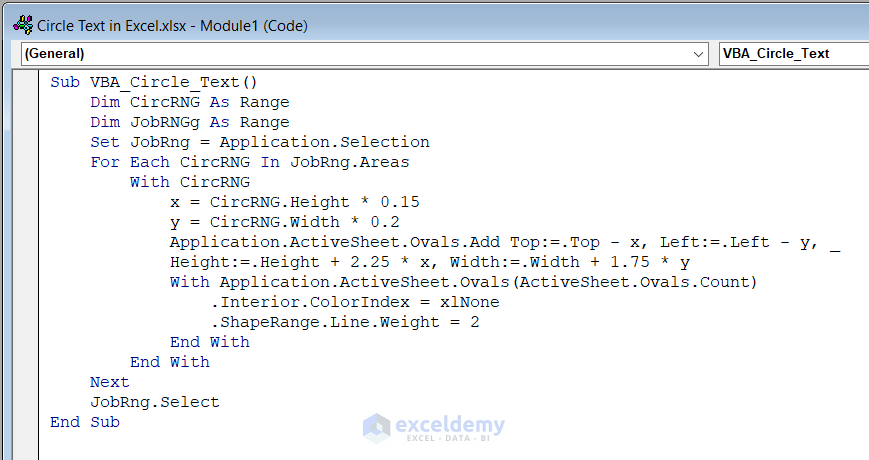
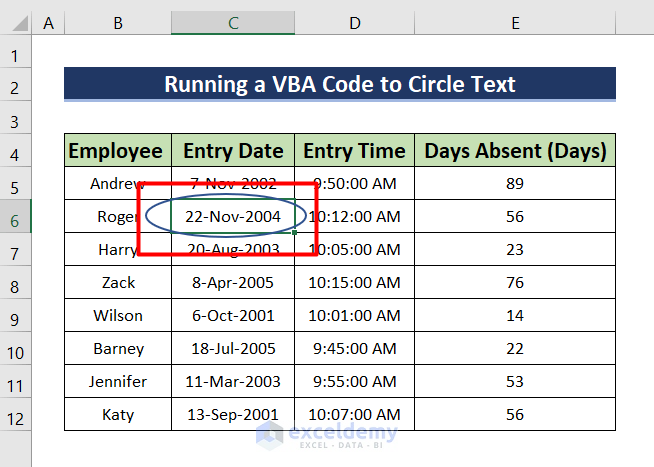
- Press F5 to run the code and go back to your worksheet.
You will see a circle around the selected cell.
Notes
Read More: How to Put a Circle Around a Number in Excel
Download Practice Workbook
Download this practice workbook.
Related Articles
<< Go Back to Circle in Excel | Learn Excel
Get FREE Advanced Excel Exercises with Solutions!
