
Excel VBA UserForms let you create interactive data entry interfaces with text boxes, dropdown lists, and buttons. Instead of entering information directly into worksheet cells, users can add, search, edit, and delete records through a custom form.
In this tutorial, we’ll show you how to build a custom data entry UserForm in Excel VBA that validates user input and stores records in an Excel table.
Step 1: Prepare the Excel Table
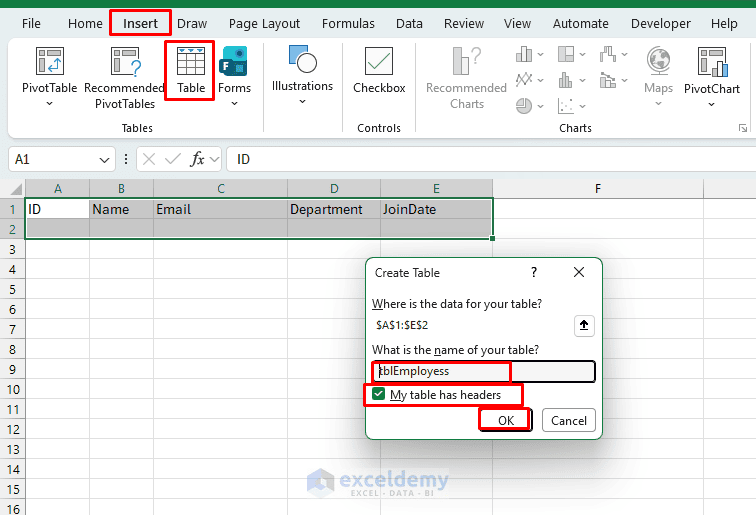
Suppose you want to build an employee data entry UserForm. Convert the data into a table so every new record stays structured and filterable.
- Open a blank workbook and rename the worksheet to Employee Records
- In A1:E1, type these headers: ID, Name, Email, Department, JoinDate
- Select the header range
- Go to the Insert tab >> select Table or press Ctrl + T
- Check My table has headers >> click OK
- Go to the Table Design tab >> in Table Name, enter tblEmployees
- Save the workbook as an Excel Macro-Enabled Workbook (.xlsm)
Step 2: Design the VBA UserForm
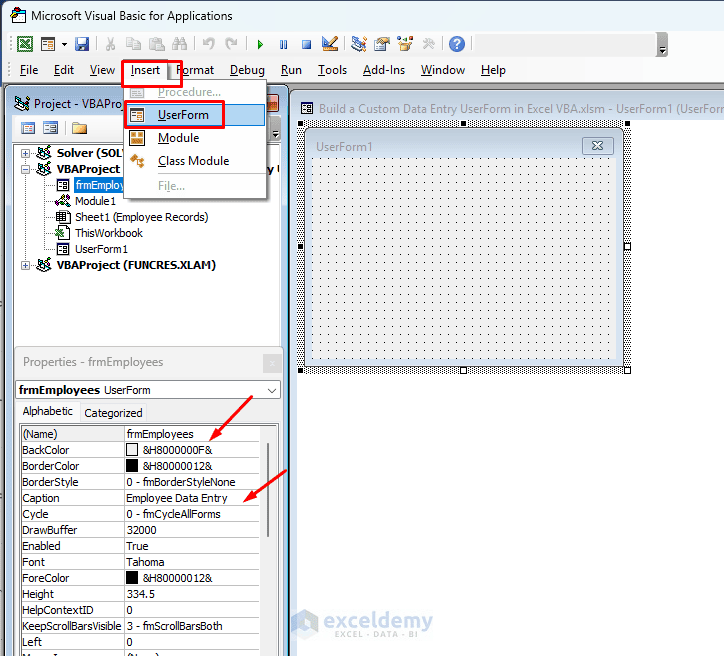
- Go to the Developer tab >> select Visual Basic or press Alt + F11
- Select Insert >> choose UserForm
- In the Properties window, change its (Name) property to frmEmployees
- Set the Caption to “Employee Data Entry”
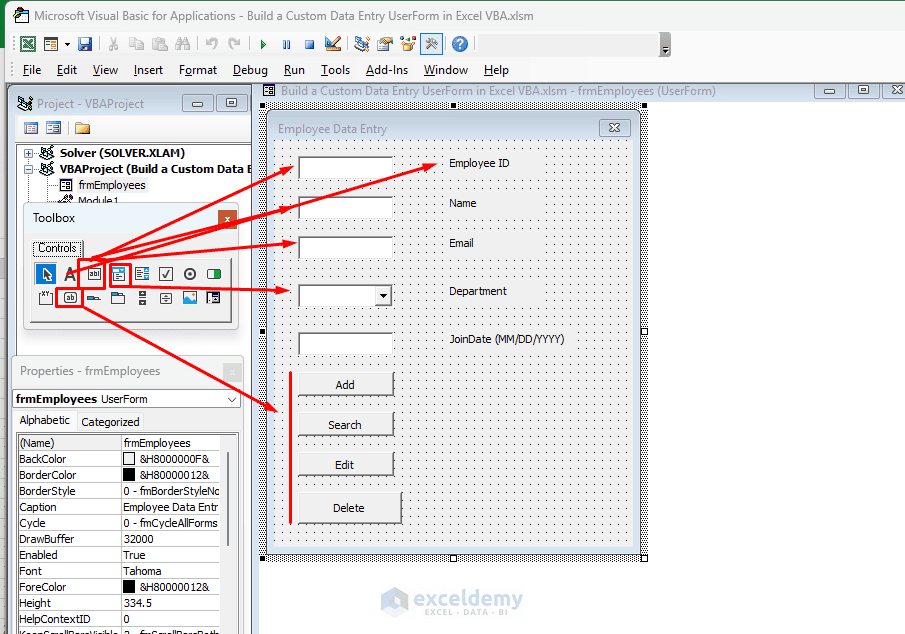
- Use the Toolbox to insert text boxes, a combo box, labels, and command buttons
- Configure the controls as follows:
| Control | Name | Caption |
|---|---|---|
| TextBox | txtID | Employee ID (label) |
| TextBox | txtName | Name (label) |
| TextBox | txtEmail | Email (label) |
| ComboBox | cmbDepartment | Department (label) |
| TextBox | txtDate | JoinDate |
| CommandButton | btnAdd | Add |
| CommandButton | btnSearch | Search |
| CommandButton | btnEdit | Edit |
| CommandButton | btnDelete | Delete |
Add a separate Label control beside each input field, and arrange the four buttons below them.
Step 3: Add Dropdown Options and Validation
Populate the department dropdown:
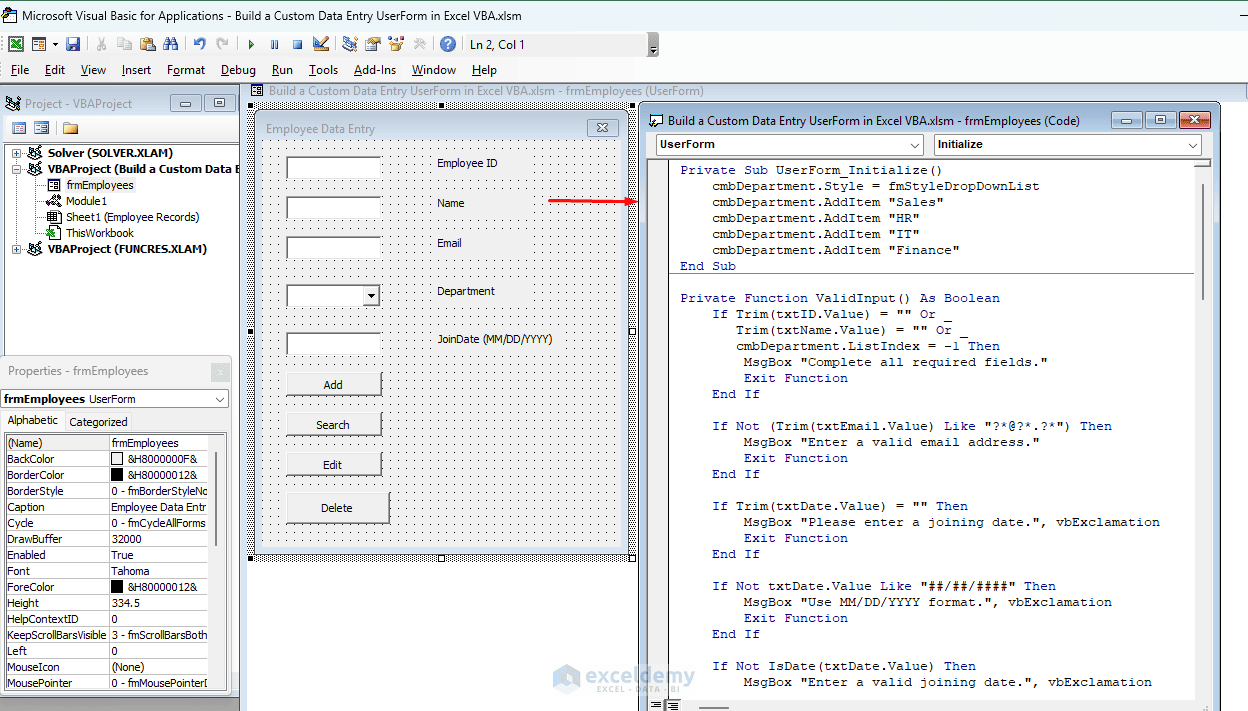
- Double-click the UserForm and paste the following code into its code window
Private Sub UserForm_Initialize()
    cmbDepartment.Style = fmStyleDropDownList
    cmbDepartment.AddItem "Sales"
    cmbDepartment.AddItem "HR"
    cmbDepartment.AddItem "IT"
    cmbDepartment.AddItem "Finance"
End Sub
Create a validation function to prevent incomplete records:
Private Function ValidInput() As Boolean
    If Trim(txtID.Value) = "" Or _
       Trim(txtName.Value) = "" Or _
       cmbDepartment.ListIndex = -1 Then
        MsgBox "Complete all required fields."
        Exit Function
    End If

    If Not (Trim(txtEmail.Value) Like "?*@?*.?*") Then
        MsgBox "Enter a valid email address."
        Exit Function
    End If

    If Trim(txtDate.Value) = "" Then
        MsgBox "Please enter a joining date.", vbExclamation
        Exit Function
    End If

    If Not txtDate.Value Like "##/##/####" Then
        MsgBox "Use MM/DD/YYYY format.", vbExclamation
        Exit Function
    End If

    If Not IsDate(txtDate.Value) Then
        MsgBox "Enter a valid joining date.", vbExclamation
        Exit Function
    End If


    ValidInput = True
End Function
The dropdown limits department selection to predefined values. Validation prevents blank required fields, checks the basic email format, and makes sure the joining date is a valid date in MM/DD/YYYY format.
Step 4: Add New Records to the Table
- Paste the following helper procedures into the same UserForm code window
Private Function EmployeeTable() As ListObject
    Set EmployeeTable = ThisWorkbook.Worksheets("Employee Records") _
                        .ListObjects("tblEmployees")
End Function

Private Function FindEmployee() As ListRow
    Dim r As ListRow
    Dim id As String

    id = Trim(txtID.Value)
    If id = "" Then Exit Function

    For Each r In EmployeeTable.ListRows
        If StrComp(CStr(r.Range.Cells(1, 1).Value2), _
                id, vbTextCompare) = 0 Then
            Set FindEmployee = r
            Exit Function
        End If
    Next r
End Function

Private Sub WriteRecord(ByVal target As Range)
    With target
        .Cells(1, 1).NumberFormat = "@"
        .Cells(1, 1).Value = Trim(txtID.Value)
        .Cells(1, 2).Value = Trim(txtName.Value)
        .Cells(1, 3).Value = LCase(Trim(txtEmail.Value))
        .Cells(1, 4).Value = cmbDepartment.Value
        .Cells(1, 5).Value = CDate(txtDate.Value)
    End With
End Sub
These procedures locate employee records and standardize the input before saving. Storing the ID as text also preserves leading zeros.
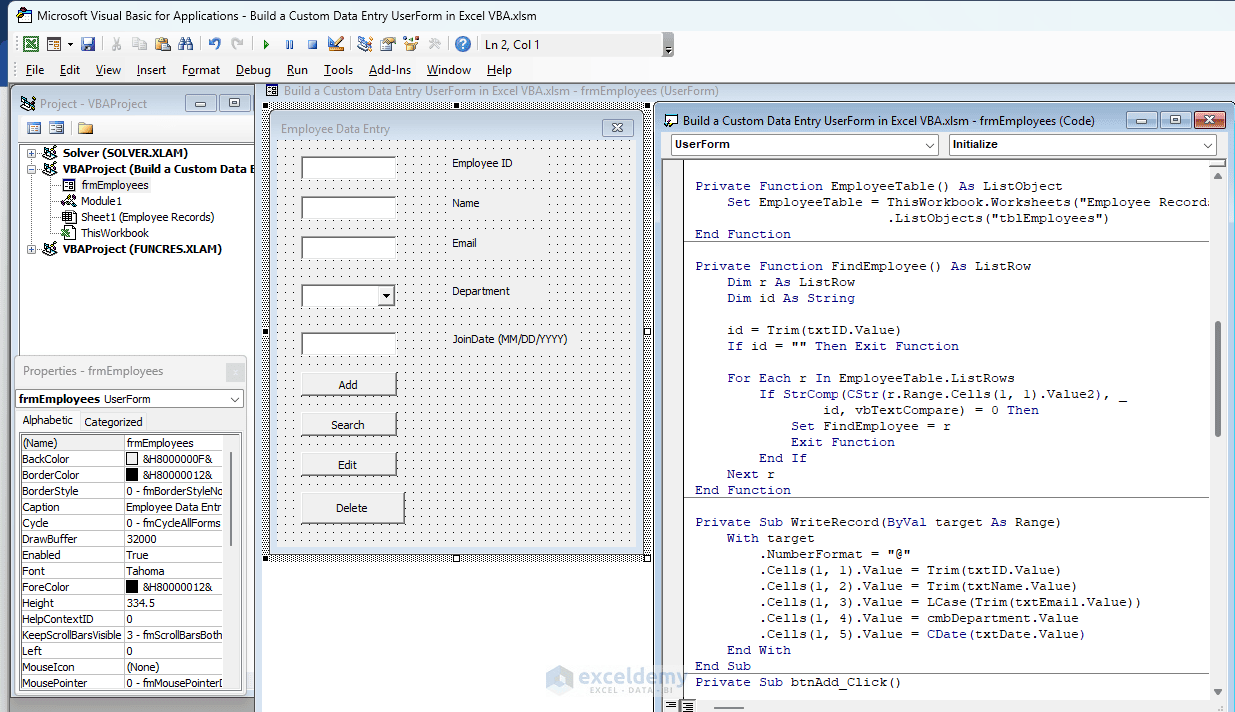
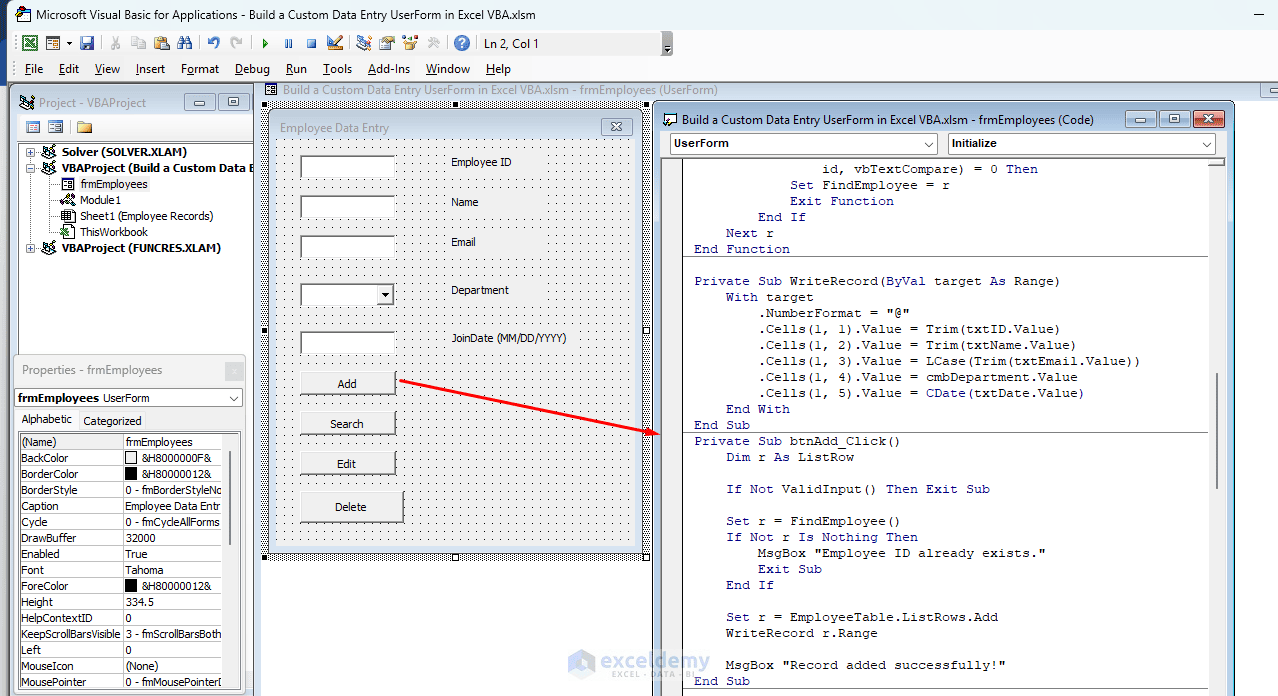
Now add the Add button code:
Private Sub btnAdd_Click()
    Dim r As ListRow

    If Not ValidInput() Then Exit Sub

    Set r = FindEmployee()
    If Not r Is Nothing Then
        MsgBox "Employee ID already exists."
        Exit Sub
    End If

    Set r = EmployeeTable.ListRows.Add
    WriteRecord r.Range

    MsgBox "Record added successfully!"
End Sub
The ListRows.Add method inserts a new row into the Excel table, allowing the table to expand automatically.
Step 5: Add Search, Edit, and Delete Buttons
- Insert the following procedures into the same UserForm
Search for an employee:
Private Sub btnSearch_Click()
    Dim r As ListRow
    Set r = FindEmployee()

    If r Is Nothing Then
        MsgBox "Employee not found."
        Exit Sub
    End If

    With r.Range
        txtName.Value = .Cells(1, 2).Value
        txtEmail.Value = .Cells(1, 3).Value
        cmbDepartment.Value = .Cells(1, 4).Value
        txtDate.Value = Format(.Cells(1, 5).Value, "mm/dd/yyyy")
    End With
End Sub
Edit an existing employee:
Private Sub btnEdit_Click()
    Dim r As ListRow

    If Not ValidInput() Then Exit Sub

    Set r = FindEmployee()
    If r Is Nothing Then
        MsgBox "Employee not found."
        Exit Sub
    End If

    WriteRecord r.Range
    MsgBox "Record updated!"
End Sub
Delete an employee:
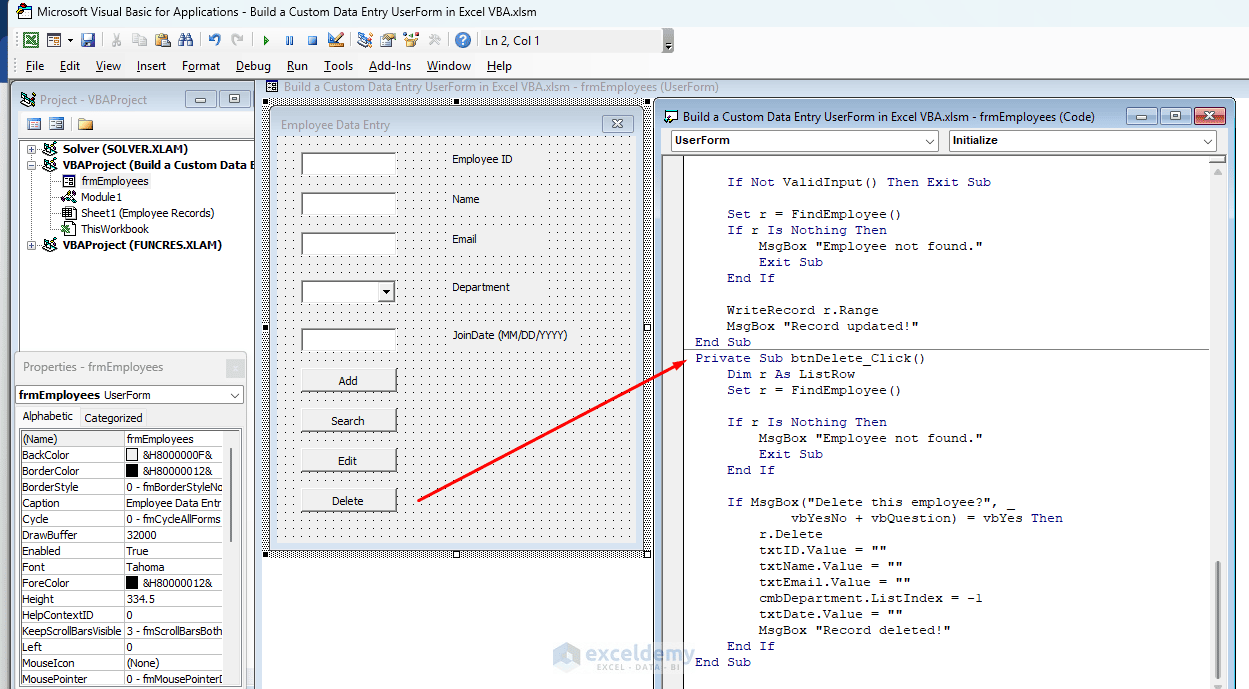
Private Sub btnDelete_Click()
    Dim r As ListRow
    Set r = FindEmployee()

    If r Is Nothing Then
        MsgBox "Employee not found."
        Exit Sub
    End If

    If MsgBox("Delete this employee?", _
            vbYesNo + vbQuestion) = vbYes Then
        r.Delete
        txtID.Value = ""
        txtName.Value = ""
        txtEmail.Value = ""
        cmbDepartment.ListIndex = -1
        txtDate.Value = ""
        MsgBox "Record deleted!"
    End If
End Sub
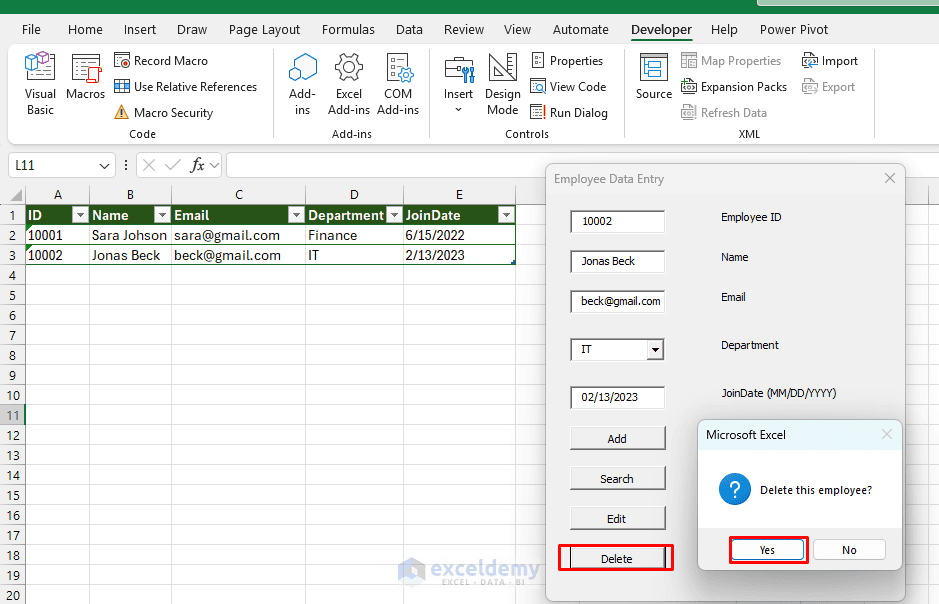
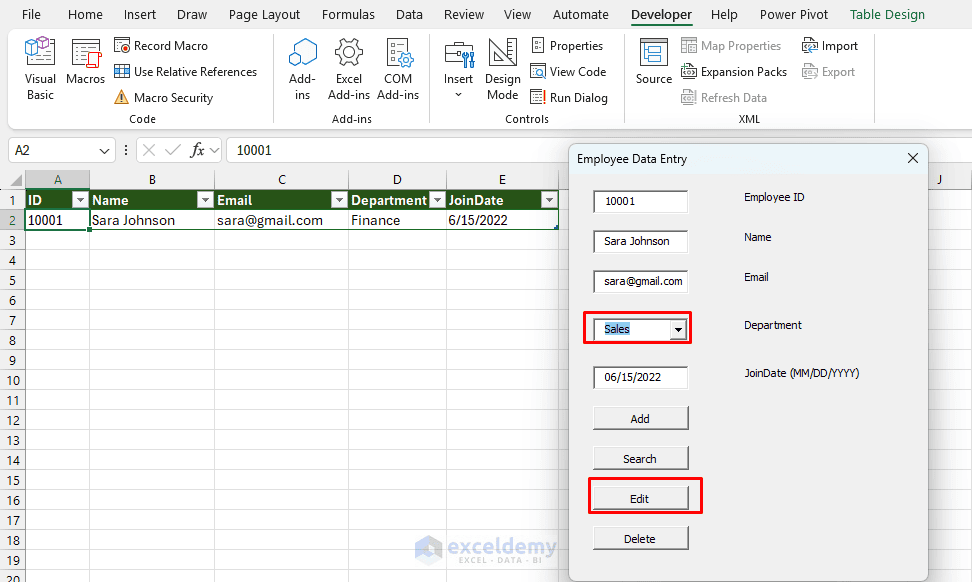
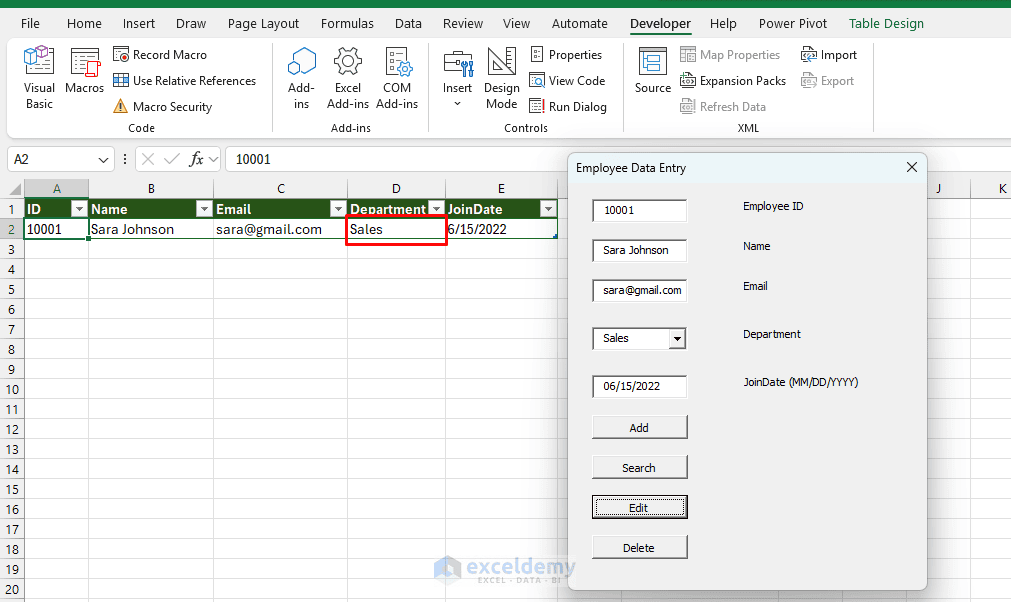
The Search button finds records by employee ID. The Edit button updates the matching record while keeping its ID unchanged, and the Delete button asks for confirmation before removing the row.
Step 6: Launch and Test the UserForm
- Go to the VBA Editor
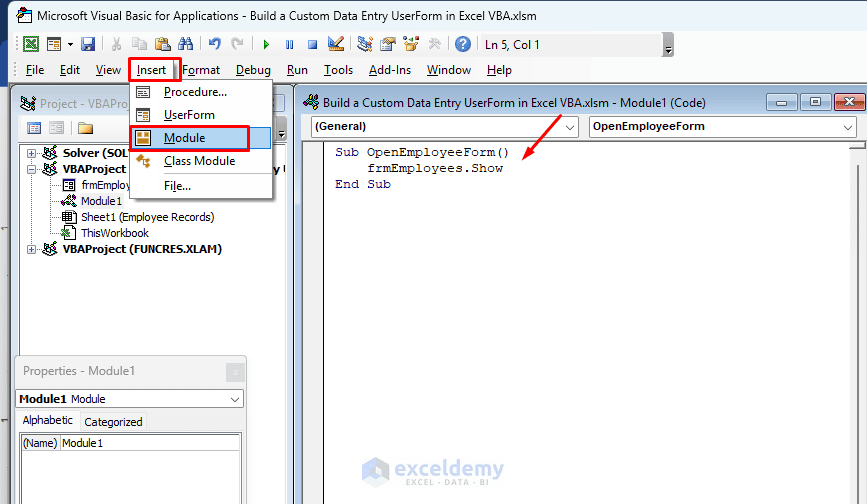
- Select Insert >> choose Module
- Add the following code:
Sub OpenEmployeeForm()
    frmEmployees.Show
End Sub
This procedure launches the UserForm in Excel.
- Return to Excel
- Go to the Developer tab >> select Macros or press Alt + F8
- Select OpenEmployeeForm >> click Run
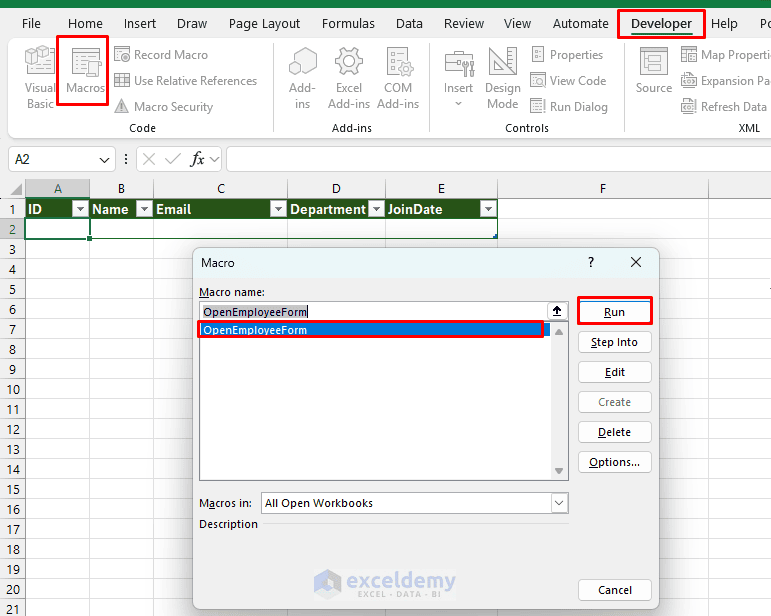
Test the UserForm:
Test the form by adding a new employee, searching by ID, modifying the department, and deleting a record. Verify that each action updates tblEmployees.
- Run the code from Macros
- Fill in all the required fields
- Click Add
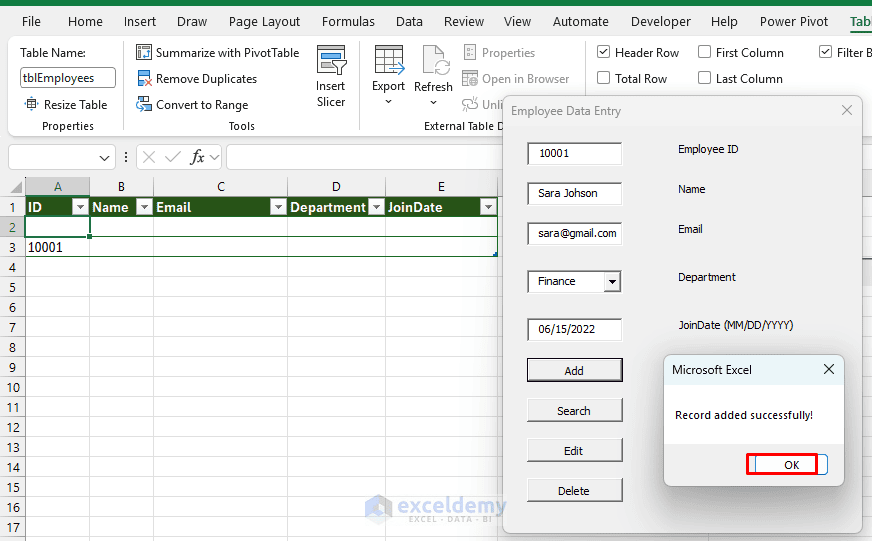
Add a Button to Launch the UserForm:
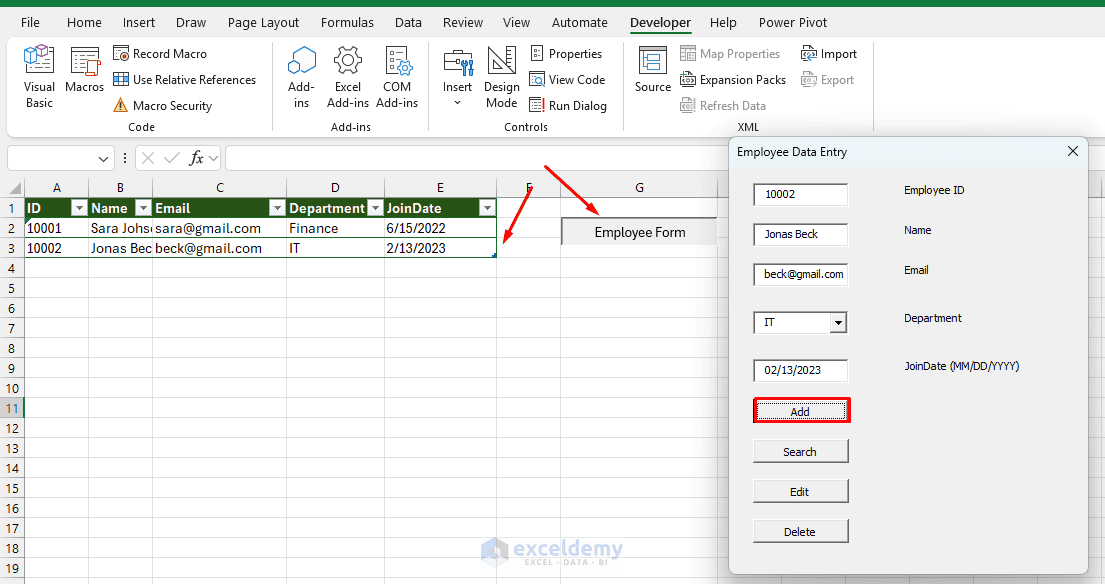
You can also insert a button on your worksheet and assign the OpenEmployeeForm macro to open the form with one click.
- Go to the Developer tab >> click Insert >> under Form Controls, select Button, then draw it on the worksheet
- Rename the button to Employee Form
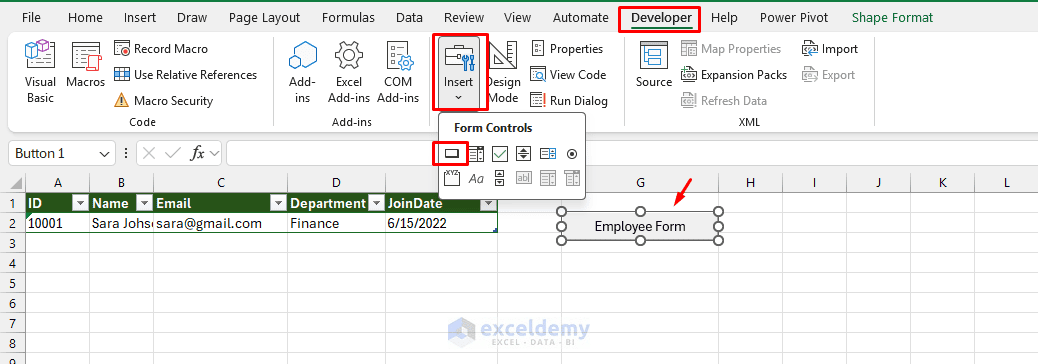
- Right-click >> select Assign Macro >> select OpenEmployeeForm >> click OK
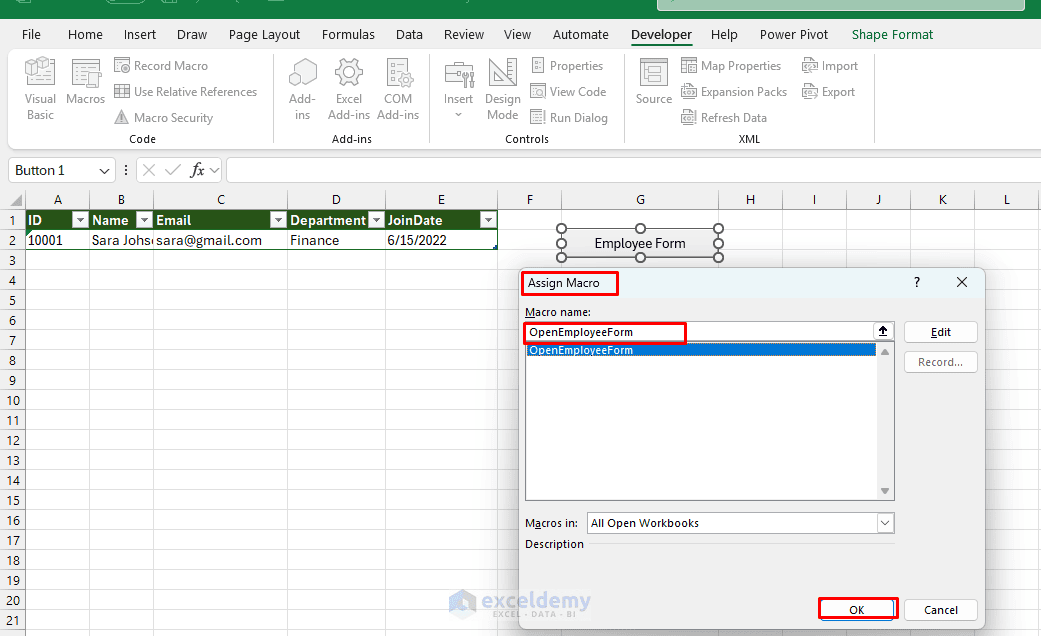
- Click the button to open the UserForm
- Now you can add, search, edit, or delete employee records
- To delete an existing record, enter the employee ID and click Search to load the details
- Click Delete
- To edit a record, enter the employee ID, click Search, then change the fields you want to update
- Click Edit
- The department name is now updated through the UserForm
Conclusion
By following the steps above, you can easily build a custom data entry UserForm in Excel VBA. A custom VBA UserForm makes Excel data entry faster, more organized, and less error-prone. By combining text boxes, dropdowns, input validation, and CRUD operations (Create, Read, Update, Delete), you can turn a standard worksheet into a simple record-management application. The form keeps data entry consistent, reduces manual worksheet editing, and provides a reusable foundation for inventory systems, customer databases, or employee trackers.
Get FREE Advanced Excel Exercises with Solutions!