Looking for ways to create Inputbox with default value in Excel VBA? Then, this is the right place for you.
Default value is an important feature of InputBox in Excel VBA. It acts as a backup plan in case the user fails to enter an input to the InputBox. These default values are the predefined values that the code developer has defined in the VBA code. This feature allows us to streamline the data entry process and provides users with a seamless and user-friendly experience.
In this article, we will discuss several examples of using the default value in Excel VBA InputBox. You can watch this short video that demonstrates one of the skills you will learn from reading this article. It can provide you with a basic understanding of the article’s content.
Introduction to Excel VBA InputBox
The VBA InputBox displays a dialog box that enables users to enter text or input values that can later be used by the program. The InputBox() function and the Application.InputBox Method are two different types of InputBoxes that are available in Excel. Let’s look at these two alternatives briefly.
InputBox() Function
InputBox() function is an in-built VBA function of Excel. It shows a dialogue box with a message, prompt and title. The InputBox function always returns a String as output. It can also be used in all Microsoft Office applications that support VBA in it.
Application.InputBox Method
The Application.InputBox Method is not available in all Office applications, rather it is only specific to Excel. Compared to the InputBox function, it offers a wider range of choices. One can specify the kind of data they want to get using this method. The InputBox() function, on the other hand, only outputs a string value.
How to Launch VBA Editor in Excel
In this section of the article, we will discuss how we can launch the VBA Editor in Excel. After launching the VBA Editor, we will be able to create Modules and write VBA codes inside the Modules. So, let’s follow the instructions outlined below to do this.
- First, go to the Developer tab >> Select the Visual Basic option.
Note: The Developer tab might not be available by default. If that’s the case, you can activate the Developer tab manually.

- After that, the VB Editor will launch. Now, go to the Insert tab >> choose the Module option.
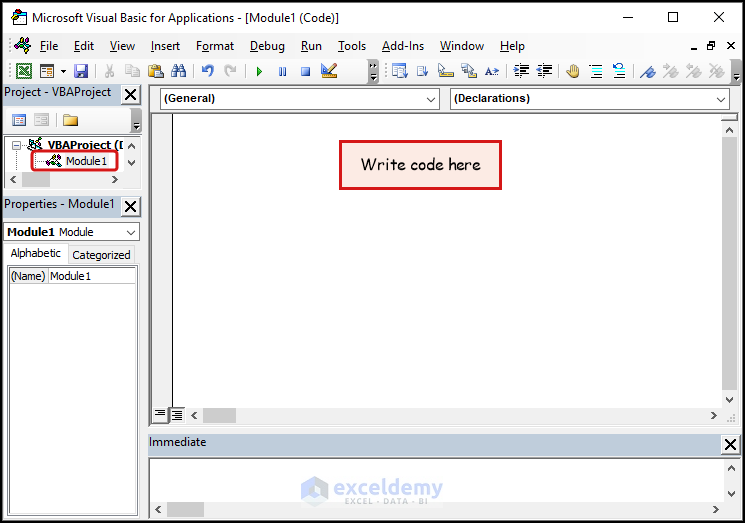
As a result, a blank Module will be created. In this article, we will create a new Module for each method before writing VBA code.
Note: You can right-click on any sheet name in the Excel workbook and select the View Code option to write VBA code. But codes that are written in this way, will only work on that particular worksheet.
Read More: Excel VBA: Custom Input Box
Excel VBA: InputBox with Default Value (8 Examples)
Now, we will learn eight useful methods to use the default value in Excel VBA InputBox. So, let’s start this article and explore the methods.
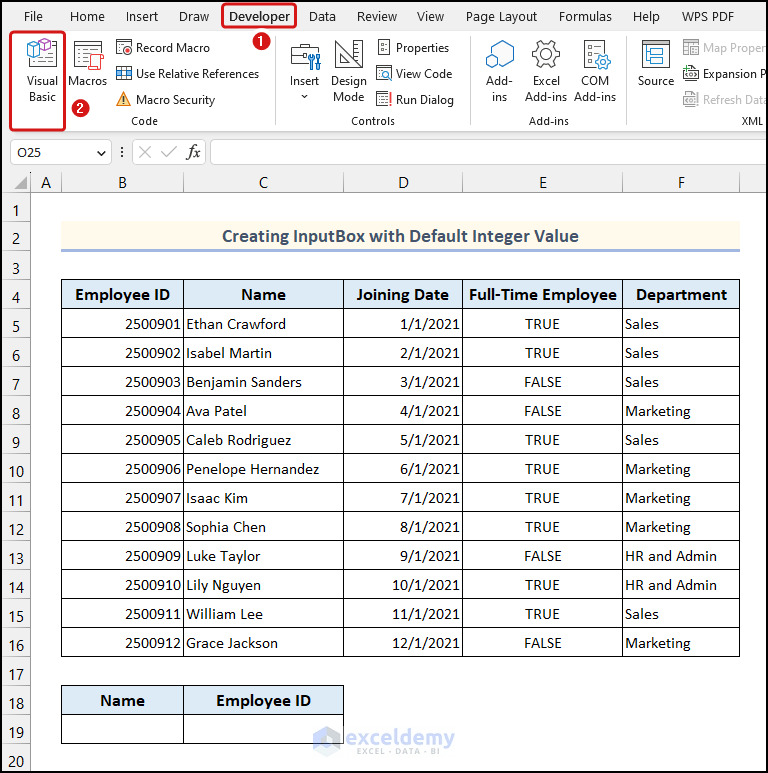
1. InputBox with Default Integer Value in Excel
In the first example, we will use a numerical value as the default value in Excel InputBox using VBA. For demonstration, we will show the first Employee ID of the dataset as the default value. So, let’s use the steps mentioned below to use a default integer value in Excel VBA InputBox.
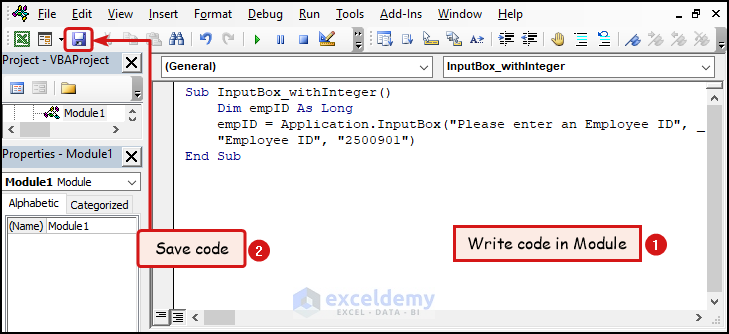
Sub InputBox_withInteger()
    Dim empID As Long
    empID = Application.InputBox("Please enter an Employee ID", _
    "Employee ID", "2500901")
End Sub
Code Breakdown
- First, we introduced a variable named empID and defined its data type as Long.
- After that, we used the Application.InputBox method and assigned the input the empID variable. Here, the “Please enter an Employee ID” is the prompt of the InputBox, “Employee ID” is the title of the InputBox, and “2500901” is the default value.
- First, create a Module >> Write VBA code >> click on the Save option. Then, use the keyboard shortcut ALT + F11 to return back to the worksheet.
At this stage, your VBA code is ready to run. In this article, we will show different ways to run a macro in Excel. You can use any of the methods according to your preference.
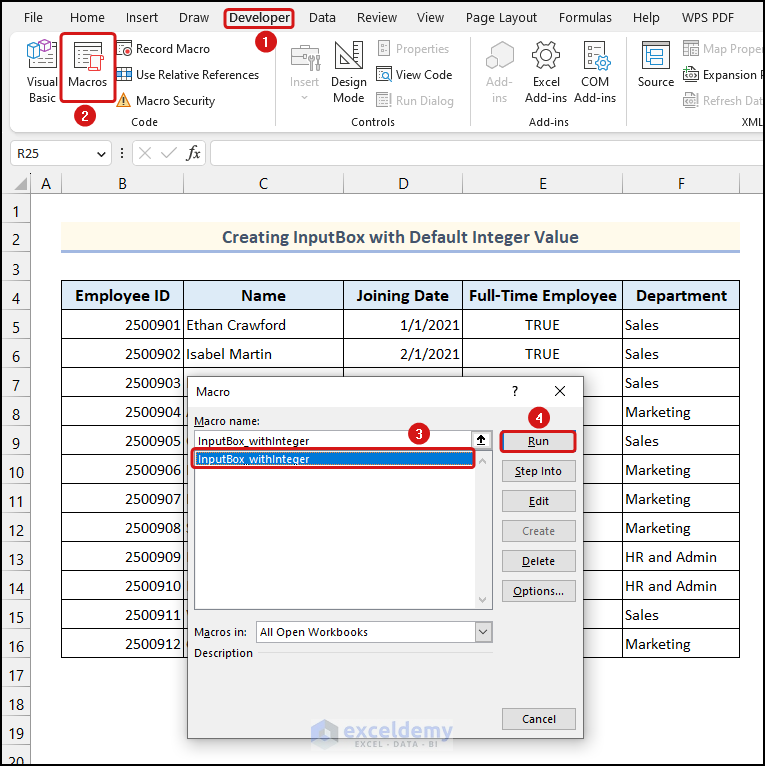
Running Macro Using Developer Tab:
- First, go to the Developer tab >> choose the Macros option >> select InputBox_withInteger from the Macros dialogue box >> click on Run.
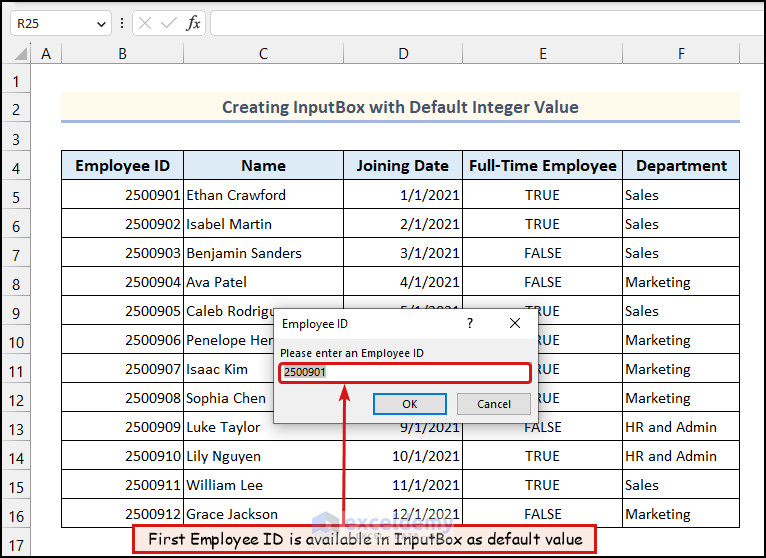
After clicking the Run option, an InputBox will open with a default integer value in it.
Read More: Excel VBA InputBox with Number Only Criteria
2. InputBox Containing Default String
When we take text data in an InputBox, the default value of the InputBox will no longer be an integer. It will be a string. In this example, we created an VBA InputBox with a default string in it in Excel.
The following video demonstrates an overview of this example. You can check this out to get a quick idea.

Sub InputBox_withText()
    Dim emp_Dept As String
    emp_Dept = Application.InputBox("Please enter Department Name", _
    "Department", "Sales")
End Sub
Code Breakdown
- First, we introduced a String type variable named emp_Dept.
- Following that, we used the Application.InputBox method to take input from the user. Here, “Sales” is the default value of the InputBox.
- First, create a blank Module >> click on the Save icon >> Apply the keyboard shortcut ALT + F11 to get back to the worksheet.
Now, we will again use the Macros dialogue box to run the VBA code. But this time, we will use a keyboard shortcut to do this.
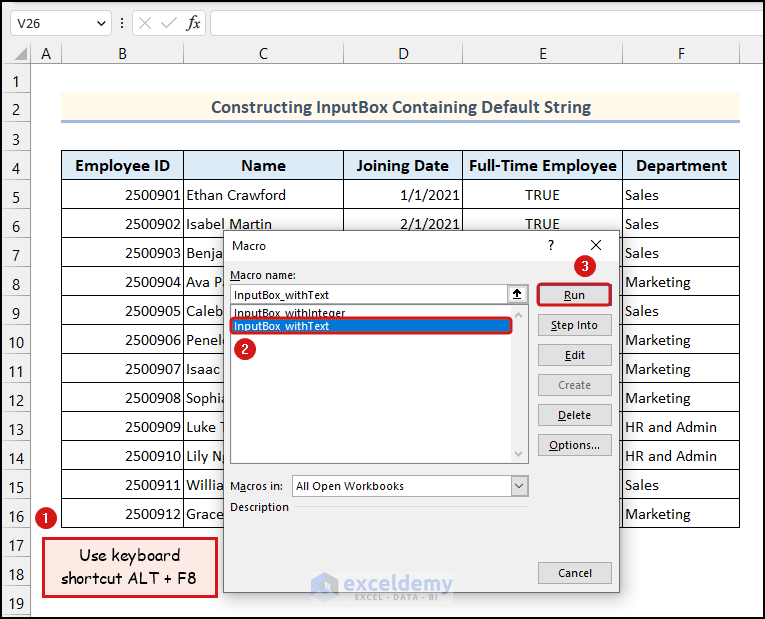
Running VBA Code Using Keyboard Shortcut:
- Use the keyboard shortcut ALT + F8 to directly open the Macro dialogue box >> select InputBox_withText >> click on Run.
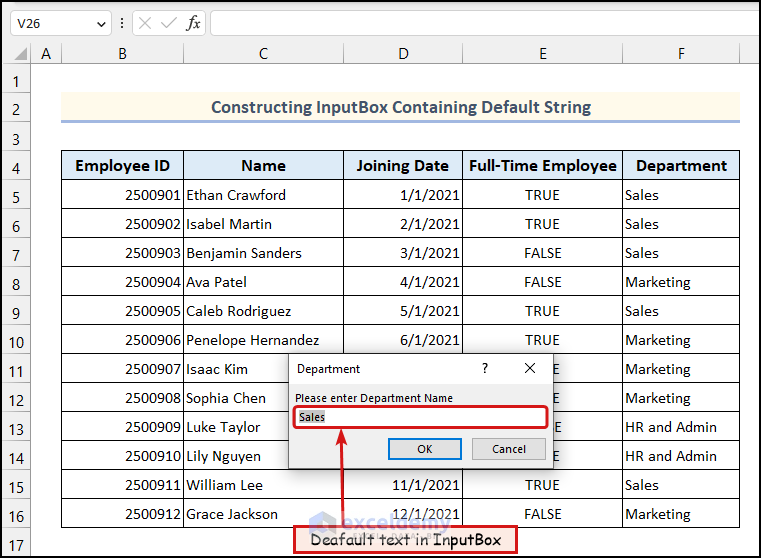
As a result, an InputBox will appear on your worksheet with a default text in it. Here, we have used the Sales department as the default Department Name.
Read More: Excel VBA: InputBox Type with Examples
3. InputBox Including Default Range/Cell Location
In Excel VBA, we can also use the address of a range/cell location as the default value in an InputBox. This can be used to define a frequently used range by the user. For instance, to create a Table we often select the entire dataset. In this example, we will use the address of the entire dataset as the default value.
The video provides a summary of this example, which you can watch to get a general understanding of how this example works.
Now, let’s follow the steps discussed below to use a default range address inside an InputBox in Excel VBA.
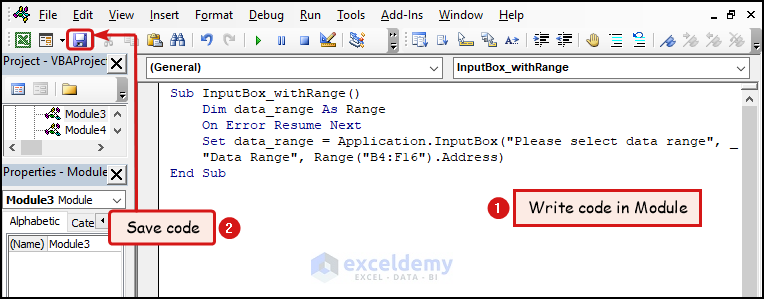
Sub InputBox_withRange()
    Dim data_range As Range
    On Error Resume Next
    Set data_range = Application.InputBox("Please select data range", _
    "Data Range", Range("B4:F16").Address)
End Sub
Code Breakdown
- First, we declared a Range type variable named data_Range.
- Then, we used the On Error statement of VBA to continue executing the next line of the code, if any unwanted error occurs.
- After that, we used the Set statement to define the value of variable data_range by taking input using the Application.InputBox method. Here, the default value of the InputBox is “B4:F16“.
- First, create a blank Module >> Write code in the Module >> click on the Save option >> Use the keyboard shortcut ALT + F11 to get back to the worksheet.
Next, we’ll generate a button within our worksheet to execute the code. Employing buttons can give your worksheet a polished and tidy outlook.
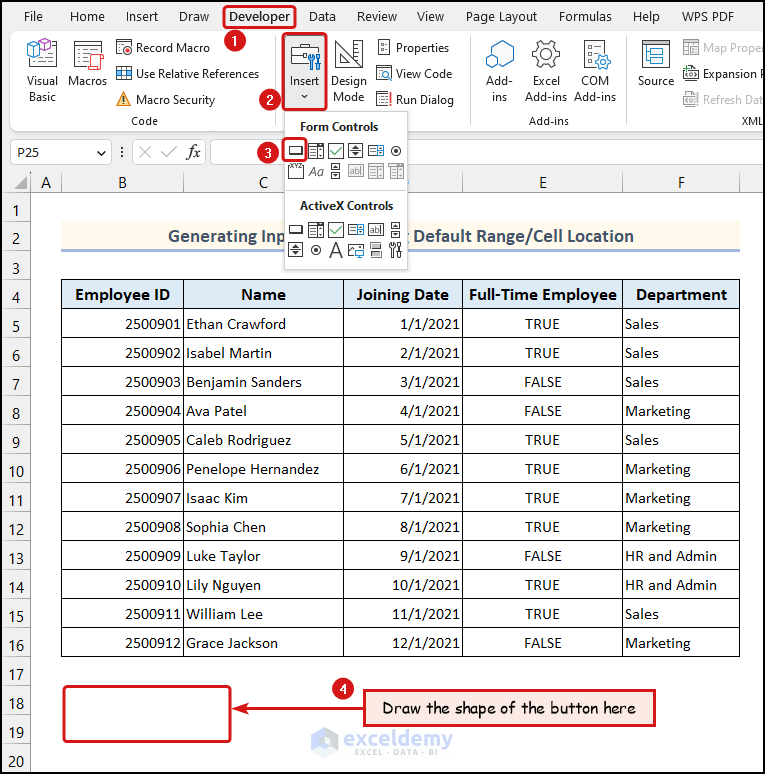
- Go to the Developer tab >> select the Insert option >> choose the Button (Form Control) from the drop-down >> draw the shape of the button in a blank space in the worksheet.
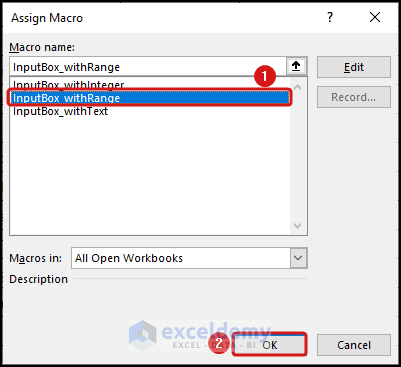
- As soon as you finish drawing the button, the Assign Macro dialogue box will appear. Then, select the InputBox_withRange option and click OK.
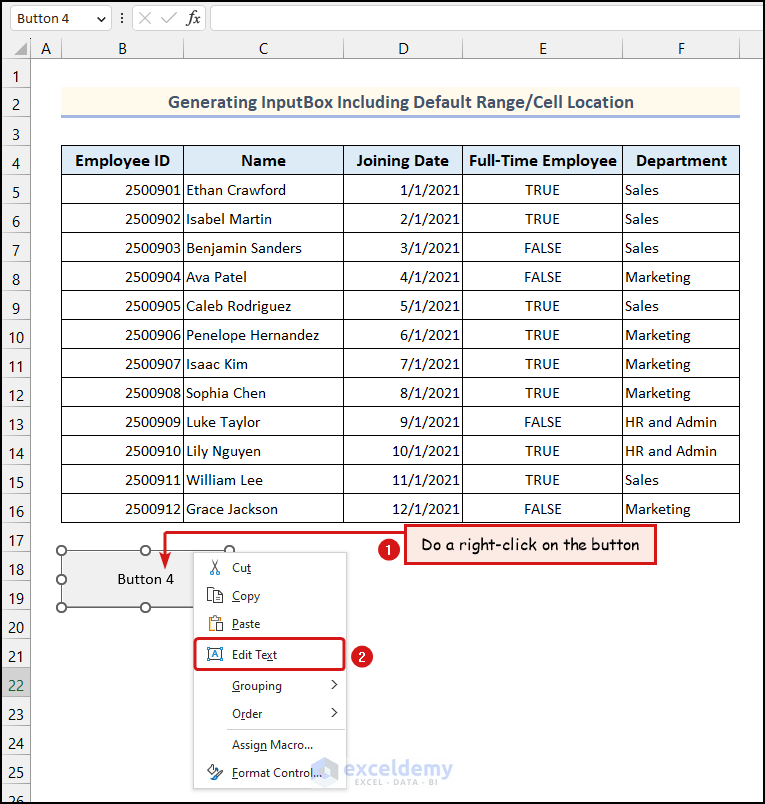
- After that, do right-click on the newly created button >> click on the Edit Text option to change the button name. Here, we changed it to “Insert Range”.

- Finally, click on the button to the VBA code.
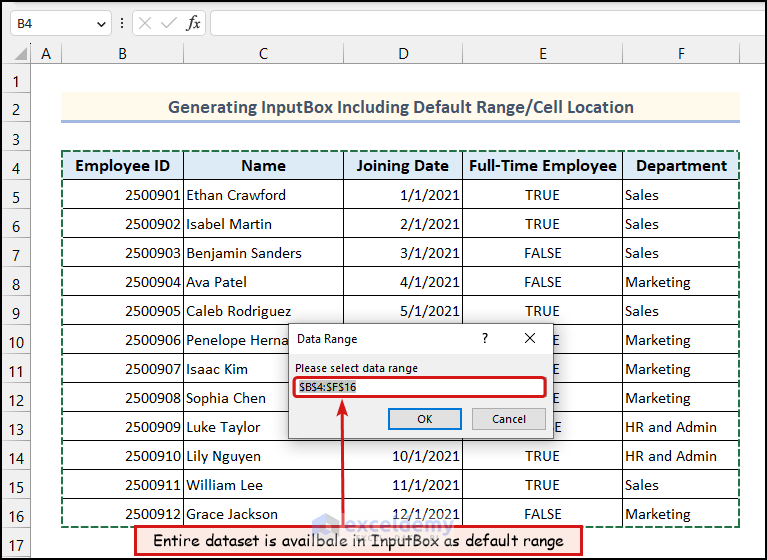
Subsequently, an InputBox will appear on your worksheet. This InputBox will contain a predefined range address as its default value, which the user can choose to modify or accept based on their needs.
4. InputBox Containing Default Boolean Operator in Excel
In this example, we will use a boolean operator as the default value in the InputBox. Boolean operators only return TRUE or FALSE values. For instance, in our dataset, we have a column named Full-Time Employee that contains boolean data in its cells. Here, we will use the TRUE value as the default value in the InputBox.
In the following video, we have shown the working process of this example in a nutshell.
Now, let’s use the instructions outlined below.
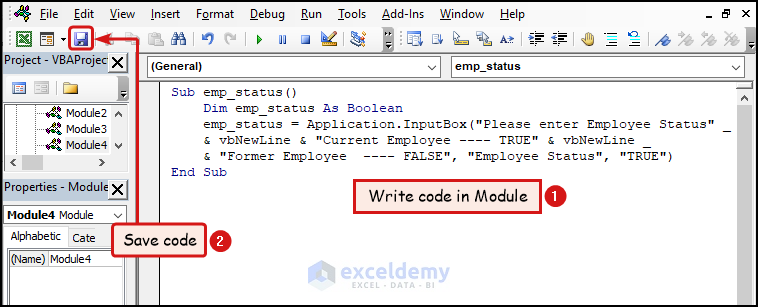
Sub emp_status()
    Dim emp_status As Boolean
    emp_status = Application.InputBox("Please enter Employee Status" _
    & vbNewLine & "Current Employee ---- TRUE" & vbNewLine _
    & "Former Employee  ---- FALSE", "Employee Status", "TRUE")
End Sub
Code Breakdown
- First, we introduced a variable named emp_status and declared its data type as Boolean.
- Then, we used the Application.InputBox method to take input from the user. Here, we used vbNewLine to insert a new line in the Prompt. Our default value for this InputBox is “TRUE“.
- First, create a Module >> write VBA code in it >> click on Save option >> use keyboard shortcut ALT + F11 to return to worksheet.
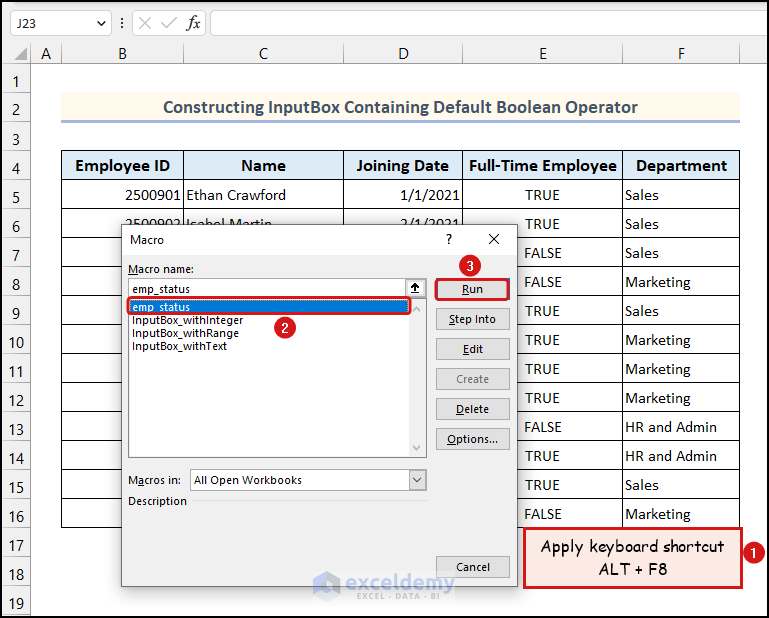
- Apply the keyboard shortcut ALT + F8 to open the Macro dialogue box. Then choose the emp_status option >> click on Run.

Subsequently, an InputBox will be available to your worksheet with a default boolean value.
Read More: VBA InputBox for Integer Value Only in Excel
5. InputBox with Default Date
While working in Excel, we often need to insert dates by using an InputBox. It becomes a lot more convenient, if the InputBox has a default date in it. In this example, we learn how we can create an InputBox with a default date value in Excel VBA.
The following video demonstrates an overview of this example. You can check this to get a general idea.
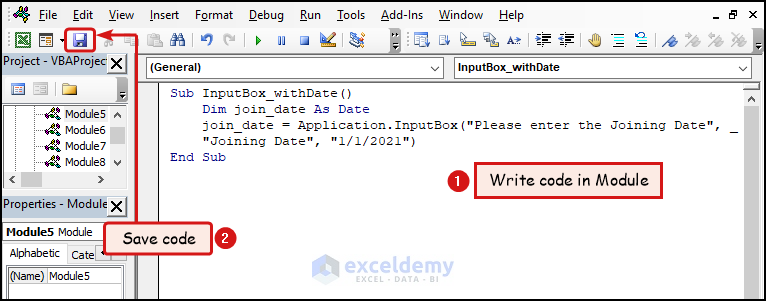
Sub InputBox_withDate()
    Dim join_date As Date
    join_date = Application.InputBox("Please enter the Joining Date", _
    "Joining Date", "1/1/2021")
End Sub
Code Breakdown
- First, we declared a Date type variable named join_date.
- Then, we used the Application.InpuitBox method to take a date as input from the user. Here, the default of the InputBox is “1/1/2021“.
- First create a new Module >> write VBA code in the Module >> click on the Save option >> utilize the keyboard shortcut ALT + F11 to return to the worksheet.
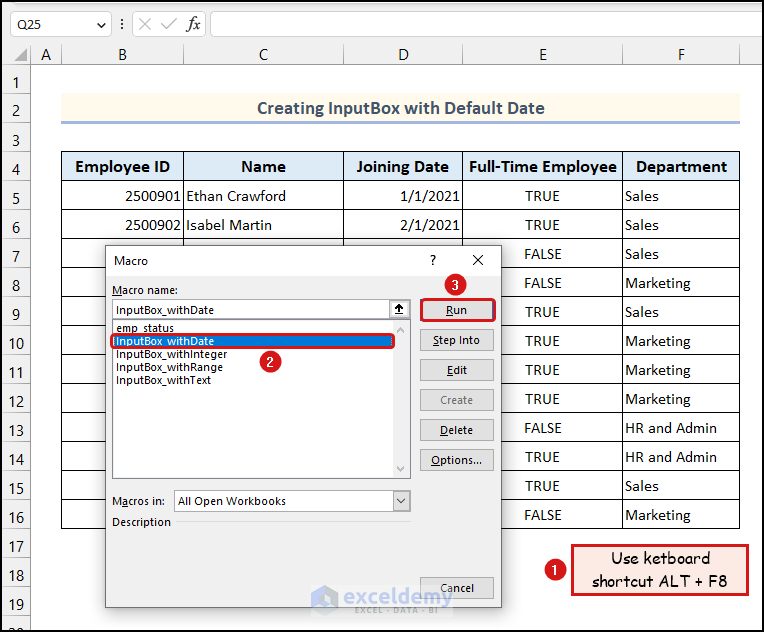
- Then, apply the keyboard shortcut ALT + F8 to open the Macro dialogue box >> select InputBox_withDate >> click on Run option.
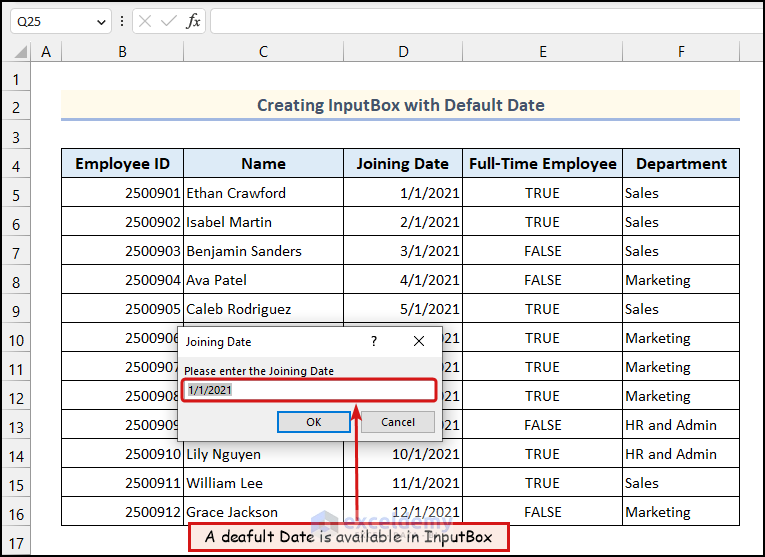
As a result, an InputBox will appear on your screen with a default date in it. You can use this date or change it according to requirement.
Read More: Excel VBA: InputBox Date Format
6. InputBox Containing Data Validation
In Excel VBA, we can create an InputBox with Data Validation. That means, the InputBox can accept only a specific type of data. Our code will change based on the type of data that we want to validate. In this article, we will discuss three different types of data validation in InputBox.
6.1 Numerical Validation
This part of the article explains the approach to conducting numerical validation within an InputBox using Excel VBA. The following video provides an overview of this method. You can check this to get a broad understanding about this method.
Now, let’s use the instructions outlined below to perform a numerical validation with an InputBox in Excel.
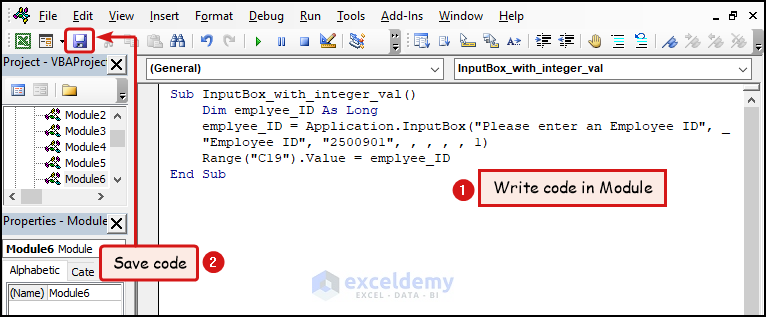
Sub InputBox_with_integer_val()
    Dim emplyee_ID As Long
    emplyee_ID = Application.InputBox("Please enter an Employee ID", _
    "Employee ID", "2500901", , , , , 1)
    Range("C19").Value = emplyee_ID
End Sub
Code Breakdown
- First, we introduced a variable named employee_ID and specified its data type as Long.
- After that, we applied the Application.InputBox method to take input from the user. Here, the default value of the InputBox is “2500901“.
- Here, we specified the data type of the return value of InputBox as Number. So, only numerical values will be accepted through this InputBox.
- First, create a blank Module >> write VBA code in it >> click on the Save icon >> apply the keyboard shortcut ALT + F11 to return to the worksheet.
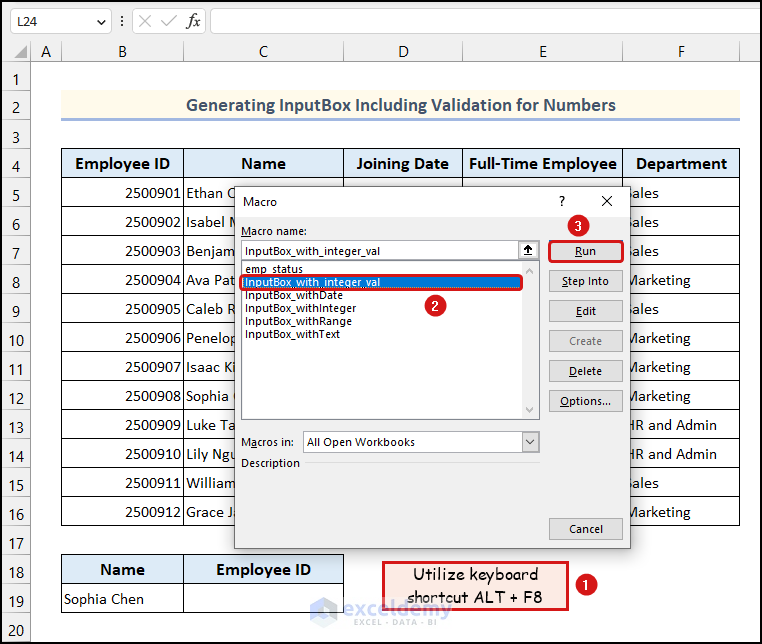
- After that, utilize the keyboard shortcut ALT + F8 to open the Macro dialogue box. Then choose the InputBox_with_integer_val option >> click on Run.
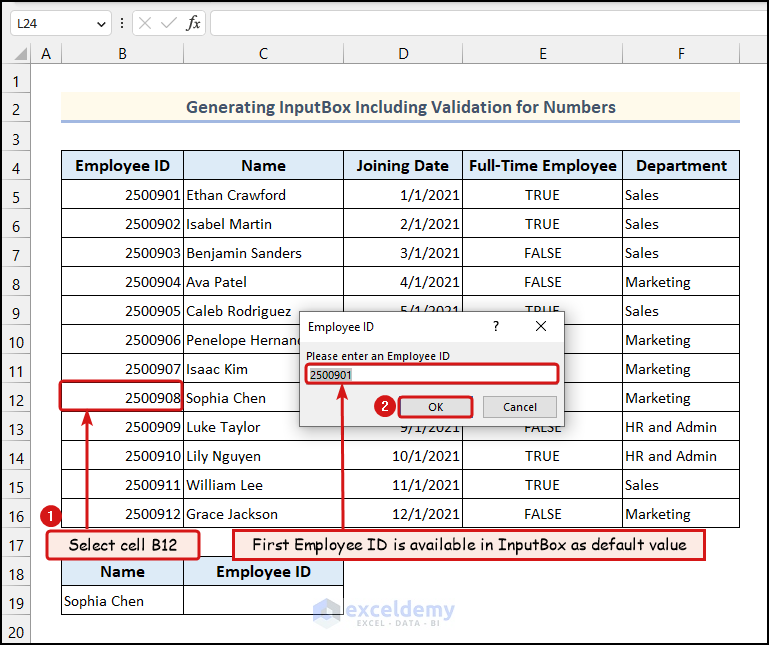
- Now, a default Employee ID will be available in the InputBox. Select cell B12 >> click OK.

As the chosen cell contains a numeric value, the output will be produced without any errors. Now, let’s see what will happen if we enter a non-numeric input in the InputBox.

- Run the VBA code again >> type any text in the InputBox >> click OK.
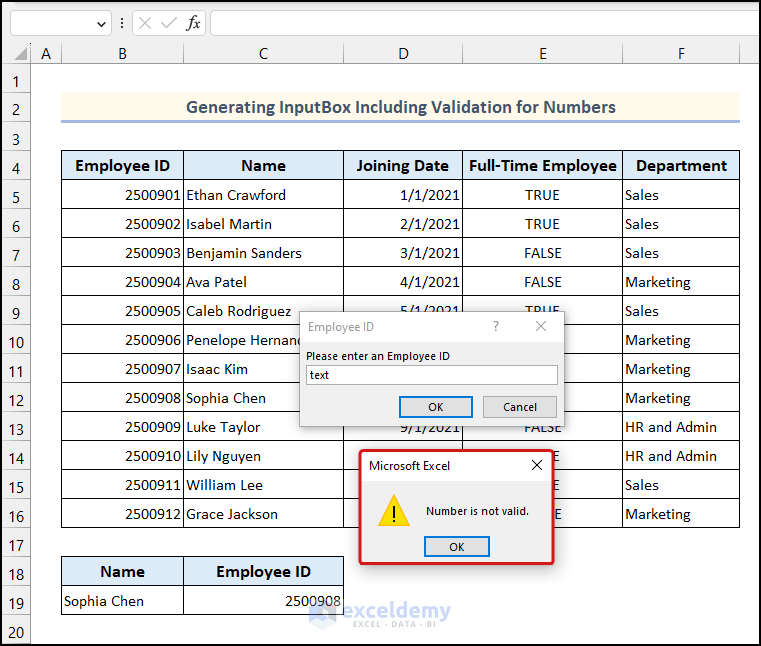
As you can see, Excel is returning an error saying that “Number is not valid”.
6.2 Text Validation
Now, we will create an InputBox with text validation in it. This can come handy when we want to accept only string data from an InputBox to have an error free system. The following video gives a general idea about this example. You can check this out.
So, let’s follow the procedure discussed below to create an InputBox with text validation.

Sub inputBox_with_text_val()
    Dim dept As String
    On Error GoTo break:
    dept = Application.InputBox("Please enter Department name", _
    "Department Name", "Sales", , , , , 2)
    If WorksheetFunction.IsNumber(Int(dept)) = True Then
        MsgBox "Please enter correct Department name"
        Range("C19").Value = ""
    End If
    Exit Sub
break:
    Range("C19").Value = dept
End Sub
Code Breakdown
Dim dept As String
    On Error GoTo break:
    dept = Application.InputBox("Please enter Department name", _
"Department Name", "Sales", , , , , 2)- First, we introduce a variable named dept as String. Then we used the On Error statement to skip to the block named break: if any error occurs.
- Following that, we used the Application.InputBox method to take input from the user. Here, we defined the data type of the return value of the InputBox as String.
If WorksheetFunction.IsNumber(Int(dept)) = True Then
        MsgBox "Please enter correct Department name"
        Range("C19").Value = ""
    End If
Exit Sub- Then, we used a combination of the If statement, WorksheetFunction.IsNumber method, and Int function to check whether the value obtained from the InputBox is a numerical value or not.
- If it is a numerical value then a MsgBox will pop up saying “Please enter correct Department name“. Then, a blank value will be assigned in cell C19 which displays the Department Name of the employee.
- After that, exit the sub-procedure.
Sub inputBox_with_text_val()
    Dim dept As String
    On Error GoTo break:
    dept = Application.InputBox("Please enter Department name", _
    "Department Name", "Sales", , , , , 2)
    If WorksheetFunction.IsNumber(Int(dept)) = True Then
        MsgBox "Please enter correct Department name"
        Range("C19").Value = ""
    End If
    Exit Sub
break:
    Range("C19").Value = dept
End Sub
- This portion of the code will run if any error occurs while executing the code. We assigned the value of the variable of dept to cell C19.
- First, create a Module >> write VBA code in Module >> click on the Save option >> apply the keyboard shortcut ALT + F11.
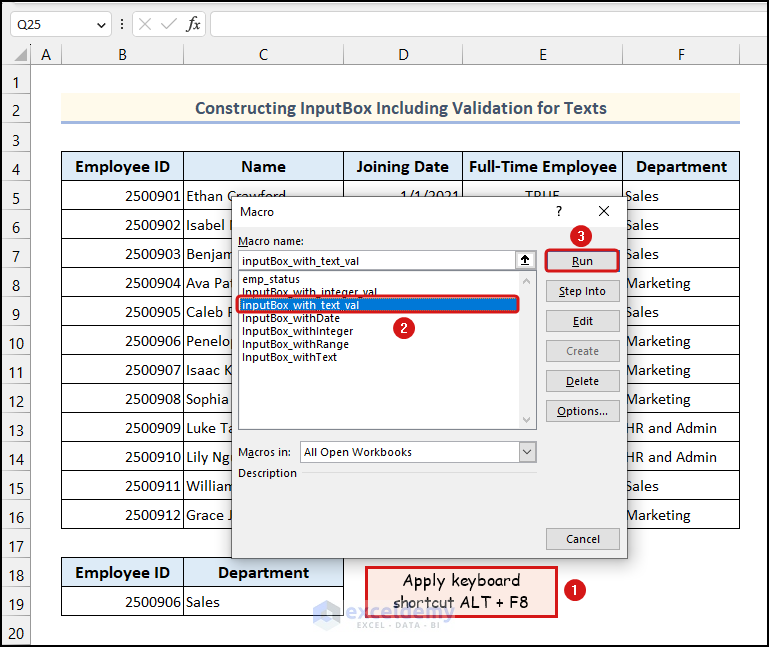
- After that, use the keyboard shortcut ALT + F8 to open Macro dialogue box >> select the inputBox_with_text_val option >> click o Run.
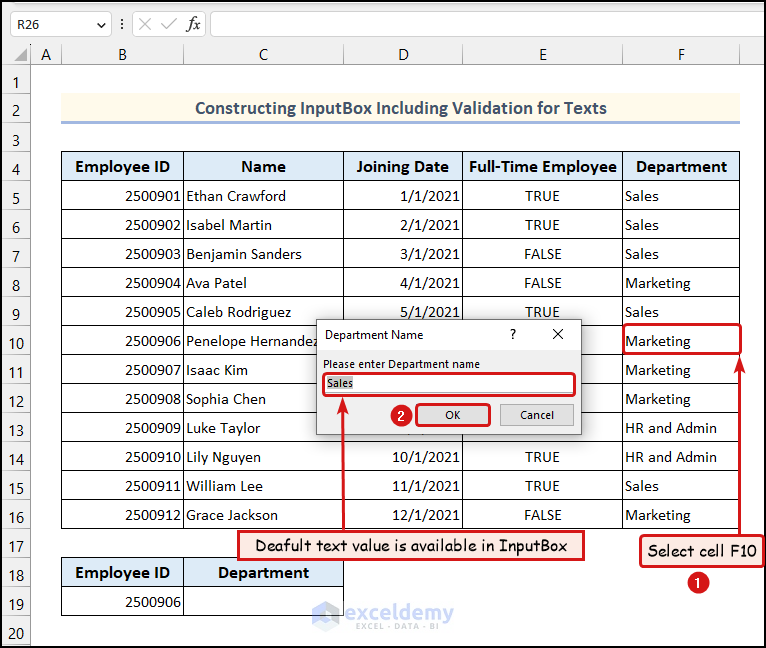
- A default text will be available in the InputBox. In this case, it is a Department Name. Then, select cell F10 >> click OK in the InputBox.
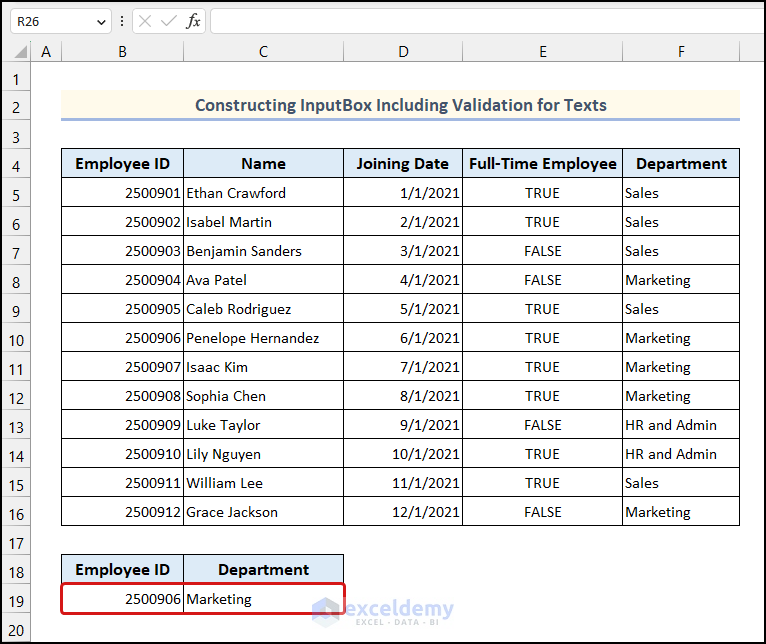
As the selected value in the InputBox was a text value, Excel will return an output without any error. Now, let’s use a different data type to see what happens.

- Run the VBA code again >> insert any number in the InputBox >> click OK.
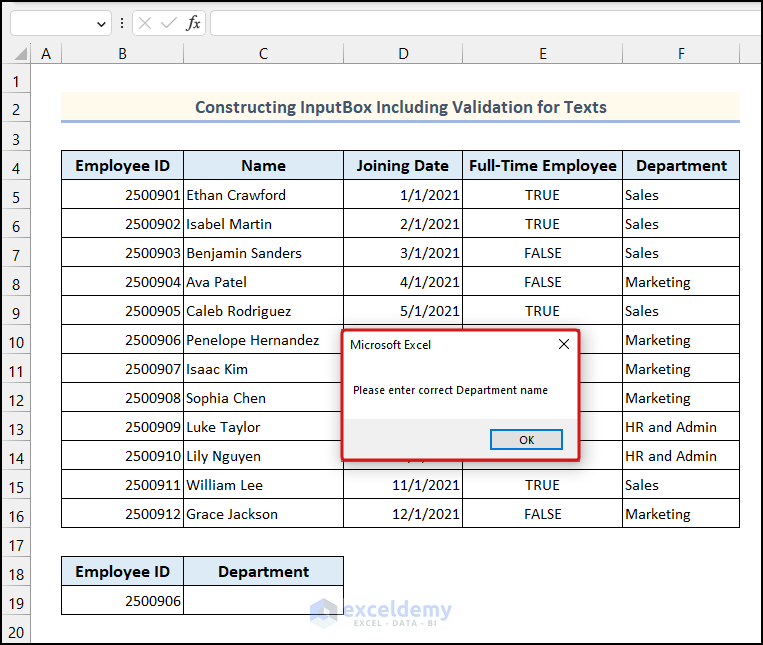
Consequently, a dialogue box will appear on your worksheet saying “Please enter a valid Department name”. This indicates that text validation in the InputBox is working properly.
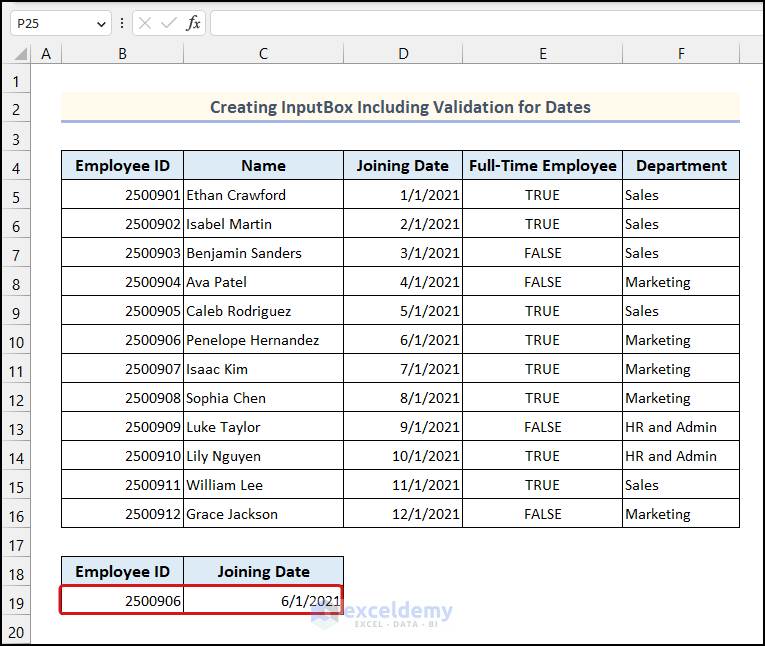
6.3 Date Validation
While working in Excel, we often need to insert dates in our worksheet. By following this example you can create an InputBox with date validation. This video demonstrates a quick view of this example. You can check this to get a general grasp.
So, let’s follow the steps mentioned below to create an InputBox with date validation.

Sub inputBox_with_date_val()
    Dim join_date As String
    join_date = Application.InputBox("Please enter Joining Date", _
    "Joining Date", "1/1/2021", , , , , 2)
    If IsDate(join_date) = False Then
        MsgBox "Please enter a valid date"
        Range("C19").Value = ""
        Exit Sub
    End If
    Range("C19").Value = join_date
End Sub
Code Breakdown
Dim join_date As String
join_date = Application.InputBox("Please enter Joining Date", _
"Joining Date", "1/1/2021", , , , , 2)- First, we introduced a String type variable named join_date and used the Application.InputBox method to take input from the user. Here, we specified the data type of the InputBox as Text String.
 If IsDate(join_date) = False Then
        MsgBox "Please enter a valid date"
        Range("C19").Value = ""
        Exit Sub
    End If
Range("C19").Value = join_date- Then, we used a combination of the If statement, and IsDate function to check whether the value inserted in the variable join_date is a valid date or not.
- If it is not a date then a MsgBox will open and show “Please enter a valid date“.
- Then, we assigned a blank to cell C19 and then the code will exit the sub procedure.
- If the inserted value in the join_date variable is indeed a date that will be assigned to cell C19.
- First create a blank Module >> write VBA code in it >> click on the Save option >> use keyboard shortcut ALT + F11 to return to worksheet.
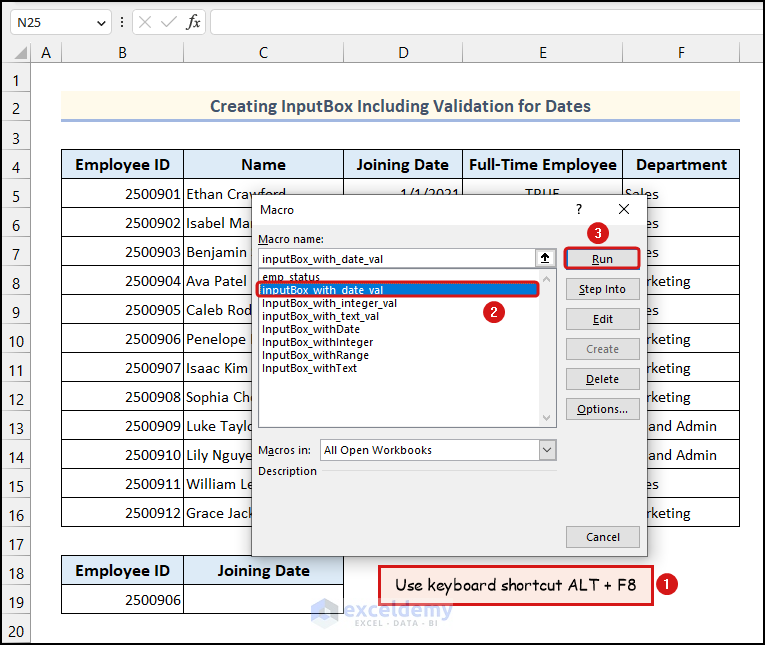
- Following that, utilize the keyboard shortcut ALT + F8 to open the Macro dialogue box >> choose the inputBox_with_date_val option >> click on Run.
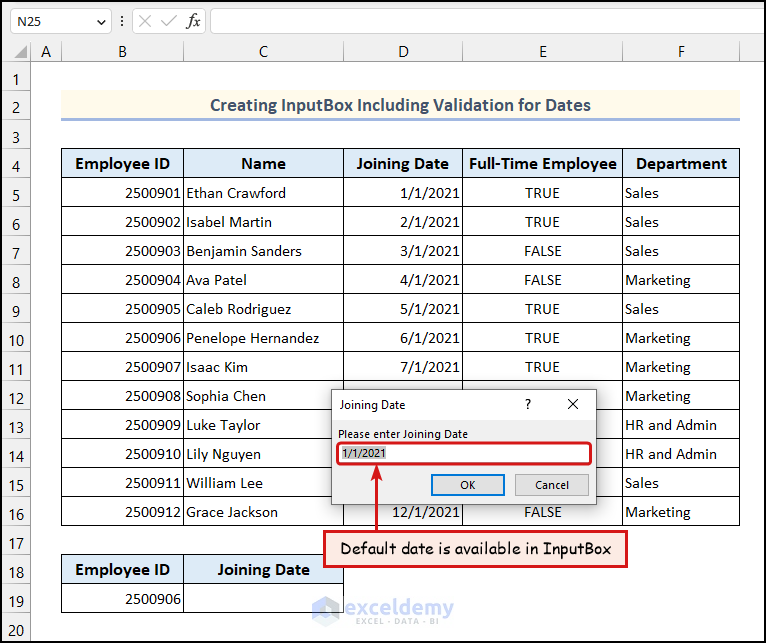
Consequently, an InputBox will appear on your screen with a default date within it.
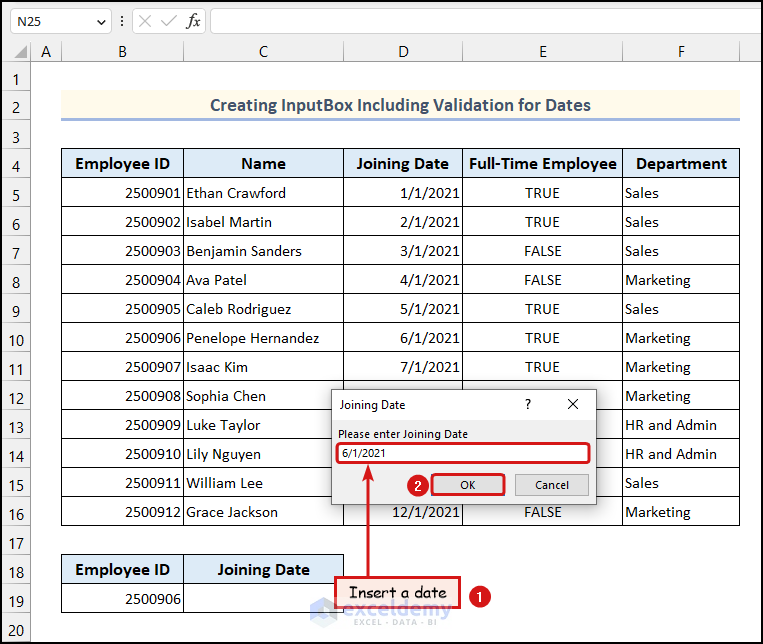
- Next, insert a date in the InputBox >> click OK.
As the entered value in the InputBox is a date, Excel will give an output without any issue. Now, let’s try to use a different data type and sew what happens.
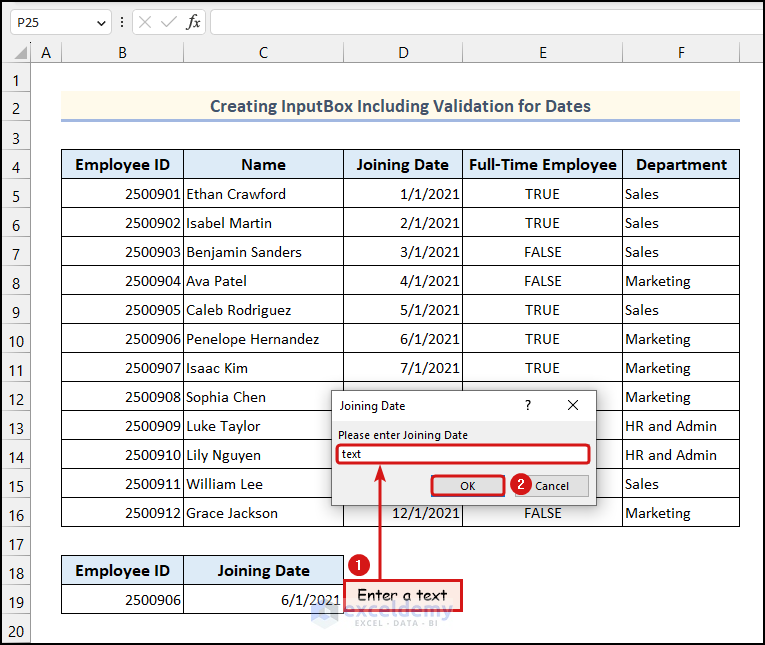
- Run the Macro again >> insert a text or a number >> click OK.
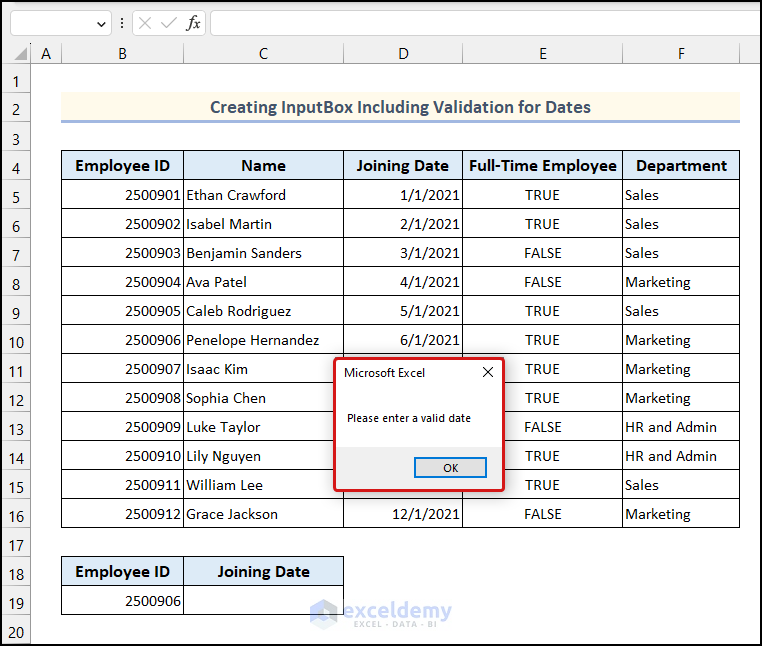
Subsequently, a dialogue box will open saying “Please enter a valid date“. This indicates that data validation is working seamlessly in our created InputBox.
7. InputBox Including Default Radio Button
In this section of the article, we will learn to add Radio Buttons in an InputBox. Radio Buttons are also known as Option Buttons. It allows us to select one option from a list of multiple options. Here, we will use one of the options as a default value.
To create this InputBox with radio buttons as default value, we need to take help from Excel VBA UserForm. The following video will give you an overall idea about this method. You can watch it to get a broad idea.
Now, let’s use the following instructions outlined below to create an InputBox with default radio buttons in Excel VBA.

- First, launch the VBA Editor >> go to Insert tab >> click on the UserForm option.
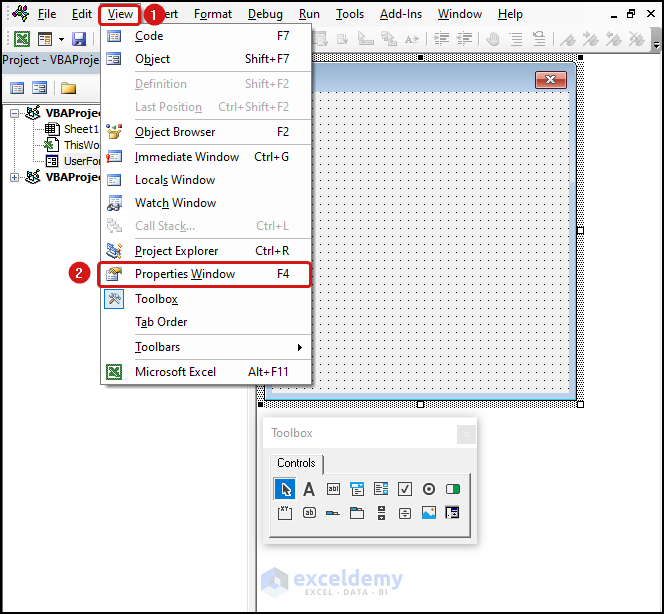
Generally, the Properties Window will be available in the VBA Editor by default. But if it’s not there for any reason, you can activate it by going to the View tab and selecting the Properties Window.
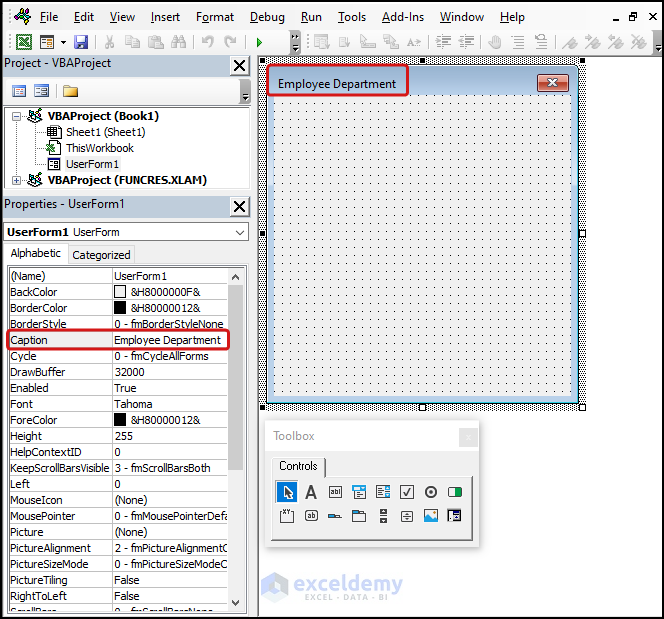
- After that, click on the UserForm and change the caption from the Properties Window. Here, we used “Employee Department” as the caption.
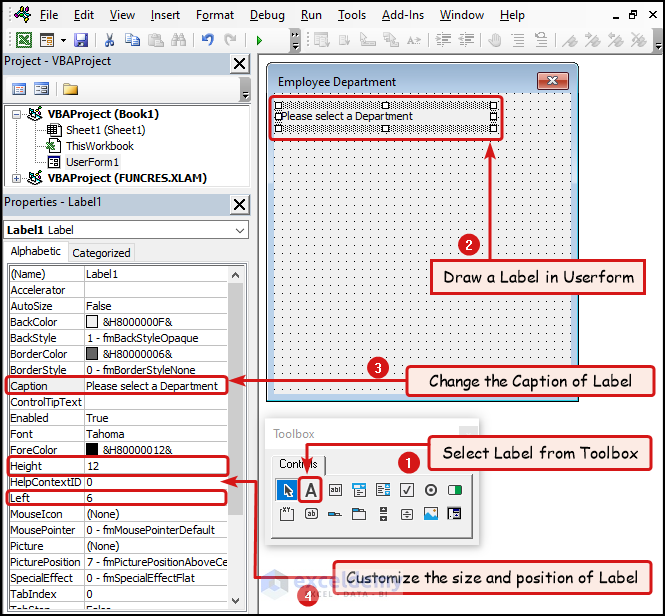
- Next, select the Label option from the Toolbox >> draw a label in the UserForm.
- Then change the caption of the Label to “Please select a Department” >> customize the size and position of the Label. Here, we have used Height 12 and applied the Left value 12 to define its position.
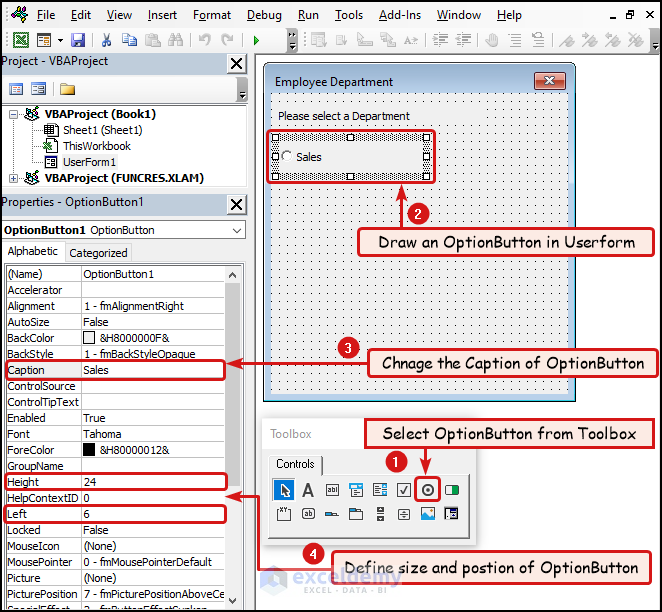
- Following that, choose the OptionButton from the Toolbox >> draw an OptionButton in the UserForm.
- Then, change the caption to “Sales” >> define the size and position of the OptionButton. Here we have defined the height as 24 and the Left value as 6. Similarly, create 2 more OptionButtons. Just change the captions of the OptionButtons as “Marketing” and “HR and Admin“.

- Next, choose the TextBox option from the Toolbox >> draw the TextBox in the UserForm >> define the size and position of the TextBox by following the previous instructions.
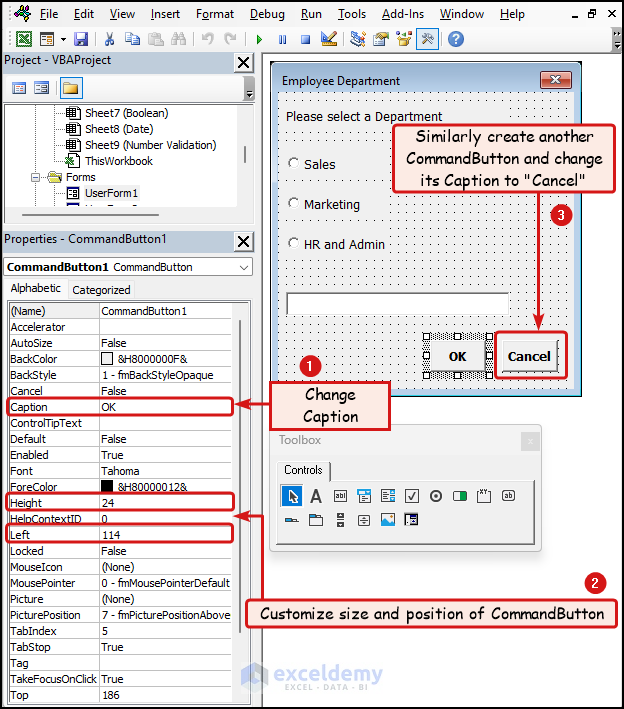
- Then, choose the CommandButton option from the Toolbox >> draw a CommandButton in the UserForm.
- Following that, change the caption to “OK” >> customize the height and position of the CommandButton. Similarly, create another CommandButton by following the same procedure. Just change the caption to “Cancel“.
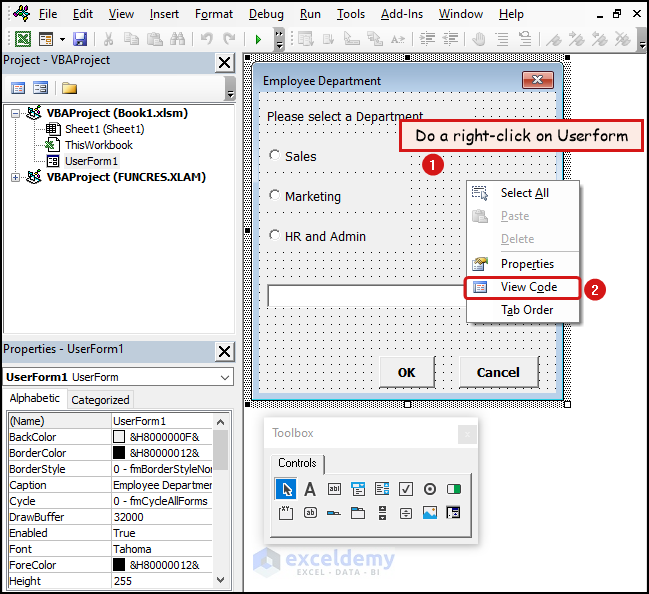
- Next, do a right-click on the UserForm and select the View Code option.
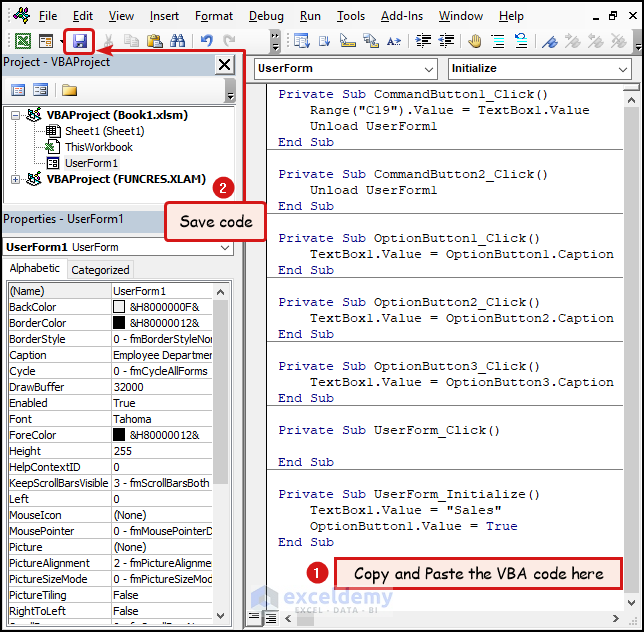
Private Sub CommandButton1_Click()
    Range("C19").Value = TextBox1.Value
    Unload UserForm1
End Sub
Private Sub CommandButton2_Click()
    Unload UserForm1
End Sub
Private Sub OptionButton1_Click()
    TextBox1.Value = OptionButton1.Caption
End Sub
Private Sub OptionButton2_Click()
    TextBox1.Value = OptionButton2.Caption
End Sub
Private Sub OptionButton3_Click()
    TextBox1.Value = OptionButton3.Caption
End Sub
Private Sub UserForm_Click()
End Sub
Private Sub UserForm_Initialize()
    TextBox1.Value = "Sales"
    OptionButton1.Value = True
End Sub
Code Breakdown
Private Sub CommandButton1_Click()
    Range("C19").Value = TextBox1.Value
    Unload UserForm1
End Sub- This private sub procedure will activate when the CommandButton1 (OK Button) is clicked. This will assign the value of the TextBox1 to cell C19.
- Then, the UserForm1 will be removed from the screen.
Private Sub CommandButton2_Click()
    Unload UserForm1
End Sub- This code will run if the CommandButton2 (Cancel Button) is clicked. If the Cancel button is clicked, the UserForm1 will be unloaded.
Private Sub OptionButton1_Click()
    TextBox1.Value = OptionButton1.Caption
End Sub
Private Sub OptionButton2_Click()
    TextBox1.Value = OptionButton2.Caption
End Sub
Private Sub OptionButton3_Click()
    TextBox1.Value = OptionButton3.Caption
End Sub- These sub-procedures will run after clicking the OptionButtons. It indicates that for any option that you click, the caption of that OptionButton will be the value of the TextBox1.
- If you click again on another OptionButton, then the previous value of the TextBox1 will be replaced with the caption of the newly selected OptionButton.
Private Sub UserForm_Initialize()
    TextBox1.Value = "Sales"
    OptionButton1.Value = True
End Sub- This code will run as soon as the UserForm1 initializes. By default, the value of the TextBox1 will be “Sales” and the value of the OptionButton1 will be True.
- Then, copy and paste the following code in it >> click on the Save option.
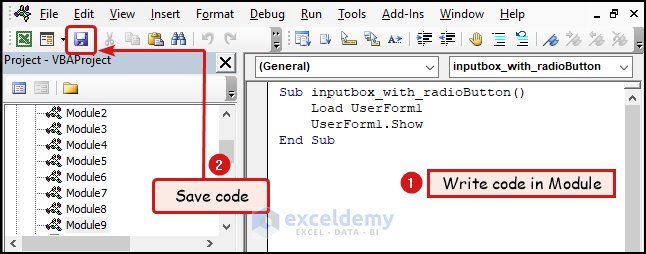
Sub inputbox_with_radioButton()
    Load UserForm1
    UserForm1.Show
End Sub
Code Breakdown
- We created this sub procedure to use created UserForm from the Macro dialogue box.
- First, UserForm 1 will load and then it will be visible on the screen. Then, all the codes inside the UserForm1 will execute.
- Create a blank Module >> Write code in the Module >> Click on the Save option >> Use the keyboard shortcut ALT + F11 to return to the worksheet.
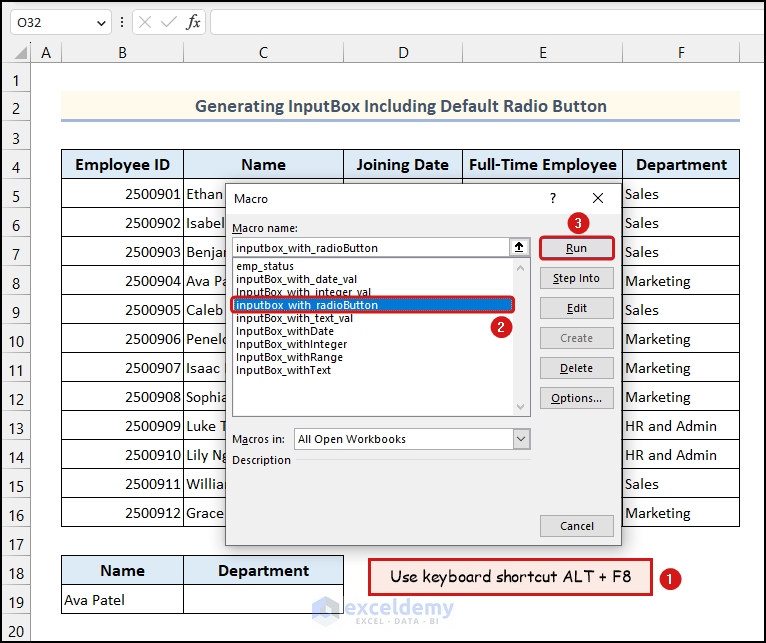
- Apply the keyboard shortcut ALT + F8 to open the Macro dialogue box >> select the inputbox_with_radioButton option >> click on Run.
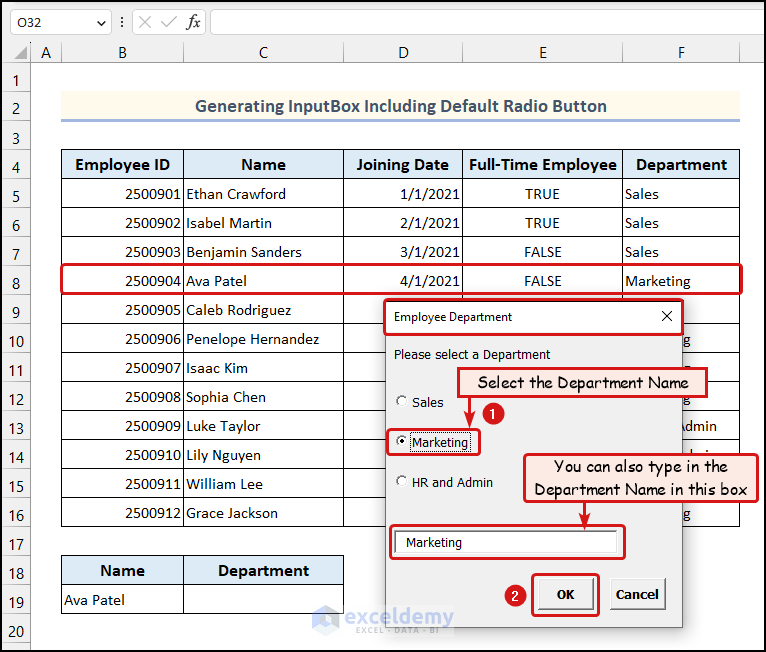
- As a result, an InputBox will appear on your worksheet. By default, the Sales option will be selected. Then, choose the appropriate Department. You can also type in the Department manually in the TextBox >> click OK.
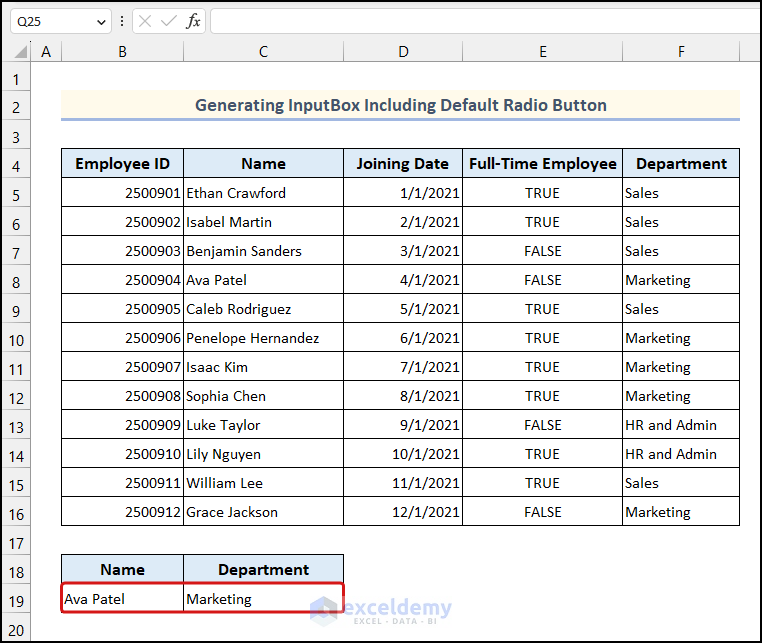
Consequently, the selected Department Name will be available in cell C19.
8. InputBox with Default Checkbox
In the previous method we used the RadioButtons aka the OptionButtons within a custom InputBox. Here, we will create a custom InputBox with default Checkboxes values in Excel using VBA. The following video describes a quick overview of the example. You can check this out to have a broad idea about this example.
So, let’s use the following instructions to use default checkboxes within an InputBox in Excel VBA.
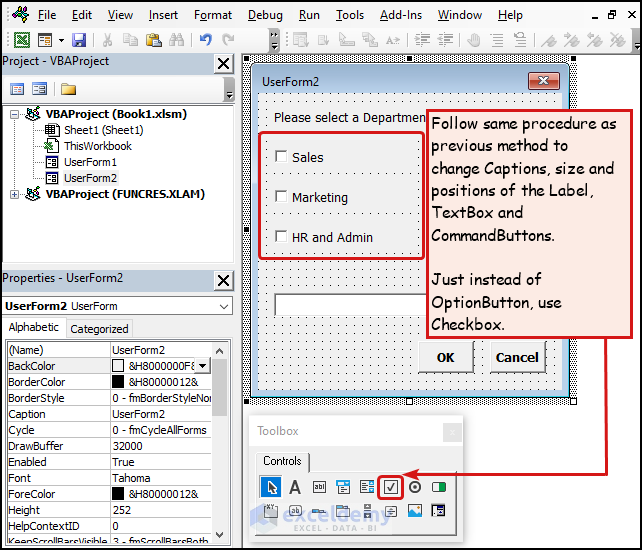
- Follow the same steps as mentioned in the previous method to design the UserForm. Just create the CheckBoxes instead of the OptionButtons.
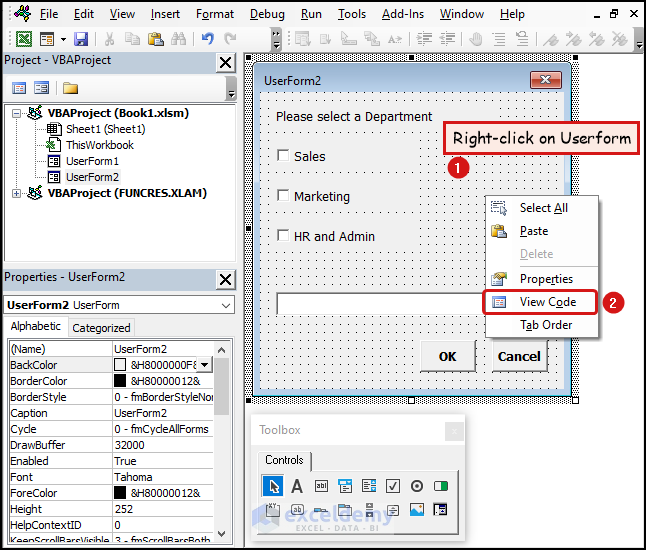
- Following that, do right-click on the UserForm >> choose the View Code option.
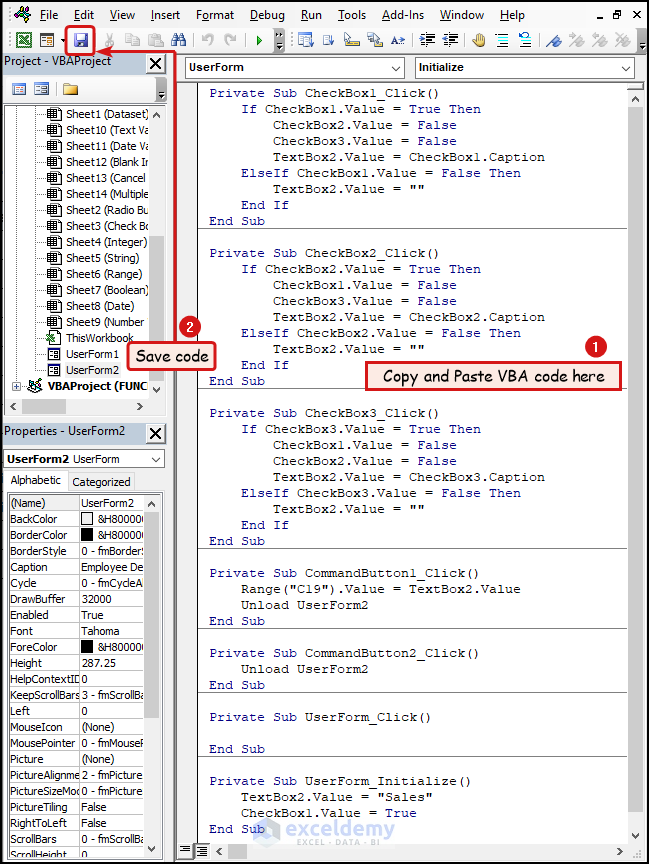
Private Sub CheckBox1_Click()
    If CheckBox1.Value = True Then
        CheckBox2.Value = False
        CheckBox3.Value = False
        TextBox2.Value = CheckBox1.Caption
    ElseIf CheckBox1.Value = False Then
        TextBox2.Value = ""
    End If
End Sub
Private Sub CheckBox2_Click()
    If CheckBox2.Value = True Then
        CheckBox1.Value = False
        CheckBox3.Value = False
        TextBox2.Value = CheckBox2.Caption
    ElseIf CheckBox2.Value = False Then
        TextBox2.Value = ""
    End If
End Sub
Private Sub CheckBox3_Click()
    If CheckBox3.Value = True Then
        CheckBox1.Value = False
        CheckBox2.Value = False
        TextBox2.Value = CheckBox3.Caption
    ElseIf CheckBox3.Value = False Then
        TextBox2.Value = ""
    End If
End Sub
Private Sub CommandButton1_Click()
    Range("C19").Value = TextBox2.Value
    Unload UserForm2
End Sub
Private Sub CommandButton2_Click()
    Unload UserForm2
End Sub
Private Sub UserForm_Click()
End Sub
Private Sub UserForm_Initialize()
    TextBox2.Value = "Sales"
    CheckBox1.Value = True
End Sub
Code Breakdown
Private Sub CheckBox1_Click()
    If CheckBox1.Value = True Then
        CheckBox2.Value = False
        CheckBox3.Value = False
        TextBox2.Value = CheckBox1.Caption
    ElseIf CheckBox1.Value = False Then
        TextBox2.Value = ""
    End If
End Sub
Private Sub CheckBox2_Click()
    If CheckBox2.Value = True Then
        CheckBox1.Value = False
        CheckBox3.Value = False
        TextBox2.Value = CheckBox2.Caption
    ElseIf CheckBox2.Value = False Then
        TextBox2.Value = ""
    End If
End Sub
Private Sub CheckBox3_Click()
    If CheckBox3.Value = True Then
        CheckBox1.Value = False
        CheckBox2.Value = False
        TextBox2.Value = CheckBox3.Caption
    ElseIf CheckBox3.Value = False Then
        TextBox2.Value = ""
    End If
End Sub- These 3 private sub procedures do similar tasks. Each of the sub procedures activate upon respective CheckBox clicks.
- If any of the CheckBox is clicked then it will be ticked and the other CheckBoxes will be unticked.
- The value of the TextBox2 will be the caption of the selected CheckBox.
- If the same CheckBox is clicked while it is ticked, then it will be unticked and the value of the TextBox2 will be replaced by a blank.
Private Sub CommandButton1_Click()
    Range("C19").Value = TextBox2.Value
    Unload UserForm2
End Sub- This code will execute if the CommandButton1 (OK Button) is clicked. The value of the TextBox2 will be assigned to cell C19.
- Then the UserForm2 will be unloaded.
Private Sub CommandButton2_Click()
    Unload UserForm2
End Sub- This sub procedure will activate if the CommandButton2 (Cancel Button) is clicked. It will unload the UserForm2 whenever the Cancel button is clicked.
Private Sub UserForm_Initialize()
    TextBox2.Value = "Sales"
    CheckBox1.Value = True
End Sub- This code runs upon initializing the UserForm2. So, by default, the value of TextBox2 will remain “Sales” and the value of CheckBox1 will be True.
- Then copy the following VBA code and paste it here >> click on the Save option.
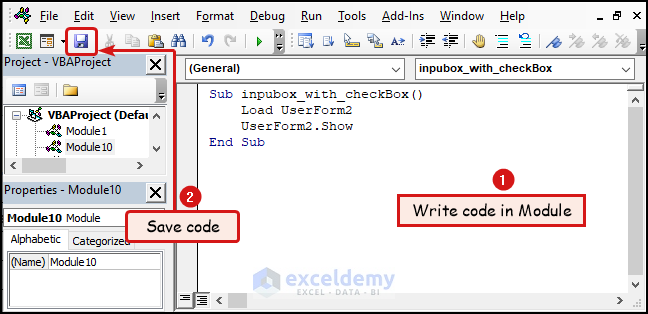
Sub inpubox_with_checkBox()
    Load UserForm2
    UserForm2.Show
End Sub- Create a new Module >> write the following VBA code in Module >> Click on Save icon >> Utilize the keyboard shortcut ALT + F11 to get back to the worksheet.

- Apply the keyboard shortcut ALT + F8 to open the Macro dialogue box >> choose the inpubox_with_checkBox option >> click on Run.

- As a result, the following InputBox will open on your worksheet. By default the Sales option will be checked >> select the appropriate Department. You can also type the name of the Department manually in the TextBox >> click OK.
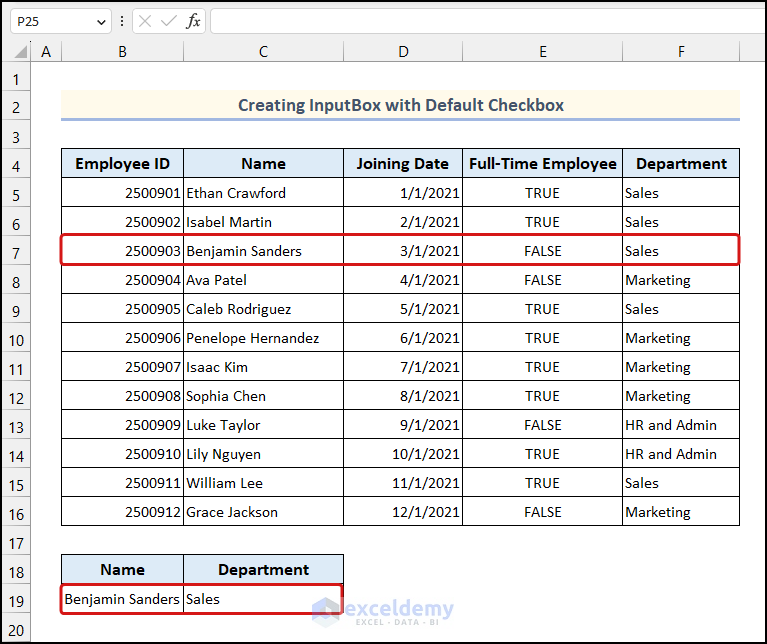
Subsequently, the selected Department Name will be available in cell C19.
How to Handle Blank VBA InputBox in Excel
While working in Excel, we often need to use InputBoxes to take input from the user and use it in the VBA code. If you enter a blank value in the InputBox, an error may occur. In VBA, the code halts when it encounters an error and does not run any of the subsequent code. So, we need to handle the blank value in the InputBox. The following video will give you a quick overview about this method.
Now, let’s follow the steps mentioned below to handle Blank VBA InputBox in Excel.
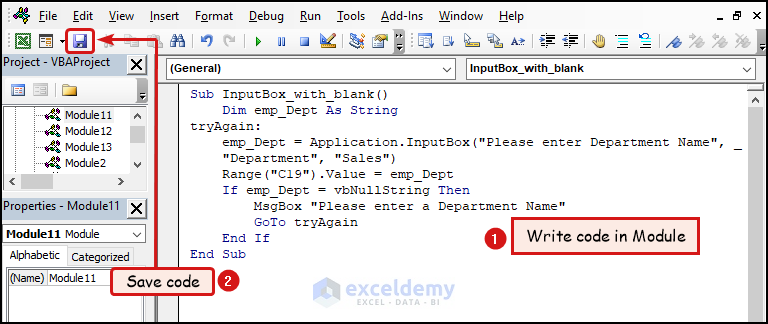
Sub InputBox_with_blank()
    Dim emp_Dept As String
tryAgain:
    emp_Dept = Application.InputBox("Please enter Department Name", _
    "Department", "Sales")
    Range("C19").Value = emp_Dept
    If emp_Dept = vbNullString Then
        MsgBox "Please enter a Department Name"
        GoTo tryAgain
    End If
End Sub
Code Breakdown
Dim emp_Dept As String
tryAgain:
emp_Dept = Application.InputBox("Please enter Department Name", _
"Department", "Sales")
Range("C19").Value = emp_Dept- First, we introduced a variable named emp_Dept as a String. After that, we created a block named tryAgain.
- Then we used the Application.InputBox method to take input from the user. The default value of the InputBox is “Sales“. Now, the value of the emp_Dept variable will be assigned to cell C19.
If emp_Dept = vbNullString Then
MsgBox "Please enter a Department Name"
GoTo tryAgain
End If
End Sub- Following that, we used an If statement to check if the inserted value in the InputBox is blank or not. If it is blank then a MsgBox will open saying “Please enter a Department Name“.
- Then, the code will start executing again from the tryAgain block.
- First, create a blank Module >> write code in the Module >> click on the Save option >> use the keyboard shortcut ALT + F11 to get back to the worksheet.

- Utilize the keyboard shortcut ALT + F8 >> select the InputBox_with_blank option >> click on Run.
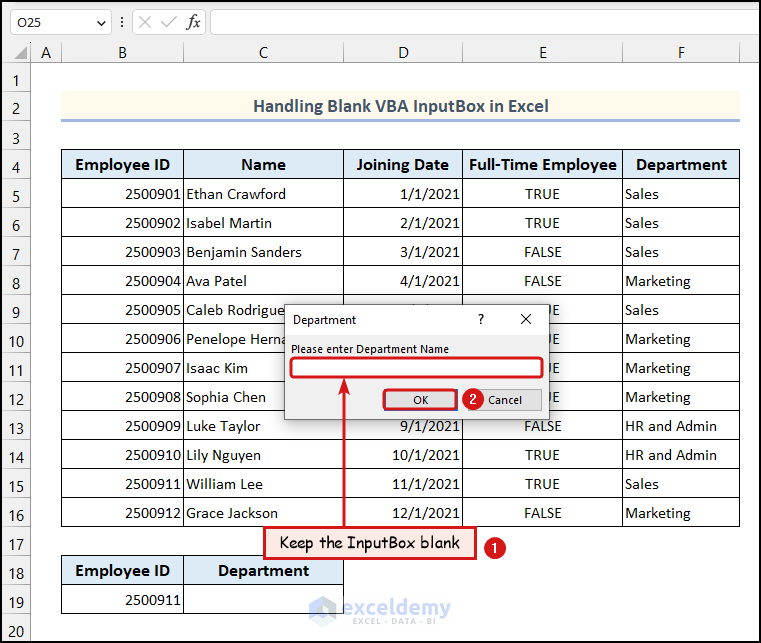
- Subsequently, an InputBox will appear on your worksheet >> keep the InputBox blank >> click OK.
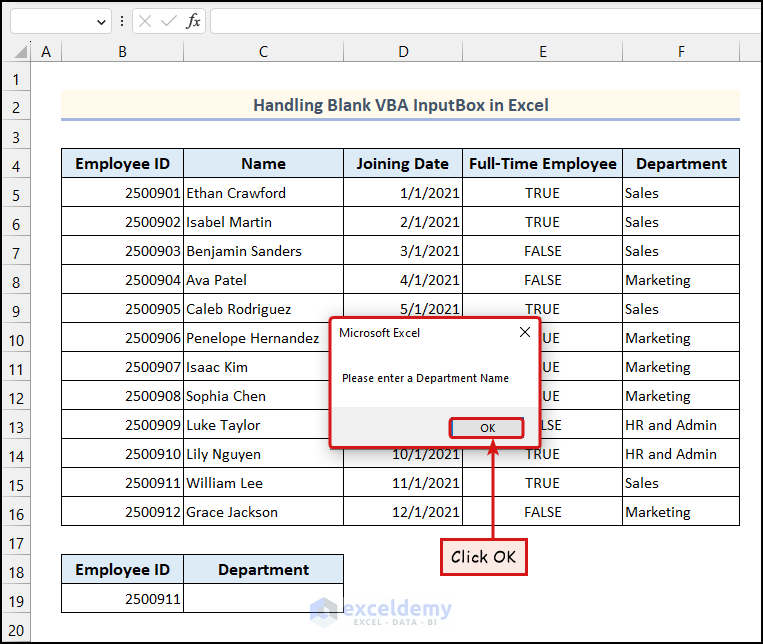
- A dialogue box will appear on your worksheet saying “Please enter a Department Name” >> click OK.
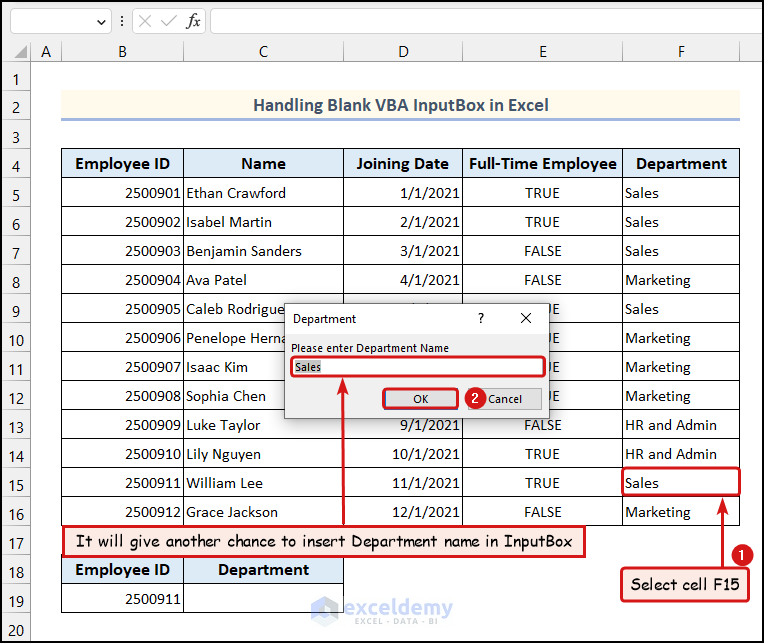
- After that, you will get another chance to insert the Department Name >> select cell F15 >> click OK.
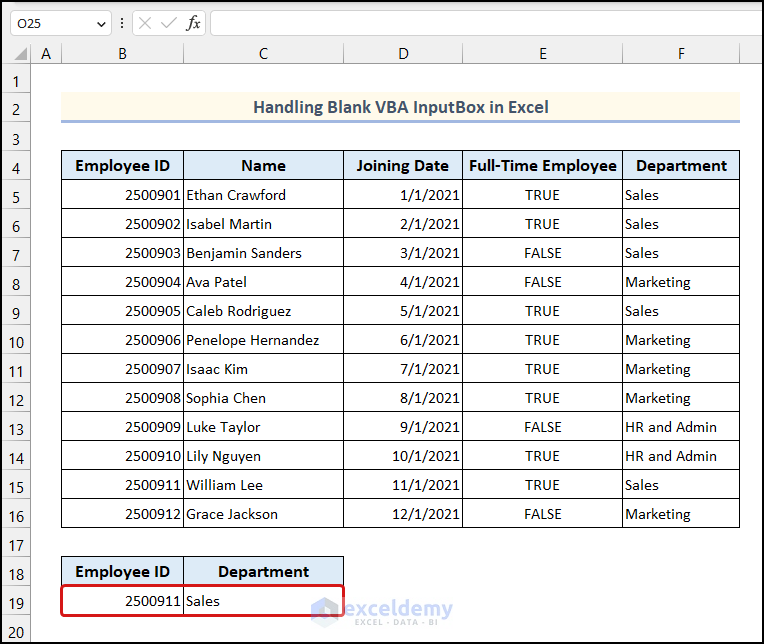
As a result, the selected Department Name will be available in cell C19. In this way, we can handle any blank input within the InputBox in Excel VBA.
How to Handle VBA InputBox Cancel Button in Excel
Like entering a blank input, canceling the InputBox may also cause an error while executing the VBA code which stops the code from executing. So, it is crucial to handle InputBox cancellation in Excel VBA. Here, we added an overview video of this method. You can watch this to get a general understanding about this method.
Now, let’s follow the procedure discussed below to do this.
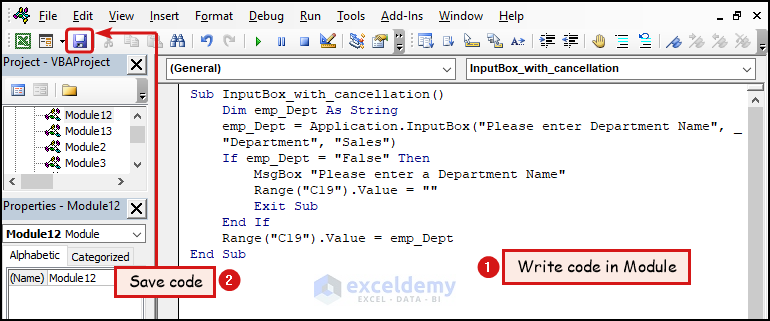
Sub InputBox_with_cancellation()
    Dim emp_Dept As String
    emp_Dept = Application.InputBox("Please enter Department Name", _
    "Department", "Sales")
    If emp_Dept = "False" Then
        MsgBox "Please enter a Department Name"
        Range("C19").Value = ""
        Exit Sub
    End If
    Range("C19").Value = emp_Dept
End Sub
Code Breakdown
Dim emp_Dept As String
emp_Dept = Application.InputBox("Please enter Department Name", _
"Department", "Sales")- First, we declared a variable named emp_Dept as String. Then, we used the Application.InputBox method to take input from the user.
If emp_Dept = "False" Then
MsgBox "Please enter a Department Name"
Range("C19").Value = ""
Exit Sub
End If
Range("C19").Value = emp_Dept
End Sub- Following that, we used an If statement to check whether the Cancel button was clicked in the InputBox. If it is clicked then a MsgBox will open saying “Please enter a Department Name“.
- Then a blank will be assigned to cell C19 and the code will exit the sub-procedure.
- If the Cancel button is not clicked, then the value of the variable emp_Dept will be assigned to cell C19.
- First, create a new Module >> write the following VBA code in it >> click on the Save option >> use the keyboard shortcut ALT + F11 to return to the worksheet.

- Now, apply the keyboard shortcut ALT + F8 >> select the InputBox_with_cancellation option >> click on Run.
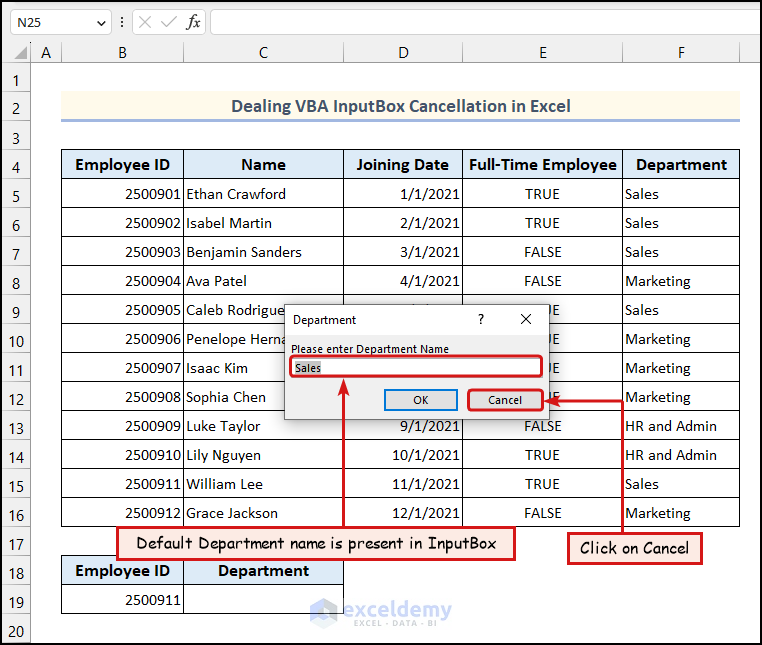
- As a result, an InputBox will open on your worksheet and a default value will be available in it. Now, click on the Cancel button.
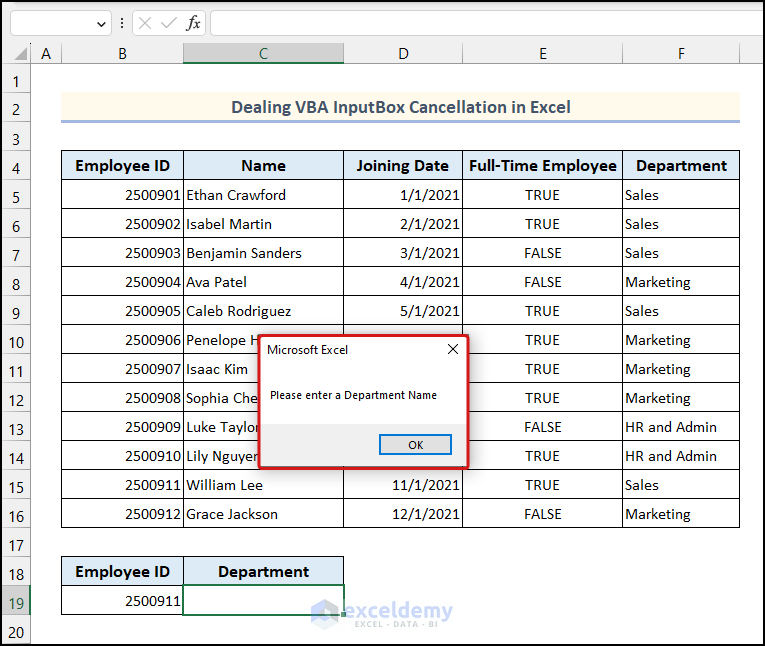
Consequently, a dialogue box will appear saying “Please enter a Department Name”. This indicates that we have successfully handled the cancellation event in the InputBox.
How to Take Multiple Inputs Through Multiple InputBox in Excel VBA
This portion of the article will demonstrate how to create an InputBox with multiple inputs in Excel VBA, which is a relatively simple process. The accompanying video provides a general overview of how this approach works.
So, let’s follow the instructions given below to do this.

Sub InputBox_with_multipleInputs()
    Dim employee_Dept As String, name As String
    name = Application.InputBox("Please enter Employee Name", _
    "Employee Name", , , , , , 8)
    employee_Dept = Application.InputBox("Please enter Department Name", _
    "Department", "Sales", , , , , 8)
    Range("C19").Value = name
    Range("D19").Value = employee_Dept
End Sub
Code Breakdown
- First, we introduced two variables named employee_Dept, and name and specified their data type as String.
- Then, we used the Application.InputBox method to take input from the user and assign it to the name variable. After that, we used another Application.InputBox method to take another input and assigned it to the employee_Dept variable.
- Following that, we assigned the value of the variables name, and employee_Dept to cell C19 and cell D19 respectively.
- First create a new Module >> write VBA code in it >> click on the Save option >> apply the keyboard shortcut F5 to run the VBA code.
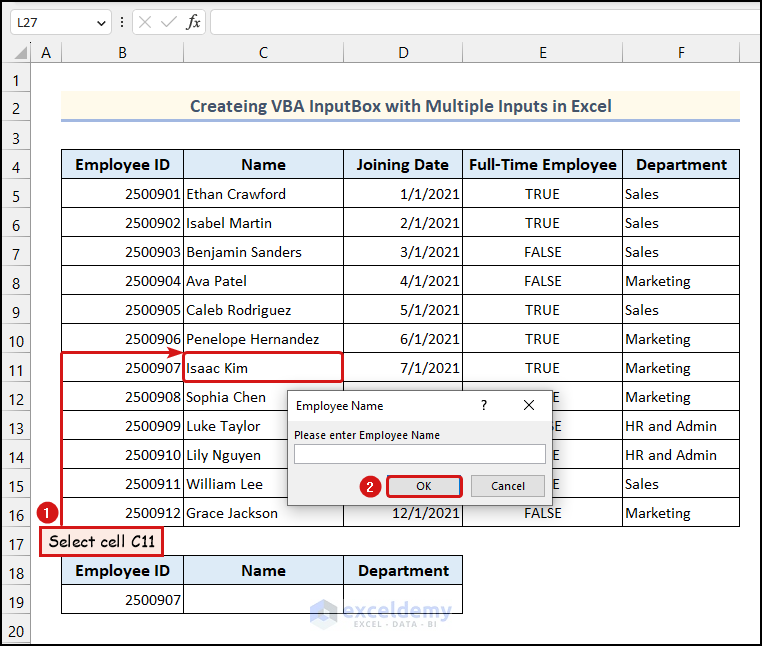
- As a result, an InputBox will open on your worksheet >> select cell C11 to insert Employee Name >> click OK.
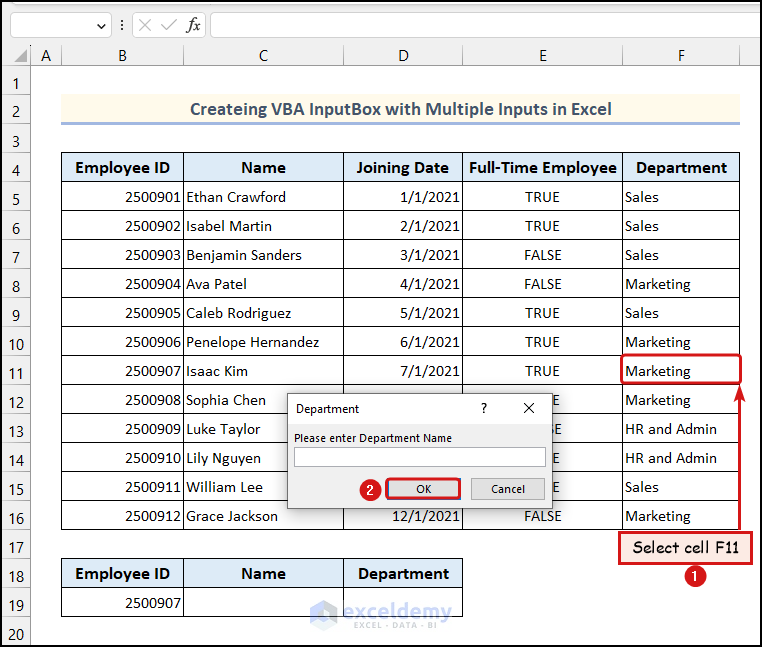
- Choose cell F11 to insert Department Name >> click OK.
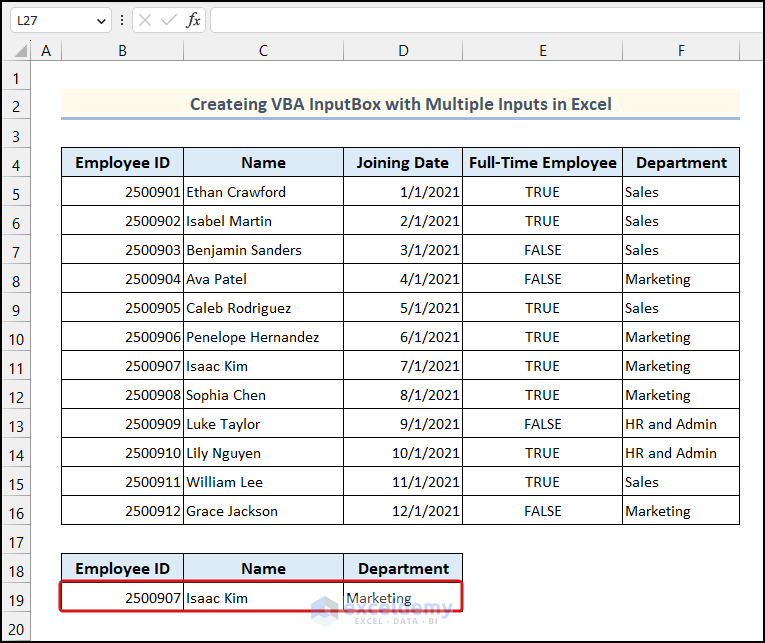
That’s it! You will have the selected inputs shown in cells C19 and D19 respectively.
Read More: Vbscript InputBox with Multiple Fields in Excel
Takeaway from This Article
- InputBox allows us to directly enter data into a dialogue box and use the value in Macros.
- Using a default value in the InputBox can make a data entry process efficient and more accurate.
- While using default values in the InputBox, be careful about the user friendliness of the process.
- If you want to create an InputBox with RadioButton or CheckBox, you need to use the UserForm option of Excel.
- Selection of the default value should be convenient and appropriate so that it can increase the efficiency of the task.
- Entering a blank InputBox or canceling an InputBox might lead to unexpected errors. So, be careful about these issues.
Frequently Asked Questions
1. What is the default value in InputBox in Excel VBA?
Ans: Default values are predefined values that will be used if the user does not enter any value in the InputBox.
2. What values does InputBox return?
Ans: InputBox function of Excel returns string-type data. Even if you enter numerical input in the InputBox, it will consider it as a string. The newer versions of Excel can sometimes identify the numerical inputs from the InputBox as numbers. If a user presses Cancel in the InputBox, a zero-length string (“”) will be returned.
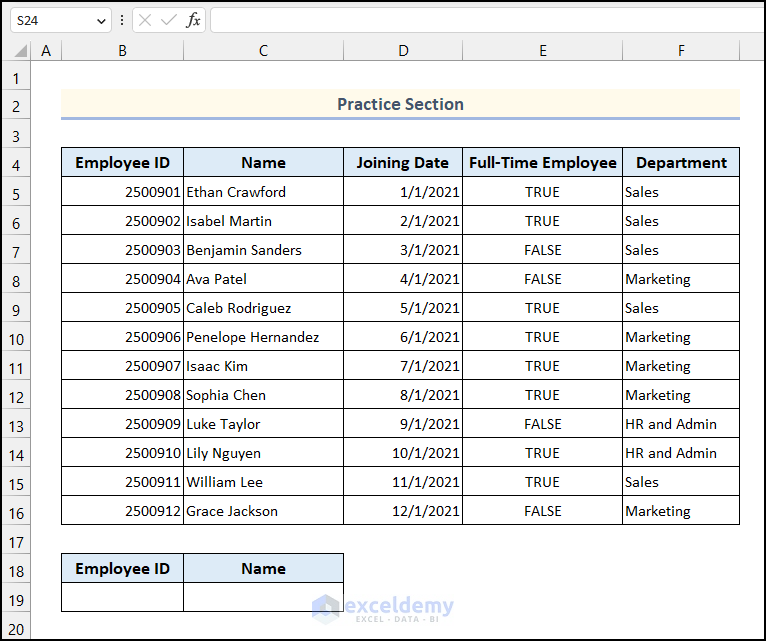
Practice Section
In the practice workbook, we have provided a Practice Section. I suggest you practice the examples that we have discussed in this article. This will help to solidify your knowledge about using default values in Excel VBA InputBox.
Download Practice Workbook
Download this practice workbook.
Conclusion
As we wrap up this article, it’s clear that utilizing default values in VBA InputBox can significantly improve task efficiency and reduce the risk of errors. However, it’s important to always consider the user experience and ensure that the InputBox is user-friendly. This article covers only eight examples of using default values in Excel VBA InputBox, but if you have any additional examples, please feel free to share them with us in the comments section.
If you require further assistance with this topic, please don’t hesitate to reach out to us. We will respond with a solution as soon as possible. For more helpful articles on Excel functions and formulas, be sure to visit our website.
Get FREE Advanced Excel Exercises with Solutions!
