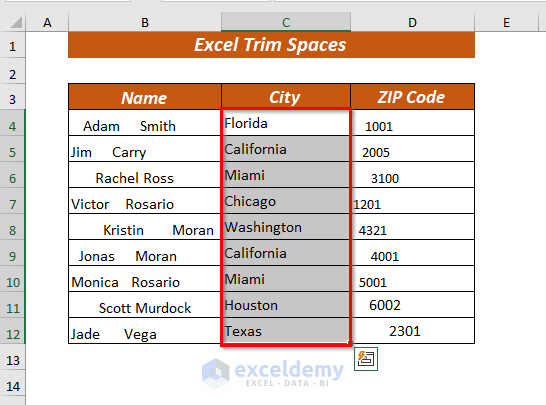
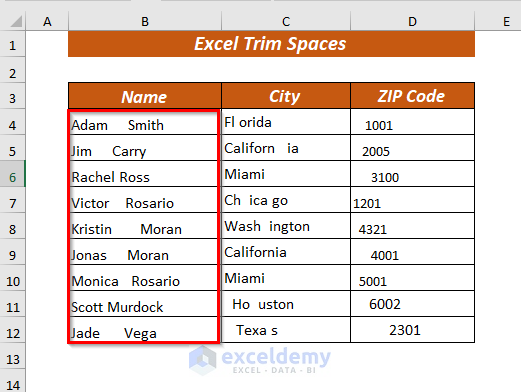
Let’s use a sample dataset that represents the personal information of a particular person. The dataset has 3 columns these are Name, City, and Zip Code.
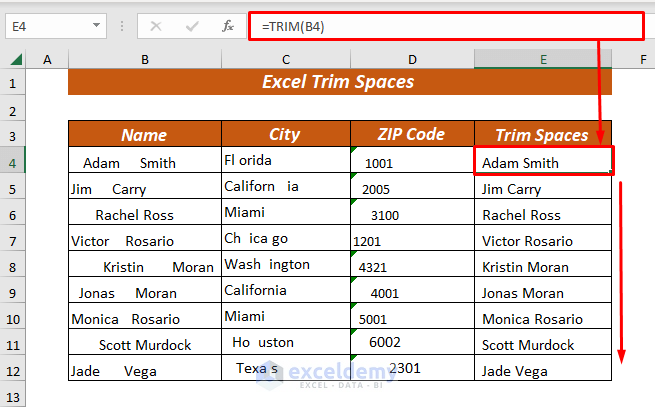
Method 1 – Using the TRIM Function to Trim Spaces from String Values
- The TRIM function is handy for removing extra spaces. It works on both string and numeric values.
- To trim spaces from the string values in the Name column:
- Select any cell (e.g., E4) to place the trimmed result.
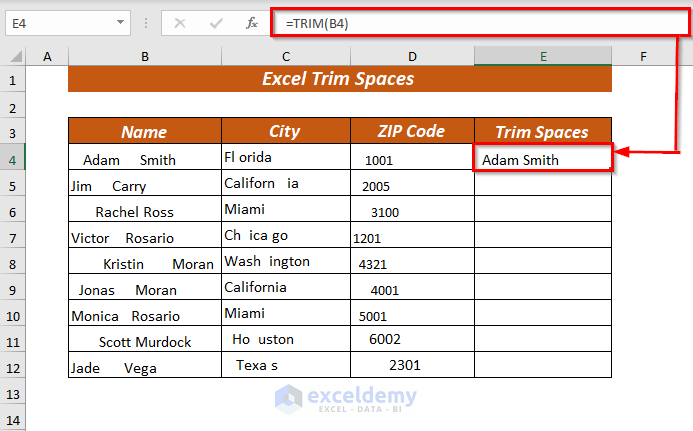
- In cell E4, enter the formula:
=TRIM(B4) 
-
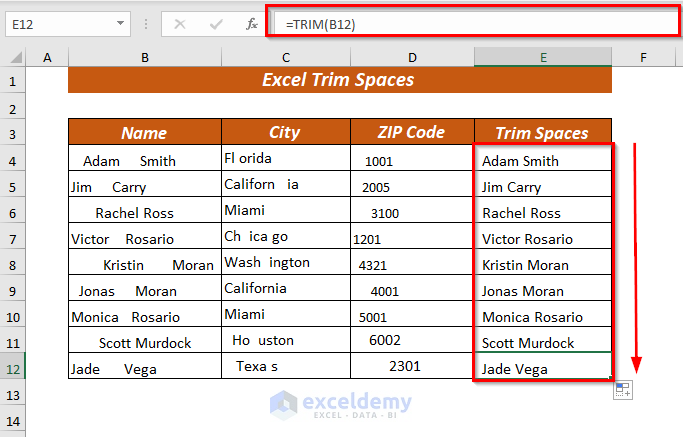
- Press ENTER, and the cell will display the Name with extra spaces removed.
-
- Use the Fill Handle to autofill the formula for the remaining cells.
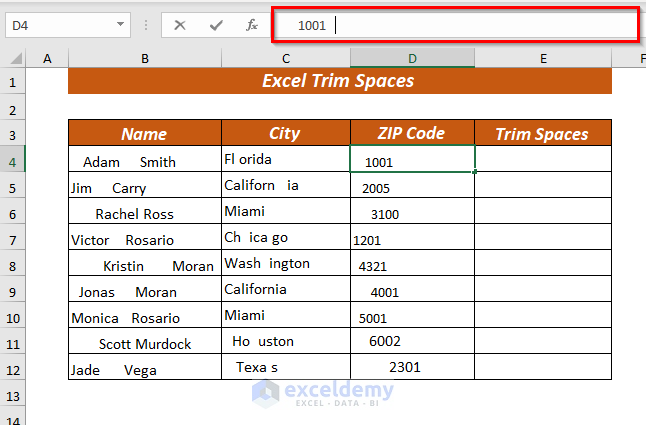
Method 2 – Using the TRIM Function to Trim Spaces from Numeric Values
- The TRIM function treats numeric values as strings, so we need an additional step.
- To trim spaces from the numeric values in the Zip Code column:
-
- Select any cell (e.g., E4) to place the result.
- In cell E4, enter the formula:
=TRIM(D4)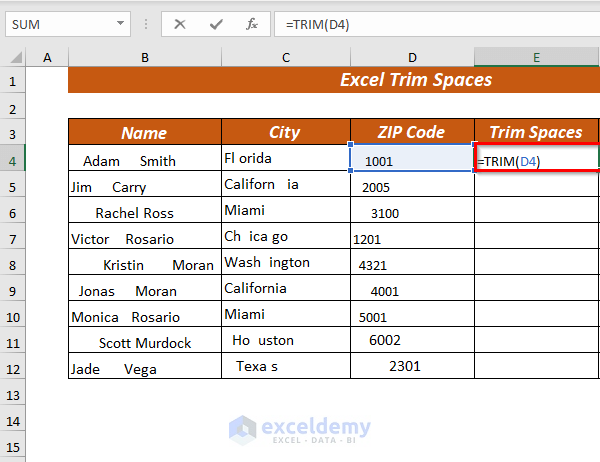
-
- This combines the TRIM function with the VALUE function to ensure the result behaves like a number.
- Press ENTER to get the trimmed Zip Code.
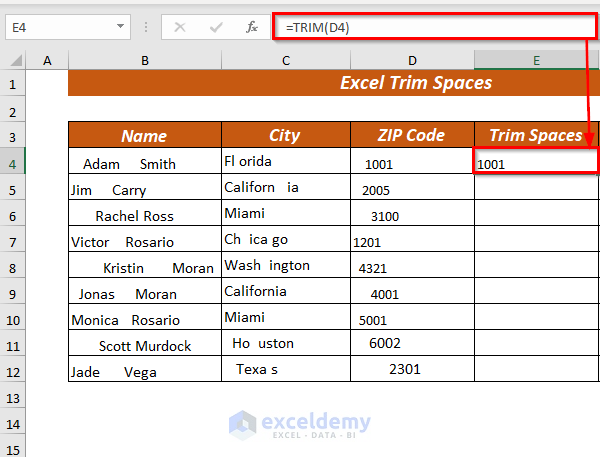
- When using the TRIM function alone, the trimmed values may still behave as text, even if they appear clean.
- To address this, combine the TRIM function with the VALUE function:
- Select any cell (e.g., E4) to place the result.
- In cell E4, enter the formula:
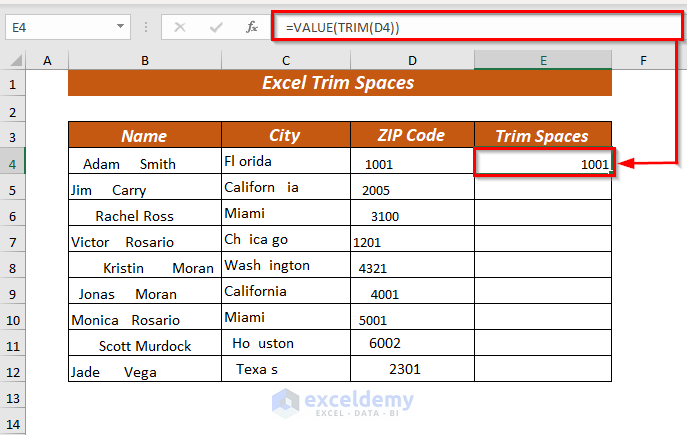
=VALUE(TRIM(D4))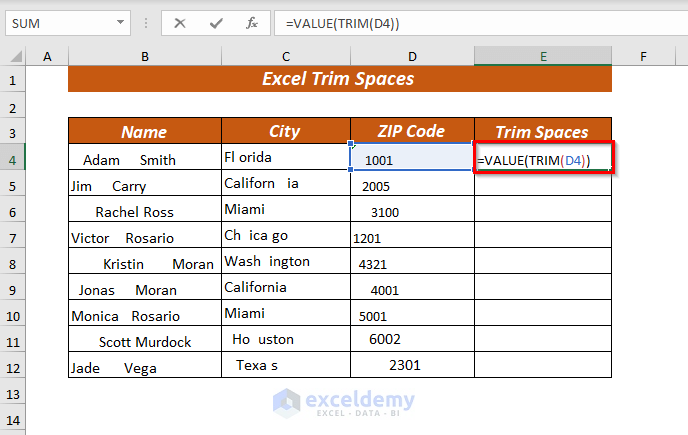
-
- This will trim spaces from the value in cell D4 and convert it into a number.
- Press ENTER to get the Zip Code as a number with extra spaces removed.
-
- Use the Fill Handle to autofill the formula for other cells as needed.

Read More: How to Trim Part of Text in Excel
Method 3 – Using Left TRIM to Trim Leading Spaces Only
- If you want to trim only leading spaces, you can use the MID , FIND , TRIM , and LEN functions together.
- Let’s say we’re working with the Name column:
- Select any cell (e.g., E4) to place the result.
- In cell E4, enter the following formula:
=MID(B4,FIND(MID(TRIM(B4),1,1),B4),LEN(B4))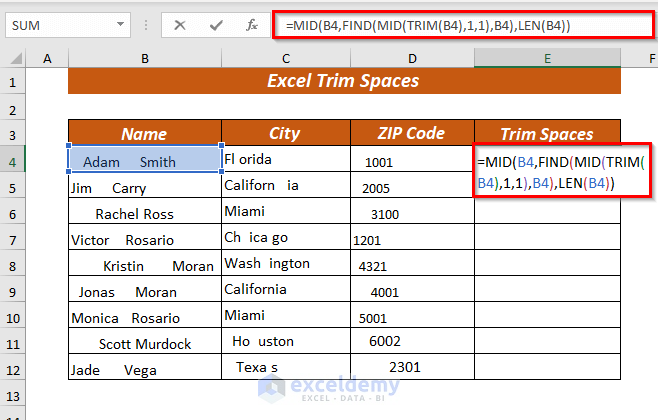
-
- Here’s what each part of the formula does:
- MID(B4, . . . ) extracts characters from cell B4.
- FIND(MID(TRIM(B4), 1, 1), B4) finds the position of the first non-space character in the trimmed value.
- LEN(B4) gives the total length of the original value.
- Here’s what each part of the formula does:
Formula Breakdown
- TRIM(B4):
- This function trims all extra spaces from the value in cell B4.
- Output: “Adam Smith”
- MID(TRIM(B4), 1, 1):
- The MID function extracts a substring from a string.
- Starting from position 1, it extracts the first character from the trimmed value.
- Output: “A”
- FIND(MID(TRIM(B4), 1, 1), B4):
- The FIND function locates the position of a specific substring within another string.
- It finds the position of the first non-space character (which is “A”) in the original value.
- Output: 4 (since “A” appears at the 4th position)
- LEN(B4):
- The LEN function returns the number of characters in the text string.
- For the original value in cell B4 (“Adam Smith”), the length is 17.
- Output: 17
- MID(B4, FIND(MID(TRIM(B4), 1, 1), B4), LEN(B4)):
-
- Combining the above steps, we get:
-
- This extracts the entire text string starting from the 4th position.
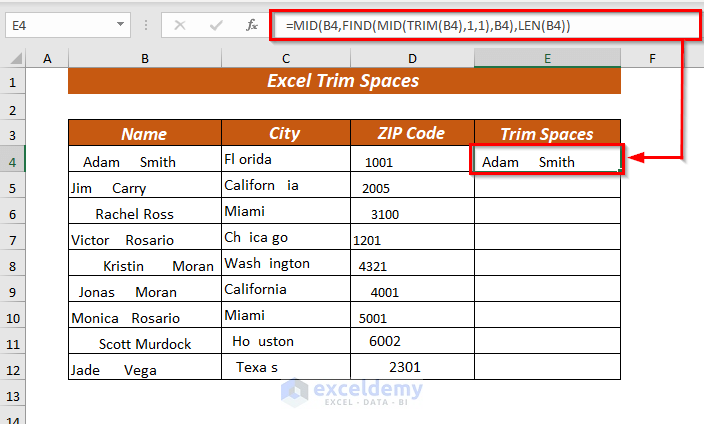
- Output: “Adam Smith”
- Explanation: We’ve successfully trimmed the leading spaces from the name ” Adam Smith.”
-
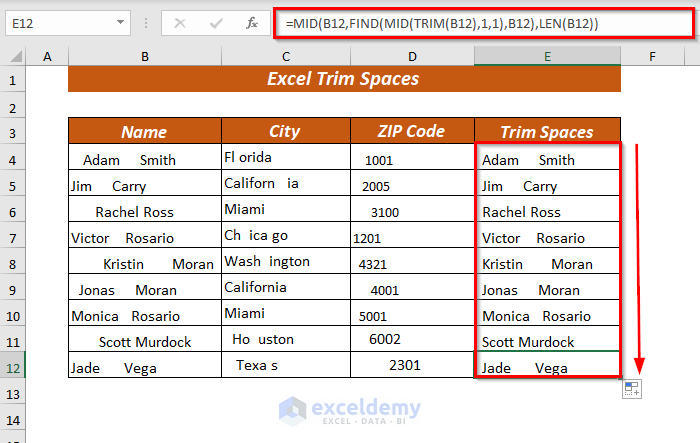
- Press ENTER to get the trimmed name with leading spaces removed.
-
- Use the Fill Handle to AutoFill the formula for the rest of the cells.
Read More: How to Use Left Trim Function in Excel
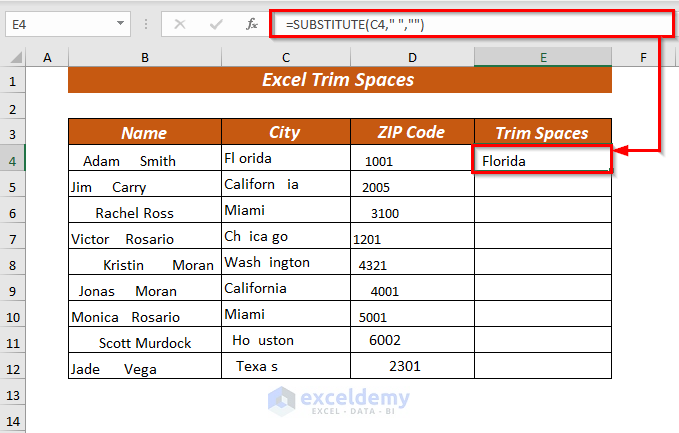
Method 4 – Using the SUBSTITUTE Function to Trim All Spaces
When you need to remove all spaces from a value, the SUBSTITUTE function comes in handy. Here’s how to trim spaces from the City column:
- Select a Cell for the Result:
- Choose any cell (e.g., E4) where you want the trimmed result.
- Enter the Formula:
- In cell E4, type the following formula:
=SUBSTITUTE(C4," ","")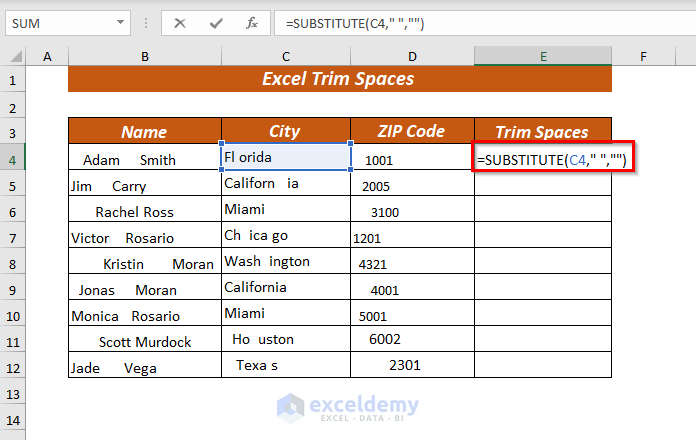
-
- Explanation:
- C4 represents the original value in the City column.
- ” ” (a single space) is the old_text to be replaced.
- ” ” (no space) is the new_text to replace the spaces.
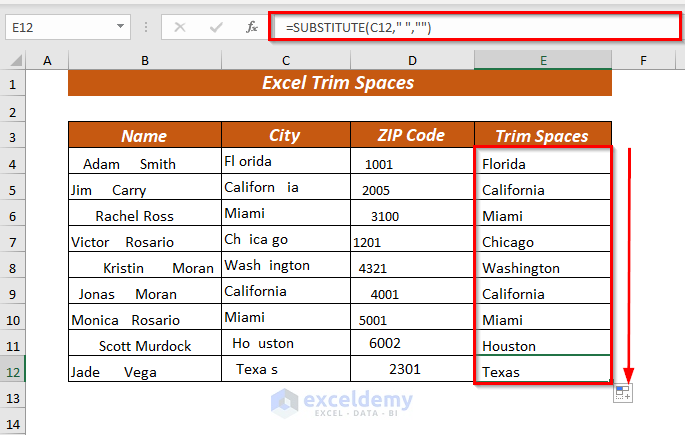
- Press ENTER to trim the extra spaces from the City column.
- Explanation:
- Autofill the Formula:
- Use the Fill Handle to autofill the formula for other cells as needed.
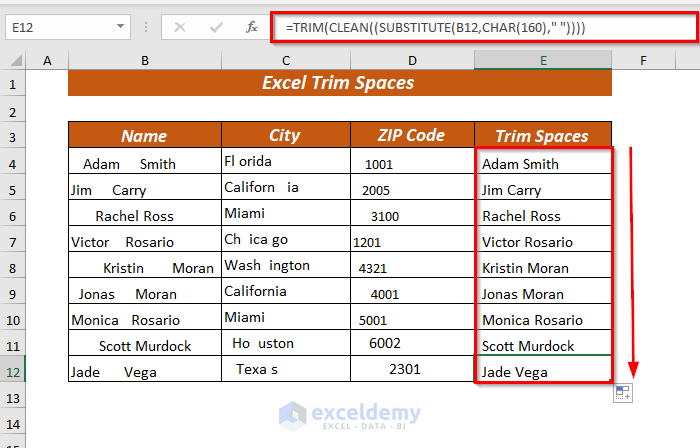
Method 5 – Using TRIM & SUBSTITUTE to Trim Non-Breaking Spaces
When importing data, non-breaking spaces can sometimes sneak in. To handle these, follow these steps:
- Select a Cell for the Result:
- Choose any cell (e.g., E4) where you want the trimmed result.
- Enter the Formula:
- In cell E4, type the following formula:
=TRIM(CLEAN((SUBSTITUTE(B4,CHAR(160)," "))))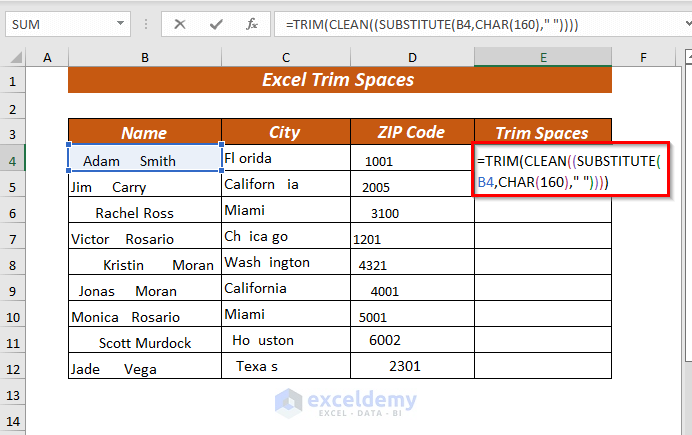
-
- Explanation:
- B4 represents the original value (e.g., from the “Name” column).
- CHAR(160) represents the non-breaking space character.
- The formula combines SUBSTITUTE, CLEAN, and TRIM functions to handle non-breaking spaces.
- Explanation:
Formula Breakdown
- SUBSTITUTE(B4,CHAR(160),” “):
- This function replaces all occurrences of the non-breaking space (character code 160) with a regular space.
- Input: “Adam Smith” (with non-breaking spaces)
- Output: “Adam Smith”
- CLEAN((SUBSTITUTE(B4,CHAR(160),” “))):
- The CLEAN function removes non-printable characters from a text string.
- It takes the result from the previous step (with regular spaces) and further cleans it.
- Input: “Adam Smith” (after replacing non-breaking spaces)
- Output: “Adam Smith”
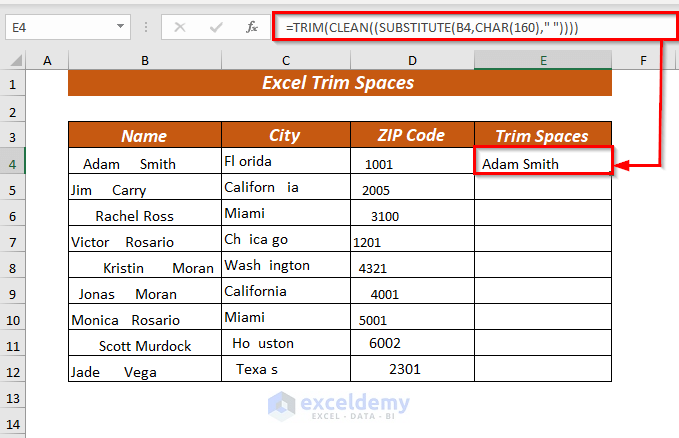
- TRIM(CLEAN((SUBSTITUTE(B4,CHAR(160),” “)))):
- Finally, the TRIM function removes any leading or trailing spaces from the cleaned value.
- Input: “Adam Smith” (cleaned and without extra spaces)
- Output: “Adam Smith”
- Explanation: We’ve successfully trimmed the non-breaking spaces from the name ” Adam Smith.”
-
- Press ENTER to get the cleaned value.
- Autofill the Formula:
- Use the Fill Handle to autofill the formula for other cells as needed.
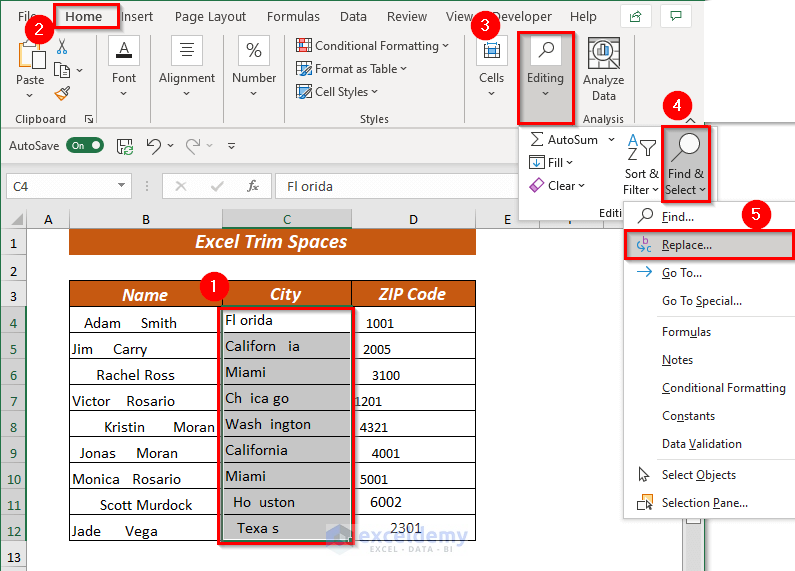
Method 6 – Using Find & Replace to Trim Spaces
- Open your Excel workbook.
- Select the cell range from which you want to trim spaces. For example, let’s say you’ve selected the cell range C4:C12.
- Go to the Home tab and find the Editing group.
- Click on Find & Select and choose Replace.
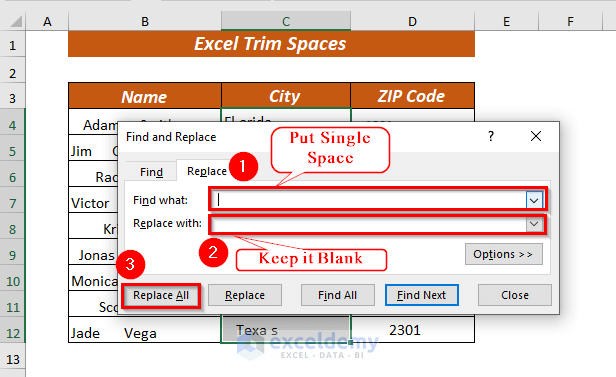
- In the dialog box that appears:
- Enter a single space in the Find what field (to identify spaces).
- Leave the Replace with field blank (so that spaces are removed).
- Click Replace All.
- A message will indicate how many replacements occurred (e.g., “17 replacements made”).
- Click OK and close the dialog box.
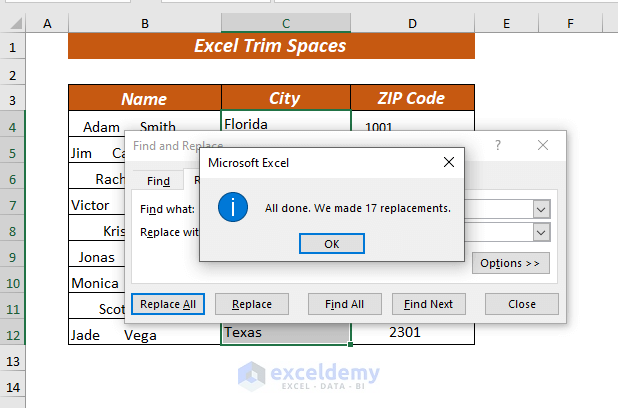
- Now, all the spaces in the selected cell range (City column) are trimmed.
Related Content: How to Trim Right Characters and Spaces in Excel
Method 7 – Using VBA to Trim Leading Spaces
- Open your Excel workbook.
- Go to the Developer tab and select Visual Basic.
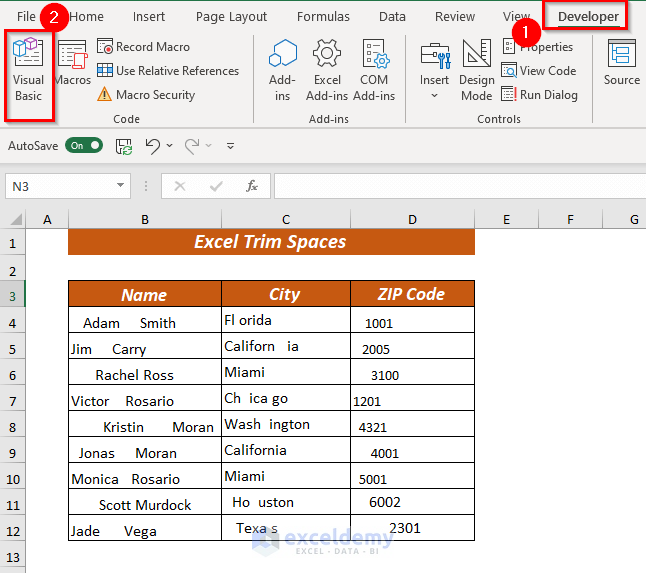
- This opens a new window for Microsoft Visual Basic for Applications (VBA).
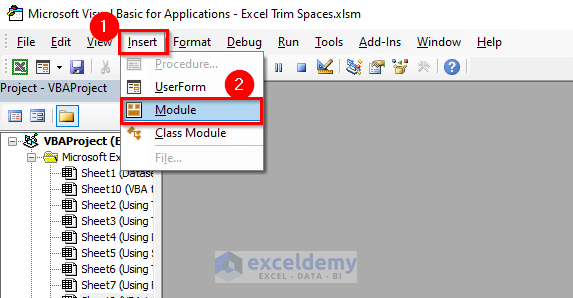
- In the VBA window, click Insert and choose Module.
- Type the following code in the opened module to trim leading spaces:
Sub Trim_Leading_Spaces()
Dim Rg As Range
Dim WRg As Range
On Error Resume Next
Excel_Title_Id = "Trim Leading Spaces"
Set WRg = Application.Selection
Set WRg = Application.InputBox("Range", Excel_Title_Id, WRg.Address, Type:=8)
For Each Rg In WRg
    Rg.Value = VBA.LTrim(Rg.Value)
Next
End Sub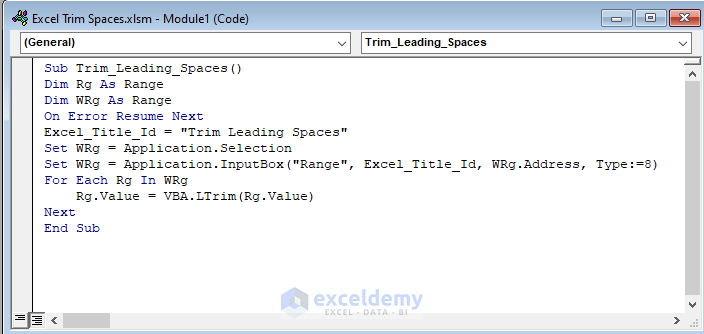
In the Sub Trim_Leading_Spaces(), I declared two variables: Rg and WRg , both of which are of type Range.
Next, I named the dialog box “Trim Leading Spaces” and utilized a For loop to trim each selected cell.
Finally, I employed the VBA LTRIM function to remove leading spaces.
- Save the code and return to your worksheet.
- To apply the VBA:
- If you haven’t already selected a cell range, you can do so now.
- Go to the View tab, click Macros, and choose View Macros.
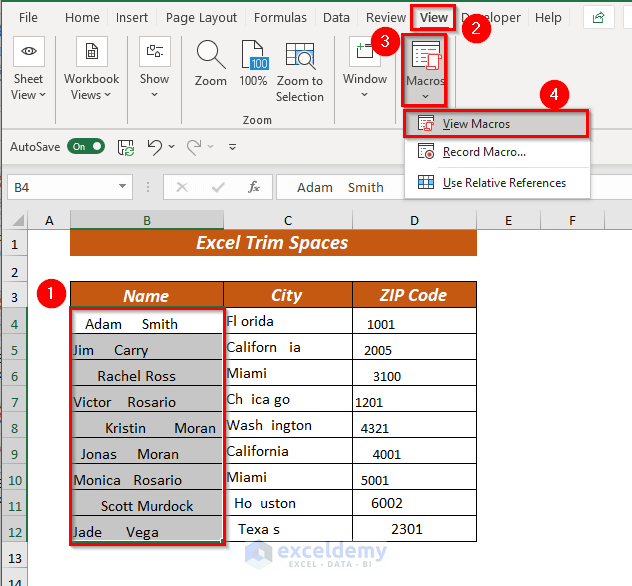
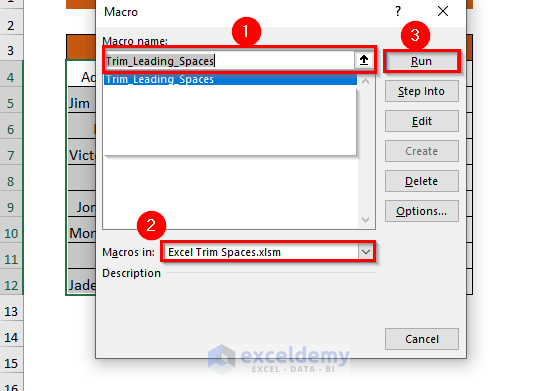
- In the dialog box:
- Select Trim_Leading_Spaces as the macro name.
- Choose Excel Trim Spaces.xlsm as the macro location.
- Click Run.
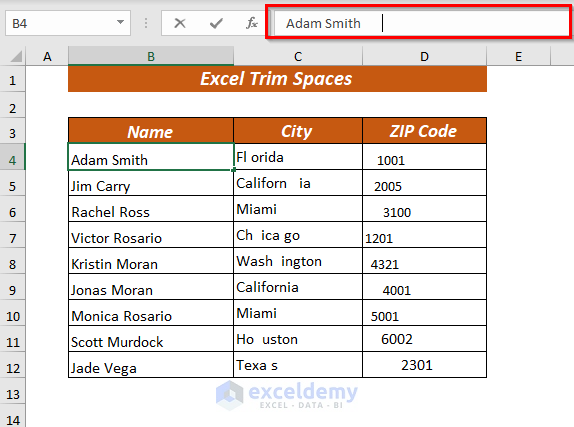
- A message box will display your selected range.
- Click OK.

All leading spaces in the specified range will be trimmed.
Method 8 – Using VBA to Trim Trailing Spaces
- If desired, you can trim trailing spaces using Visual Basic (VBA).
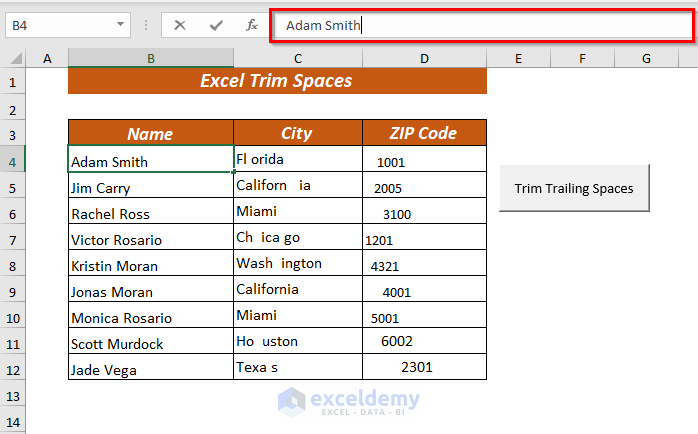
- Let’s assume you want to trim trailing spaces from the Name column.
- To open the Visual Basic for Applications window, follow the steps explained in section 7.
- In the VBA window, create a new module and type the following code:
Sub Trim_Trailing_Spaces()
Dim rng As Range
For Each rng In Selection.Cells
rng = Trim(rng)
Next
End Sub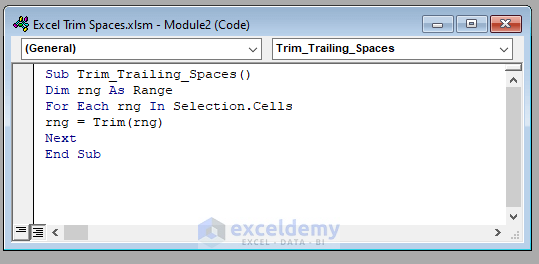
- In the Sub Trim_Trailing_Spaces(), I declared the rng variable as a Range.
- The code uses the VBA TRIM function to remove trailing spaces.
- Save the code and return to your worksheet.
- Go to the Developer tab, click Insert, and select Button from Form Controls.
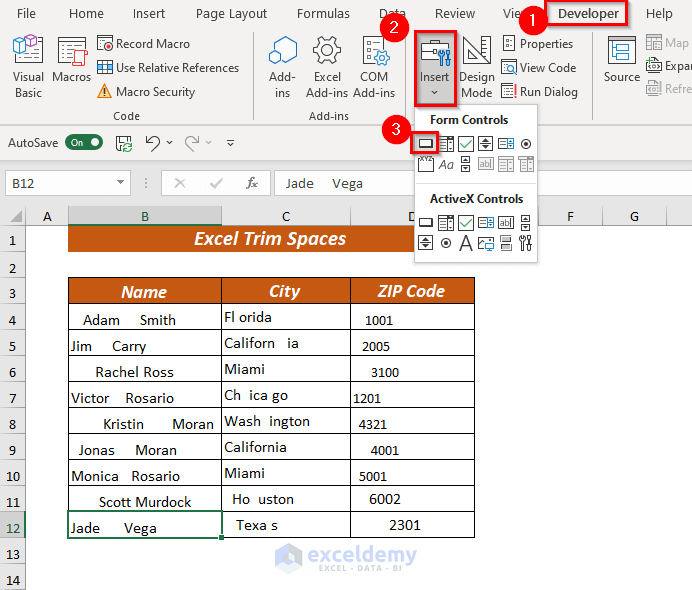
- Drag the button to where you want it and assign a caption (e.g., “Trim Trailing Spaces”).
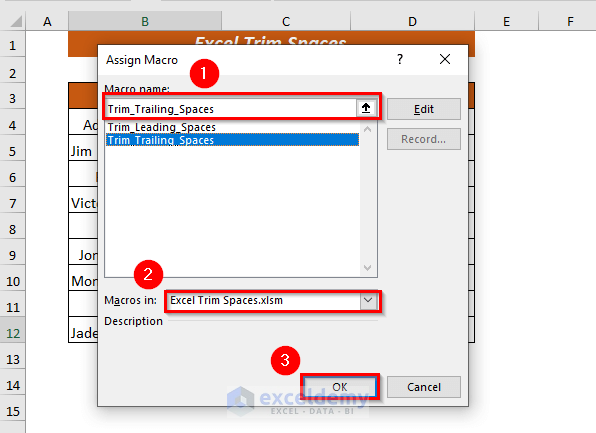
- When the Assign Macro dialog box appears:
- Choose the macro name (Trim_Trailing_Spaces).
- Select the workbook containing the macro (e.g., Excel Trim Spaces.xlsm).
- Click OK and rename the button.
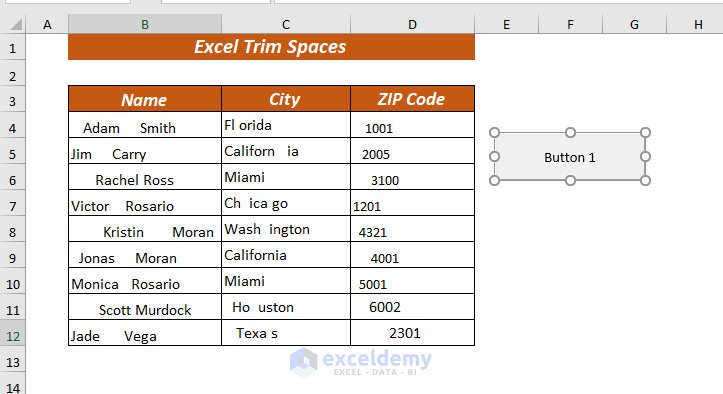
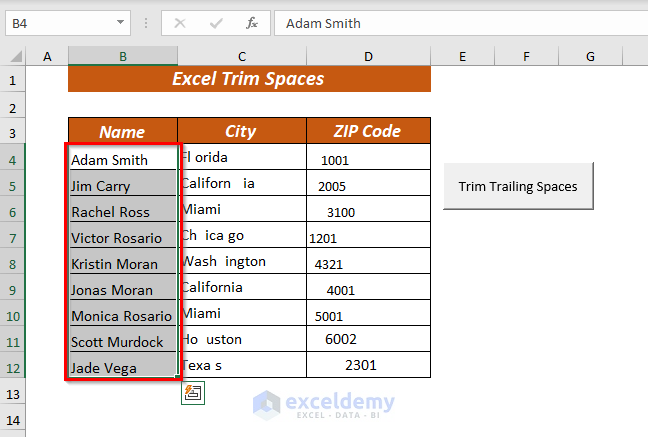
- Click the button to run the code.
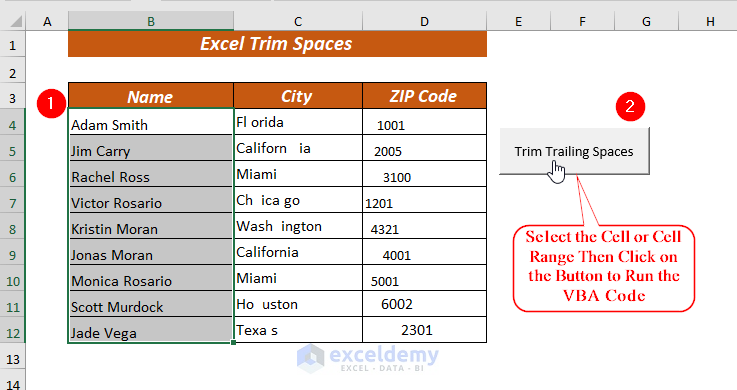
- All trailing spaces from the Name column will be trimmed.
Things to Remember
The TRIM function treats all values as string values, so exercise caution when trimming spaces from numeric data.
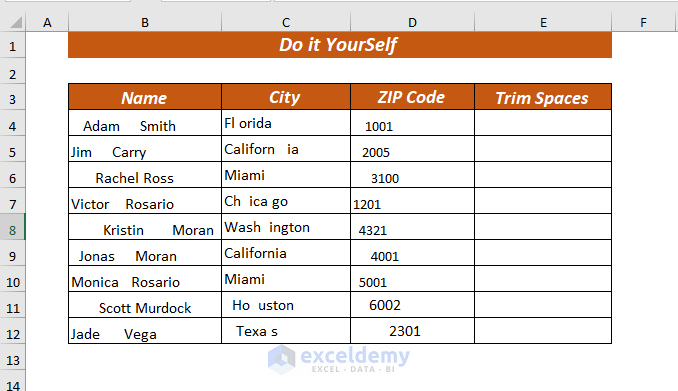
Practice Section
I’ve provided a practice sheet in the workbook for you to practice the methods explained above for trimming spaces. You can download it from the link above.
Download to Practice
You can download the practice workbook from here:
Related Articles
<< Go Back to Excel TRIM Function | Excel Functions | Learn Excel
Get FREE Advanced Excel Exercises with Solutions!
