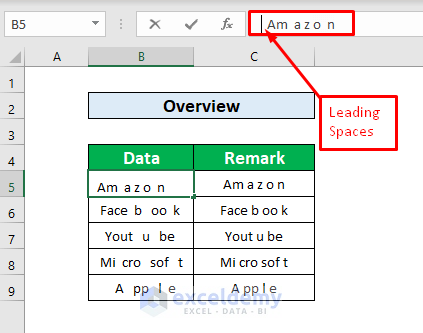
The Trim Function can trim extra leading and trailing spaces within text cells in Excel. Normally, the spaces given before a word are called leading spaces.
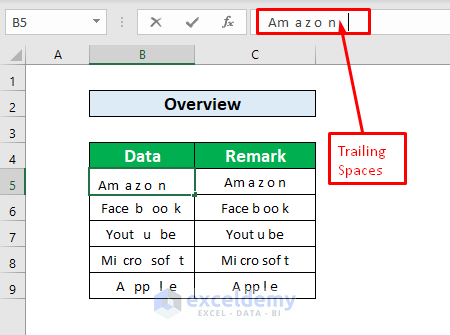
The spaces given at the end of a word are called Trailing spaces.
The TRIM Function is,
Where text is the required argument for the TRIM Function to trim text or numbers.

From our dataset, we’ll learn how the TRIM function works. Please follow the instructions to learn the working procedure of the TRIM function!
Steps:
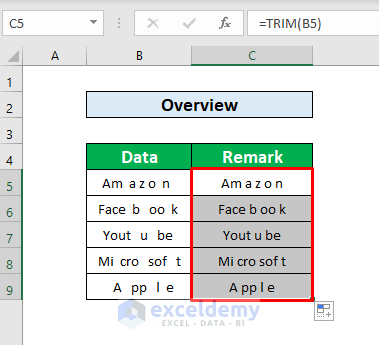
- Select a cell where we will type the TRIM function; from our dataset, we select cell C5 and type the TRIM function. The TRIM function is,
=TRIM(B5)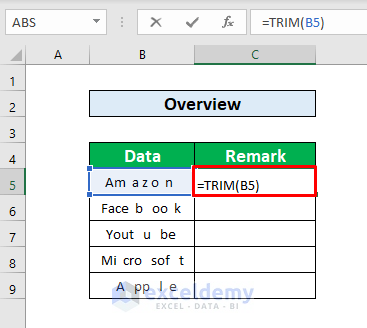
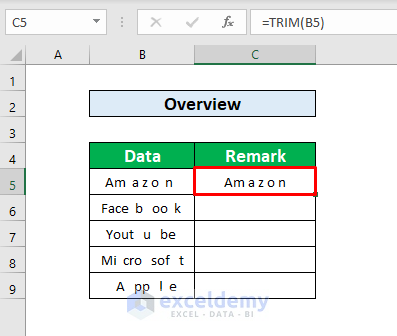
- Press Enter to remove spaces before and after Am a z o n, as given in the screenshot below.
- Place your cursor on the Bottom-Right of cell C5, and an autoFill sign will appear in front of you. Drag it downward.
- By dragging the autoFill sign downward, you can trim spaces to column B in column C.
Method 1 – Apply the SUBSTITUTE Function to Fix the TRIM Function Not Working
1.1 Insert the Basic SUBSTITUTE Function
Steps:
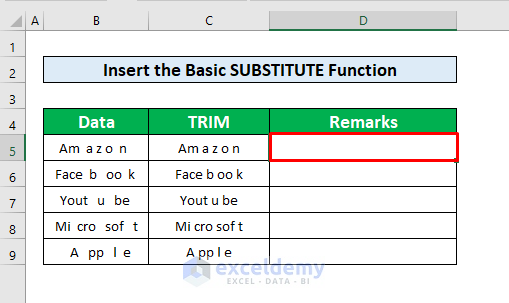
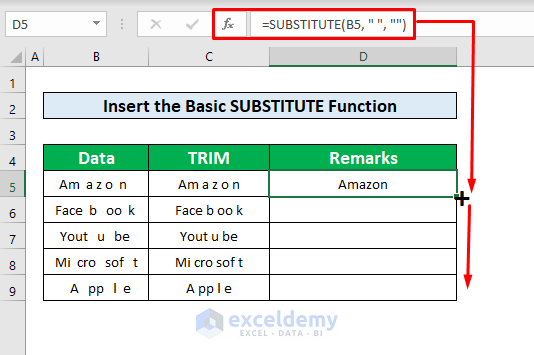
- Select a cell where we’ll apply the SUBSTITUTE function. We’ll select cell D5 from our dataset to apply the SUBSTITUTE function.
- Enter the SUBSTITUTE function in the Formula Bar. The SUBSTITUTE function in the Formula Bar is,
=SUBSTITUTE(B5, " ", "")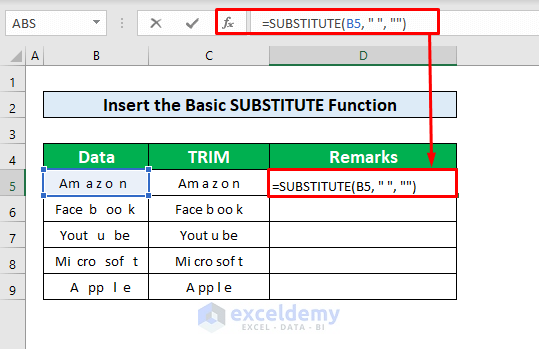
- Press Enter to get Amazon in cell D5 as the return of the SUBSTITUTE function.
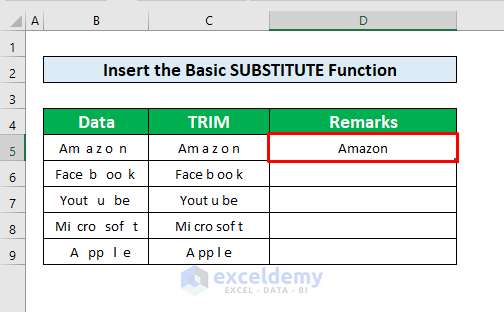
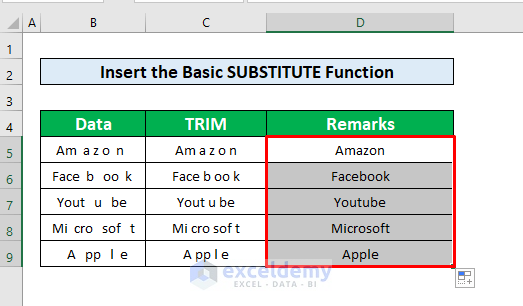
- Place your cursor on the Bottom-Right side of cell D5 and an autoFill sign pops up.
- Drag the autoFill sign downward.
- After completing the above process, you will be able to replace Spaces with Empty in the entire column D by applying the SUBSTITUTE function; the TRIM function can not do that, as shown in the screenshot.
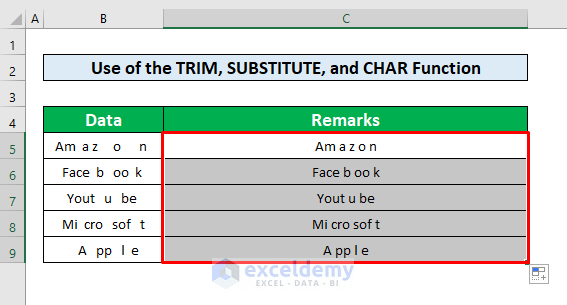
1.2 Use of the SUBSTITUTE and CHAR Functions
Steps:
- Select cell C5 from our dataset to apply the TRIM, SUBSTITUTE, and CHAR functions to remove extra spaces.
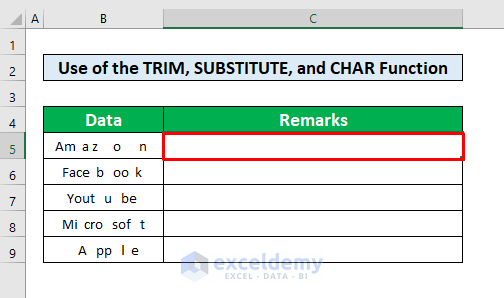
- Enter the TRIM, SUBSTITUTE, and CHAR functions in the Formula Bar and Type the SUBSTITUTE and CHAR functions inside the TRIM function in the function dialog box. The formula is:
=TRIM(SUBSTITUTE(B5,CHAR(160), 0))
- Press Enter to get Am a z o n as the output of these functions.
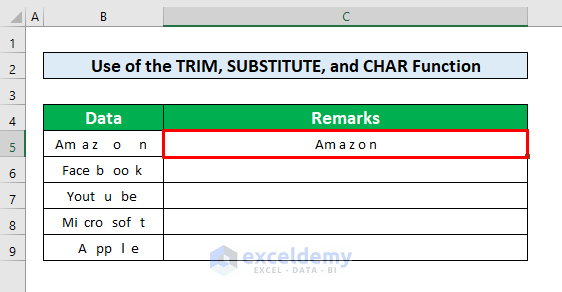
- Place your cursor on the Bottom-Right side of cell C5, and an autoFill sign pops up.
- Drag the autoFill sign downward to get your desired output.
Read More: How to Trim Right Characters and Spaces in Excel
Method 2 – Perform Find & Select Command to Fix TRIM Function Not Working
Steps:
- From your Home tab, go to Home → Editing → Find & Select → Replace

- After clicking on the Replace option, a Find and Replace window pops up.
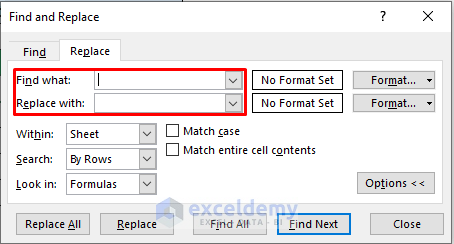
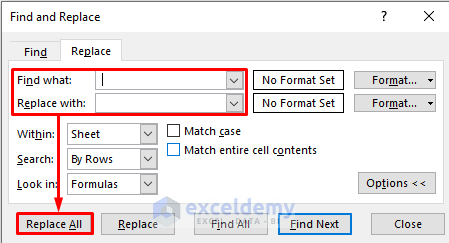
- From the Find and Replace window, Give Space in the Find what box and Replace with box keeps
- Click on the Replace All box.
- A new dialog box named Microsoft Excel appears, showing All done. We made 54 replacements.
- Press OK.
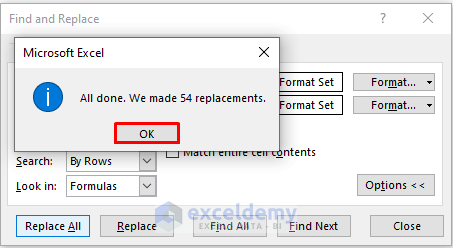
- After completing the above process, you will be able to replace Space with Empty, which the TRIM function can not do, as shown in the screenshot below.

Things to Remember
If the Excel TRIM is not working, you may run into issues besides non-breaking spaces. You may face those problems, particularly if you’re working with HTML-based source material.
The SUBSTITUTE function is useful for changing any ASCII code with any other code.
Download the Practice Workbook
Download this workbook to practice.
Related Articles
<< Go Back to Excel TRIM Function | Excel Functions | Learn Excel
Get FREE Advanced Excel Exercises with Solutions!
