Method 1 – Using Convert to Range Feature to Enable Merging Cells in Table
Steps:
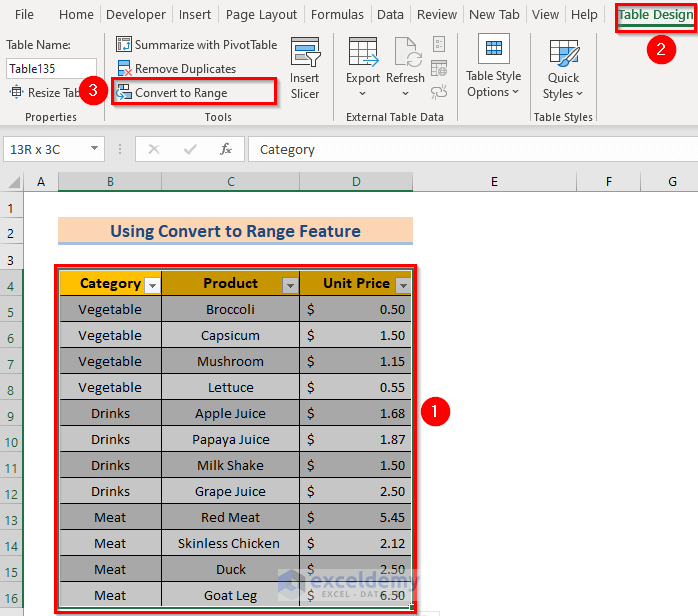
- Select the entire dataset. Excel displays the Table Design tab along with the other tabs. Go to Table Design > Select Convert to Range (from the Tools section).
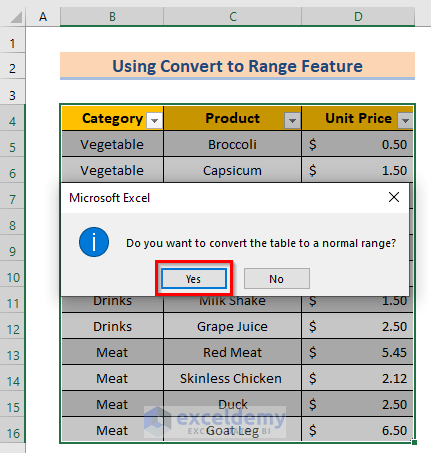
- Excel displays a confirmation pop-up saying it’ll convert the Table to a normal range. Click YES to confirm the application.
- Select the desired cells, Go to Home > Alignment section > Select Merge & Center.
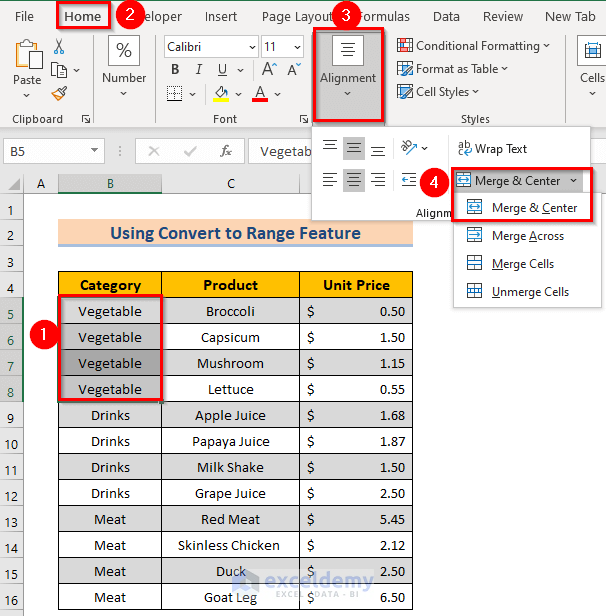
- Selecting Merge & Center makes Excel show a warning that only the upper left value will remain after merging. Click OK to get the desired result.

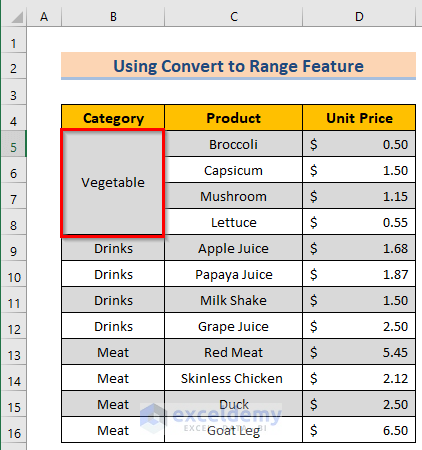
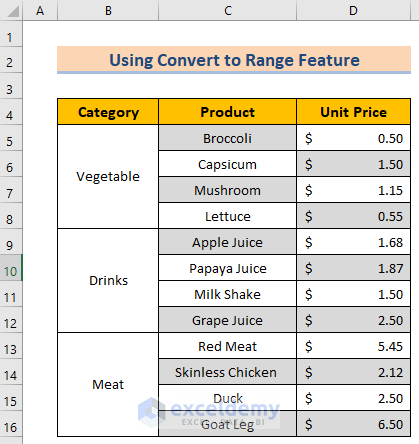
- You will get the result for the particular group. It is very important to remember that the merged cell will contain the first cell’s value like the image below.
- Repeat the whole process for all the groups, you will get the desired result.
Method 2 – Use of Context Menu to Merge Cells in Table!
Steps:
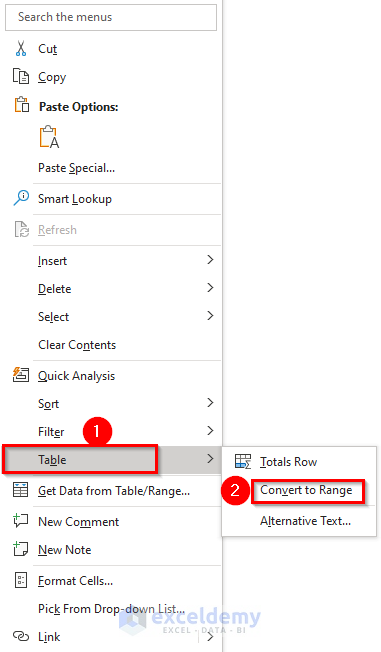
- Select the entire data table and right-click on the table.
- The Context Menu will appear on the screen. From the Context Menu, choose the Table option > Select Convert to Range.
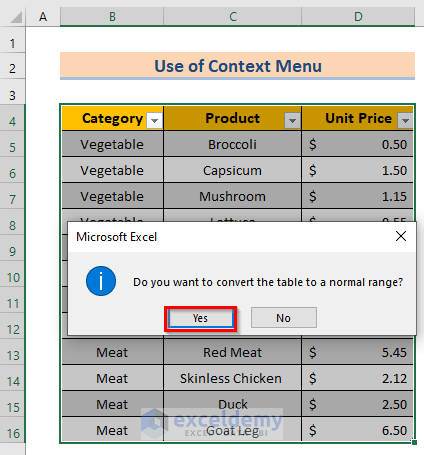
- Excel displays a confirmation window saying it’ll convert Excel Table to the normal range. Click YES to apply the application.
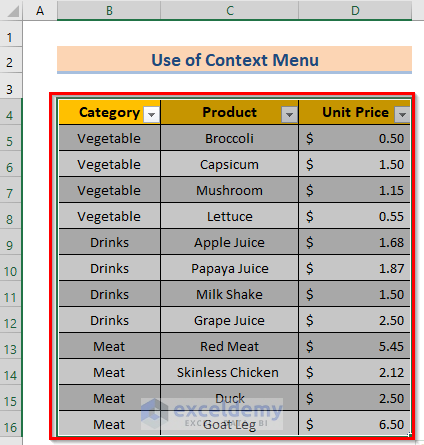
- Repeat the last step of the first method(select the desired cells>go to Home > Alignment section > Select Merge & Center), and you will get the desired result for every group like the below image.
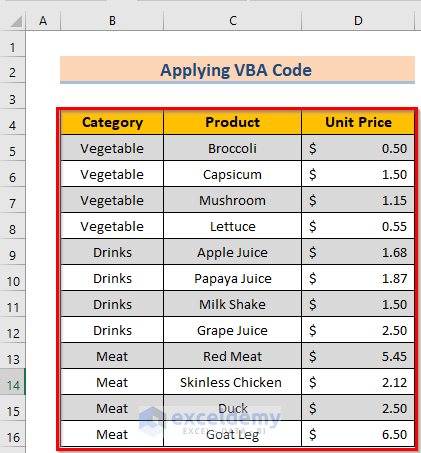
Method 3 – Applying VBA Code
Steps:
- Press ALT+F11 to open Microsoft Visual Basic in the window, go to the Insert tab (from the Toolbar) > Select Module (from the options).

- Insert the following macro code in the module.
Sub TableToRange()
Dim wrkSheet As Worksheet
Dim wrkList As ListObject
Set wrkSheet = ActiveWorkbook.ActiveSheet
For Each wrkList In wrkSheet.ListObjects
wrkList.Unlist
Next
End Sub
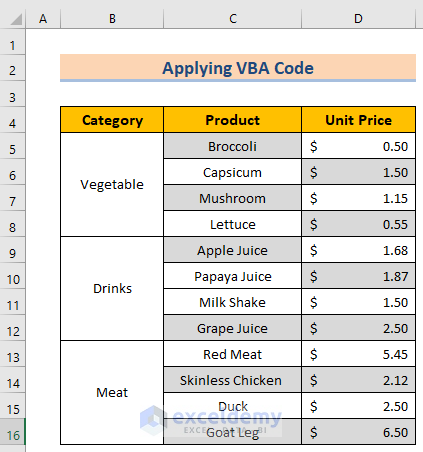
- Use the F5 key to run the macro. After returning to the worksheet, you see no Table Design tab though you click on cells within the pre-existing Table This indicates the confirmation of the conversion of the Excel Table to a normal range.
- Repeat the last step of the first method(select the desired cells>go to Home > Alignment section > Select Merge & Center), and you will get the desired result for every group, like the image below.
Things to Remember
- In all cases, if you merge the cells, the merged cell will show the result of the first cell.
- Moreover, the first method is the easiest among all methods. In the case of the second and third methods follow a similar method as the first one with the slightest change.
- Lastly, we recommend downloading the Excel file and having a look while reading the article to have a better understanding.
Download Practice Workbook
You can download the practice workbook from here.

