Here’s an overview of a checkbook register with reconciliation in Excel.
What Is Reconciliation?
Reconciliation is a technique in accounting that analyzes two sets of records to ensure that the numbers are accurate and consistent. It verifies the consistency, accuracy, and completeness of the accounts in the general ledger.
Bank reconciliation, vendor reconciliation, business-specific reconciliation, intercompany reconciliation, and customer reconciliation are the five main categories of account reconciliation. In this article, we will focus mainly on Bank Reconciliation.
How to Create an Excel Checkbook Register with Reconciliation: Step-by-Step Procedures
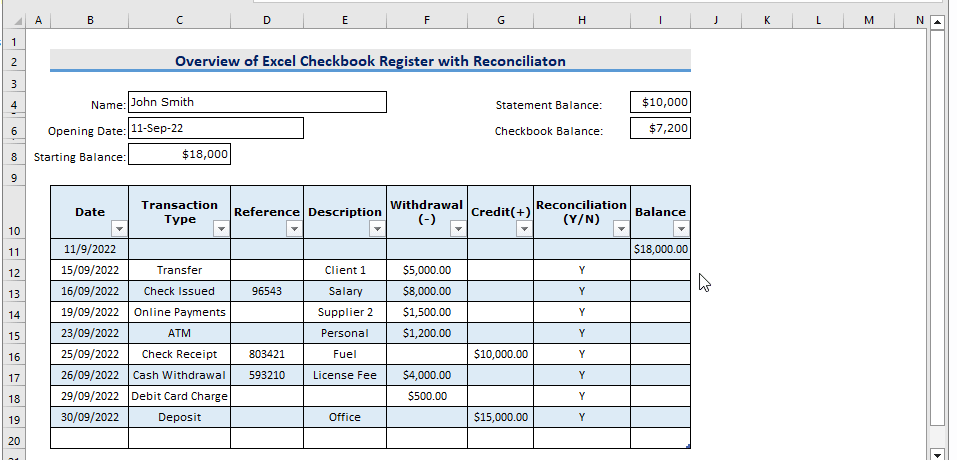
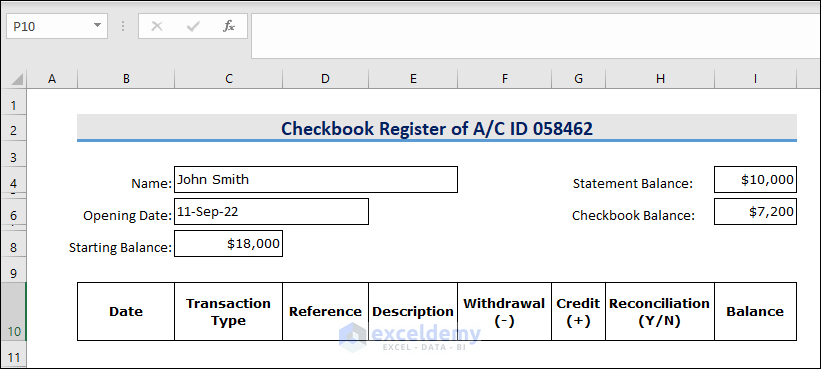
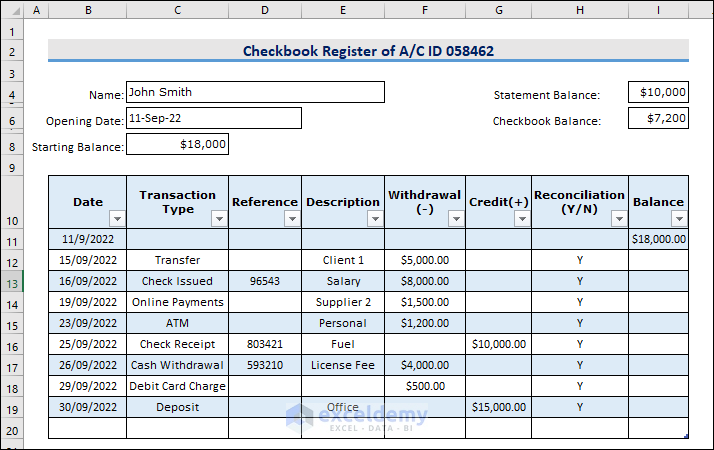
We will show the bank account information of a person named John Smith. He created his bank account in September 2022, and the Excel sheet we will create will show all his transactions in September 2022.
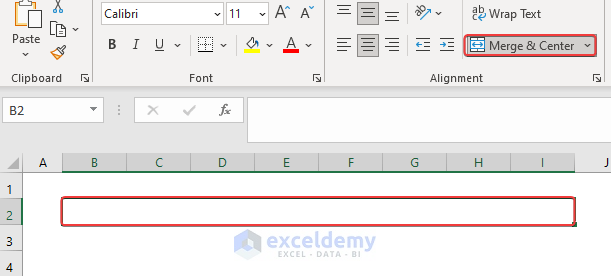
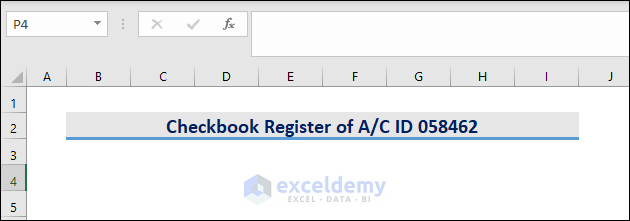
Step 1 – Create a New Excel File and Give it a Title
- Open a fresh Excel Workbook.
- Take some cells from one of the top rows and merge those cells into one. We will take B2:I2 in this case and use Merge & Center.
- We put the value Checkbook Register of A/C ID 058462. This is the “title.”
- Modify the formatting of the cell to make it pop.
Read More: How to Create Sales and Purchase Ledger in Excel
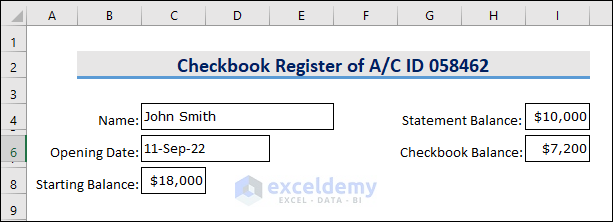
Step 2 – Insert the Information of the Account Holder
- Format the space for name as text, the opening date as date, and the remaining cells as Currency.
- Enter the information.
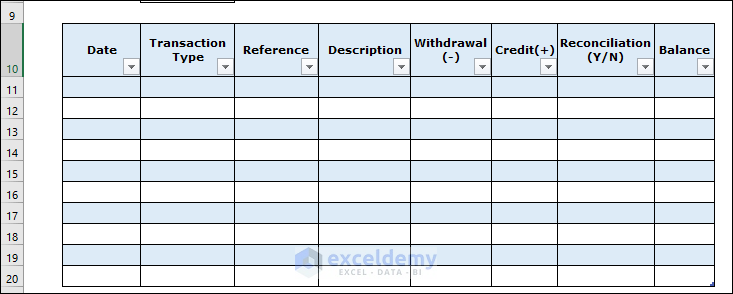
Step 3 – Create Columns in the Checkbook Register with Reconciliation
- We will create 8 columns, each with unique column headers and unique functions.
- See the image for the guide for cells B10 to I10.
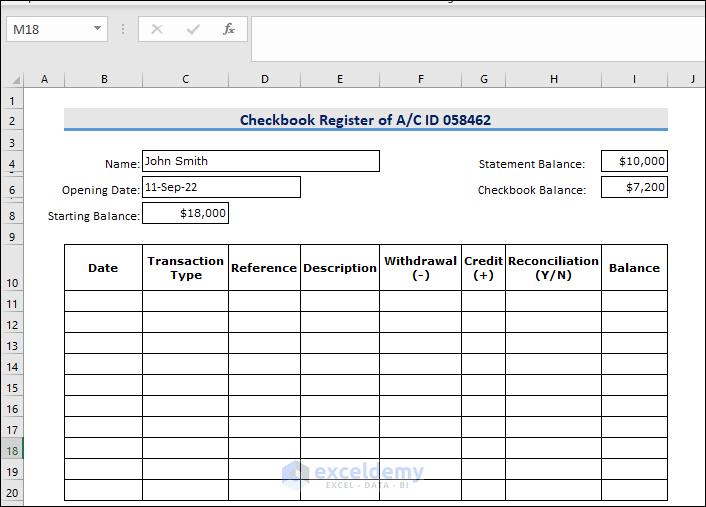
- Insert blank rows as needed.
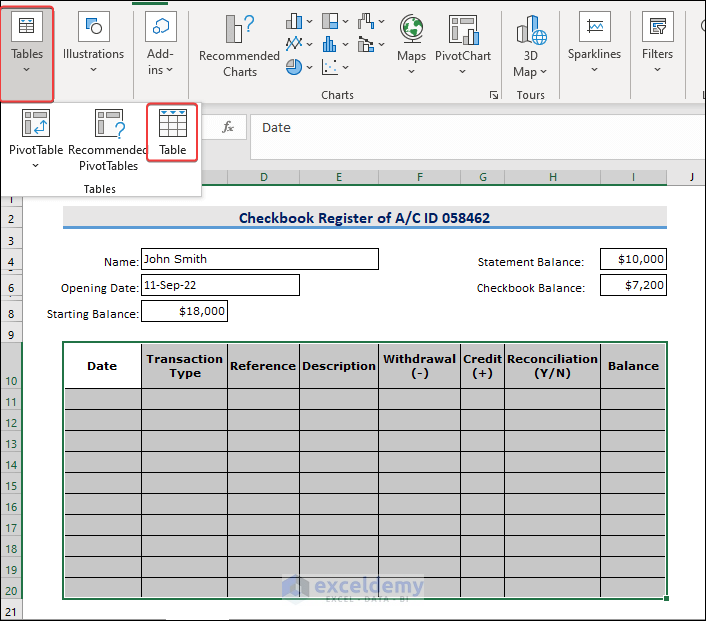
Step 4 – Convert the Range into a Table
- Select all the cells after the headers, go to the Tables ribbon, and hit Table.
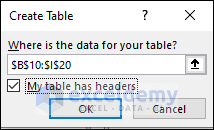
- A dialog box appears.
- Select My Table has Headers and hit OK.
- We get our desired table.
Step 5 – Input the Checkbook Register Values
- We will insert some random data into the rows.
- For the first row, copy the value from Starting Balance and leave the other values empty.
Step 6 – Insert Formula in the Balance Column
- Insert the following formula into I12.
=IF(ISBLANK(B12),"",I11-F12+G12)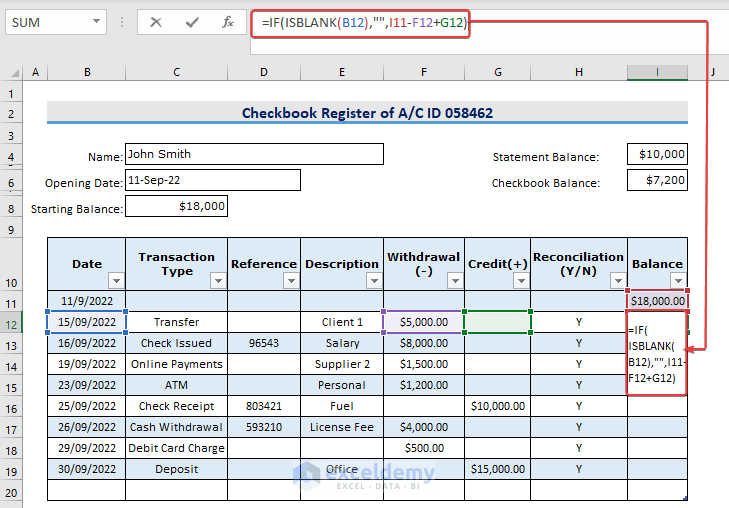
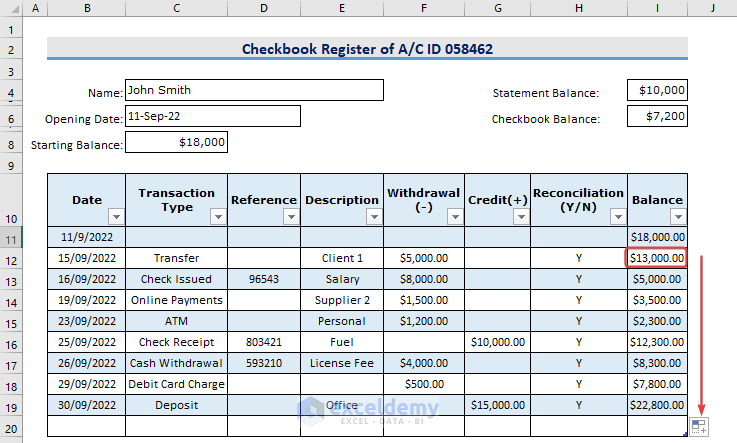
- Hit Enter and use the AutoFill feature to fill the remaining cells.
Download the Practice Workbook
<< Go Back to Accounting Templates | Excel Templates
Get FREE Advanced Excel Exercises with Solutions!
