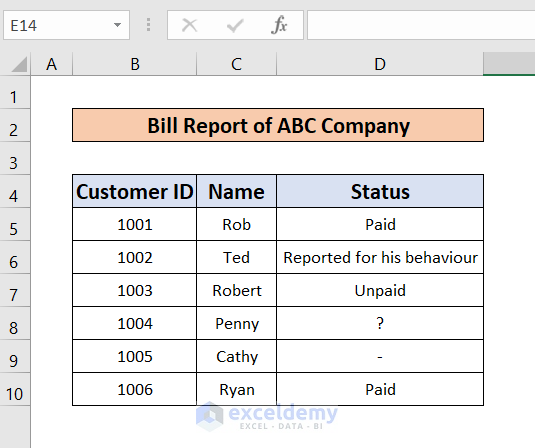
Below is a dataset on the Bill Report of ABC Company. The dataset has three columns: Customer ID, Name, and Status. Penny’s status is unknown, and Cathy’s status is not available.
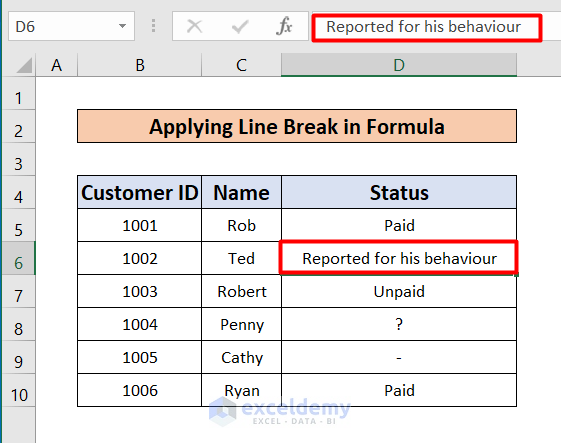
Method 1 – Applying a Line Break Using the CHAR(10) Function
Steps:
- Select cell D6 and apply a Line Break.
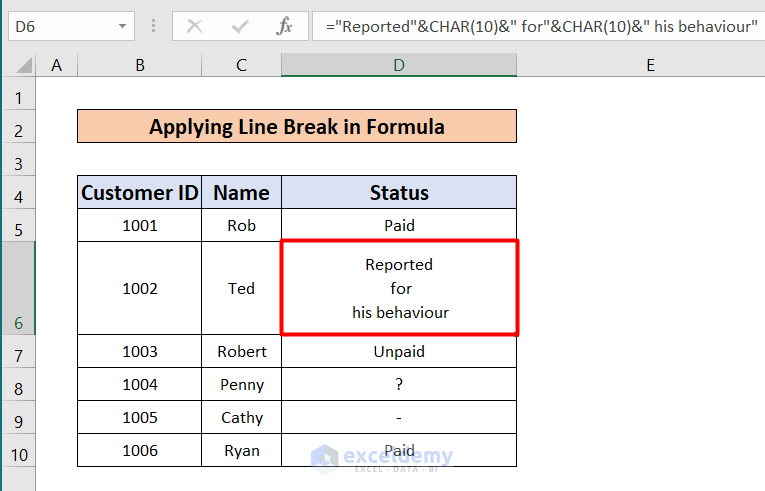
- Enter the following formula in cell D6:
="Reported"&CHAR(10)&" for"&CHAR(10)&" his behaviour" 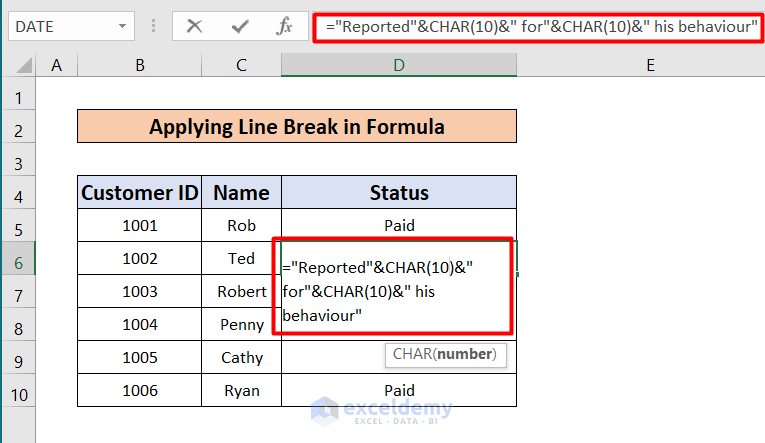
- The result should look like the following picture.
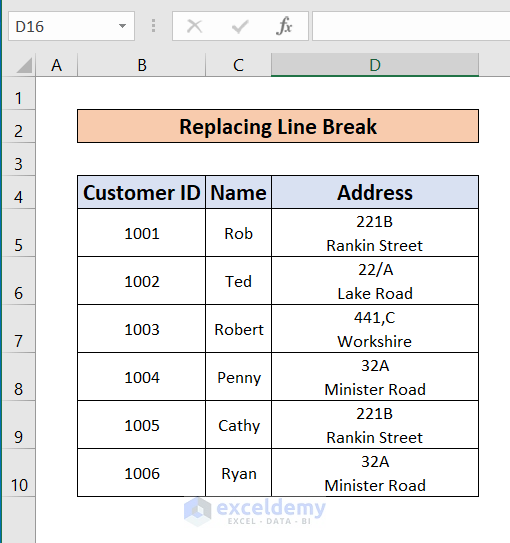
Method 2 – Replacing a Line Break Using the CHAR(10) Function
In the modified dataset, the status column was replaced with an address. Every address in this dataset is under the Line Break command.
Steps:
- Add a new column called Address.
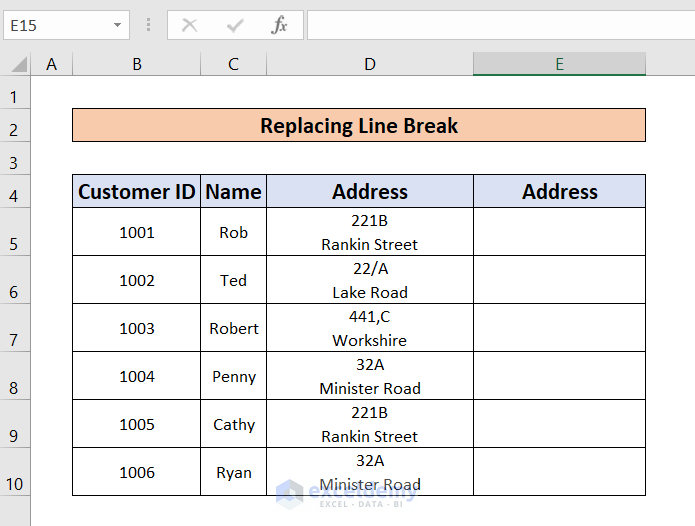
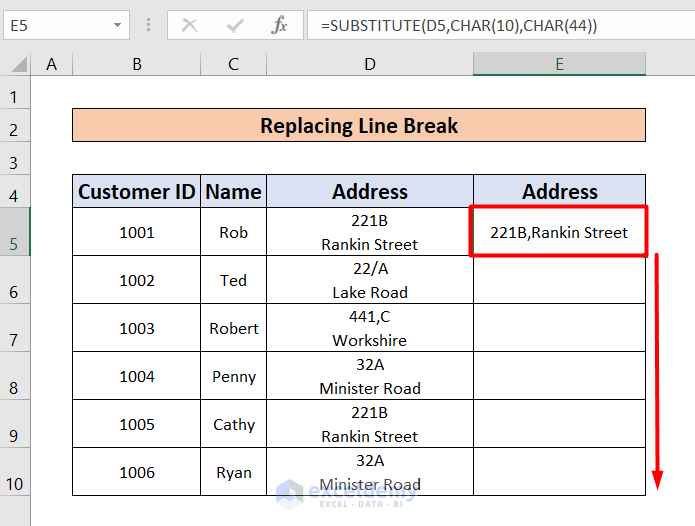
- Enter the following formula in cell E5:
=SUBSTITUTE(D5,CHAR(10),CHAR(44))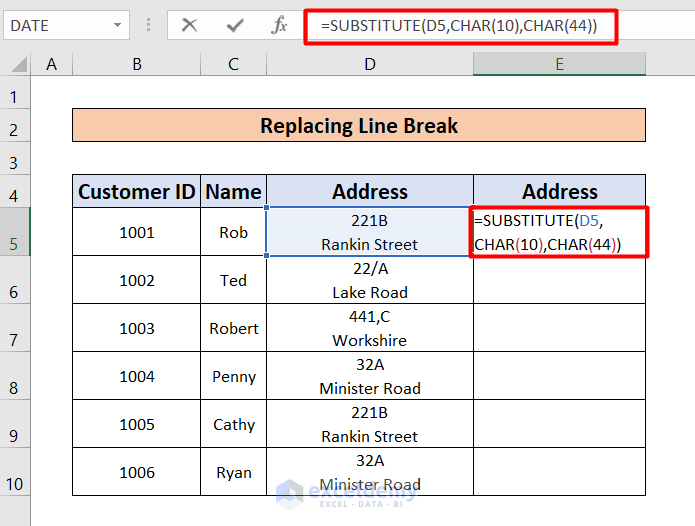
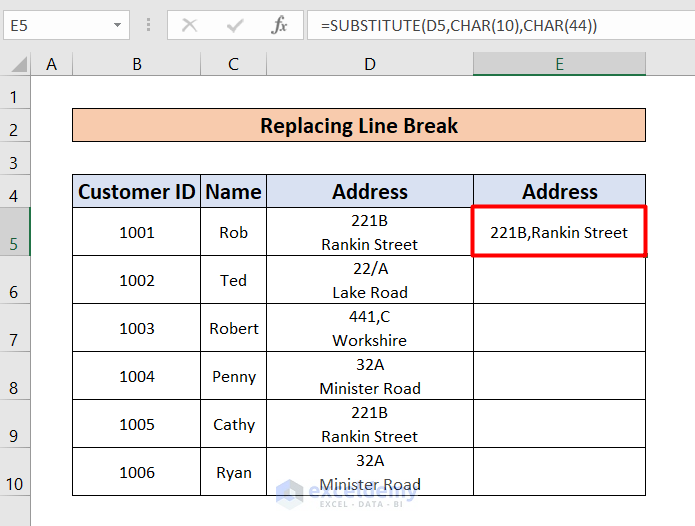
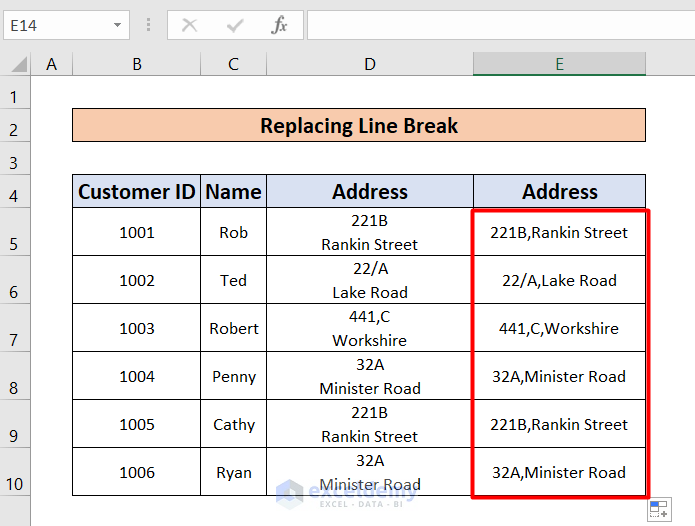
- The result should look like the picture below.
- Fill Handle the formula from cell E5 to E10.
- The result should look like the picture below.
Read More: How to Convert Excel ASCII to Char
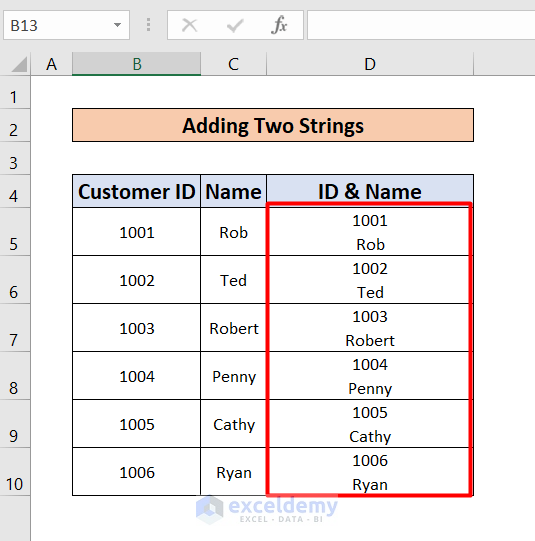
Method 3 – Adding Two Strings Using the CHAR(10) Function
Steps:
- Select cell D5 and enter the following formula:
=B5&CHAR(10)&C5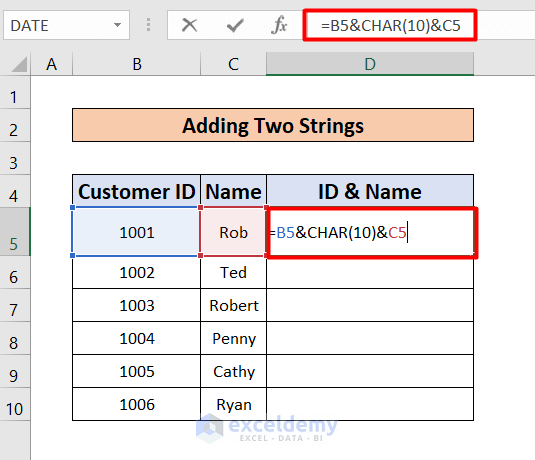
- Fill Handle the equation from cell D5 to D10.
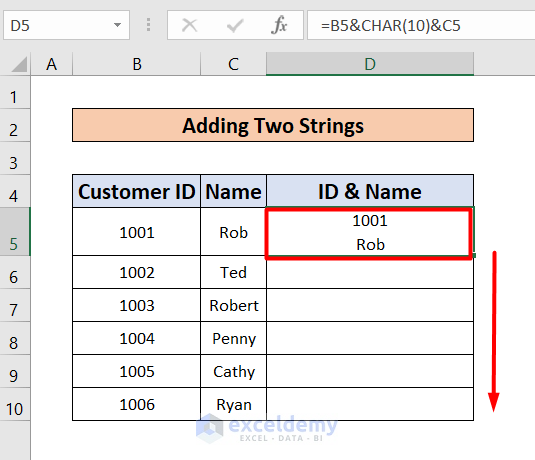
- The result should look like the picture below.
Read More: How to Use Code 9 with Excel CHAR Function
Download the Practice Workbook
Download the practice workbook to practice yourself.
Related Articles
- How to Use CHAR(32) Formula in Excel
- How to Use CHAR(34) Formula in Excel
- How to Insert a New Line Using CHAR Function in Excel
<< Go Back to Excel CHAR Function | Excel Functions | Learn Excel
Get FREE Advanced Excel Exercises with Solutions!
