Introduction to The CHAR Function
Summary
The CHAR function returns a character specified by a code number from your computer’s character set. It’s particularly useful for translating ASCII code page numbers into actual characters or inserting line breaks into text.
Syntax
The syntax for the CHAR function is as follows:
CHAR(number)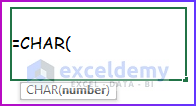
Argument
| Argument | Required/Optional | Explanation |
|---|---|---|
| number | Required | An integer between 1 and 255 that specifies the character you want to retrieve. The character corresponds to the character set used by your computer. |
Note: Different operating systems may yield different results for the same number. For example, Windows OS uses the ANSI character set, while Macintosh uses the Macintosh character set.
Return
The CHAR function will return a character specifically for the number given as an argument.
Read More: Character Codes for CHAR Function in Excel
CHAR(34) Function in Excel
The CHAR(34) function in Excel will return a double quote (“) as the output after inserting it in any phrases or Excel formulas.
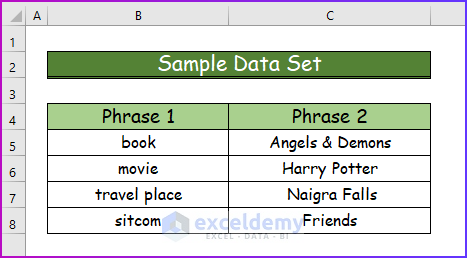
Dataset Overview
We’ll use the following data set to complete the examples. We will join the phrases from the following image and turn them into complete sentences.
Example 1 – Inserting Double Quotes Between Phrases
In the first example, we will simply insert double quotes between two phrases using the CHAR(34) function. We will also demonstrate the difference between inserting double quotes in a phrase manually and using this function.
Manual Approach
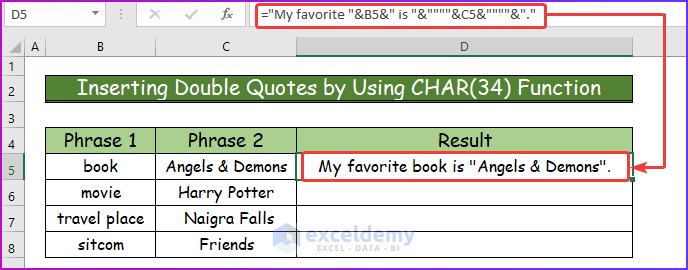
- To make a complete sentence and add double quotes, see the following sequence in cell D5.
="My favorite "&B5&" is "&""""&C5&""""&"."- To add the double quotes inside the phrase of cell C5, we manually added two extra double quotes(“”) before and after C5 in the above sequence.
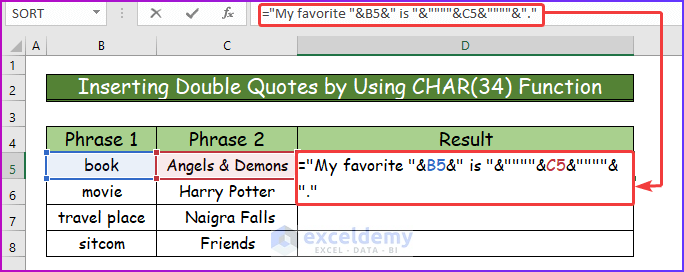
- Press Enter to see the result. You will find the double quotes before and after the book name in cell C5.
- Applying too many double quotes will confuse the users.
Using CHAR(34) Function
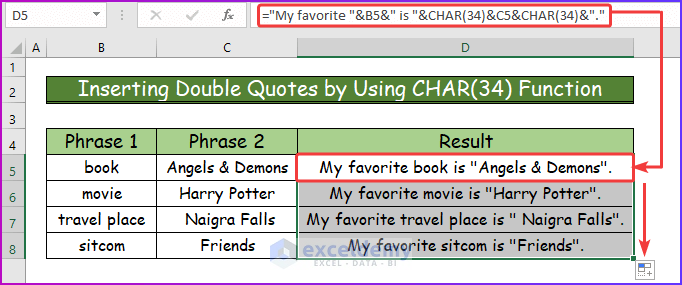
- In the following steps, we will use the CHAR(34) function to add the double quotes.
- In cell D5, insert the following formula containing the CHAR(34) function instead of the double quotes:
="My favorite "&B8&" is "&CHAR(34)&C8&CHAR(34)&"."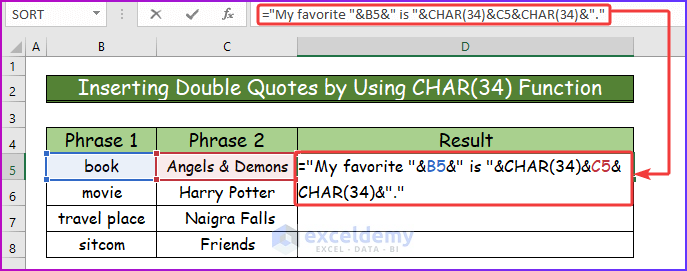
- Press Enter to see the complete sentence in cell D5.
- Use AutoFill to get all the completed sentences.
Read More: How to Use CHAR(10) Function in Excel
Example 2 – Applying CHAR(34) Function with Multiple Functions
We will apply the CHAR(34) function in this second example inside multiple functions. We will use the IF function to demonstrate this example. Generally, users get the return from the IF function in a text format without any symbol or quote. So, we will use the CHAR(34) function to show the output from the IF function together with double quotes.
- In cell D5, insert the following formula:
=IF(C5>B5,CHAR(34)&"Profit"&CHAR(34),CHAR(34)&"Loss"&CHAR(34))- In the above formula, we added the CHAR(34) function before and after the outputs.
- It will return the specific output with double quotes.
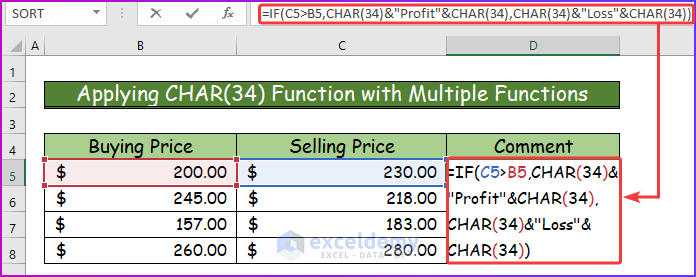
- Press Enter to see the output with double quotes around it.
- Use Fill Handle to get the desired output for the lower cells as well.

Read More: How to Use CHAR(32) Formula in Excel
Download Practice Workbook
You can download the practice workbook from here:
Notes
- The CHAR function returns a text value.
- It was introduced in Excel 2000 and is available in all subsequent versions.
- It’s the inverse of the CODE function, which gives the code for a given character.
- For numbers greater than 255, consider using the UNICHAR function.
Related Articles
- How to Use Code 9 with Excel CHAR Function
- How to Convert Excel ASCII to Char
- How to Insert a New Line Using CHAR Function in Excel
<< Go Back to Excel CHAR Function | Excel Functions | Learn Excel
Get FREE Advanced Excel Exercises with Solutions!
