How to Space Rows Evenly in Excel (5 Methods)

Get FREE Advanced Excel Exercises with Solutions!
If you are looking for some special tricks to space rows evenly in Excel, you’ve come to the right place. In Microsoft Excel, there are numerous ways to space rows evenly in Excel. In this article, we’ll discuss five methods to space rows evenly in excel. Let’s follow the complete guide to learn all of this.


How to Space Rows Evenly in Excel: 5 Easy Methods

We will use five effective and tricky methods to space rows evenly in Excel in the following section. This section provides extensive details on five methods.  You should learn and apply all of these, as they improve your thinking capability and Excel knowledge.


1. Use of Row Height Command

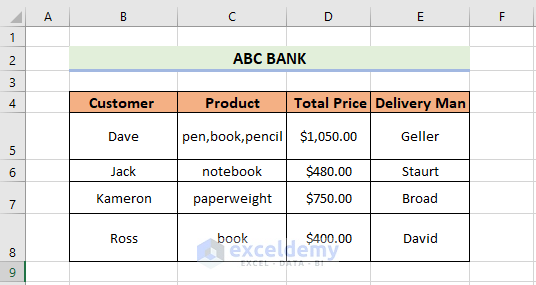
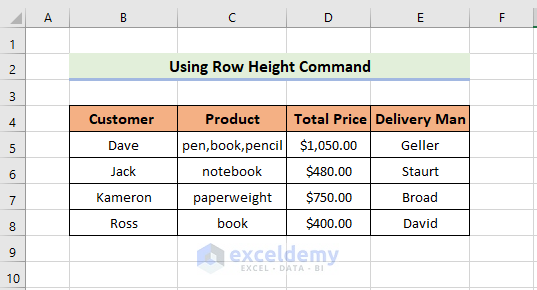
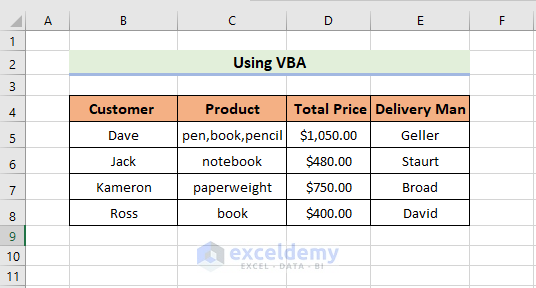
Here, we have a dataset containing the customer names, products, prices, and delivery man names of ABC Bank. Our main goal is to space rows evenly. Columns A, B, C, and D, as well as whole columns within the spreadsheet, can be accessed by this method. You have to follow the following steps.

Use of Row Height Command

📌 Steps:

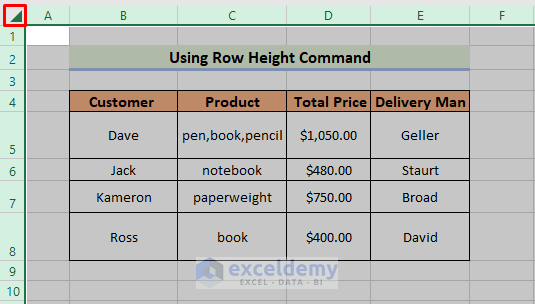
  • Firstly, click on the “Select All” option, which will select every cell in the spreadsheet.

Use of Row Height Command

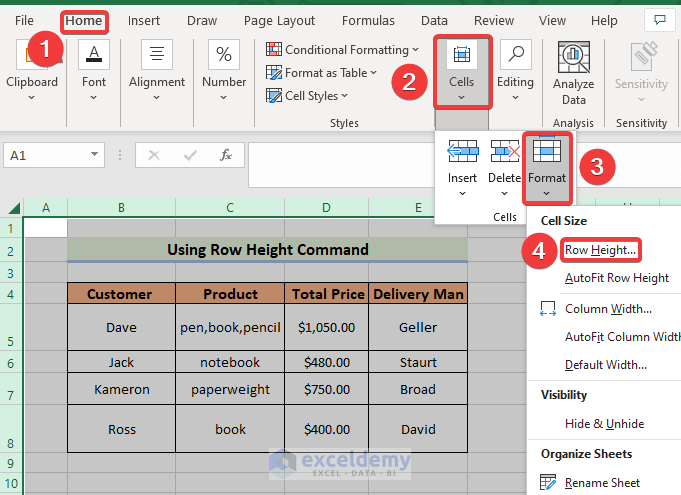
  • Next, go to the Home tab, from the Cells group, and select Format. Finally, select the Row Height command.

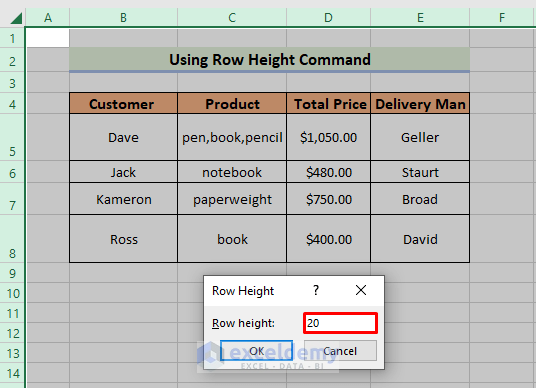
  • When the Row Height box appears, type the desired row height. Click on OK.

Use of Row Height Command

Finally, all rows will have the same height like the following:

You can also follow the procedures to space columns evenly.

Read More: How to Space out Cells in Excel


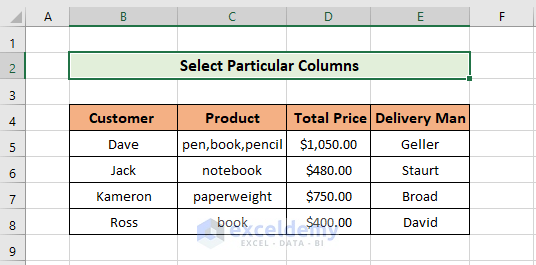
2. Select Particular Columns to Space Rows Evenly

If you want to space rows evenly only a limited number of rows, you have to follow this method which is an effective and quickest method.

📌 Steps:

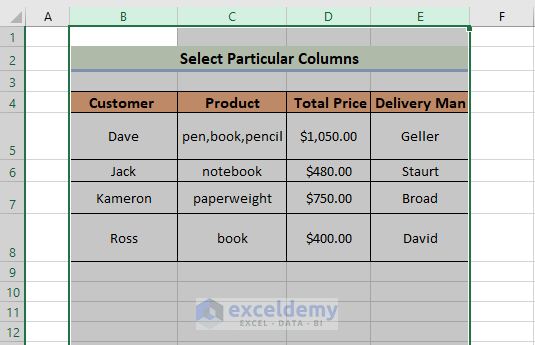
  • Firstly, select Column B with the mouse, and press the Shift key, tap on Columns C, D, E.

Select Particular Columns to Space Rows Evenly

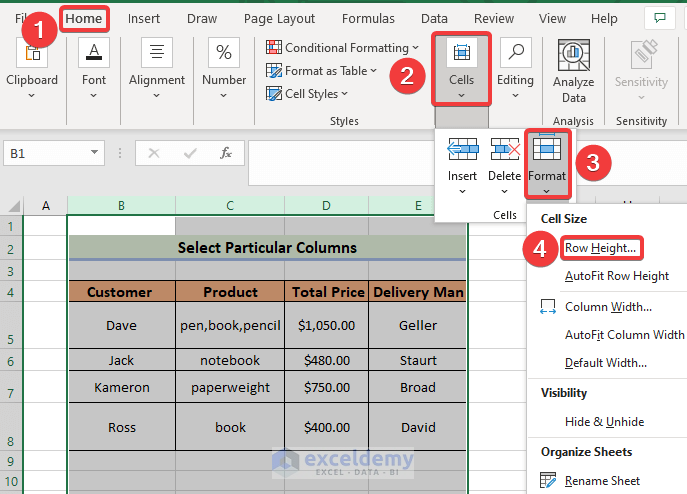
  • Next, go to the Home tab, from the Cells group, and select Format. Finally, select the Row Height command.

Select Particular Columns to Space Rows Evenly

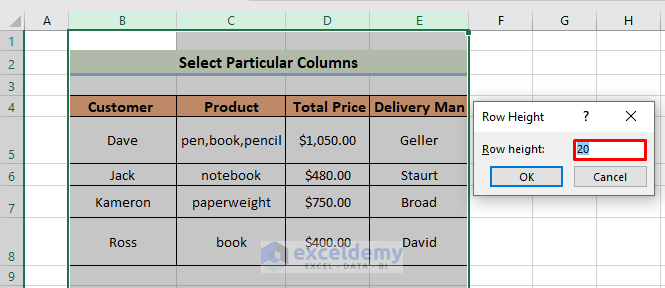
  • When the Row Height box appears, type the desired row height. Click on OK.

Finally, all rows will have the same height like the following:

Select Particular Columns to Space Rows Evenly

You can also follow the procedures to space columns evenly.

Read More: How to Add Space between Numbers in Excel


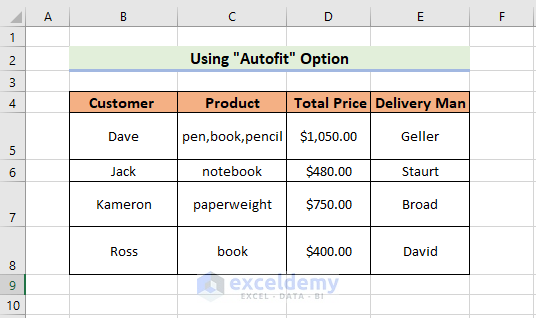
3. Utilizing “AutoFit” Option in Excel

Here, I will demonstrate another quickest method that will save your time. You have to follow the following steps.

📌 Steps:

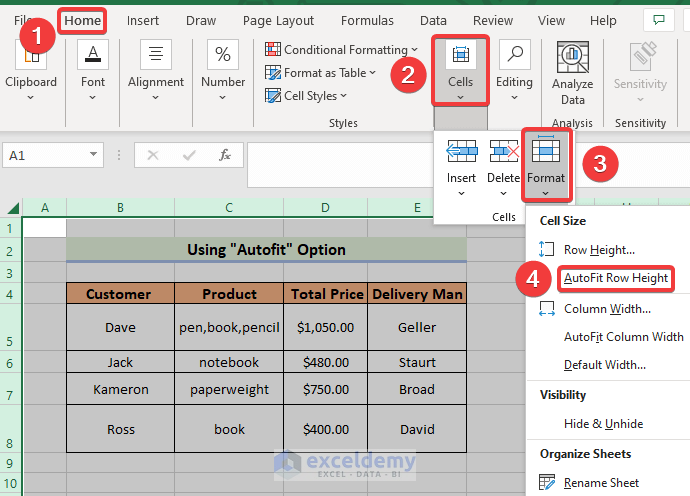
  • Firstly, click on the “Select All” option, which will select every cell in the spreadsheet.

Utilizing “AutoFit” Option in Excel

  • Next, go to the Home tab, from the Cells group, and select Format. Finally, select the AutoFit Row Height command.

Utilizing “AutoFit” Option in Excel

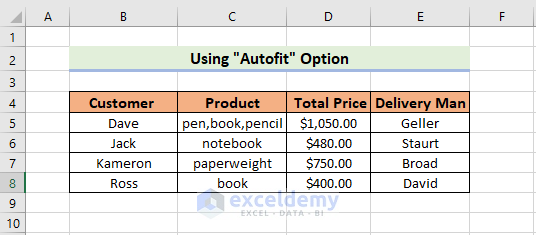
Finally, all rows will have the same height like the following:

Read More: How to Add Space Between Text in Excel Cell


4. Double-Click the Row Heading

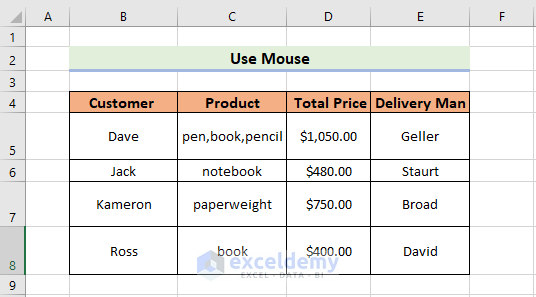
Here, is another simple method to use the mouse to space rows evenly which will definitely save you time. You have to follow the following steps.

Double Click to Space Rows Evenly

📌 Steps:

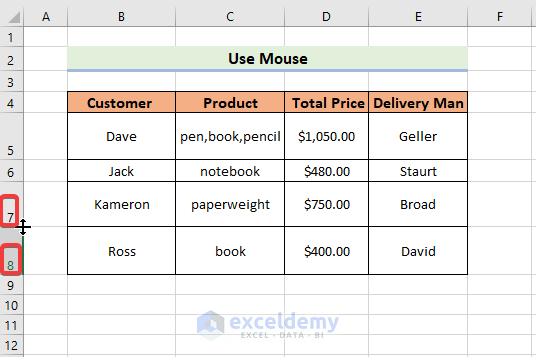
  • Firstly, point the mouse cursor on the row heading between Rows 7 & 8. The mouse cursor will automatically become a sign when you point it.
  • Now, you have to double-click on the left button of the mouse.
  • You have to follow the same procedures for other rows.

Double Click to Space Rows Evenly

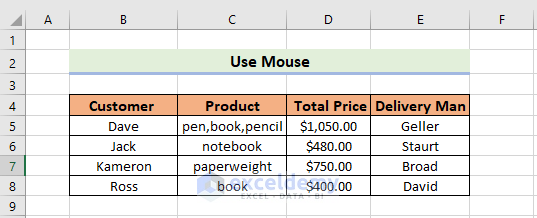
Finally, all rows will have the same height like the following:

You need to follow this quickest procedure if you have a small dataset. But if you have a large dataset, you need to follow the previous 3 methods.


5. Embedding VBA Code to Space Rows Evenly

By using a simple code, you will be able to space rows evenly. You have to follow the following steps.

📌 Steps:

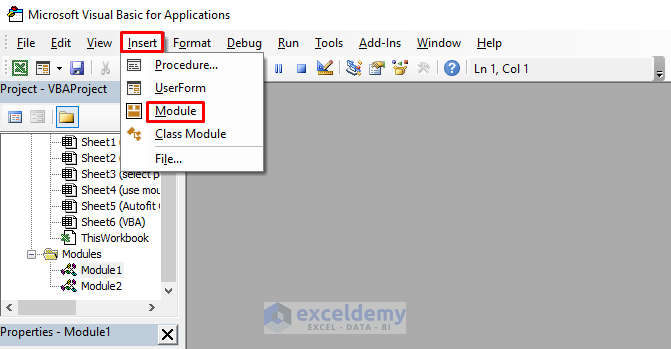
  • Firstly, press ALT+F11 or you have to go to the tab Developer. Select Visual Basic to open Visual Basic Editor, and click Insert. After that, select Module.

Embedding VBA Code to Space Rows Evenly

  • Next, you have to type the following code:
Sub space()
Selection.RowHeight = 20
End Sub
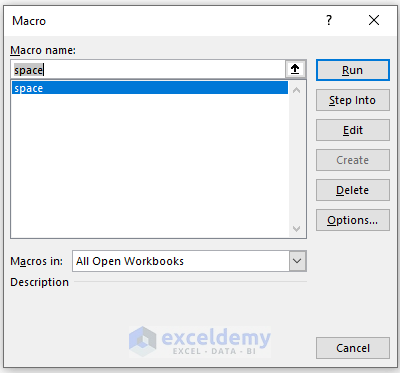
  • After that, close the Visual Basic window, you have to select the dataset and press ALT+F8.
  • When the Macro dialogue box opens, select the space in the Macro name. Click on Run.

Embedding VBA Code to Space Rows Evenly

Finally, all rows will have the same height like the following:


Download Practice Workbook

Download this practice workbook to exercise while you are reading this article.


Conclusion

That’s the end of today’s session. I strongly believe that from now you may space rows evenly in Excel. If you have any queries or recommendations, please share them in the comments section below. Keep learning new methods and keep growing!


Related Articles


<< Go Back to Space in Excel | Text Formatting | Learn Excel

What is ExcelDemy?

ExcelDemy - Learn Excel & Get Excel Solutions Center provides online Excel training , Excel consultancy services , free Excel tutorials, free support , and free Excel Templates for Excel professionals and businesses. Feel free to contact us with your Excel problems.
Saquib Ahmad Shuvo
Saquib Ahmad Shuvo

Saquib Ahmad Bhuiyan, holding a BSc degree in Naval Architecture & Marine Engineering from Bangladesh University of Engineering and Technology, skillfully integrates engineering expertise with a passion for Excel. He provides solutions to complex issues as an Excel & VBA Content Developer for ExcelDemy Forum. He demonstrates an enthusiastic mindset and adeptness in managing critical situations with finesse, showcasing his commitment to excellence. Apart from creating Excel tutorials, he is interested in Data Analysis with MS Excel, Rhinoceros,... Read Full Bio

We will be happy to hear your thoughts

Leave a reply

Advanced Excel Exercises with Solutions PDF


ExcelDemy
Logo