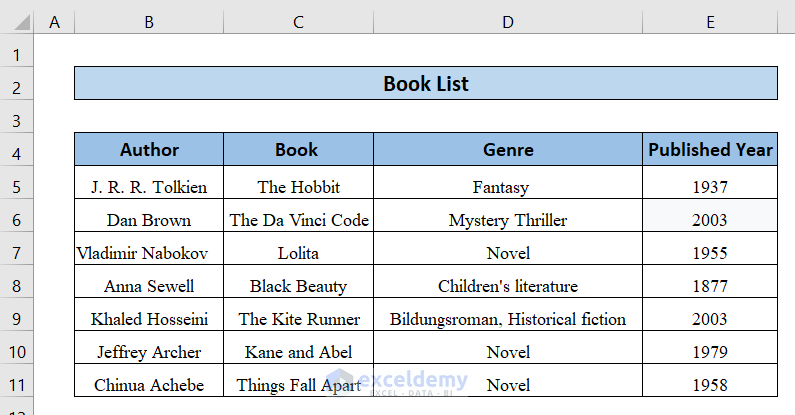
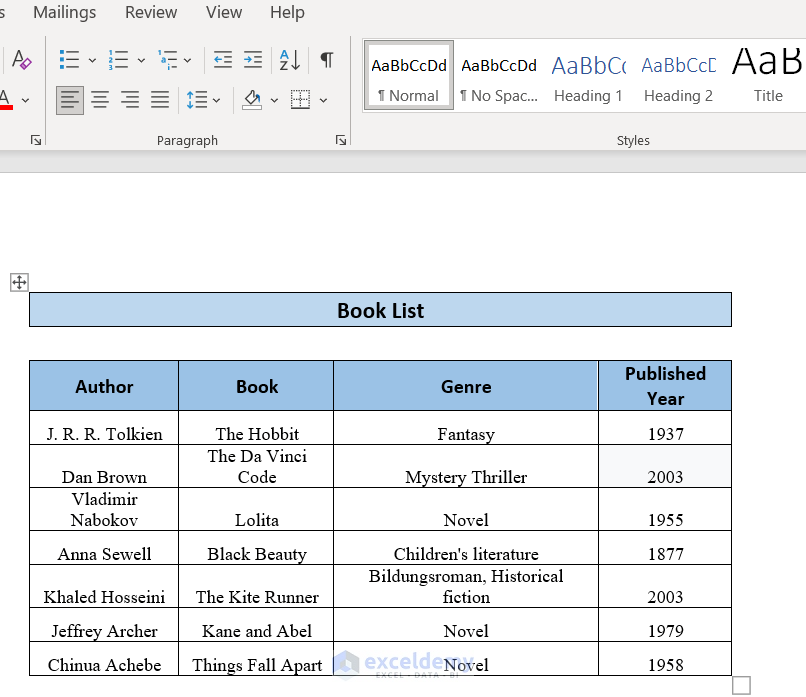
The following Book List table shows the Author, Book, Genre, and Published Year Columns. We’ll transfer this table from Excel to Word.
Method 1 – Using the Copy and Paste Option to Transfer Data from Excel to Word Automatically
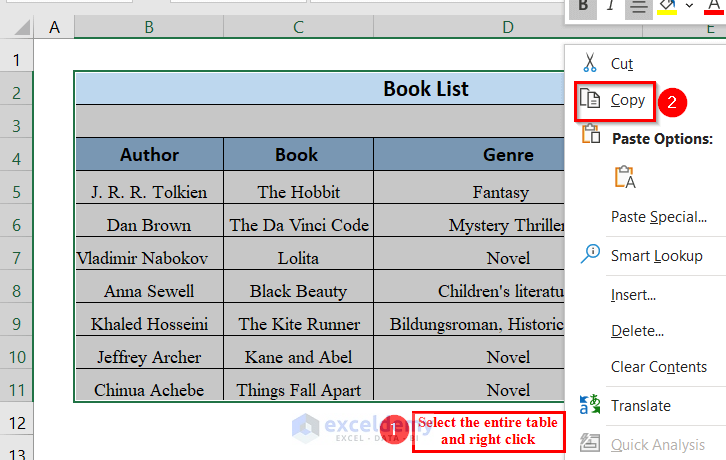
- Select the entire data range from the table Book List and right-click on it.
- A context menu will appear. Select Copy. You can also use the keyboard shortcut Ctrl + C.
![]()
- Open the Word file.
- Click where you want to insert the table.
- Right-click and select Paste (A) the Paste Options. You can also use the Ctrl + V keyboard shortcut.
![]()
- You can see the table in Word.

Read More: How to Copy from Excel to Word Without Losing Formatting
Method 2 – Using the Paste Special Option
- Select the entire dataset and copy it.
- Open the Word document.
- Click on the arrow under the Paste box.
![]()
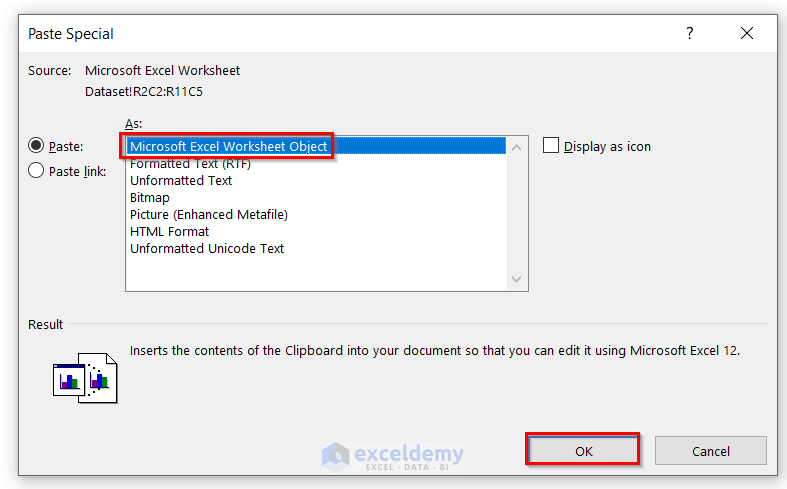
- Select Paste Special.
![]()
- Select Microsoft Excel Worksheet Object from the list and click OK.
- You’ll see the table in the Word file.

Read More: How to Export Data from Excel to Word
Method 3 – Using the Copy as Picture Option to Transfer Data from Excel to Word Automatically
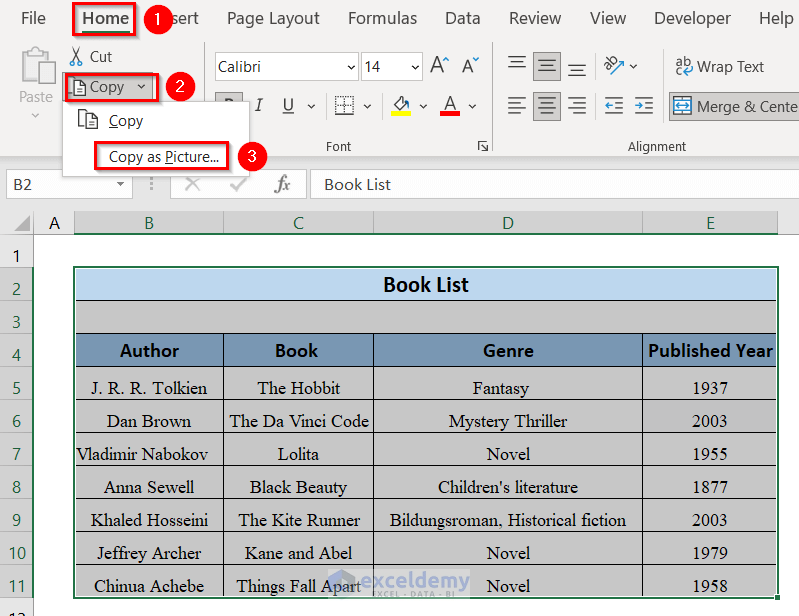
- Select the entire dataset.
- Go to the Home tab, click on Copy, and select Copy as Picture.
- A Copy Picture window will appear. Keep Appearance and Format as-is and click on OK.
![]()
- Open the Word file.
- Click on the down arrow of the Paste box and select Paste Special.
![]()
- Click OK in the Paste Special dialog box.
![]()
- You’ll see the table embedded as an image in the Word file. This means the data inside can’t be edited.
Read More: How to Copy and Paste from Excel to Word Without Cells
Method 4 – Using the Insert Excel Object Option
- Open the Word file and go to the Insert tab.
![]()
- Click on Object and select the Object option.
![]()
- An Object window will appear. Select Create from File and click on Browse.
![]()
- Find the Excel file and click on Insert.
![]()
- Click OK in the Object window.
![]()
- The table will be copied from Excel to Word.

Method 5 – Import Text from a CSV File to Microsoft Word Document
- Open the Word document and go to the Insert tab.
![]()
- Click on Object and select Text from File.
![]()
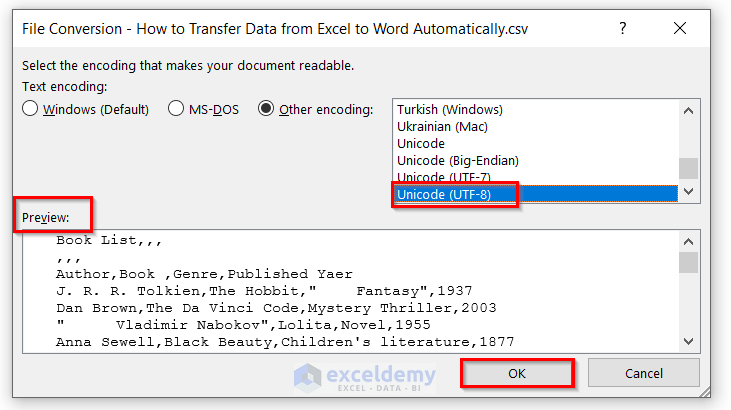
- Select the CSV file by clicking on the All Files option to find the CSV file in the folder.
- Click on Insert.
![]()
- A File Conversion window will appear. You can see the preview and the CSV file type in the window. Click on OK.
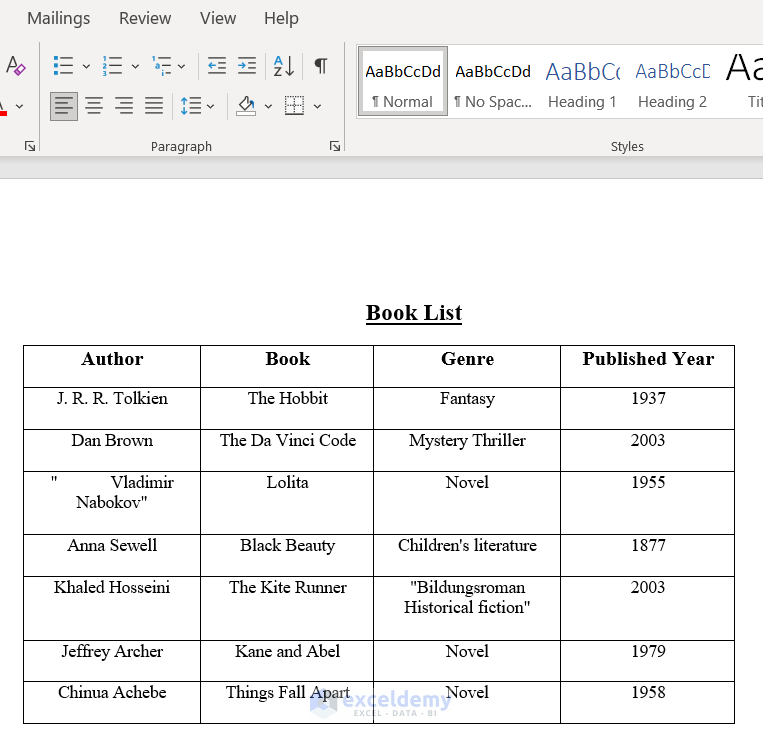
- You can see the data in the Word file, but it needs to be rearranged.
![]()
- We created a table manually and pasted the data to make it presentable.
Read More: How to Copy Only Text from Excel to Word
Download the Workbook
Related Articles
- How to Extract Data from Excel to Word
- How to Link Excel Cell to Word for Automatic Update
- How to Insert an Excel Spreadsheet into Word
- How to Copy a Chart from Excel to Word
<< Go Back to Export Excel to Word | Export Data from Excel | Learn Excel
Get FREE Advanced Excel Exercises with Solutions!
