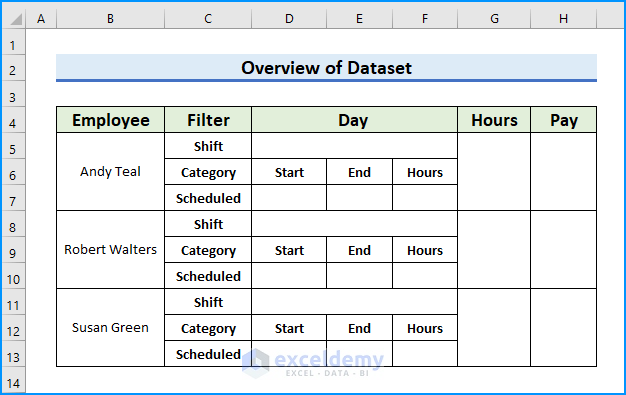
Let’s take a sample dataset that represents the roster format of a company.
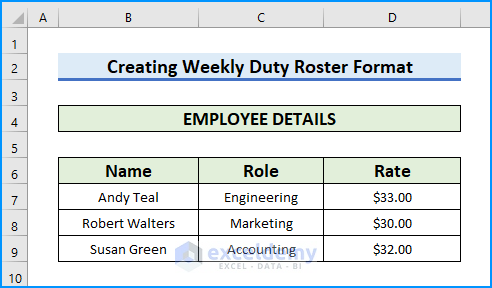
Step 1 – Insert Staff Details
- Insert 3 sub-headers namely: Name, Role, and Rate.
- Add necessary data under the sub-headers.
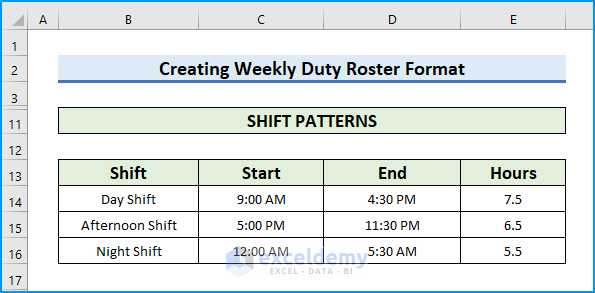
Step 2 – Specify the Shift Pattern
- Put 4 sub-headers in the Shift Pattern section and name them Shift, Start, End, and Hours.
- Fill them with the correct information.
Step 3 – Start Work Scheduling Using the VLOOKUP Function
- Use the following VLOOKUP formula in cell C5 to import data from another worksheet.
=VLOOKUP(B5,Dataset!$B$6:$D$9,2,0)
- Press Enter or Tab.
- The Role of the employee will be fetched from the worksheet.
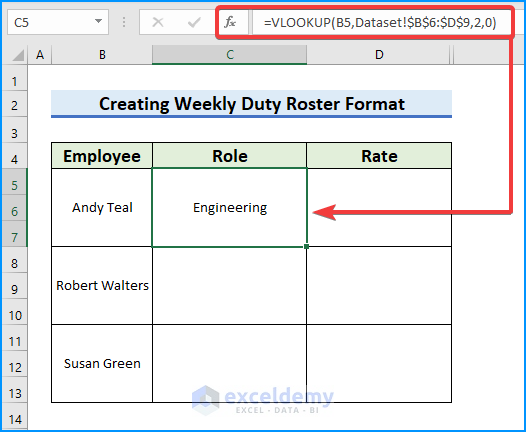
- Pull the AutoFill handle down to get other employee roles.

- Insert the following formula in D5:
=VLOOKUP(B5,Dataset!$B$6:$D$9,3,0)
- Press Enter.
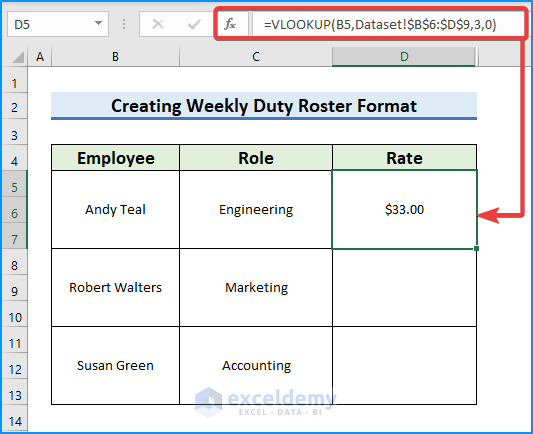
- Drag the AutoFill handle down to get the other employee rates.

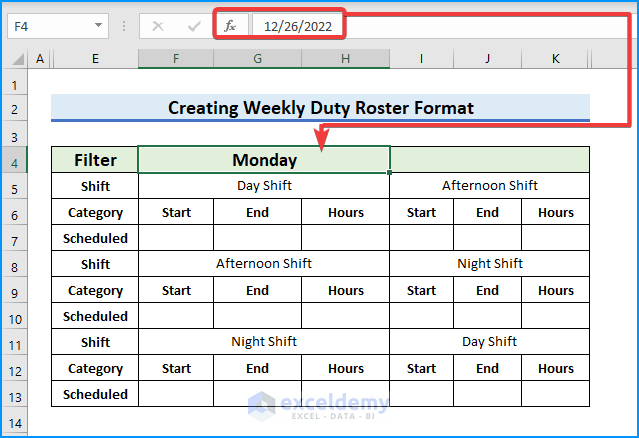
- Input the week’s starting date in cell F4.
- Put the date into a day format.
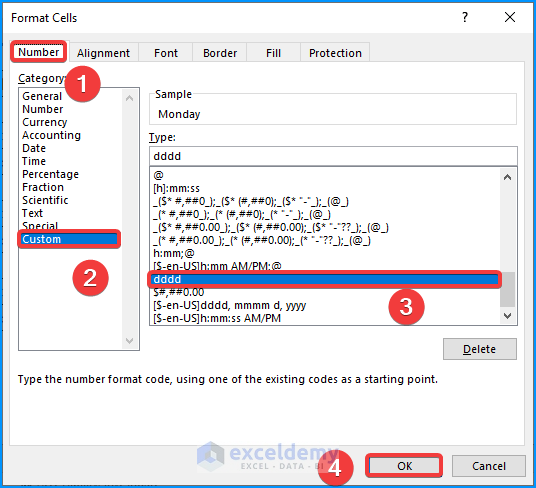
- Right-click on F4 and a context menu will pop up.
- Select Format Cells.

- The Format Cells menu will open.
- Select Number then Custom.
- Choose dddd from the list of types.
- Click OK.
- Use the following code in I4:
=F4+1
- Drag the formula to X4 to get all the weekdays.

- Use the following VLOOKUP function in F7.
=VLOOKUP(F5,Dataset!$B$13:$E$16,2,0)

- Copy the formula and paste it under each Start header.

- In cell G7, insert:
=VLOOKUP(F5,Dataset!$B$13:$E$16,3,0)
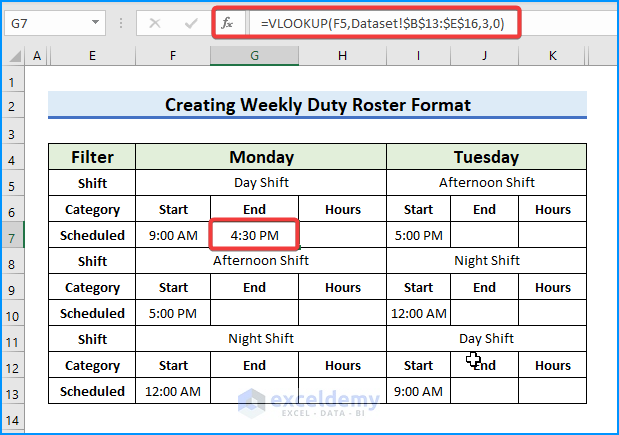
- Copy the formula and paste it under End sub-headers.

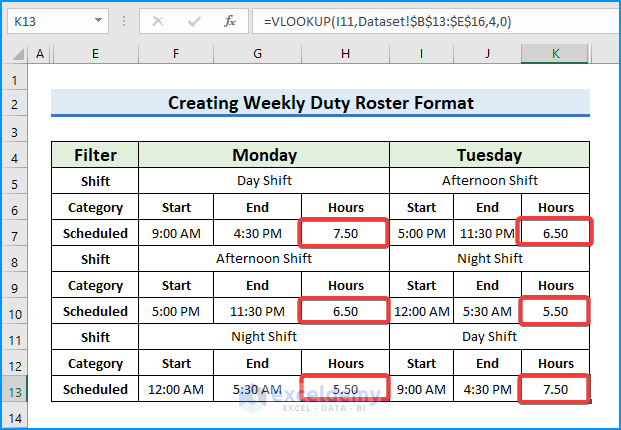
- Use the following formula in cell H7,
=VLOOKUP(F5,Dataset!$B$13:$E$16,4,0)
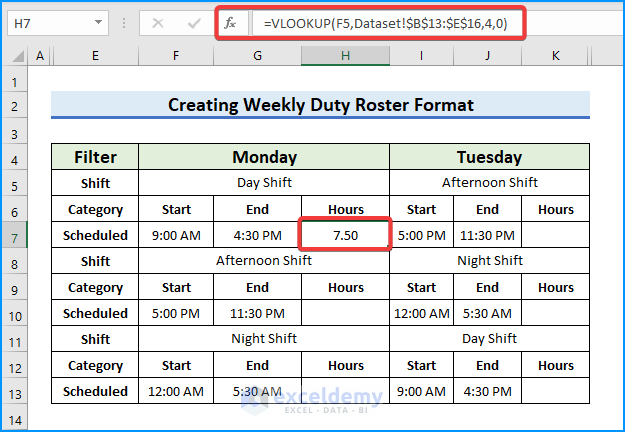
- Copy and fill every Hours cell.
- Do this on all other weekdays except Sundays.
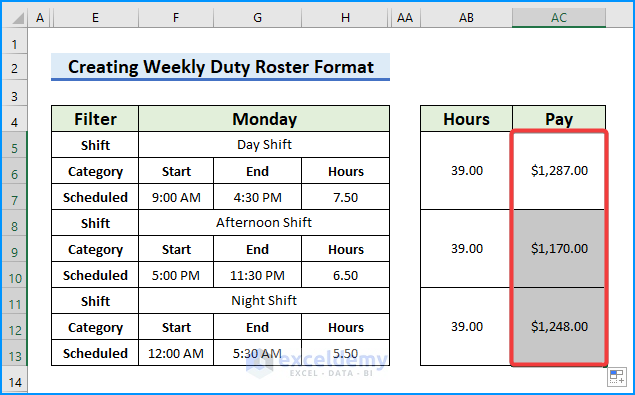
Step 4 – Use the SUM Function to Calculate the Weekly Shift Hours and Pay
- Use this formula in cell AB5:
=SUM(H7,K7,N7,Q7,T7,W7)
- Press Enter.
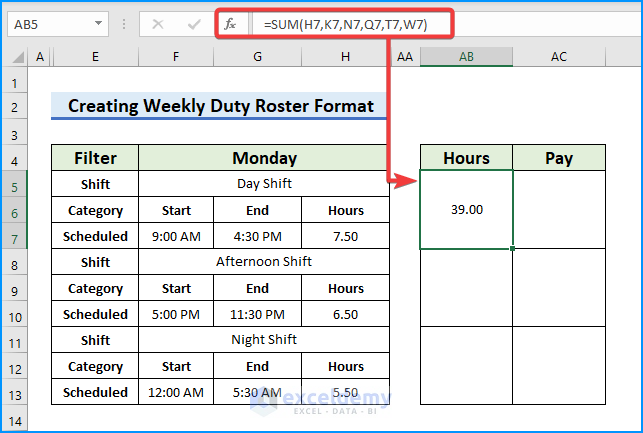
- Drag the cell down to AutoFill.

- Use this formula in AC5,
=D5*AB5
- Pressing the Tab button will give you the multiplied output of D5 and AB5.
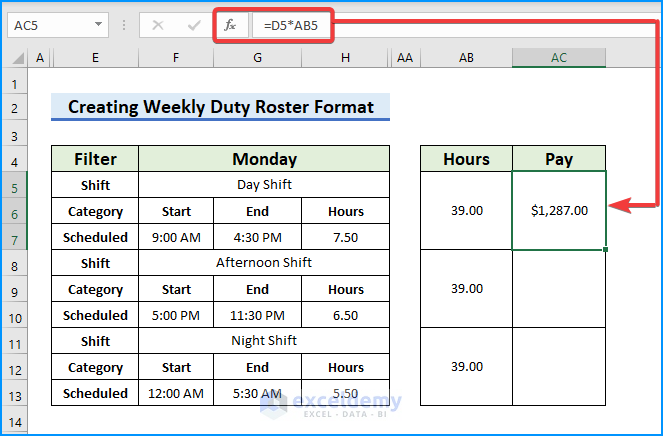
- AutoFill through the column.
Step 5 – Apply Conditional Formatting to Set up the Duty Roster
- Select the cell range B4:Z13.
- From your Home tab, go to Conditional Formatting, then to Highlight Cells Rules, and select Text that Contains

- Type Day Shift and select Green Fill from the box.
- Hit the OK button to add color to the text.

- For the Afternoon Shift, add Yellow Fill in the same box.

- Add a different color for the Night Shift in the same way.
- We completed our weekly duty roster.

Read More: How to Create Monthly Duty Roster Format in Excel
Download the Practice Workbook
You can use our practice workbook as a template.
Related Articles
- Weekly Meal Planner Template with Snacks
- How to Create Automatic Schedule Generator for Free in Excel
- How to Create Shift Roster 24×7 with Excel Automation
<< Go Back to Roaster Templates | Excel Templates
Get FREE Advanced Excel Exercises with Solutions!
