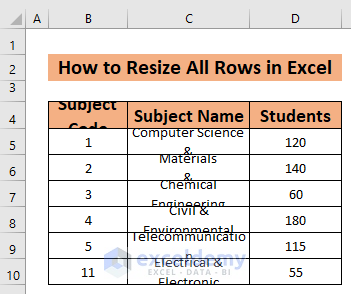
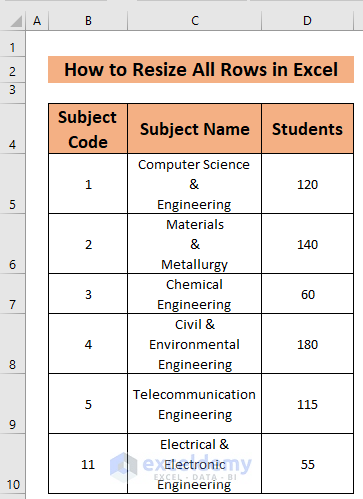
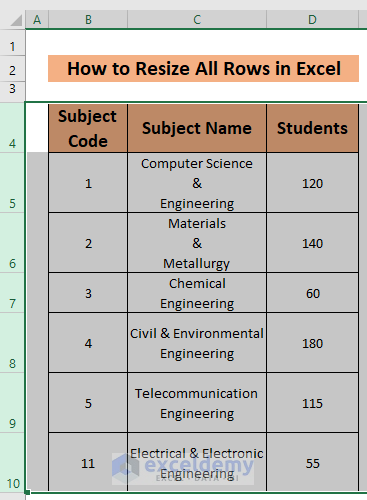
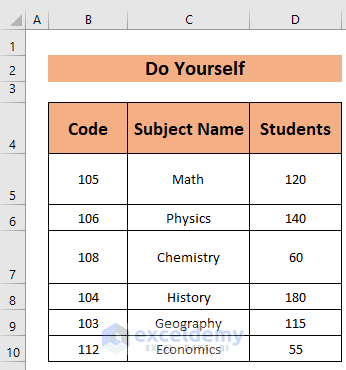
The datasheet below shows Subject Codes, Subject Names, and the number of Students in the departments. The Subject Code (cell B4) and the subject names are not clearly visible. We need to resize all rows.
Method 1 – Resize All Rows by Dragging
Steps:
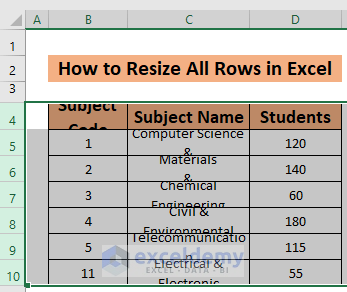
- Select the rows you want to resize (i.e., row 4 – row 10).
- Move your cursor to the left until the plus sign pops up – as shown below.

- Drag to increase or decrease to your liking. The row height will change.
Note: In our case, selecting from the 4th row to the 10th row is sufficient. If you need to resize all the rows, you just have to select the entire rows.
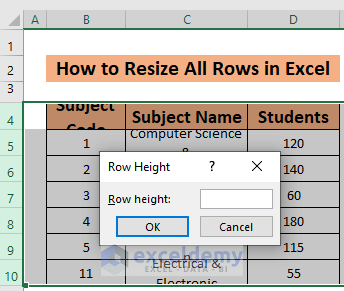
Method 2 – Resize All Rows to a Specific Height
2.1. Increase Row Size
Steps:
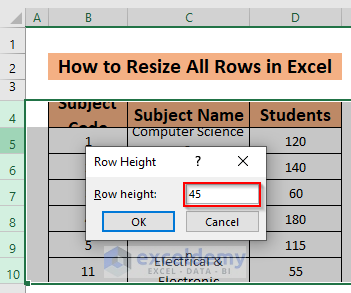
- Select the rows you are working with (i.e. row 5 – row 10).
- Go to Home tab >> select Cells >> select Format >> select Row Height
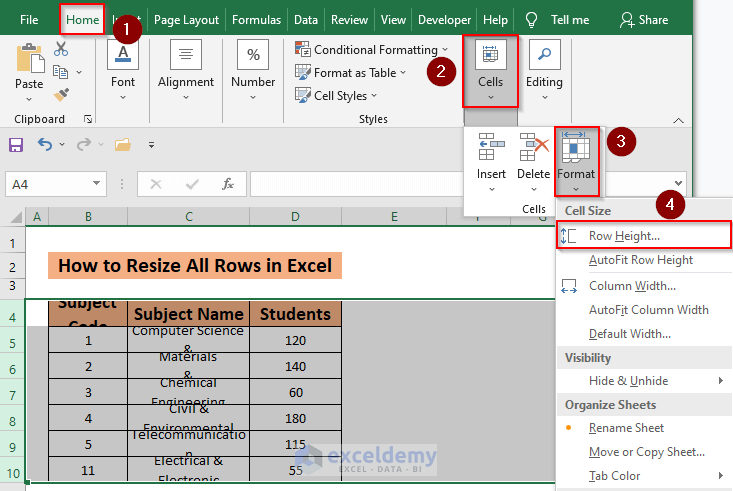
- Row Height window will appear.
- Enter your desired height (i.e., 45 points).
- Click OK.
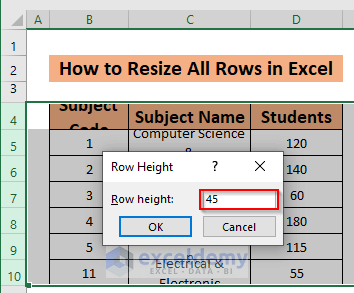
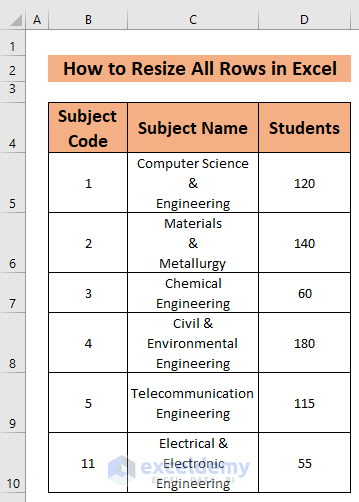
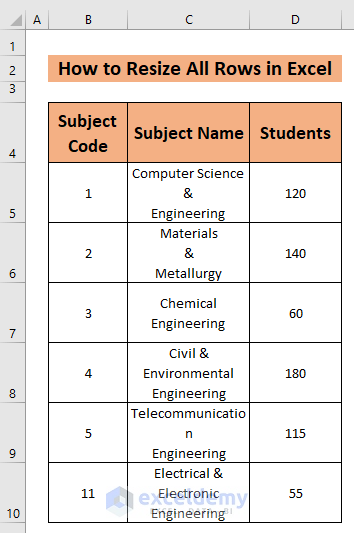
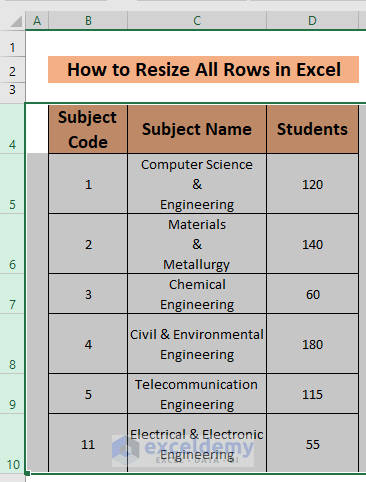
Your rows are resized.
Read More: How to Expand and Collapse Rows in Excel
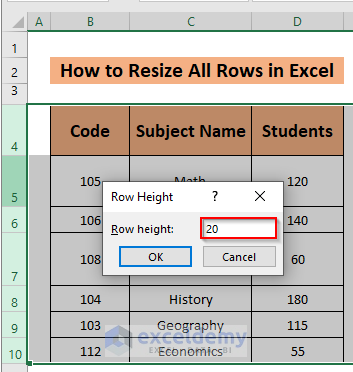
2.2. Decrease Row Size to Resize All Rows
Steps:
- Select the range (i.e., row 4 to row 10).
 Open the Row Height window just like you did in section 2.1.
- Enter the Row height as 20 points. Then click OK.
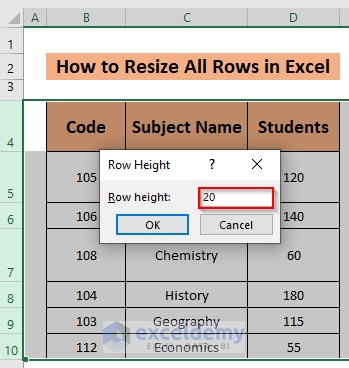
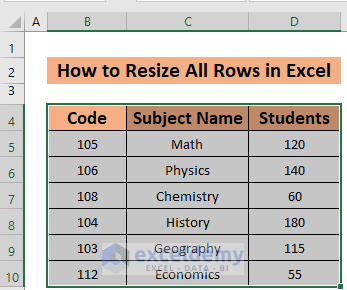
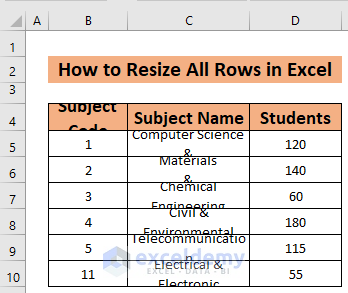
The rows are resized.
Method 3 – Resize All Rows Using Double Click
Steps:
- Select the rows (i.e., row 5 to row 10).
- Move your cursor to the left until the plus sign pops up.
- Double-click the left side of your mouse. Excel will resize the rows automatically.
Method 4 – Resize All Rows Using Right Click
4.1. Increase Row Size
Steps:
- Select your dataset (i.e., row 4 to row 10).
- Right-click your mouse. The Context menu will pop up.
- Select Row Height.

- The Row Height window will appear. Set Row height as 45 points. Click OK.
The rows are resized.
4.2. Decrease Row Size
Steps:
- Select the dataset.
- Open the Context menu and select Row Height.
- Enter the row height as you require (i.e., 20 points).
The rows have been resized.
Method 5 – Resize All Rows Using AutoFit
Steps:
- Select the rows (i.e., row 5 to row 10).
- Go to the Home tab >> select Cells >> select Format >> select AutoFit Row Height.

Excel will automatically resize the rows.
Method 6 – Resize All Rows Using Keyboard Shortcut
Steps:
- Select your dataset (i.e., row 4 to row 10).
- Press ALT + H, O, and A.
- Excel will AutoFit the selected rows.
Note: You need to press the keyboard buttons sequentially, not altogether. First, select ALT and H together ALT + H, press O and finally A.
A is for AutoFit. If you want to resize by changing the Row Height, press H despite A.
Practice Workbook
Use this to practice increasing the row size to alter all rows.
This one is for practicing decreasing the row to regulate all rows.
Download the Practice Workbook
Related Articles
- How to Color Alternate Rows in Excel
- How to Create Collapsible Rows in Excel
- How to Expand or Collapse Rows with Plus Sign in Excel
- How to Create Rows within a Cell in Excel
- How to Copy Every Nth Row in Excel
- How to Lock Rows in Excel
<< Go Back to Rows in Excel | Learn Excel
Get FREE Advanced Excel Exercises with Solutions!
