Method 1 – Using Legacy Wizard to Open CSV File in Excel with Columns
Steps
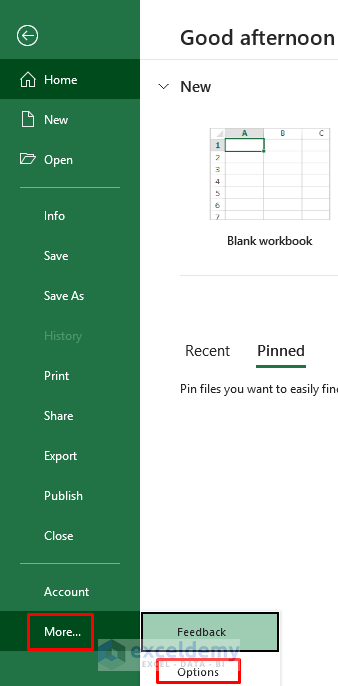
- You need to enable the text import wizard. Go to the File tab in the ribbon and select More From there, select Options.
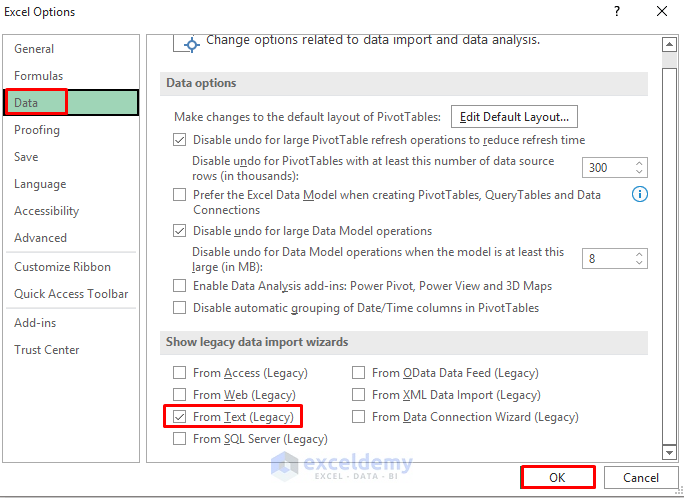
- Excel Options window will pop up. Select the Data. From the Show legacy data import wizards, and click on From Text (Legacy). Click on ‘OK’. It will enable the text import wizard.
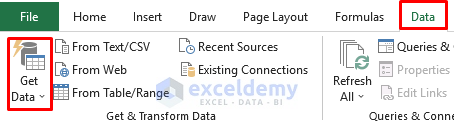
- To import a CSV file, go to the Data tab in the ribbon and select Get Data from the Get & Transform Data group.
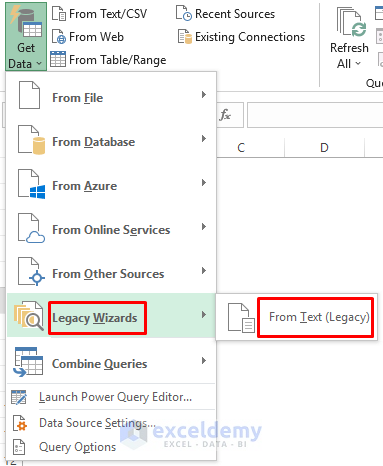
- From the Get Data option, select Legacy Wizards where you’ll get From Text (Legacy). Click on it.
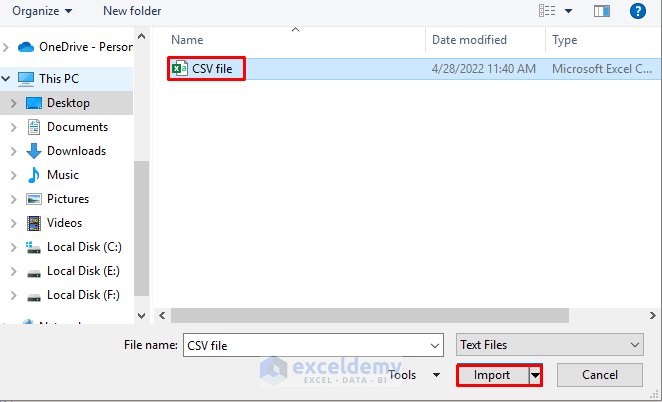
- A new window will appear where you can find your CSV file and finally click on Import.
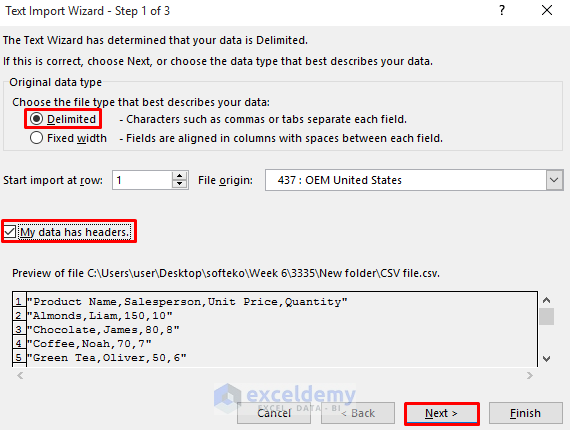
- Text Import Wizard dialog box will occur where you need to go through all three steps. In the first step, choose the file type as Delimited to describe your data. Click on My data has headers which will set your first row as a header. Click Next.
- In step 2, set Comma as Delimiters and click Next.

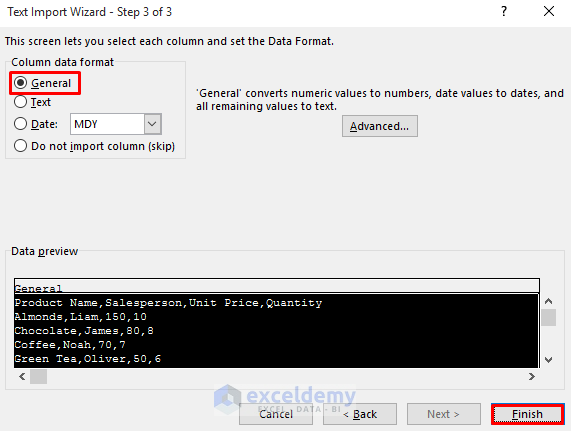
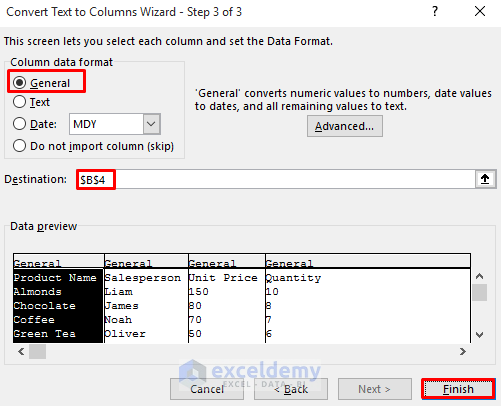
- In step 3, select Column data format as General and click on Finish.
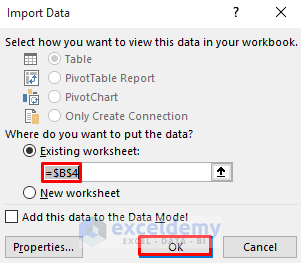
- A dialog box will appear. In it, you can select the location where you want to store your data. Click on ‘OK.’
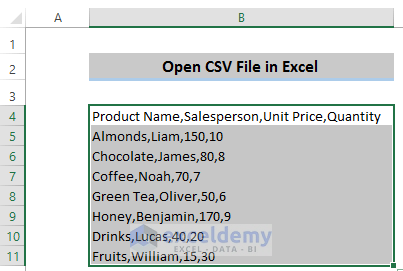
- The problem is the CSV file imports one column, which is not what we want. To move all the data into different columns after the comma, we need to select the whole dataset.
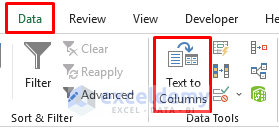
- Go to the Data tab in the ribbon and select Text to Columns from the Data tools group.
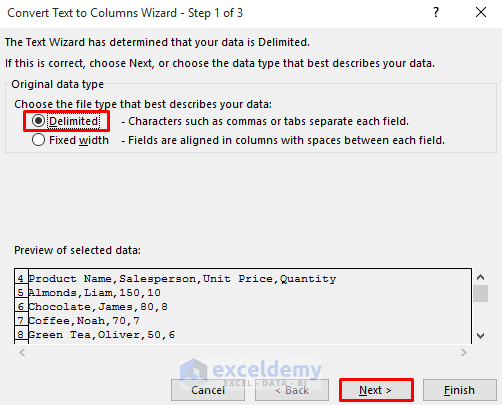
- Convert Text to Columns Wizard dialog box will appear. We need to do the same steps as the above process. In the first step, choose the file type, as Delimited to describe your data. Click Next.
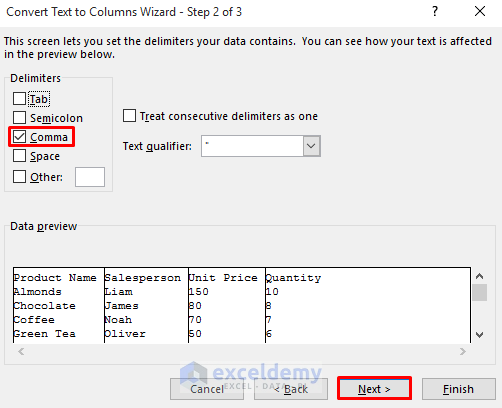
- Set Comma as Delimiters and take a look at the Data Preview where you will find all the data are separated by columns. Click Next.
- Set the Column data format as General and also set your preferred Destination. Click Finish.
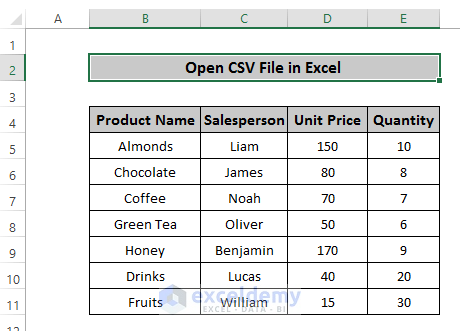
- Set all the CSV data into different columns after a comma. You can format the dataset according to your choice.
Method 2 – Using Excel Power Query to Open CSV File with Columns
Steps
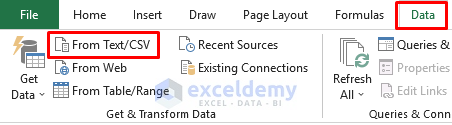
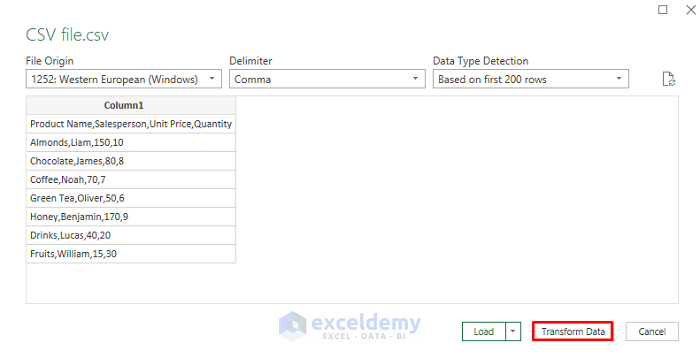
- Go to the Data tab, and select From Text/CSV from the Get & Transform Data group.
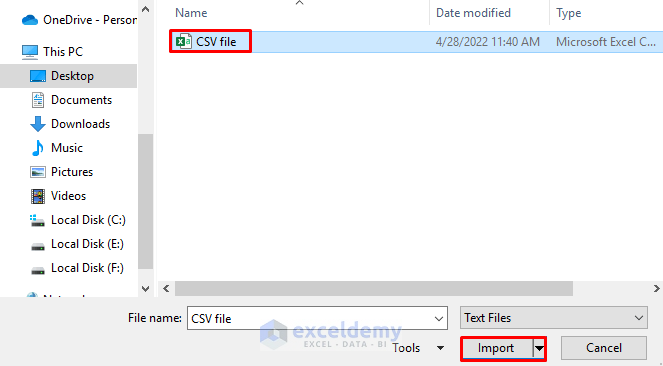
- A new window will appear where you can select your CSV file and click on Import.
- A new dialog box will appear where data from the CSV file is shown in one column. You need to Transform Data to Power Query for further modification.
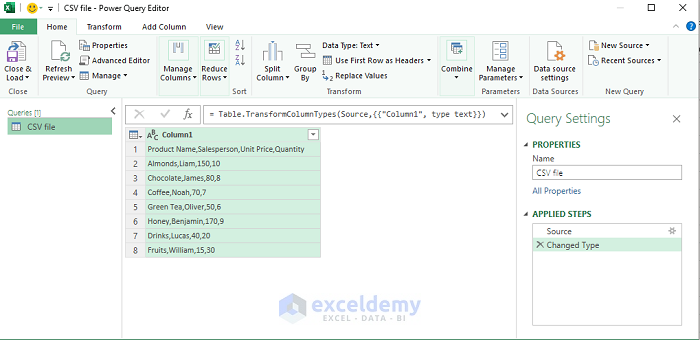
- After clicking Transform Data, the Power Query dialog box will appear where you need to split all the text into different columns and set the first row as a header.
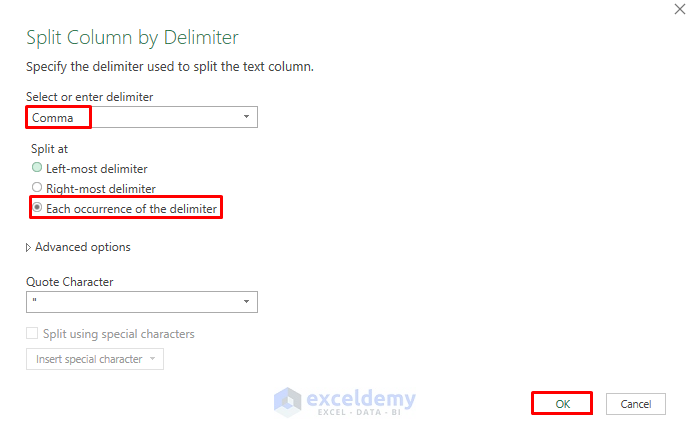
- To split all the text after delimiter, we need to go to the Home tab in the Power Query, and in the Transform group, select Split Column. In the split column option, select By delimiter, which will eventually split the column after the delimiter.

- Split Column by Delimiter dialog box will appear. In the Select or enter delimiter segment, select Comma as your preferred delimiter and also select Each occurrence of the delimiter from the Split at section.
- To make the first row a header, go to the Home tab in the Power Query and select Use First Row as Headers from the Transform group.

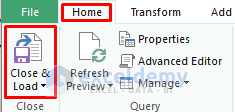
- Select Close & Load from the Home tab.
- It will appear on a different sheet in Excel, but you can copy and paste it to your preferred sheet. This will provide the desired result, with texts importing in different columns after the comma.
Method 3 – Opening CSV File with Columns from Folder Selection Tab
Steps
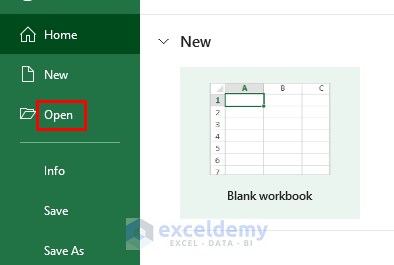
- Go to the File tab and select the Open command.
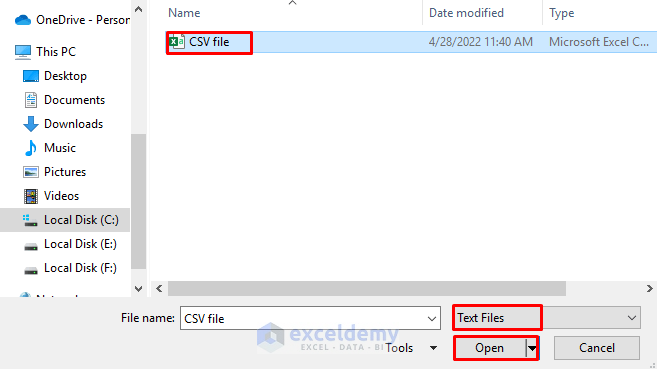
- A new dialog box will appear. Select Text Files from the drop-down box in the lower right bottom. Select your CSV file and click on Open.
- Open the CSV file in one column, then you can split the text into several columns after comma by using Text to Column just like the first method.
Download Practice Workbook
Download this practice workbook
Related Articles
- How to Read CSV File in Excel
- How to Open CSV with Delimiter in Excel
- How to View CSV File in Excel
- CSV File Not Opening Correctly in Excel
- [Solved:] Excel Is Opening CSV Files in One Column
<< Go Back to Open CSV in Excel | Import CSV to Excel | Importing Data in Excel | Learn Excel
Get FREE Advanced Excel Exercises with Solutions!
