Case 1 – A CSV File Is Opening in One Column
When the delimiter is not properly set, Excel may open CSV files in one column.
- Open the CSV file in the Notepad: data is delimited by commas.
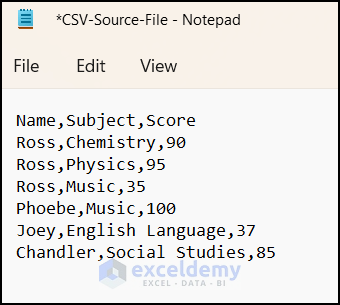
- If you open it in Excel, data will be displayed in column A

Solution 1 – Change the Regional Settings
Steps:
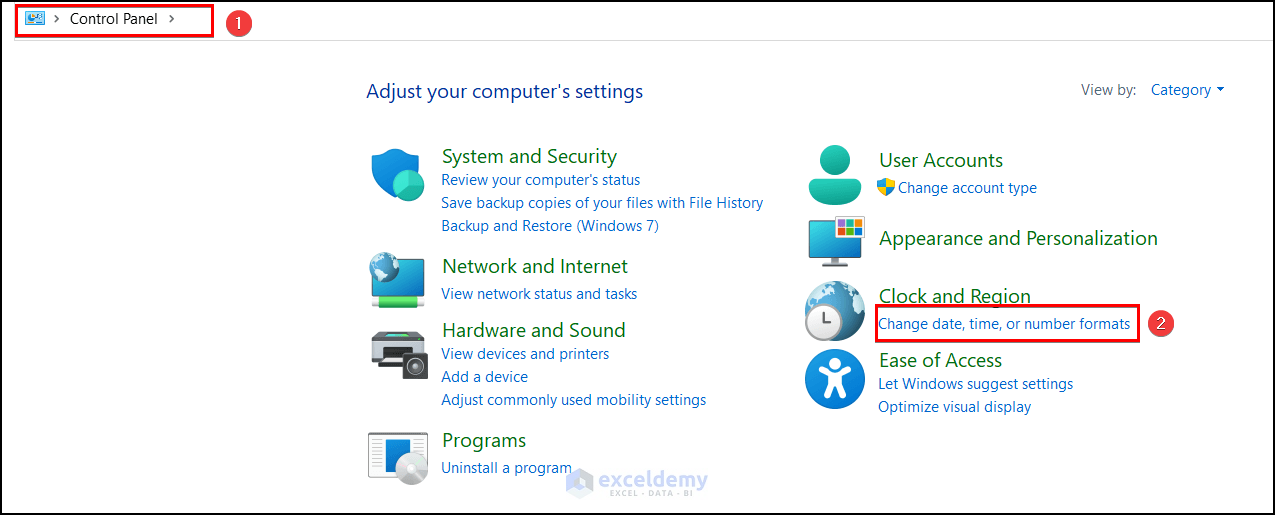
- Open the Control Panel.
- Click Clock and Region. Make sure, view by category is selected. Otherwise, you will need to select Region.
- In the new window, select Change data, time or number formats in Region.
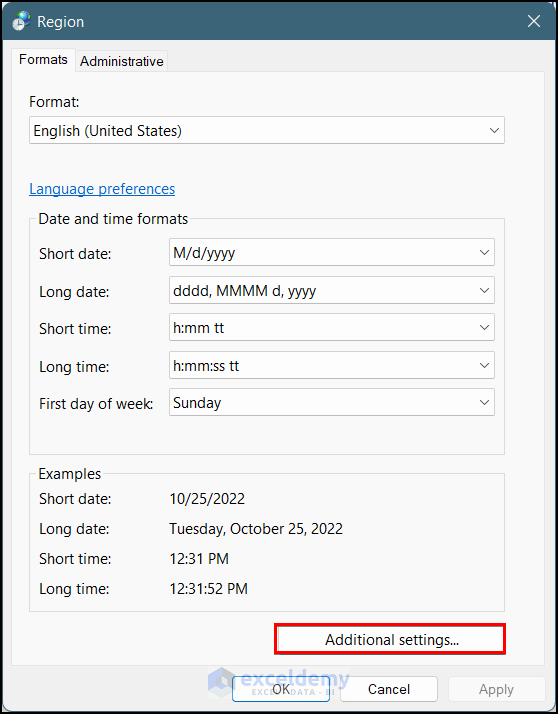
- In the Region window, select “Additional settings…”.
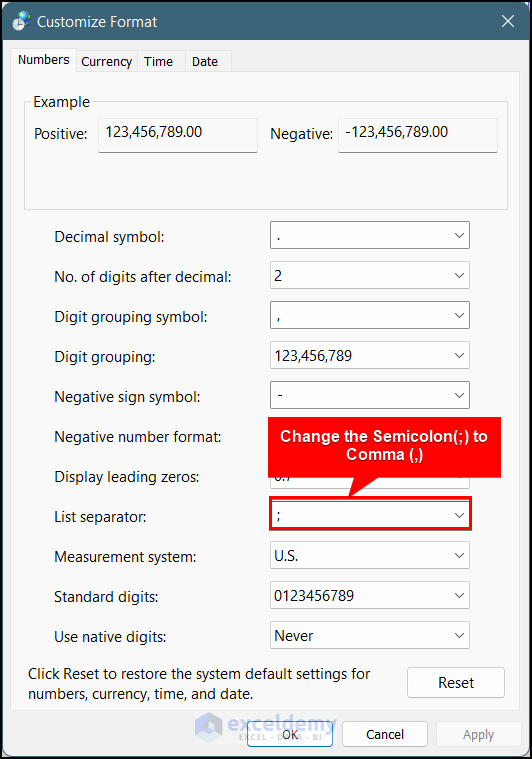
- In the Customize Format window, enter comma (,) in List separator.
- Click OK.
- If you open the CSV file, it will be displayed in multiple columns.
Read More: How to View CSV File in Excel
Solution 2 – Specify the Delimiter by Editing the CSV File
If Excel can recognize the data separators, it will show them in multiple columns.
Steps:
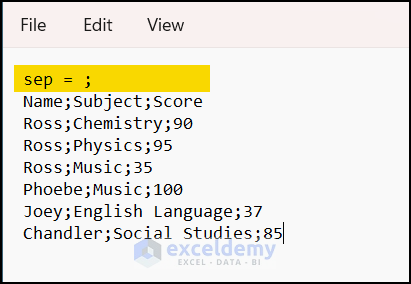
- Data is delimited by a semicolon.

- Open the file in a text editor. Here, Notepad.
- Enter the following lines at the top.
sep = ;
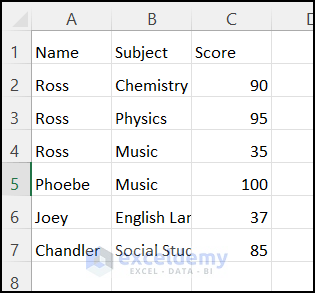
- If you open the file in Excel, data will be displayed in multiple columns.
Solution 3 – Specify the Delimiter
Steps:
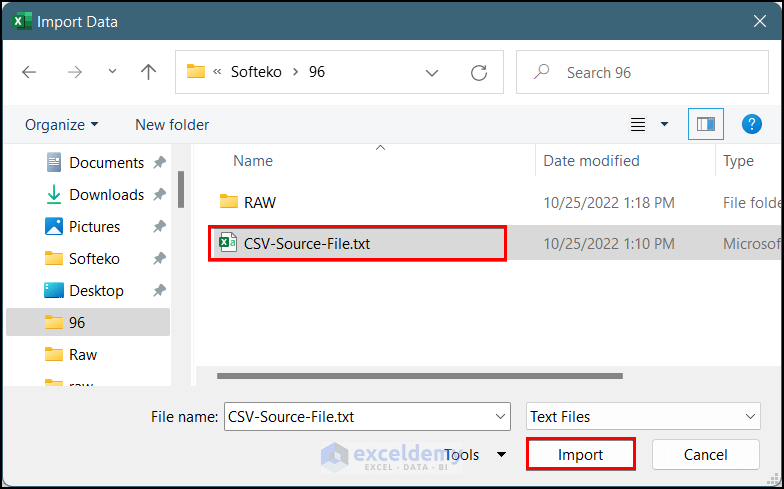
- Go the Data tab and select From Text/CSV.

- In the Import Data window, go to the file location.
- Select the CSV file and click Import.
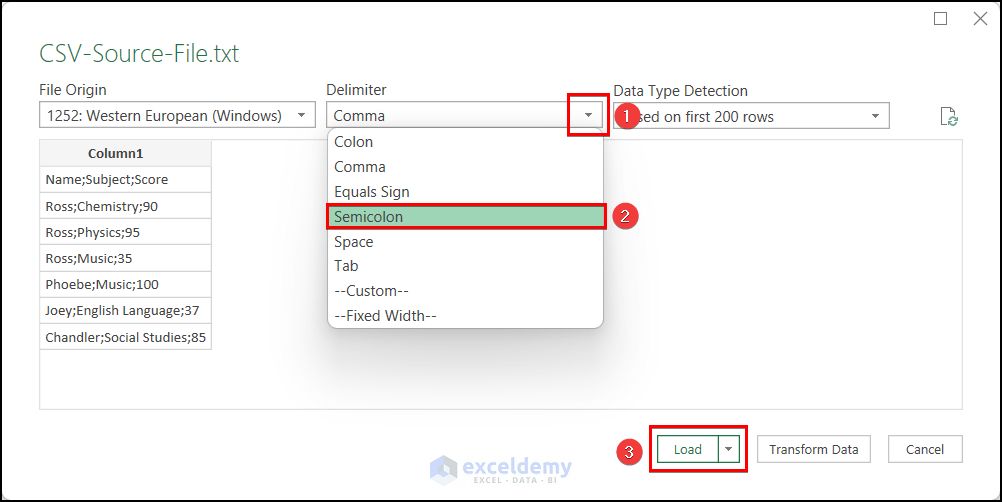
- In the new window, in Load, select “Load”.
- The CSV data will be imported into Excel. Delete row 5 (used in Solution 2).

Read More: How to Open CSV with Delimiter in Excel
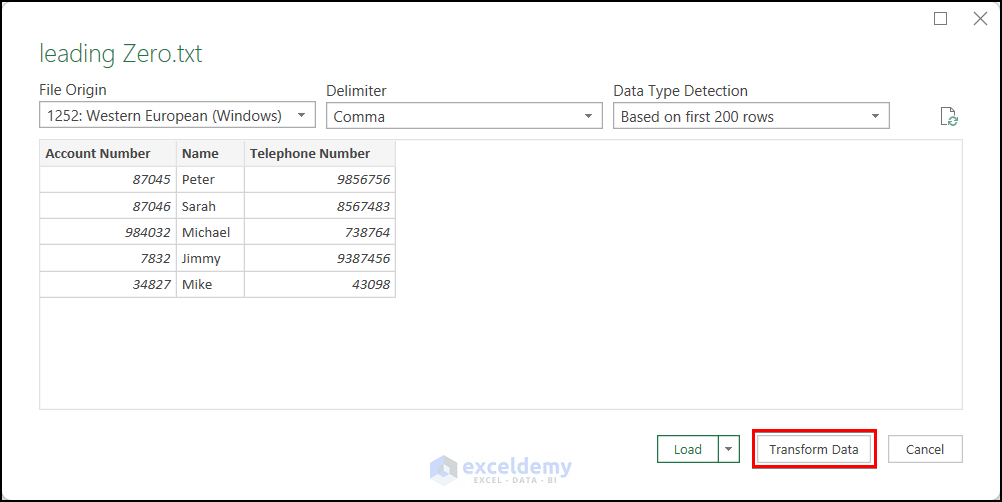
Case 2 – Leading Zeros Aren’t Kept after Importing a CSV File
In a CSV file, leading zeros are frequently omitted by default.
Steps:
- Go to the Data tab.
- Select From Text/CSV in Get & Transform Data
- Locate your CSV file and select it.
- Click Import.
You will see a preview:
- Click Transform Data.
- In the Power Query Editor window, select the Account Number column.
- Select Text.
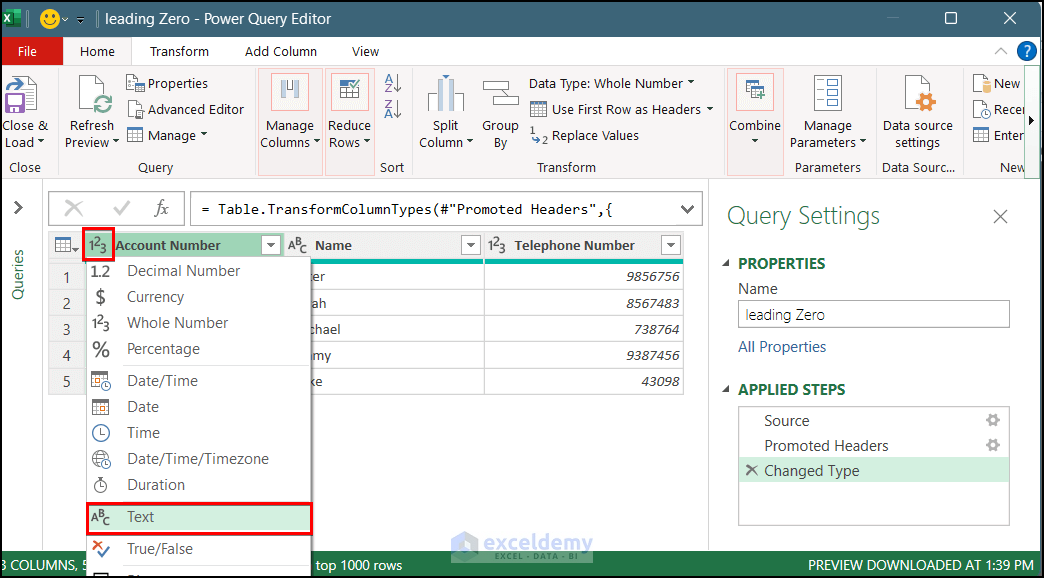
- In the dialog box, choose Replace Current.

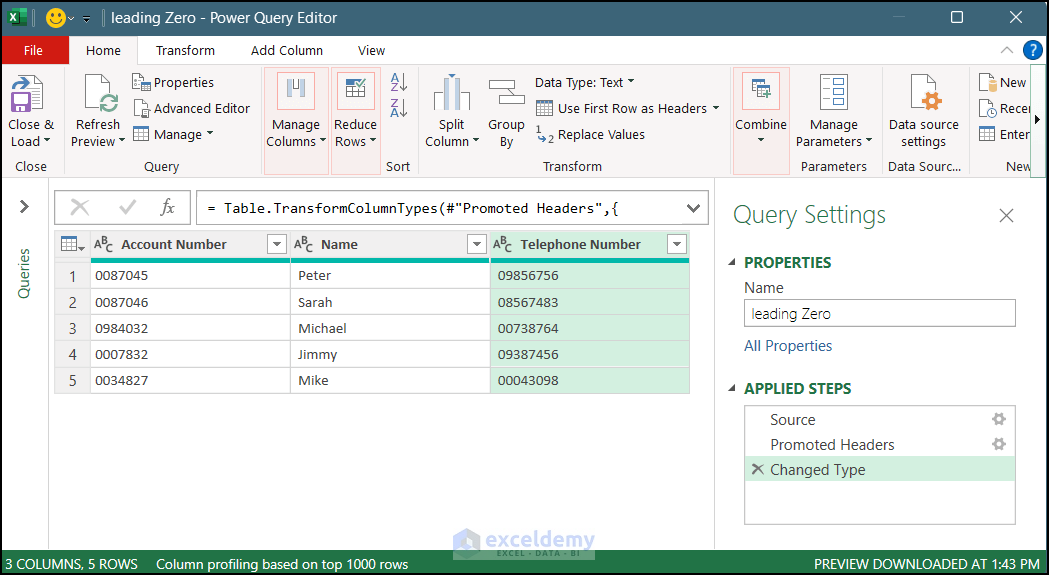
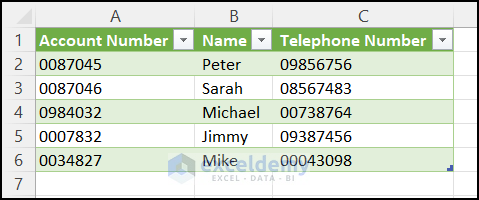
You will see that zeros in the Account Number column are displayed.
- Follow the same steps for the Telephone Number column:
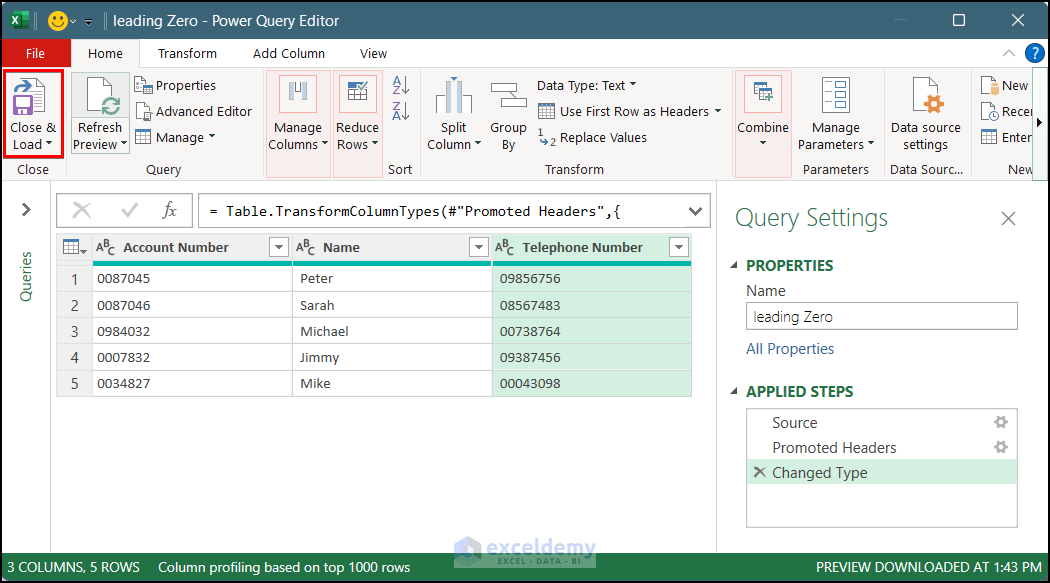
- Click Close & Load.
This is the output.
Read More: Open CSV File in Excel Without Formatting
Case 3 – Dates Are Incorrectly Formatted after Importing a CSV File
Steps:
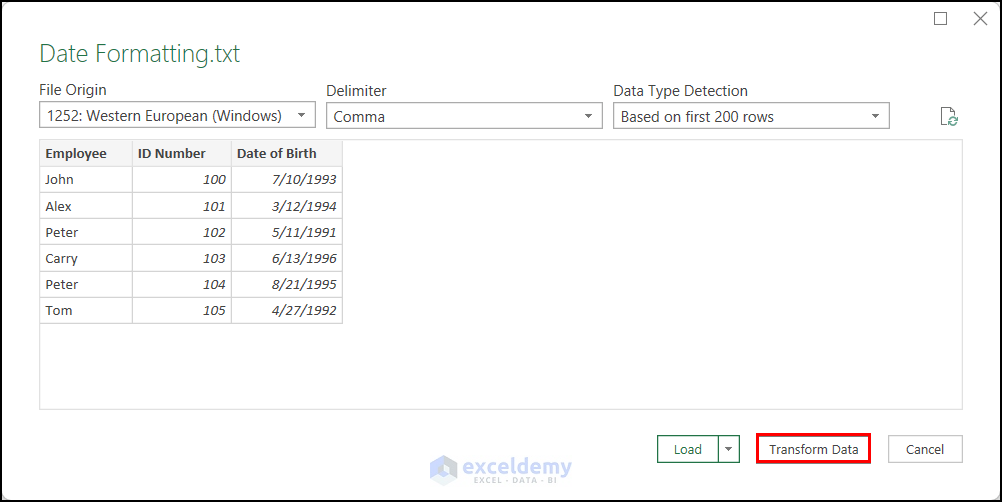
- Go to the Data tab and select From Text/CSV to open Import Data.
- Select the CSV file and click Import. Select All Files in the file type field.
- In the window containing the dataset, select Transform Data.
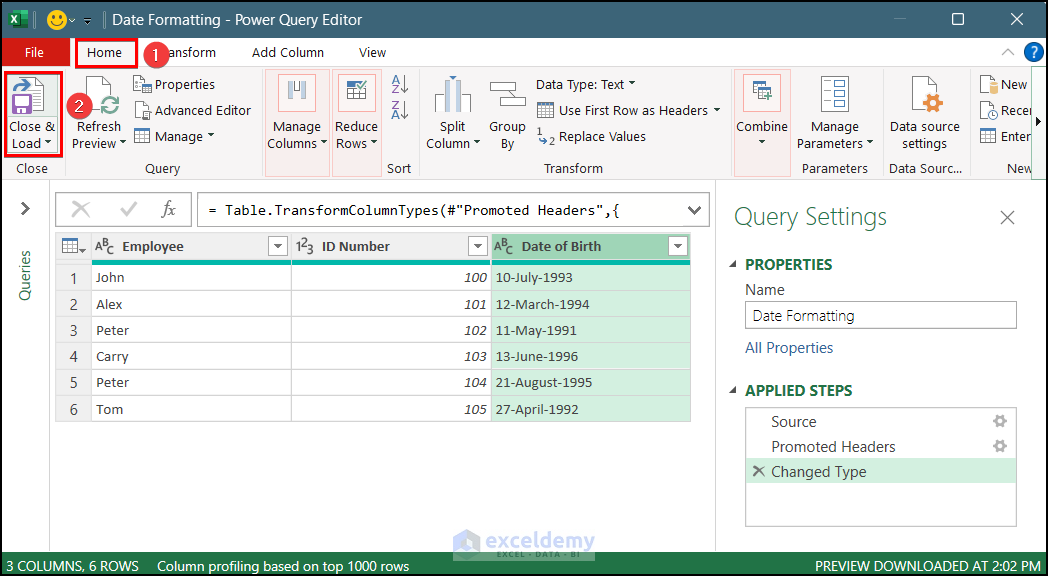
- In the Power Query Editor, select the Date of Birth column.
- Go to the Transform tab and select Data Type.
- Select Text.

- In the Change Column Type dialog box, select Replace current.
- Go to the Home tab and select Close & Load.
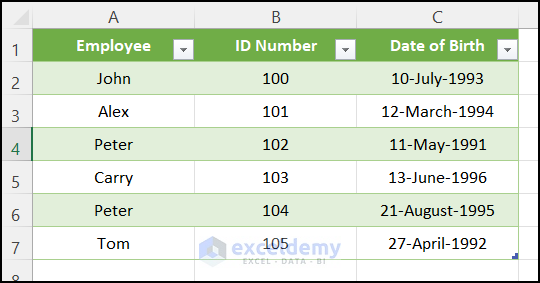
This is the output.
Read More: How to Open Large CSV Files in Excel
Case 4 – Numbers are Converted to Scientific Notation
After importing a CSV file, numbers are converted to scientific notation. To avoid this:
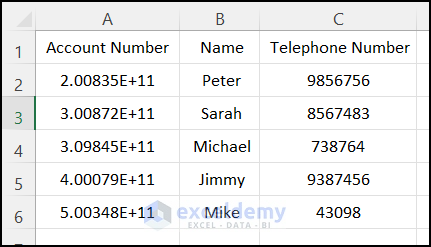
Steps:
- Go to the Data tab, select From Text/CSV and import the CSV file.
- In the window containing the dataset, select Transform Data.

- In the Power Query Editor, select Account Number.
- Choose Text.
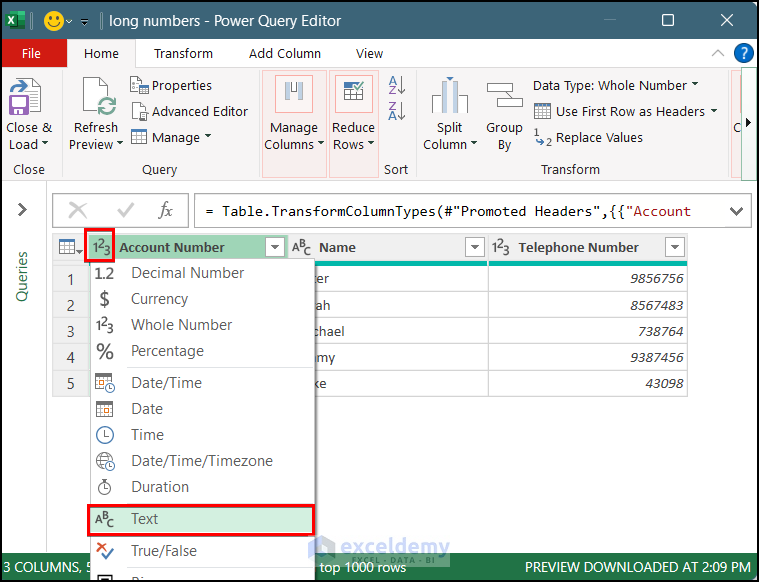
Numbers will be displayed in full form.
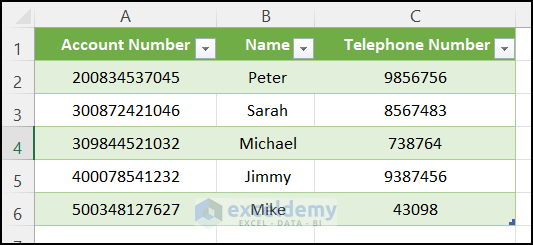
- Go to the Home tab and select Close & Load.

This is the output.
Read More: How to Open CSV File in Excel with Columns Automatically
Related Articles
<< Go Back to Open CSV in Excel | Import CSV to Excel | Importing Data in Excel | Learn Excel
Get FREE Advanced Excel Exercises with Solutions!
