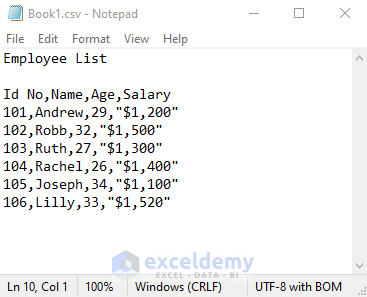
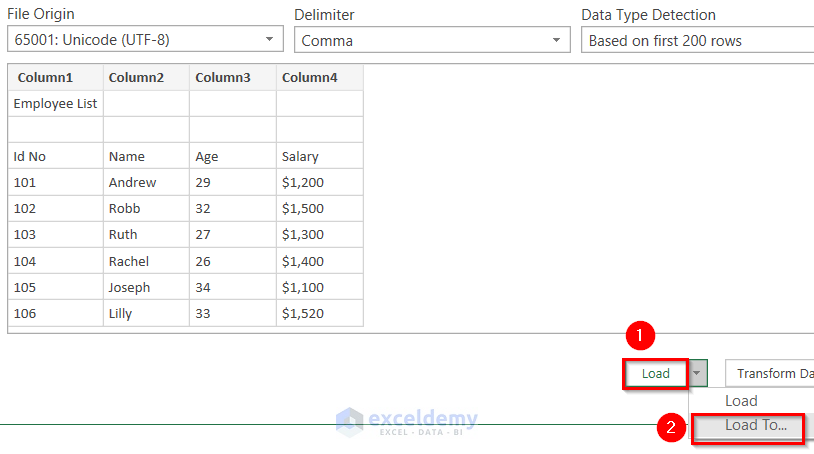
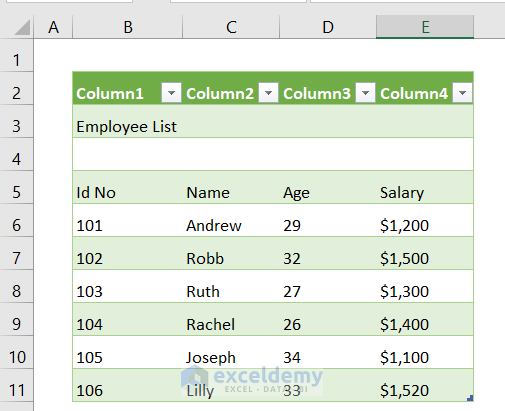
We have a CSV file where the following Employee List table shows ID No, Name, Age, and Salary columns. We’ll convert this CSV file into an Excel with columns.
Method 1 – Using the From Text Option
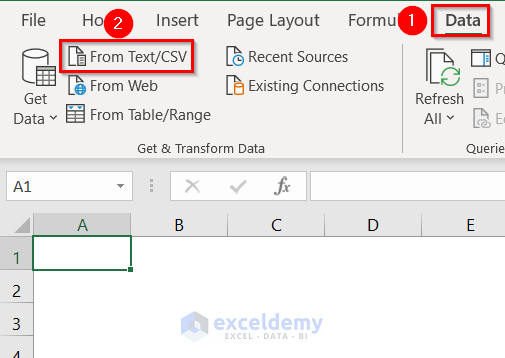
- Open Excel.
- Go to the Data tab and select the From Text/CSV option.
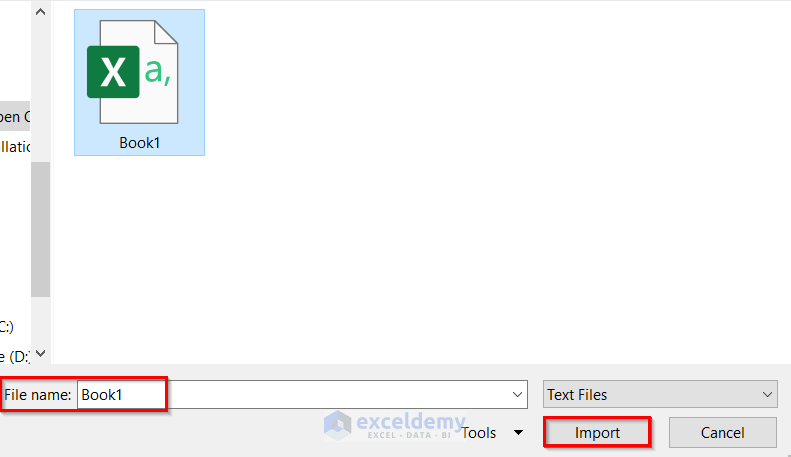
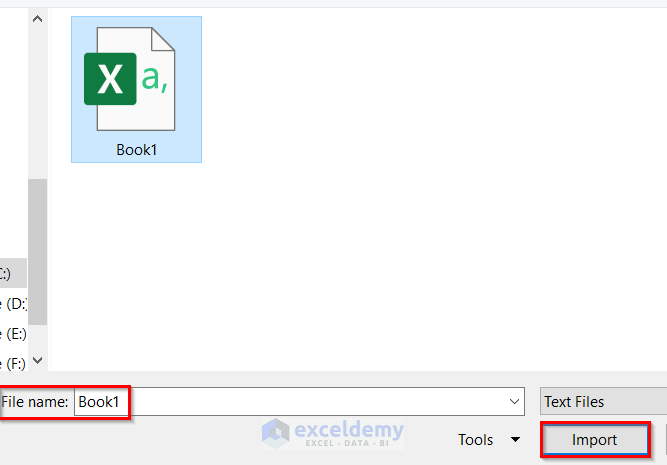
- Select the Book1 file (or the CSV you want to import) and click on Import.
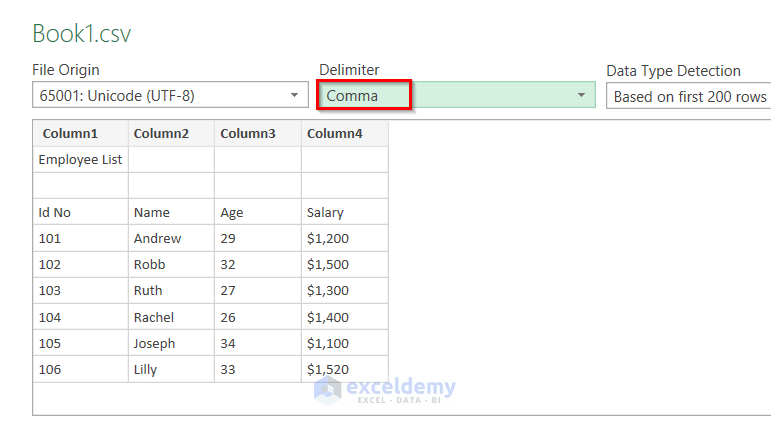
- You’ll get a new import window that has the same name as the file.
- For Delimiter, select Comma.
- Click on Load and select Load To.
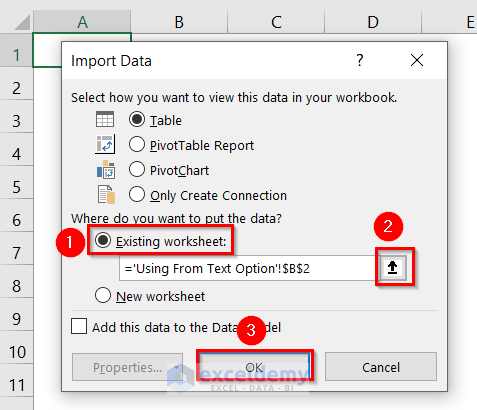
- An Import Data window will appear.
- Select Existing worksheet.
- Choose or input a location in the box (clicking on the arrow on the box allows you to choose a cell from your sheet).
- Click OK.
- You’ll see the table.

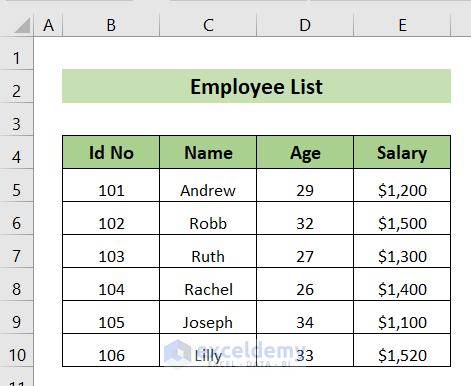
- Re-arrange this table by deleting the default column headers: Column1, Column2, Column3, and Column4.
- The table is converted to a range.

Read More: How to Open CSV File with Columns in Excel
Method 2 – Using the Data Tab to Open a CSV File in Excel
- Open a blank worksheet.
- Select Data and click on Get Data.

- Select From File and choose From Text/CSV.

- Select the CSV file and click Import.
- A window named like the file will appear.
- For Delimiter, select Comma.
- Select Load and choose Load To.

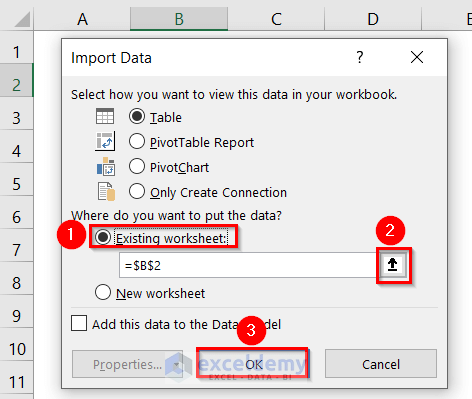
- An Import Data window will appear.
- Select Existing worksheet and click on the up arrow to select the location.
- Click OK.
- You can see the table in Excel.
- Remove the default column headers and reformat as needed.
Read More: Open CSV File in Excel Without Formatting
Method 3 – Open Multiple CSV Files in Excel at Once
- Open Excel and select the File tab.
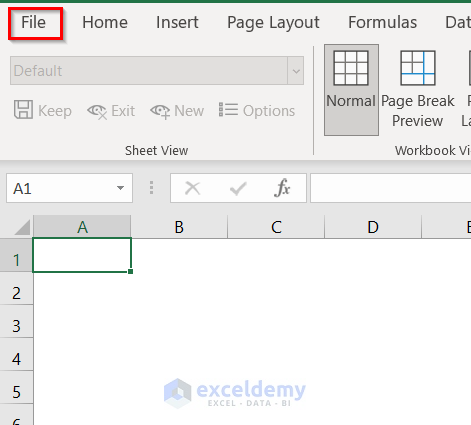
- Select Open. Alternatively, can use the keyboard shortcut Ctrl + O.

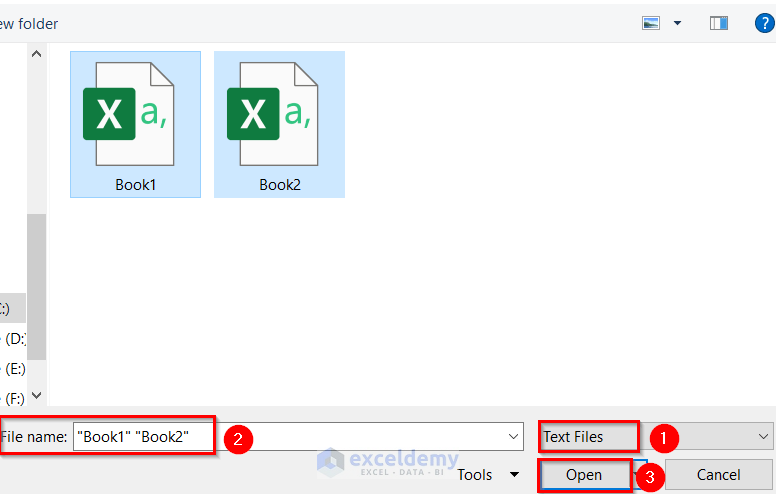
- Choose the Text Files you want to open (we chose our sample files) and click on Open.
- A Text Import Wizard window will appear for Book2.
- Click on My data has headers.
- Click Next.

- Check Comma and Tab.
- Click Next.

- You’ll see the preview of the data.
- Click Finish.
- The table from Book2 is imported.
- Another Text Import Wizard window appears for Book1.
- Select My data has headers and click Next.

- Check Tab and Comma and click Next.

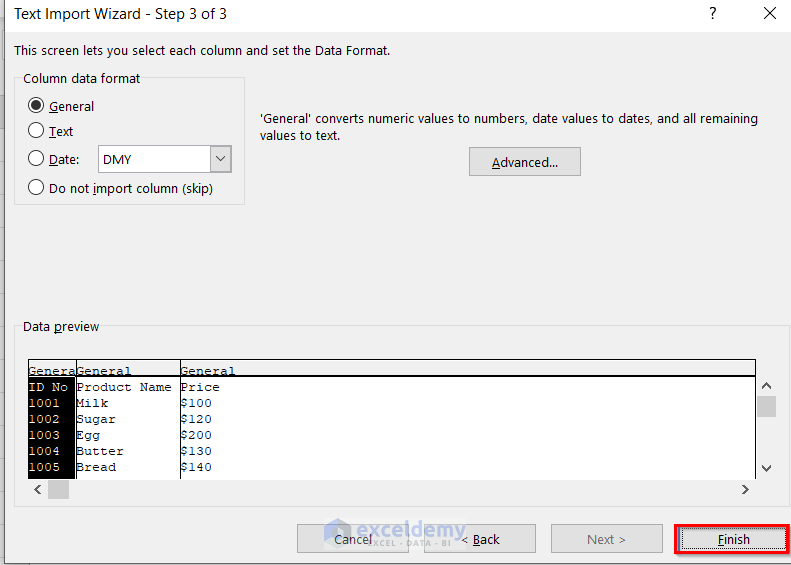
- You can see the Data preview. Click on Finish.

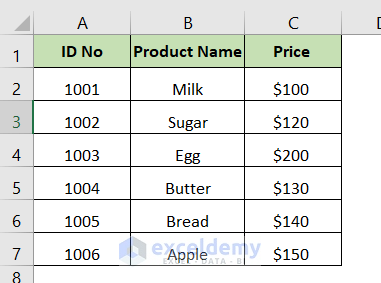
- You can see the second table.

Read More: How to Open CSV with Delimiter in Excel
Download the Workbook
Related Articles
- How to Read CSV File in Excel
- How to Open Large CSV Files in Excel (2 Easy Methods)
- How to View CSV File in Excel (3 Effective Methods)
- CSV File Not Opening Correctly in Excel (4 Cases with Solutions)
- [Solved:] Excel Is Opening CSV Files in One Column (3 Solutions)
<< Go Back to Open CSV in Excel | Import CSV to Excel | Importing Data in Excel | Learn Excel
Get FREE Advanced Excel Exercises with Solutions!

Thank you so much for teaching me how to load a .csv on Excel.
Hello JC,
You are most welcome.
Regards
ExcelDemy
Hello JC,
You are most welcome.
Regards
ExcelDemy