What Is an Address Book in Excel?
Like the phone book in our phone, we can create an address book in Excel. In this book, we can store a lot of data in different categories for persons. The advantage is that we can sort and filter the data and modify it in various ways easily.
How to Make an Address Book in Excel
Steps:
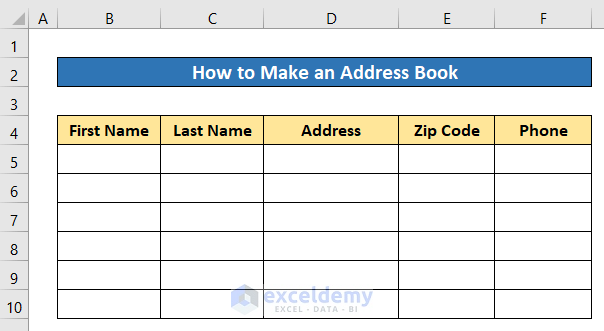
- Insert the necessary headers along a row. Inserted along row 4.
- To highlight the headers, bold them, fill them with color, and use the center and middle alignment.
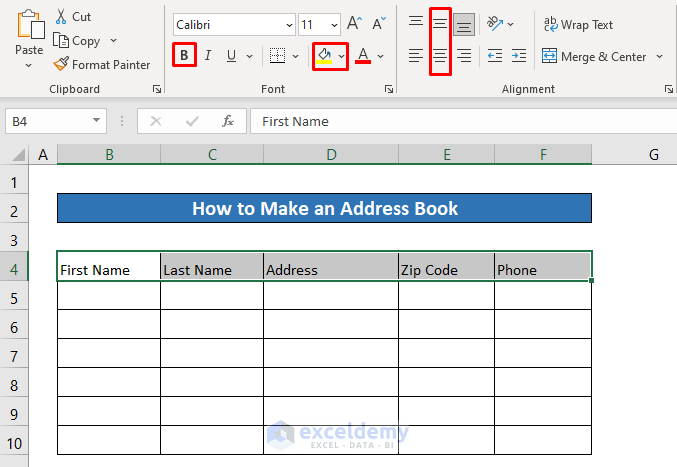
The headers are now highlighted with our selected formats.
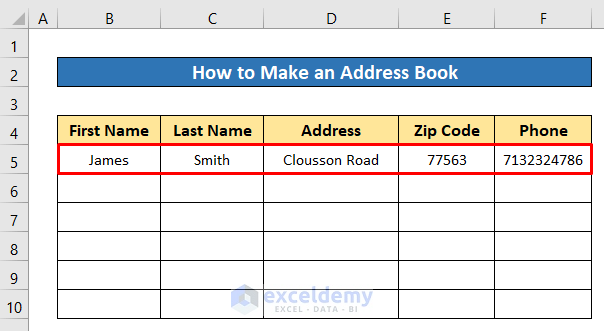
- Insert the corresponding data under the headers.
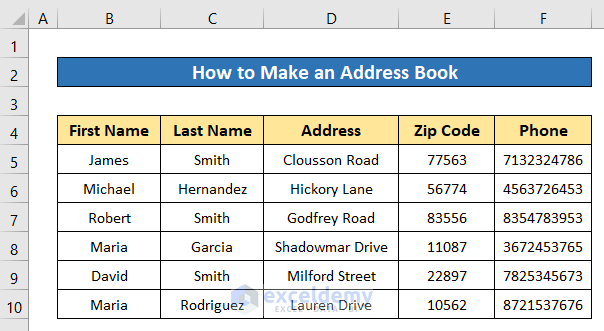
- Insert more data under the headers. You can add more headers if you want.
How to Manage an Address Book
Sorting
Steps:
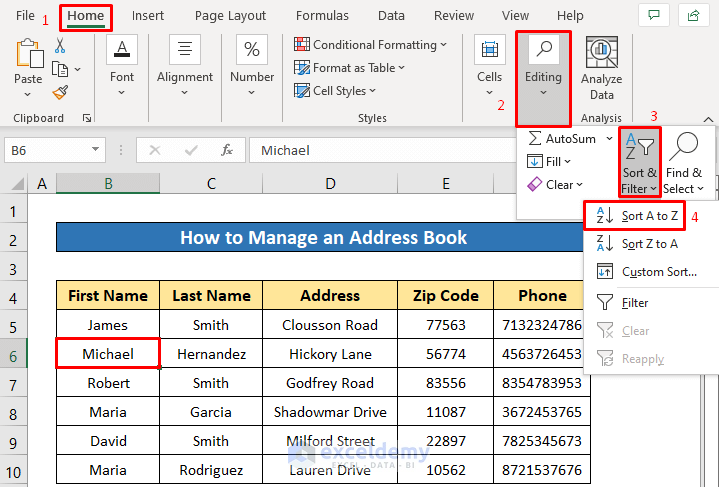
- Click on any data in the column where you want to sort. I’ll sort the first column in A to Z alphabet order.
- Click as follows: Home > Editing > Sort & Filter > Sort A to Z.
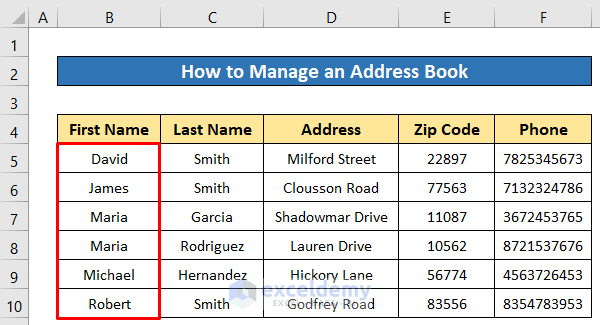
The First Name column is sorted in that order.
Filtering
Steps:
- Select any data from the address book.
- Click as follows: Home > Editing > Sort & Filter > Filter.
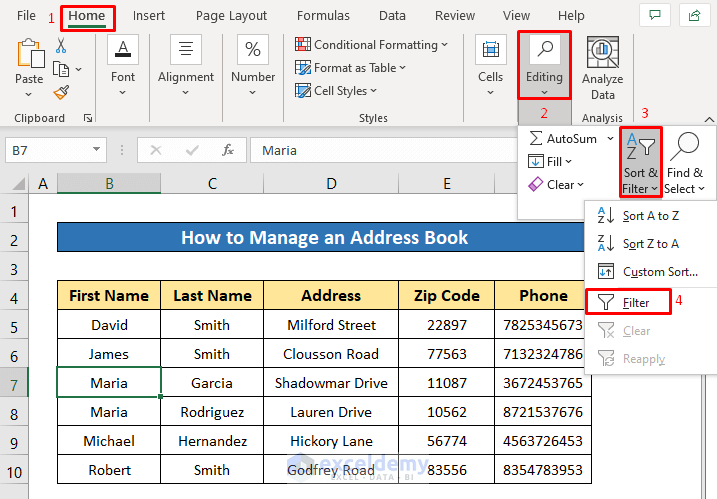
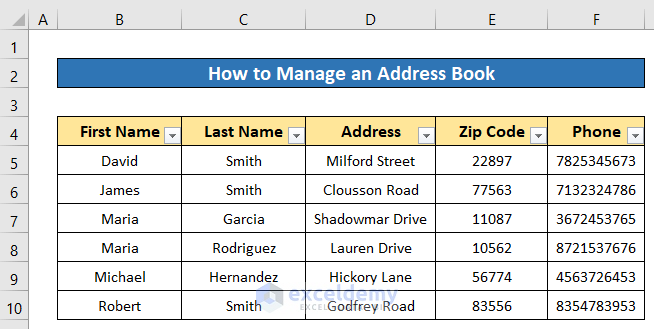
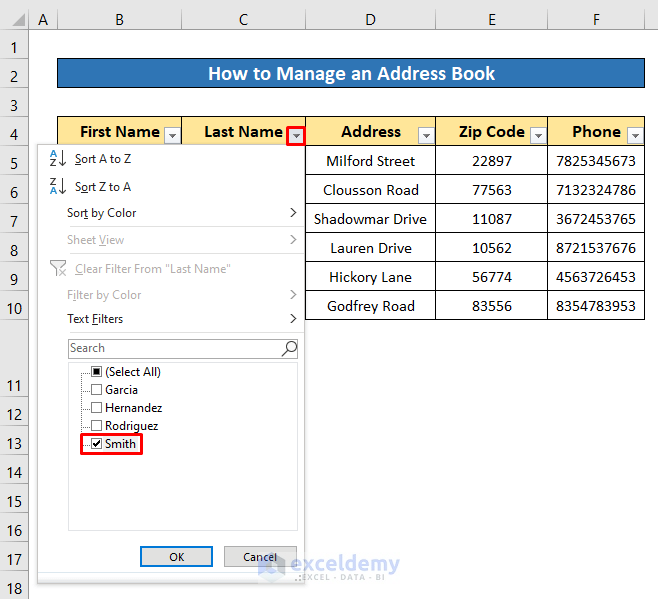
Get the filter icon in every header. Let’s filter in the Last Name column.
- Click on the filter icon of the Last Name column.
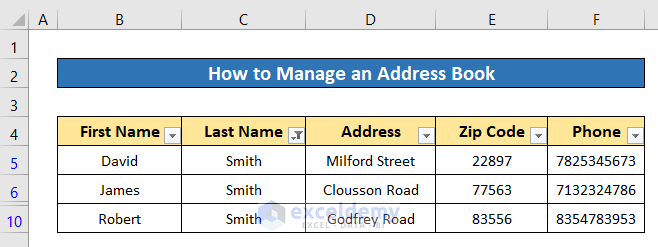
- Mark the data you want to filter for and then press OK. I marked Smith.
Now it is showing the data which has the last name- Smith.
Search in Address Book
Steps:
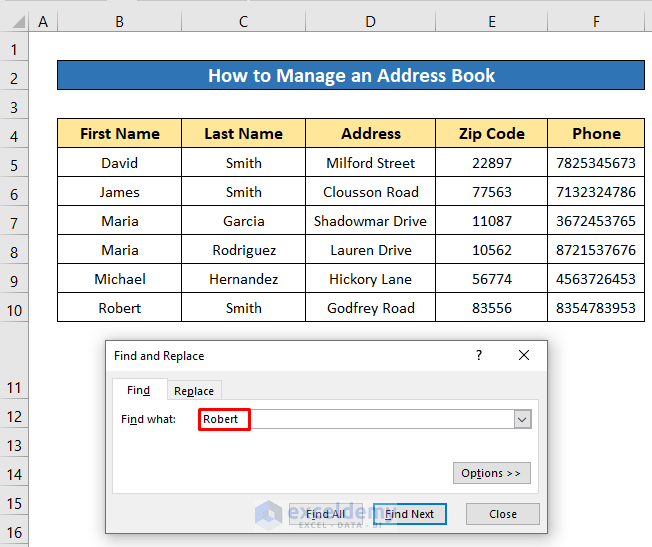
- Press CTRL + F to open the Find section of the Find and Replace tool.
- Type the data you want to search for in the Find what box. I searched for Robert.
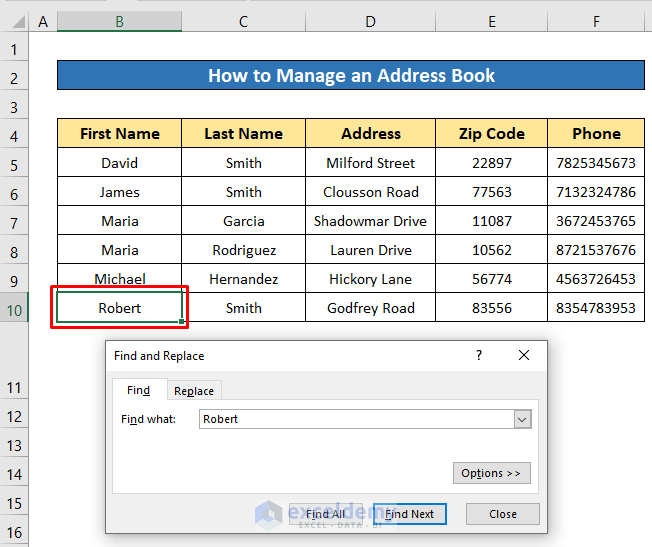
- Press Find Next.
- It will highlight the result with a green cell border.
- If your data has more results then press Find Next again to see the next result. Press Find All.
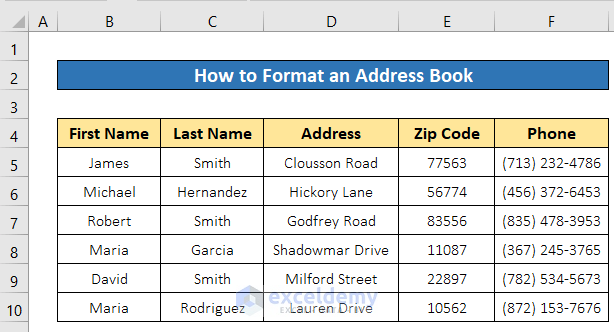
How to Format an Address Book in Excel
Format As Table
Steps:
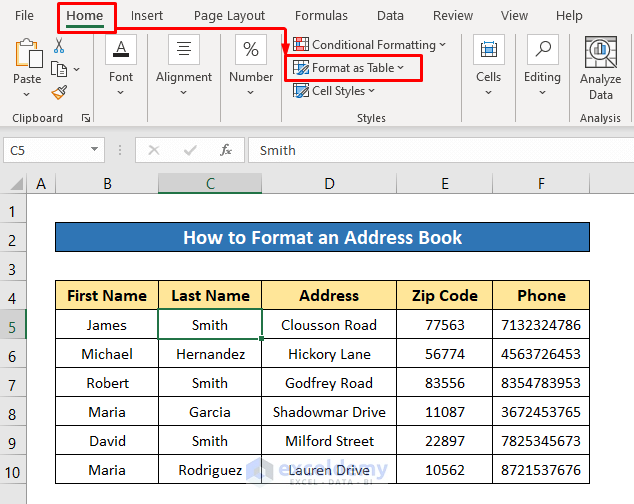
- Click on any data from your address book.
- Click as follows: Home > Format As Table.
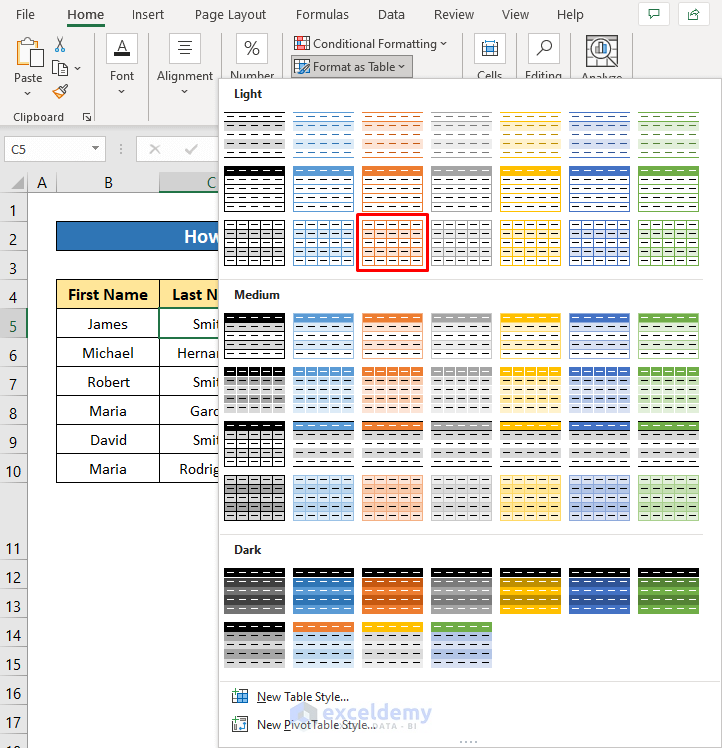
- From the menu, you can select any table style. I selected the table style- Light Orange.
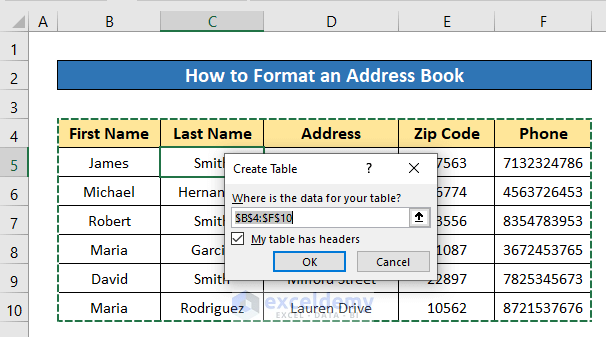
- A dialog box will open up to ensure the table range. Press OK at this moment.
The address book is now converted to a table. Apply all the table features in our address book like, Sort & Filter, table color, etc.
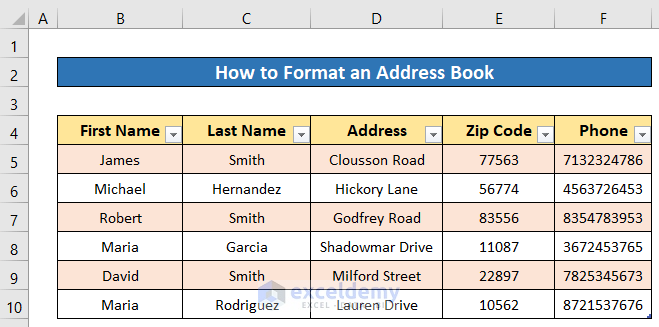
The same Sort & Filter feature that we applied before.

Change Cell Format
Steps:
- Select all the cells from the Phone column.
- Click on the Number Format shortcut icon from the Number section of the Home ribbon.
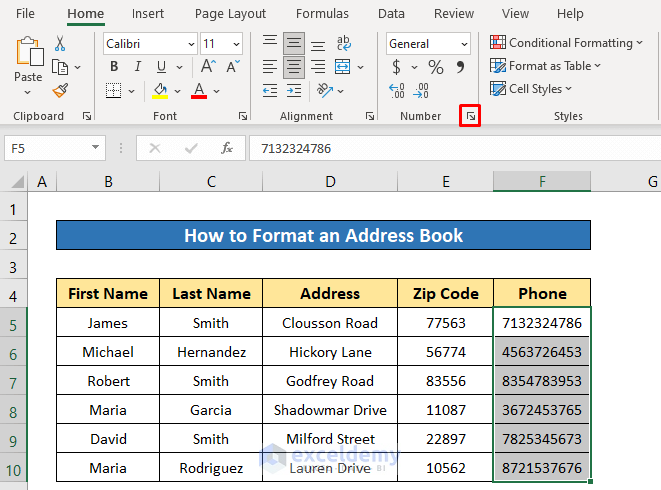
- Click Special from the Category section.
- Select Phone Number from the Type section.
- Just press OK.
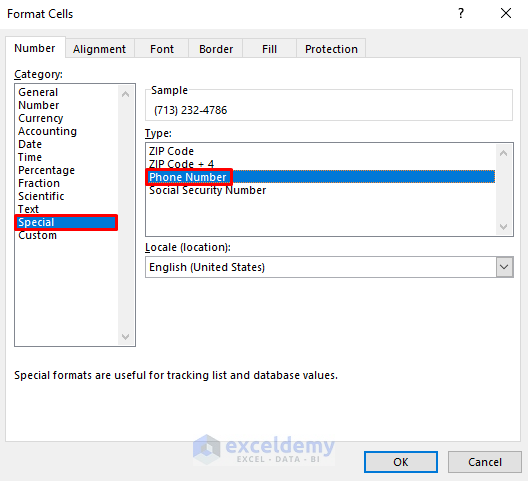
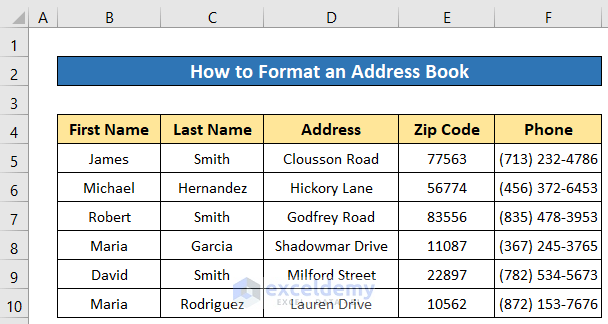
The numbers are now formatted to the default phone number format of the USA.
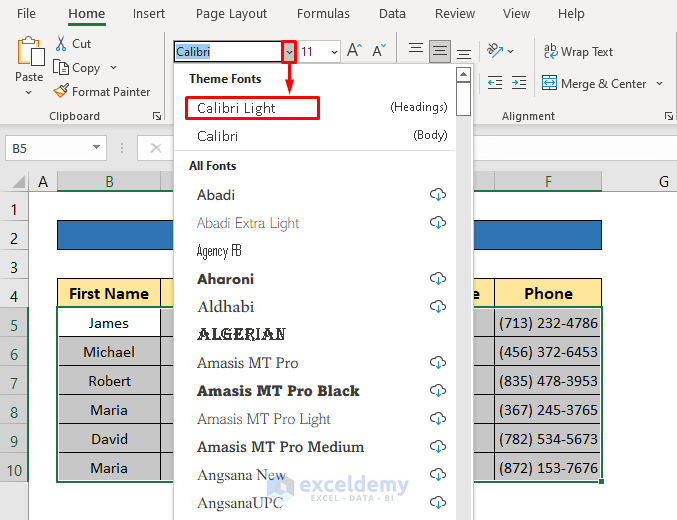
Format Fonts
Steps:
- Select all the data from the address book, excluding headers.
- In the font selection box, click the drop-down icon and select your desired font. We set Calibri Light.
Download Practice Workbook
You can download the free Excel workbook from here and practice on your own.
Related Articles
- How to Organize Addresses in Excel
- Extracting Email Addresses from Excel
- Format a Column for Email Addresses in Excel
- Create Email Address with First Initial and Last Name Using Excel Formula
<< Go Back to Address Format | Text Formatting | Learn Excel
Get FREE Advanced Excel Exercises with Solutions!
